How to Change a Miter Saw Blade (Which Way the Bolt Turns)
A miter saw blade bolt loosens clockwise on nearly every major brand — DeWalt, Ryobi, Bosch, Makita, and Ridgid all use a reverse-thread design — because a standard thread would work itself loose every time the blade spins during a cut. Turning it the normal counterclockwise way only tightens it further, which is why most first blade changes stall. This guide covers the exact turn direction, the full removal-to-install steps, and what to do when the bolt will not budge.
Insert your Affiliate Disclosure reusable block here
Why the Bolt Turns “Backward” on Most Miter Saws
Best Miter Saw Blade Pick
Diablo 12-Inch 80-Tooth Fine Finish Saw Blade
A high tooth-count, Hi-Density carbide blade built for splinter-free crosscuts on trim and hardwood.
- Best for: Everyday crosscuts on a 12-inch saw where finish quality matters
- Why we picked it: 80-tooth ATB grind and a Perma-SHIELD coating that resists pitch buildup
- Main drawback: Slower feed rate than a low-tooth-count framing blade
Compare more miter saw blade options
 Option 1 DEWALT 12″ 80T Fine Finish Blade
|
 Option 2 CRAFTSMAN 10″ 60T Blade
|
 Option 3 WEN BL1280 12″ 80T Blade
|
As an Amazon Associate we earn from qualifying purchases.
The reverse thread is not a manufacturing quirk — it is a deliberate safety design. A spinning blade creates a small amount of rotational drag on the arbor nut in the same direction the blade turns. If the nut used a standard right-hand thread, that drag would slowly back the nut off every time you made a cut, eventually letting the blade come loose mid-operation. Cutting the threads in reverse means normal use tightens the nut instead, so the harder the saw works, the more secure the blade gets.
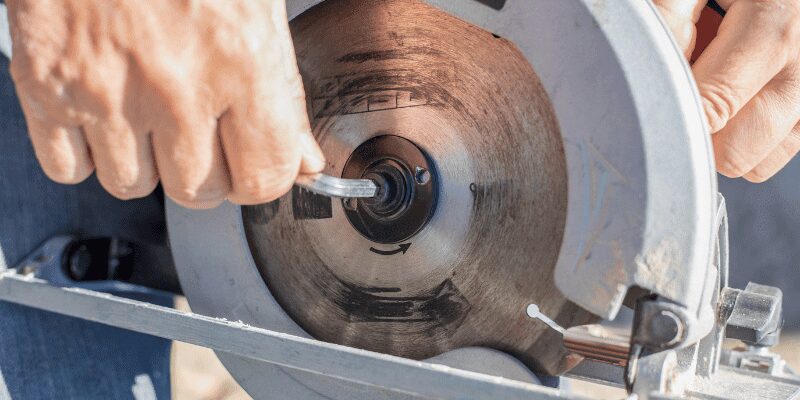
That gives you a field rule that works even if you cannot find your manual: look at the rotation arrow stamped on the blade itself, which shows the direction the blade spins during a cut. The arbor bolt loosens in the opposite rotational direction from that arrow. On virtually every compound miter saw sold today, that means turning the wrench clockwise to loosen and counterclockwise to tighten — the reverse of “righty-tighty, lefty-loosey.”
Bolt Direction by Brand
| Brand | Thread Type | Loosen By Turning | Notes |
|---|---|---|---|
| DeWalt | Reverse (left-hand) | Clockwise | See our full DeWalt walkthrough |
| Ryobi | Reverse (left-hand) | Clockwise | See our full Ryobi walkthrough |
| Bosch | Reverse (left-hand) | Clockwise | Confirmed in Bosch’s own operating manual |
| Makita | Reverse (left-hand) | Clockwise | Same principle on corded and cordless models |
| Ridgid | Reverse (left-hand) | Clockwise | Matches the same self-tightening logic |
| Craftsman | Reverse (left-hand) | Clockwise | Older units may use a spanner instead of a spindle lock |
This covers the vast majority of compound and sliding miter saws on the market. It is not a universal guarantee — always confirm with your owner’s manual before forcing a stuck bolt in either direction, since a small number of older or off-brand saws are wired the other way.
Tools You’ll Need
Most blade changes take three tools and about ten minutes:
- Replacement blade — matched to your saw’s arbor size and the diameter stamped on your old blade.
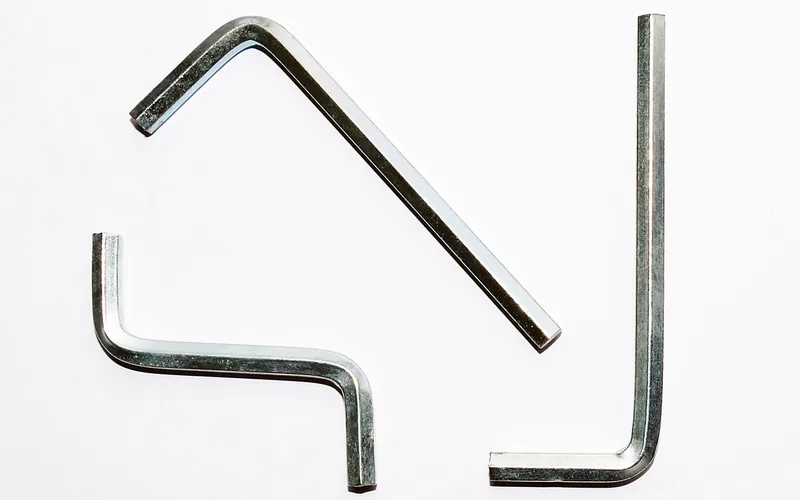
- Hex key or wrench sized to your arbor bolt — most saws ship one clipped to the base or stored under the table.
- Safety glasses and work gloves — blade edges stay sharp even when “dull.”
- A block of scrap wood or a clamp — only needed if your saw has no spindle lock, to brace the blade while you loosen the bolt.
Step-by-Step: How to Change a Miter Saw Blade
- Unplug the saw: pull the power cord, or remove the battery on a cordless model. Never work on the blade with any power source connected.
- Release the blade guard: remove the guard-retaining screw in front of the arbor housing, then rotate the guard up as far as it will go to expose the bolt.
- Engage the spindle lock: press and hold the lock button while slowly turning the blade by hand until it clicks and stops rotating.
- Loosen the arbor bolt: with the lock held, turn the bolt clockwise (see the brand chart above) using the correct hex key or wrench.
- Remove the bolt, washer, and old blade: set them aside in the order you removed them — you’ll reverse the same order for the new blade.
- Check the rotation arrow: match the arrow printed on the new blade to the direction stamped on the saw’s blade guard or housing before mounting it.
- Mount the new blade: slide it onto the arbor flush against the inner flange, replace the outer washer, then thread the bolt on by hand.
- Tighten the bolt: hold the spindle lock and turn the bolt counterclockwise until snug — firm, not maximum force. Overtightening can warp the arbor flange.
- Reseat the blade guard: lower it back into place and replace the retaining screw you removed in step 2.
- Test before cutting: spin the blade by hand to confirm it clears the guard and table insert, then plug the saw back in and make a slow test cut on scrap.
Choosing the Right Replacement Blade
Tooth count is the biggest factor in cut quality. More teeth cut slower but leave a smoother edge; fewer teeth cut faster but tear more.
| Tooth Count | Cut Speed | Best For |
|---|---|---|
| 24–40T | Fastest | Framing lumber, rough crosscuts |
| 60T | Balanced | General trim and everyday cuts (most common pick) |
| 80–100T | Slowest | Crown molding, picture frames, veneered plywood |
Carbide-tipped blades cost more than high-speed steel but hold an edge many times longer, and they’re the standard choice for anyone cutting more than the occasional board. If your saw takes a smaller diameter than the standard 10 or 12 inches, confirm the swap is safe first — see our guide on whether you can put a smaller blade on a miter saw. For a deeper comparison of specific models, our best miter saw blade picks breaks down tooth count and kerf by brand.
📊 A quality 10–12 inch carbide miter saw blade typically runs $20–$60 for an all-purpose blade, and $60–$200+ for premium fine-finish or specialty blades. — Source: current Home Depot and Amazon retail listings, 2026.
Best Miter Saw Blades to Buy
Why Your Blade Might Look Dull When It Isn’t
Before buying a new blade, check for pitch and resin buildup, which mimics a dull edge. Wood sap and sawdust bake onto the carbide teeth from cutting friction, adding drag and rough edges that look identical to genuine dullness. A blade cleaner or a soak in warm water with a little dish soap, followed by a soft brush along the gullets, often restores a blade that was never actually worn out. If the cut quality doesn’t improve after cleaning, the blade is genuinely dull or chipped and it’s time to replace it.
My Arbor Bolt Won’t Loosen — What to Do
A stuck bolt is almost always a direction problem, not a strength problem. Before applying more force, work through these in order:
- Re-check the direction: confirm you’re turning clockwise to loosen (see the brand chart above) — forcing it the wrong way is the single most common cause of a “stuck” bolt.
- Brace the blade properly: if the spindle lock won’t fully engage, wedge a scrap block of wood against the teeth to keep the blade from spinning while you apply torque.
- Add penetrating oil: a few drops on the bolt threads, left to sit 10–15 minutes, loosens rust or resin binding the threads.
- Add leverage: slide a short length of pipe over your wrench handle for extra torque rather than switching to a larger, ill-fitting tool that can round the bolt head.
- Apply gentle heat: a heat gun aimed near (not directly on) a rust-bound nut for a minute can break the corrosion’s grip before you try again.
Whatever you try, never work on the bolt with the saw plugged in or the battery installed — a stuck bolt that suddenly breaks free while the saw is live is a real hand-injury risk.
Common Mistakes When Changing a Miter Saw Blade
- Forcing the bolt the wrong direction. Rounds off the bolt head or strips the hex socket, which then requires an extraction tool to remove.
- Installing the blade backward. The rotation arrow on the blade must match the arrow on the saw’s guard — a reversed blade cuts poorly and can kick material back.
- Skipping the spindle lock. Trying to hold the blade still by hand while loosening the bolt risks a slipped wrench and cut fingers.
- Overtightening the arbor bolt. Firm and snug is enough; maximum force can warp the arbor flange and cause the new blade to wobble.
- Forgetting to reseat the blade guard. Test-cutting without the guard back in place removes a safety feature the saw was designed around.
Frequently Asked Questions
Which way do you turn the bolt to change a miter saw blade?
Turn it clockwise to loosen and counterclockwise to tighten on nearly every major brand, including DeWalt, Ryobi, Bosch, Makita, and Ridgid. This reverse-thread design keeps the bolt from vibrating loose while the blade spins during normal cuts.
How often should you change a miter saw blade?
Most hobbyist users replace or sharpen a blade every 3 to 6 months of regular use, but cut quality is the better signal than a calendar — if cuts start tearing or burning after cleaning off pitch buildup, the blade needs attention regardless of how long it’s been installed.
How much does a new miter saw blade cost?
A quality 10 to 12-inch carbide-tipped blade typically costs $20 to $60 for an all-purpose option, with premium fine-finish and specialty blades running $60 to $200 or more depending on tooth count and brand.
Why won’t my miter saw blade bolt loosen?
The most common cause is turning the wrench the wrong way — most miter saw bolts loosen clockwise, not counterclockwise. If direction isn’t the issue, the bolt is likely bound by rust or resin; penetrating oil, added leverage, and light heat usually free it without forcing.
Which way should the teeth face when installing a new blade?
Match the rotation arrow printed on the blade to the direction arrow on the saw’s blade guard or housing. On a miter saw, the teeth at the bottom of the blade should point downward and toward the fence, cutting on the downstroke.
Can you sharpen a miter saw blade instead of replacing it?
Yes, carbide-tipped blades can typically be professionally sharpened 2 to 3 times before the carbide wears too thin to regrind, usually for less than the cost of a new blade. See our guide to sharpening a miter saw blade for the full process and when replacement makes more sense.
Conclusion
Once you know the bolt turns clockwise to loosen, a miter saw blade change is a 10-minute job on almost any brand. Browse the full miter saw category for more setup, maintenance, and buying guides.
Sponsored / affiliate links. As an Amazon Associate I earn from qualifying purchases. I may earn additional commission from eligible campaigns.