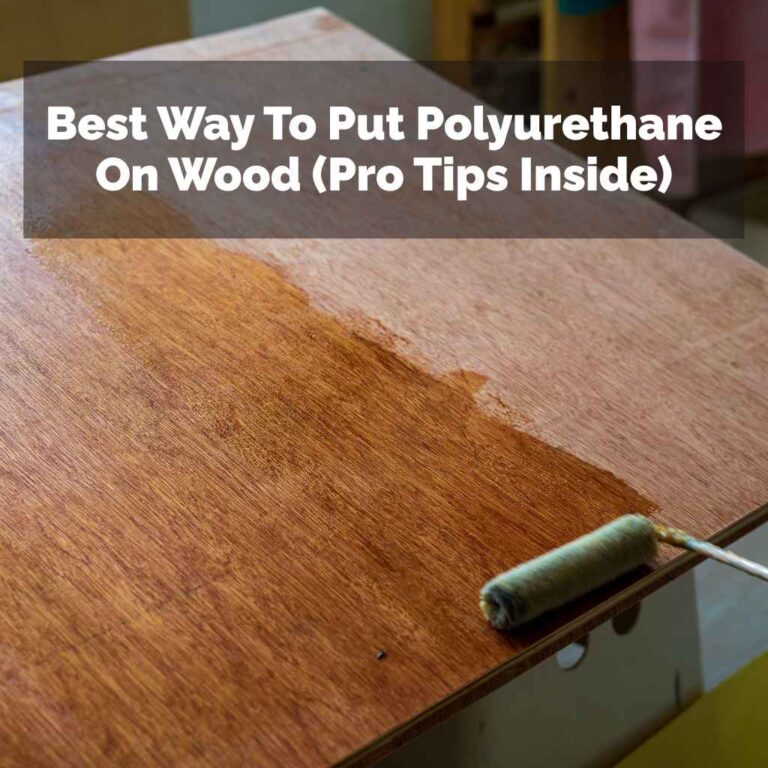
How To Clean Polyurethane Wood Floors Without Damage
It feels like just yesterday you picked out those gorgeous floors. They add so much warmth to your home. But now, you’re staring at them, wondering how to keep them looking that good.
Especially when it comes to cleaning, you want to do it right. You’ve heard horror stories about ruining a finish. That’s why knowing the best way to clean polyurethane wood floors is so important.
We’ll walk through it step-by-step.
Safely cleaning polyurethane wood floors involves using gentle methods and the right products. The key is to avoid harsh chemicals, excessive water, and abrasive tools. Regular dusting and damp mopping with a pH-neutral cleaner will protect the finish and keep your floors looking their best.
Always test any cleaning solution in an inconspicuous area first.
Understanding Polyurethane Wood Floors
Polyurethane is a tough, protective coating. It’s put on top of wood floors. This coating shields the wood from spills, scratches, and daily wear.
Think of it like a clear, durable shield. It comes in different sheens. You might see satin, semi-gloss, or high-gloss finishes.
Each one looks a little different. But they all serve the same main purpose: to protect the wood underneath.
The finish is what you actually clean. The wood itself is safe below. But if you damage the polyurethane, water can seep in.
That’s when the wood can swell or stain. So, your cleaning efforts focus on keeping that top layer in great shape. It’s a flexible plastic layer.
It can wear down over time. Scratches can dull its shine. Harsh cleaners can strip it away.
Most modern wood floors use either oil-based or water-based polyurethane. They behave a bit differently. Oil-based finishes are more durable.
They often have a warmer, amber tone. Water-based finishes dry clearer. They are also more resistant to yellowing over time.
Knowing which one you have can sometimes help. But for general cleaning, the rules are mostly the same. The goal is always to protect that protective layer.
The good news is that caring for them isn’t overly complicated. It mostly involves simple, consistent steps. You don’t need a cabinet full of fancy products.
Most of the time, a few basic tools and a gentle cleaner are all you need. It’s about being smart with what you use and how you use it. Let’s dive into how to do that.
My First PU Floor Fiasco
I remember my first set of real hardwood floors. They had this beautiful, deep semi-gloss polyurethane finish. I was so proud.
Then, a small spill happened. Orange juice, of course. I grabbed the first cleaner I saw under the sink.
It smelled lemony and strong. I thought, “This will get it clean!” I gave the spot a good scrub. And then I wiped it down with a damp cloth.
The spill was gone. But the spot I cleaned looked… dull. It lost its shine.
I tried to buff it. Nothing worked. Over the next few weeks, I noticed other spots starting to look less shiny.
I was horrified. I had used a cleaner that was too harsh. It had dulled the polyurethane finish.
I felt so foolish. That’s when I started researching. I learned that not all cleaners are friends with polyurethane.
It was a tough lesson, but a vital one.
The panic was real. I thought I’d ruined them. I pictured spending a fortune to refinish them.
But thankfully, I learned to spot clean gently. And I learned to use the right tools for the job. It taught me to always read labels.
And to always, always test in a hidden spot first. This experience shaped how I approach cleaning all my floors now. It’s all about gentle care.
The Right Tools for the Job
Before you even think about a cleaning solution, let’s talk tools. Having the right ones makes a huge difference. They ensure you’re cleaning effectively without causing harm.
This is crucial for maintaining that lovely polyurethane finish. You’re not looking for heavy-duty scrubbers here. Think soft and gentle.
Essential Cleaning Tools
Soft Bristle Broom or Dust Mop: This is your daily fighter against dust and grit. Grit acts like sandpaper on your finish. A broom with soft, fine bristles works well.
A good quality dust mop is even better. It traps dust instead of just pushing it around. Look for microfiber heads.
They are excellent at grabbing tiny particles.
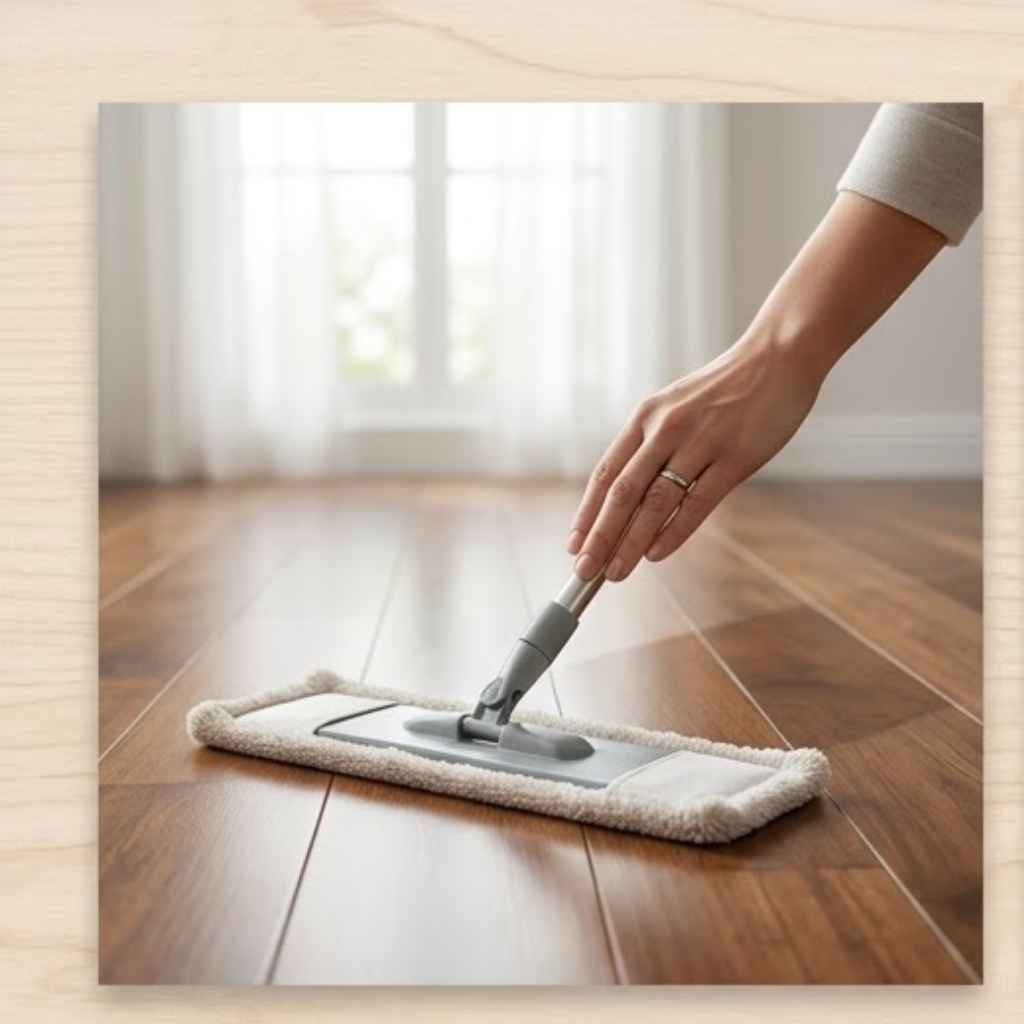
Microfiber Mop: This is your go-to for damp mopping. Microfiber is super absorbent. It picks up dirt and grime effectively.
It also uses less water than traditional mops. This is important because too much water is bad for wood floors. Make sure the mop head is washable.
You can reuse it many times.
Soft Cloths or Towels: You’ll need these for spot cleaning and drying. Cotton rags or old t-shirts can work. Microfiber cloths are ideal.
They are non-abrasive. They are also great for buffing. Always have a few on hand.
They are useful for wiping up spills right away.
Spray Bottle: For mixing your own gentle cleaning solution. This gives you control over the ingredients. And the amount you use.
It’s much better than pouring cleaner directly onto the floor.
These tools are simple. But they are very effective. Using them properly will help protect your polyurethane finish.
They prevent scratches. They reduce the risk of water damage. And they make the whole cleaning process easier.
Think of them as your allies in keeping your floors beautiful.
Step-by-Step Cleaning Process
Let’s get down to the actual cleaning. This process is designed to be gentle and effective. It will help your polyurethane floors look their best for a long time.
Remember, consistency is key. You don’t need to deep clean every day. But regular light cleaning prevents build-up.
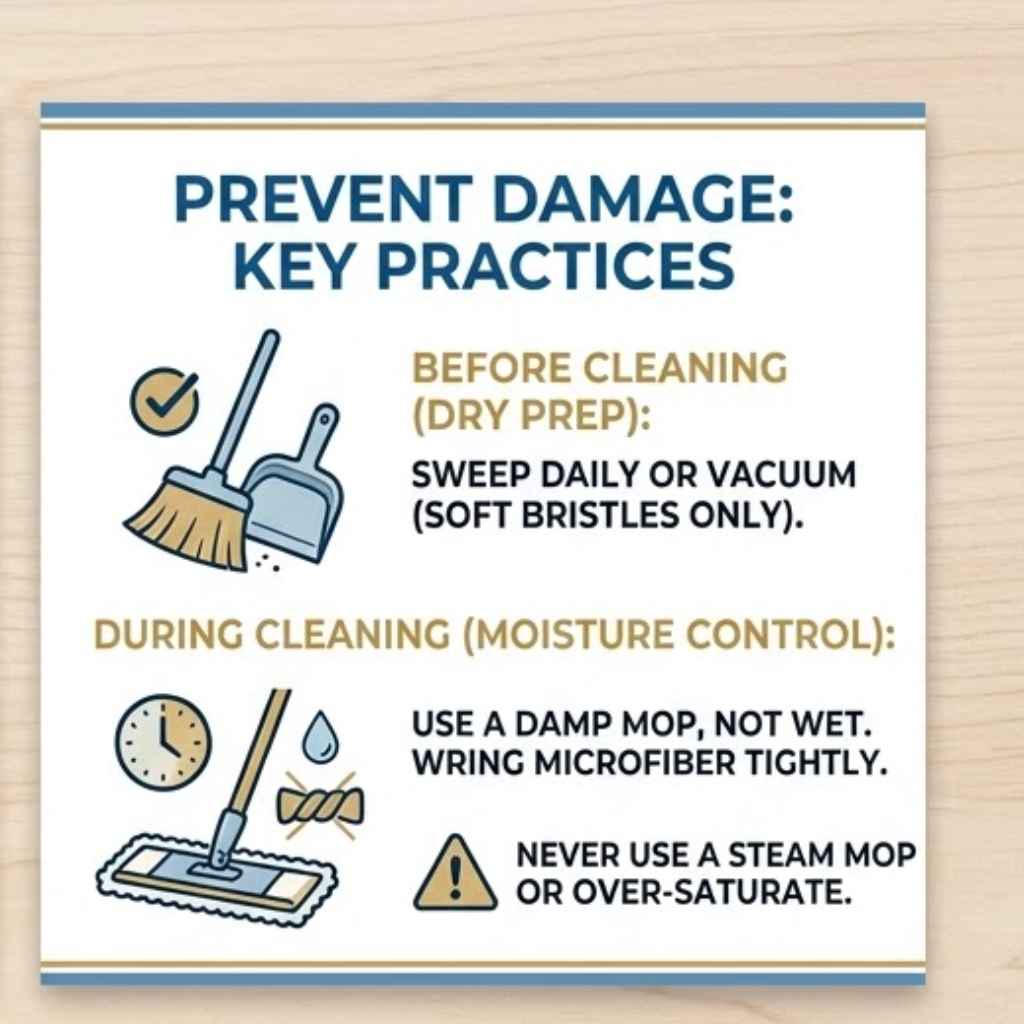
1. Dry Cleaning First
Always start with dry cleaning. This removes loose dirt, dust, and grit. Grit is the enemy of any floor finish.
It can scratch the polyurethane. Use your soft bristle broom. Or better yet, a good quality microfiber dust mop.
Work your way across the floor. Pay attention to corners and edges. This step alone can significantly reduce wear and tear.
If you have pets, this step is even more important. Pet hair can trap dust. It can also be a bit abrasive when walked on.
So, a good sweep or dust mop daily or every other day is a lifesaver. Imagine tiny pieces of sand. That’s what accumulated dust and grit are like.
They grind away at the finish over time.
2. Prepare Your Cleaning Solution
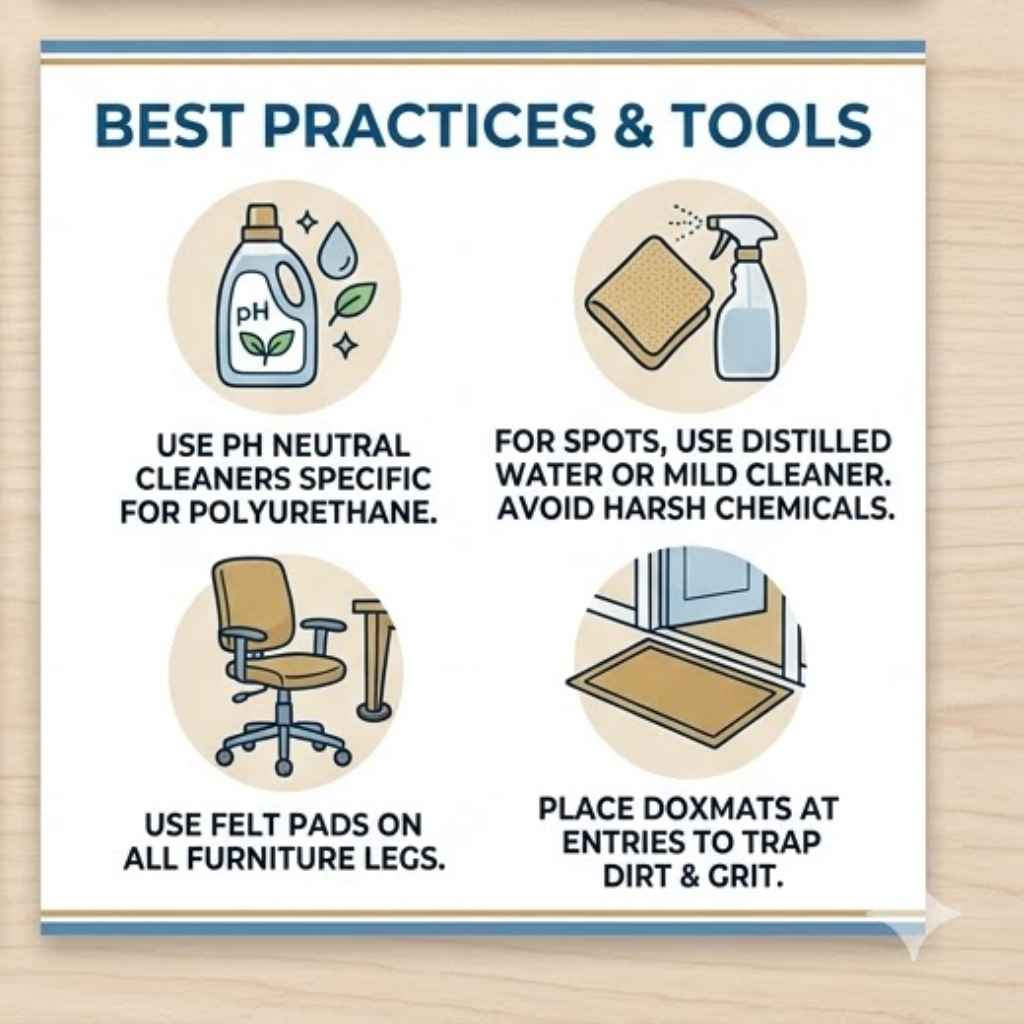
For routine cleaning, you want a pH-neutral cleaner. This means it’s not too acidic or too alkaline. Harsh cleaners can damage the polyurethane.
Many store-bought wood floor cleaners are okay. But check the label carefully. Make sure it’s safe for polyurethane finishes.
Some people prefer to make their own solution.
A popular DIY cleaner is a mix of water and a tiny bit of mild dish soap. Use just a drop or two of soap in a gallon of water. Another option is a small amount of white vinegar mixed with water.
About half a cup of vinegar per gallon of water. Vinegar is acidic. So, use it sparingly.
And only if your floor manufacturer allows it.
The best bet is often a cleaner specifically made for polyurethane floors. Or a pH-neutral multi-surface cleaner. Always read the instructions.
Never mix cleaners. And definitely never use ammonia or bleach. Those are far too harsh.
DIY Gentle Cleaner Recipe
Ingredients:
- 1 gallon of warm water
- 2-3 drops of mild dish soap (like Dawn, unscented if possible)
- OR 1/2 cup white vinegar (use less often, test first)
Instructions:
- Mix ingredients in a bucket or spray bottle.
- Stir gently.
- For spray bottles, use a fine mist setting.
Important Note: Always test any cleaning solution in an inconspicuous area first, like inside a closet or under a rug, to ensure it doesn’t damage or discolor your finish.
3. Damp Mopping
This is where your microfiber mop comes in. Lightly dampen the mop head with your cleaning solution. You want it to be damp, not wet.
Wring it out very well. Excess water can seep into the wood. It can cause swelling and damage the finish over time.
Think of it as a very light wipe-down.
Work in sections. Mop in the direction of the wood grain. This helps lift dirt more effectively.
Overlap your strokes slightly. This ensures you don’t miss any spots. Don’t let water pool on the floor.
If you see puddles, you’re using too much water.
Rinse your mop head frequently in clean water. Or use a second mop. This prevents spreading dirty water back onto the floor.
A good rhythm is to mop a small area, rinse the mop, then move to the next section. This keeps your cleaning water clean.
4. Drying
This step is often overlooked, but it’s crucial. You want to ensure the floor dries quickly and completely. Once you’ve finished a section with the damp mop, you can follow up with a dry microfiber cloth or a dry mop head.
This picks up any lingering moisture.
You can also open windows or use fans to speed up drying. Especially in humid climates. The goal is for the floor to be dry to the touch within a few minutes.
If it’s taking a long time to dry, you’re using too much water. You might need to wring out your mop even more thoroughly next time.
Never leave standing water on your polyurethane floors. This is one of the fastest ways to cause damage. So, a quick dry-off is always a good idea.
Spot Cleaning Spills and Stains
Accidents happen. Wine spills, muddy paw prints, dropped food. The key to spot cleaning is acting fast.
The longer a spill sits, the more likely it is to stain or damage the finish.
For most fresh spills, a clean, soft cloth is all you need. Blot up the spill immediately. Don’t wipe, as this can spread the mess.
Blotting absorbs the liquid without pushing it into the wood grain.
If the spill leaves a residue, use a slightly damp cloth with a tiny bit of your pH-neutral cleaner. Gently wipe the area. Then, immediately dry it with a clean, dry cloth.
For sticky messes, like soda or juice, you might need to use a bit more of the cleaning solution. But always follow up with a dry cloth to remove all moisture.
Tackling Tougher Spots
Stubborn Marks: For scuff marks or dried-on grime, try a white eraser. Gently rub the mark. If that doesn’t work, use a microfiber cloth with a bit of your gentle cleaner.
Rub gently in a circular motion.
Grease Stains: For grease, you can use a damp cloth with a very small amount of mild dish soap. Gently dab the stain. Then wipe with a clean damp cloth.
Finish by drying thoroughly.
Ink or Marker: These can be tricky. Try a melamine foam sponge (like a Magic Eraser), but use it very lightly and damp. Test in an inconspicuous spot first.
If that’s too risky, use a soft cloth with a tiny bit of mineral spirits. Wipe gently, then clean the area with your regular cleaner and dry well. Be very cautious with solvents.
Always remember to test any spot cleaning method in a hidden area first. This is especially true for anything beyond plain water. You want to be sure you aren’t damaging the finish or removing its shine.
What to Absolutely Avoid
This is just as important as knowing what to do. There are certain things that will almost certainly damage your polyurethane wood floors. Avoiding them will save you a lot of headaches and money.
Think of these as the “don’ts” of wood floor care.
Harsh Chemicals
This is the big one. Anything with ammonia, bleach, or strong solvents will strip away the polyurethane finish. They can also cause discoloration.
Even some all-purpose cleaners are too harsh. Stick to pH-neutral cleaners specifically designed for sealed wood floors, or your DIY gentle solution.
You might think a strong cleaner will get your floors really clean. But it’s like using sandpaper on a delicate painting. It might look clean for a moment, but it’s damaging the surface.
Always read the ingredients list. If you don’t recognize a chemical, it’s probably best to avoid it.
Excessive Water
Wood and water are not best friends. Polyurethane offers protection, but it’s not a waterproof barrier. If you use too much water when mopping, it can seep into the seams between the floorboards.
This can cause the wood to swell, warp, or even rot.
This is why damp mopping is so important. Your mop should feel slightly moist, not wet. Never let water stand on the floor.
If you spill something, clean it up immediately. Use fans to help dry the floor quickly if it gets too damp.
Abrasive Tools and Cleaners
Anything that can scratch the surface is a no-go. This includes steel wool, abrasive sponges, and scouring powders. Even stiff-bristled brushes can cause damage over time.
Always use soft cloths and microfiber mops. If you’re dealing with a stubborn mark, try gentler methods first.
Think about what happens when you use a rough scrub brush on a car’s paint job. It leaves tiny scratches that dull the shine. The same principle applies to your wood floors.
Grit and rough materials are the enemy.
Steam Mops
This is a common point of confusion. Many people think steam mops are great for all floors. However, most manufacturers of polyurethane-finished wood floors advise against them.
The high heat and moisture from steam can force its way into the wood. It can break down the polyurethane finish over time. It can also cause the wood to warp.
Always check your floor manufacturer’s warranty and recommendations.
If your floors are older or you’re unsure about the finish’s condition, a steam mop is definitely a risk. The potential for damage is high. Stick to the tried-and-true damp mop method.
“Never Use On Polyurethane Floors” Checklist
- Ammonia-based cleaners: Can dull and damage the finish.
- Bleach: Too harsh, will break down the protective layer.
- Wax-based polishes: Can create a slippery build-up that’s hard to remove.
- Oil soaps: Often leave a residue that attracts dirt.
- Abrasive cleaners or pads: Will scratch the surface.
- Excessive water: Leads to swelling, warping, and water stains.
- Steam mops: High heat and moisture can damage the finish.
When in doubt, consult your floor manufacturer’s guidelines.
By avoiding these common pitfalls, you’ll be well on your way to keeping your polyurethane wood floors looking beautiful for years. It’s all about using the right approach.
Deep Cleaning Your Polyurethane Floors
Most of the time, your routine dry and damp mopping will be enough. But every so often, you might feel your floors need a more thorough clean. This could be after a party, or if you notice a bit of grime build-up that damp mopping isn’t quite tackling.
A deep clean for polyurethane floors is still about being gentle. It just involves a bit more attention to detail. It’s not about using harsher chemicals.
It’s about technique. You can do this every few months, or as needed.
The Gentle Deep Clean Method
Start with thorough dry cleaning, just like your routine. Sweep or dust mop very well. Remove every bit of loose debris.
This is critical for a deep clean. You don’t want to be pushing grit around while trying to get the floor truly clean.
Next, prepare your cleaning solution. You can use your regular pH-neutral cleaner. Or you can opt for a cleaner specifically formulated for a deep clean of polyurethane floors.
Some brands offer these. Follow the product’s instructions precisely.
Use your microfiber mop. Dampen it well, but wring it out thoroughly. You want it damp, not soaking.
Work in small sections. Mop in the direction of the wood grain. You might find that you need to rinse your mop head more often during a deep clean.
This is because you’re dealing with more potential grime.
As you mop, pay attention to any slightly duller spots or areas that feel a little sticky. Gentle pressure with the microfiber mop should lift these. If a spot is particularly stubborn, you might need to go over it a second time with your damp mop.
Once you’ve mopped a section, follow up immediately with a clean, dry microfiber cloth or a dry mop head. Buff the area lightly to ensure it dries quickly and evenly. This helps restore the sheen.
The key to a deep clean is patience and thoroughness. Take your time. Don’t rush the process.
And always, always ensure the floor is left dry. If you notice any streaks after drying, it might mean you used a bit too much cleaner. You can buff these out with a dry microfiber cloth.
When to Consider a Deep Clean
- After a major event: Parties, holidays, or gatherings can leave floors dirtier than usual.
- Seasonal changes: More dirt and moisture tracked in during certain times of the year.
- Noticeable build-up: If a regular damp mop doesn’t seem to be getting the job done anymore.
- Dullness appearing: A deep clean can sometimes revive a tired-looking finish.
Recommendation: Perform a deep clean no more than once every 1-3 months, depending on traffic and usage. Over-cleaning can sometimes wear down the finish faster.
Remember, the goal of a deep clean is to refresh your floors, not to strip them or alter the finish. Gentle is always the best approach. This process will help your floors look their best without causing any damage.
Maintaining the Shine
Keeping that beautiful polyurethane shine is about more than just cleaning. It’s about a combination of protecting the finish and regular upkeep. Little things can make a big difference in how long your floors look brand new.
Protect Your Finish
The easiest way to keep your floors looking good is to prevent damage in the first place. This means being proactive. Think about what causes wear and tear.
Use Floor Mats: Place mats at all entryways, both inside and out. These trap dirt, sand, and moisture before they get tracked onto your wood floors. Choose mats with a dense pile that can effectively grab debris.
Avoid rubber-backed mats, as the rubber can sometimes react with certain floor finishes and leave marks.
Furniture Pads: Put felt pads on the legs of all furniture. Chairs, tables, sofas – anything that gets moved. This prevents scratches and dents.
Check the pads regularly. They can wear down or collect grit themselves. Replace them as needed.
Remove Shoes: Make it a household rule to remove shoes at the door. High heels, cleats, or even just shoes with rough soles can cause damage. Going barefoot or wearing soft slippers indoors is much kinder to your floors.
Pet Care: Keep pet nails trimmed. This significantly reduces scratches. Wipe pet paws when they come inside, especially during wet or muddy weather.
You can keep a towel or a pet-specific mat by the door.
Daily Habits for Floor Longevity
- Sweep or Dust Mop Daily: Focus on high-traffic areas.
- Wipe Up Spills Immediately: Don’t let them sit.
- Place Mats at Entrances: Essential for trapping dirt.
- Use Furniture Pads: Protect against scratches.
- Encourage Shoe Removal: A simple but effective rule.
These small habits prevent bigger problems down the line.
Regular Upkeep
Beyond preventing damage, consistent upkeep is vital. This means not letting dirt and grime build up. It also means dealing with minor issues before they become major ones.
Routine Dry Cleaning: As we’ve discussed, daily or every-other-day dry cleaning is paramount. This removes the abrasive particles that wear down the finish.
Occasional Damp Mopping: Depending on your home, this might be weekly or every two weeks. It removes light dirt and keeps the floor looking fresh.
Spot Cleaning as Needed: Don’t let spills and marks linger. Address them as soon as you see them.
Buffing: Sometimes, after damp mopping and drying, your floors might look a little dull. You can use a clean, dry microfiber cloth or a buffer machine (with a soft pad, on a low setting) to buff the floor. This can help restore some of the shine.
Do this only when needed, not as part of every cleaning routine.
By integrating these protective measures and consistent upkeep habits into your routine, you’ll significantly extend the life and beauty of your polyurethane wood floors. It’s about consistent, gentle care.
When to Call the Professionals
While most polyurethane floor care can be handled at home, there are times when it’s best to bring in the experts. These situations usually involve more significant damage or issues that are beyond DIY solutions.
Deep Scratches or Gouges
If you have deep scratches that go beyond the surface layer of the polyurethane, or if there are actual gouges in the wood, simple cleaning won’t fix it. These often require professional refinishing. A professional can sand down the floor and apply a new coat of polyurethane.
The extent of the damage will determine if a spot repair is possible or if the entire floor needs attention. If you notice widespread deep scratches, it’s a good sign it’s time to consult a flooring professional.
Warping or Cupping
If your floorboards are starting to warp (bend upwards at the edges) or cup (bend downwards in the middle), this is usually a sign of moisture damage. It could be from a major flood, a leaky appliance, or consistent over-wetting during cleaning. This type of damage is often difficult or impossible to repair without replacing boards or refinishing the entire floor.
Professionals can assess the extent of the moisture damage. They can advise on the best course of action, which might involve drying out the subfloor and then refinishing. In severe cases, board replacement is necessary.
Discoloration or Fading
Significant discoloration, especially if it’s uneven, can be caused by prolonged sun exposure or harsh chemicals that have stripped the finish unevenly. While some fading from sunlight is natural, if you see drastic patches or a generally washed-out look, it might be time for professional help. They can often restore color and apply a fresh protective coat.
This is also relevant if you notice yellowing that seems excessive or inconsistent. Sometimes, older oil-based polyurethanes naturally yellow over time, but if it’s a new or extreme change, a pro can diagnose it.
Unknown Finish Type
If you’ve recently moved into a home and aren’t sure what type of finish is on your floors, or if they are very old and the finish is questionable, it’s wise to consult a professional. They can identify the finish type. They can then recommend the safest and most effective cleaning and maintenance plan.
This prevents you from accidentally using the wrong products and causing damage.
Sometimes, older floors might have wax finishes or other types that require very different care than polyurethane. A professional assessment can save you from costly mistakes.
Signs It’s Time for Professional Help
- Deep scratches or gouges
- Warped or cupped floorboards
- Significant, uneven discoloration
- Finish is peeling or flaking
- Uncertainty about the floor’s finish type
- Major water damage
Don’t hesitate to get a quote from a reputable flooring company if you see these issues.
Ultimately, your intuition is a good guide. If you feel a problem is beyond your comfort level or expertise, it probably is. A professional can provide peace of mind and ensure your valuable wood floors are treated correctly.
Frequently Asked Questions
Can I use a damp mop on my polyurethane floors every day?
While it’s great to be proactive, damp mopping daily might be too much moisture. It’s better to sweep or dust mop daily and damp mop weekly or every two weeks, depending on how much dirt your floors accumulate. Too much moisture can damage the wood over time.
What is the best way to clean scuff marks off polyurethane floors?
For light scuff marks, try a clean white eraser first. If that doesn’t work, use a microfiber cloth with a tiny bit of your pH-neutral wood floor cleaner. Gently rub the mark in a circular motion.
Always follow up by drying the area thoroughly with a clean, dry cloth.
Is it okay to use a wood floor cleaner with a bit of wax in it?
Generally, it’s best to avoid wax-based cleaners on polyurethane floors. They can build up over time, creating a slippery surface. This build-up can also attract dirt and make your floors look dull.
Stick to pH-neutral cleaners that don’t leave a residue.
My floors look dull. Can I use a polish to restore the shine?
Be very careful with floor polishes. Some can leave a residue that dulls the finish further or makes it difficult to clean later. Look for polishes specifically designed for polyurethane finishes and test in an inconspicuous area first.
Often, a good buffing with a dry microfiber cloth after cleaning can restore shine without needing a polish.
How often should I have my polyurethane floors professionally cleaned or refinished?
Routine professional cleaning isn’t usually necessary unless you have very heavy traffic or significant damage. However, refinishing is typically needed every 5-10 years, depending on wear and tear. This involves sanding down the old finish and applying a new one to restore the floor’s appearance and protection.
Can I use vinegar and water to clean my polyurethane floors?
A diluted vinegar and water solution (about 1/2 cup of white vinegar to 1 gallon of water) can be used sparingly for cleaning. However, vinegar is acidic, so it’s best not to use it too often. Always test it in a hidden spot first to ensure it doesn’t dull your finish.
A pH-neutral cleaner is usually a safer, more consistent choice.
Conclusion
Keeping your polyurethane wood floors looking fantastic is totally achievable. It boils down to consistent, gentle care. By using the right tools, avoiding harsh chemicals and excess water, and acting fast on spills, you protect that beautiful finish.
Regular dry cleaning and occasional damp mopping will keep your floors shining. And remember, when in doubt, professional help is always an option.