How to Find an Angle in Woodworking: Measuring vs. Transferring Angles
Most “how to find an angle” guides lump every tool together and never explain why you’d reach for one over another. In practice it comes down to one question: do you need to know the actual number of degrees, or do you just need to copy an angle that already exists? A digital angle finder answers the first question. A bevel gauge (also called a sliding T-bevel) answers the second – and it does it without ever telling you what the degree reading is. Knowing which job you’re actually doing saves a surprising amount of wasted wood.
Measuring vs. Transferring: Two Different Jobs
2-IN-1 MEASURE & TRANSFER PICK
 |
General Tools T-Bevel Gauge & Protractor – $23.40 One tool that covers both jobs in this article: it’s a sliding T-bevel for copying an angle you can’t measure, and a digital protractor with an LCD readout for the times you need the actual degree number.
|
A digital angle finder (sometimes sold as a digital protractor) tells you an exact number – 63.4 degrees, 22.5 degrees, whatever the surface actually is. You need that number when you’re cutting a compound angle from a plan, replicating a design from a magazine, or feeding a measurement into a miter saw’s degree scale. A bevel gauge does the opposite job on purpose: swing the blade until it sits flush against an existing angle, lock the wing nut, and carry that exact shape to the saw or the next board. You never learn what the angle “is” in degrees, and for a lot of woodworking – matching an out-of-square wall corner, copying a broken part, scribing a piece to an irregular edge – you don’t need to. Trying to measure that same corner with a protractor and then dial the same number into a saw just adds a step where rounding errors creep in.
The Core Tools, and What Each One Is Actually For
Most shops end up with some combination of these four. None of them makes the others obsolete – they solve different problems.
| Tool | Tells you the degree? | Best use |
|---|---|---|
| Combination square | No (fixed 45°/90°) | Fast, dead-accurate 90° and 45° checks – the everyday workhorse |
| Protractor / miter gauge | Yes, read off a printed scale | Laying out an angle on paper or wood before you cut |
| Bevel gauge (sliding T-bevel) | No – it copies, doesn’t read | Transferring an existing, possibly irregular, angle |
| Digital angle finder | Yes, precise to about a tenth of a degree | Compound angles, replicating a plan, checking a saw’s own angle setting |
A combination square is still the tool most woodworkers reach for first, simply because 90 and 45 degrees cover most furniture and cabinet work. The other three come into play once a project involves an angle that isn’t one of those two standards.
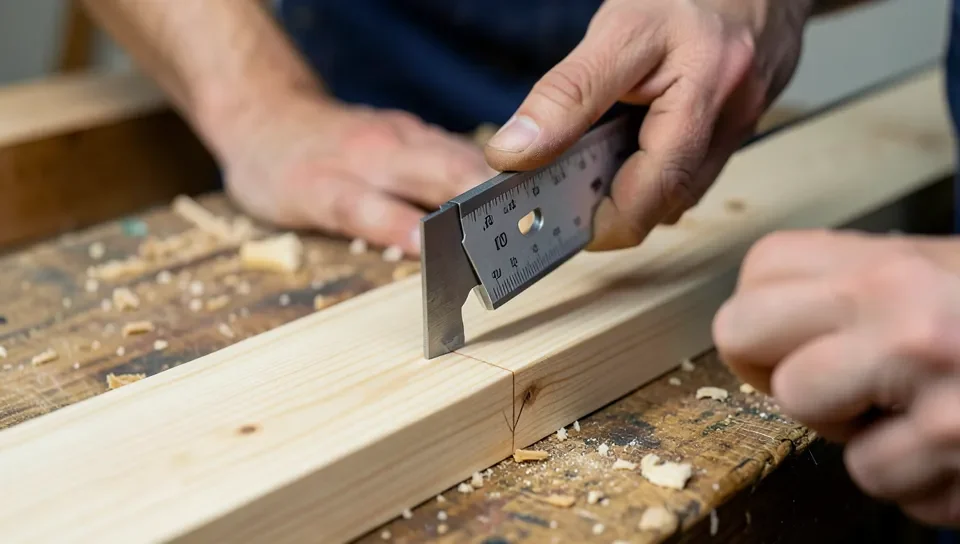
How to Measure an Angle You Don’t Know
This is the job for a protractor or a digital angle finder, and the steps are the same either way – only the last step changes.
- Set the tool’s pivot point exactly on the corner or vertex of the angle you’re measuring.
- Line up one arm of the tool flush against one of the two surfaces forming the angle.
- Swing the second arm (or, on a digital finder, the hinged leg) until it sits flat against the other surface, with no gap.
- Read the number: on a manual protractor, read the printed scale where the arm crosses it; on a digital model, read the LCD directly.
- Double-check by rotating the tool slightly off the corner and re-measuring – a reading that moves by more than a degree or two usually means the surface isn’t flat or the pivot wasn’t seated on the actual corner.
For a standard picture frame or box corner, this is almost always just confirming 90 degrees. The measuring step matters more on irregular work: an out-of-square wall corner, a hexagonal stool seat, or any joint where you can’t assume a textbook number.
How to Transfer an Angle Without Knowing the Degree
This is where the bevel gauge earns its keep. You’re not trying to learn a number – you’re copying a shape.
- Loosen the wing nut or locking screw on the bevel gauge so the blade swings freely.
- Press the stock (the fixed handle) flat against one surface of the existing angle.
- Swing the blade until it lies flat against the second surface, with the point sitting in the corner.
- Tighten the lock so the blade can’t shift.
- Carry the gauge to your new material, press the stock against the reference edge, and scribe along the blade with a marking knife or pencil.
Because nothing gets converted into a number and back, there’s no rounding error – the copied angle is exactly the angle you started with. That’s the whole advantage over measuring it and re-cutting to a dialed-in degree setting.
Compound Angles and Miter Math
A basic miter joint on a square frame is just half the corner angle – for a standard 90-degree corner, that’s 45 degrees on each piece. If the corner genuinely isn’t square (an addition to an older house, for example), measure the real corner angle with a digital angle finder and divide that number by two instead of assuming 90.
Crown molding adds a second variable because the molding also sits at a spring angle against the wall – almost always either 38 or 45 degrees, depending on the profile. That’s why crown molding miter and bevel settings come from a lookup table rather than simple division: the saw’s miter angle and bevel angle both have to be set together, and getting one without the other still leaves a gap. If you’re setting those angles by hand rather than trusting a printed chart, a digital angle finder that reads to a tenth of a degree removes most of the guesswork; see our crown molding miter saw angle guide for the actual setting combinations.
Common Mistakes That Throw Off an Angle
The most frequent error isn’t a bad tool – it’s measuring against a board that isn’t actually flat. A cupped, twisted, or slightly bowed piece of wood will give a false reading no matter how precise the gauge is, because the tool is only as accurate as the surface it’s resting on. Sight down the edge of any board before you trust an angle measurement taken from it, and joint or plane it flat first if it isn’t.
The second common mistake is trusting a single digital reading without a cross-check. Digital angle finders can drift out of calibration, and a dead battery or a speck of sawdust under the pivot point will throw a reading off by a degree or more without any obvious sign something’s wrong. Confirm an unusual or critical reading with a second method – a protractor, a known 90-degree reference, or simply flipping the tool over and re-measuring – before you cut expensive material to it.
Practice Project: A Simple Mitered Frame
This is a fast way to build confidence with both measuring and transferring before moving on to compound angles.
- Cut four strips of scrap to the same width.
- Set a miter saw or miter box to 45 degrees and cut both ends of each strip.
- Dry-fit the four corners and check each one with a bevel gauge set to a true 90-degree square – any gap shows which cut needs a slight adjustment.
- Glue and clamp the frame using wood glue and clamps, checking the corners stay square as you tighten.
- Once it’s dry, sand the joints flush.
If you want a project that puts angled legs to use as well, our guide on how to attach legs to a table without an apron covers cutting and setting an angled leg from scratch, and our guide to cutting angles on a miter saw goes deeper into dialing in the saw itself once you know the number you need.
Frequently Asked Questions
What’s the difference between a bevel gauge and a digital angle finder?
A bevel gauge copies an existing angle from one surface to another without ever showing you a degree number – it’s a transfer tool. A digital angle finder measures and displays the actual degree reading, which you need when cutting from a plan or setting a saw to a specific number rather than matching something that already exists.
How do I measure an angle accurately in woodworking?
Set the tool’s pivot on the exact corner, align one arm flush against each surface with no gap, and read the scale or LCD directly. Re-check the reading after slightly repositioning the tool – a result that shifts by more than a degree or two usually means the reference surface isn’t flat.
What tools are essential for finding angles in woodworking?
A combination square handles the 90 and 45-degree angles most projects need. A bevel gauge (sliding T-bevel) is essential for transferring irregular angles, and a digital angle finder or protractor is needed whenever you have to know the actual degree number, such as for compound miters.
Conclusion
Before reaching for a tool, decide which question you’re actually answering: do you need the degree number, or do you just need to copy a shape that already exists? A digital angle finder solves the first problem, a bevel gauge solves the second, and a combination square still handles the vast majority of everyday 90 and 45-degree work. Keeping that distinction straight is what separates guessing at an angle from setting it correctly the first time.
Sponsored / affiliate links. As an Amazon Associate I earn from qualifying purchases. I may earn additional commission from eligible campaigns.