How to Hardwood Floor Installation: Genius Method
Mastering hardwood floor installation yourself is achievable! This genius method breaks down the process into simple, manageable steps, using common tools and smart techniques. Get ready to transform your home with beautiful, durable hardwood floors without the stress or high cost of hiring professionals.
Making over your home can feel like a huge undertaking, and updating your floors is a big part of that. Many homeowners dream of the warmth and elegance of hardwood floors but hesitate due to the perceived difficulty and cost of installation. It’s true, professional installation can be pricey! But what if I told you that with the right guidance, you can achieve stunning results yourself? This guide is designed to make “how to hardwood floor installation” feel less like a daunting project and more like a rewarding DIY adventure. We’ll walk through it step-by-step, keeping things simple and safe.
Your Hardwood Floor Installation FAQ
Q1: Is DIY hardwood floor installation truly affordable?
A1: Yes! Doing it yourself can save you significantly on labor costs, often cutting the total project price by 50% or more. You’ll still need to factor in the cost of the wood, underlayment, tools, and any finishing supplies, but the savings are substantial.
Q2: What’s the easiest way to lay hardwood floors for a beginner?
A2: For beginners, a floating floor installation using click-lock or tongue-and-groove engineered hardwood is often the simplest. This method doesn’t require nailing or gluing planks directly to the subfloor, making it more forgiving and less labor-intensive.
Q3: How much time does it take to install hardwood floors?
A3: The time varies greatly depending on the size of the room and your experience. For a typical 12×12 foot room, a DIYer might take 2-3 full days, including preparation and clean-up, but it could be quicker with experience or in larger spaces.
Q4: Do I need special tools for hardwood floor installation?
A4: You’ll need a few essential tools like a measuring tape, chalk line, tapping block, pull bar, and a good quality saw (miter saw or circular saw). For nail-down installations, a flooring nailer and air compressor are necessary. Many basic tools can be rented if you don’t want to buy them.
Q5: Can I install hardwood floors over existing flooring?
A5: Sometimes, yes! You can often install a floating hardwood floor over existing vinyl, laminate, tile, or even a well-maintained existing wood floor. However, it’s crucial that the subfloor beneath is clean, flat, and stable. Always check the manufacturer’s recommendations for your specific flooring.
Q6: How difficult is it to cut hardwood planks?
A6: Cutting is one of the easier parts. With a miter saw or a circular saw and a guide, you can make straight cuts easily. For curved cuts around obstacles like door frames, a jigsaw is your best friend. It’s mostly about measuring accurately and using the right blade for a clean cut.
Q7: What’s the most important step in hardwood floor installation?
A7: Acclimation is critical! Allowing the new hardwood planks to sit in your home for a few days (or as recommended by the manufacturer) helps them adjust to the temperature and humidity. This prevents warping, gapping, or buckling later on.
How to Hardwood Floor Installation: A Genius Method for DIYers
So, you’re ready to tackle the project of installing hardwood floors yourself. Fantastic! It’s a fantastic way to boost your home’s value and aesthetic. Many homeowners feel a little intimidated by this project, but I’m here to tell you it’s absolutely doable. My “genius method” focuses on simplifying each step, using clever techniques, and ensuring you get a professional-looking finish without the professional price tag. We’ll cover everything from preparing your subfloor to laying the final plank with confidence.
Step 1: Planning and Preparation – The Foundation of Success
Before you even open a box of flooring, a little planning goes a long way. This phase is crucial for an easy installation and a beautiful, long-lasting floor. We want to make sure everything is perfect before we start laying planks.
Gathering Your Tools and Materials
Having everything you need at hand makes the process smooth. Here’s a list of essential items and some optional helpers.
Hardwood Flooring: Choose your style! Engineered hardwood is often easier for beginners.
Underlayment: Needed for most floating floors to provide cushioning, moisture protection, and sound dampening.
Moisture Barrier: Essential for installations over concrete subfloors. Use a 6-mil polyethylene vapor barrier.
Measuring Tape: For accurate measurements.
Chalk Line: To snap straight lines on your subfloor.
Pencils: For marking.
Utility Knife: For cutting underlayment and moisture barriers.
Hammer: For tapping planks snugly.
Tapping Block: A specifically designed block to protect plank edges when tapping them together.
Pull Bar: Used to gently pull the last plank in a row tight against the previous one.
Gloves: For comfort and grip.
Safety Glasses: Always protect your eyes!
Dust Mask: Especially important when cutting wood.
Saw: A miter saw is ideal for clean, precise cuts. A circular saw with a straight edge guide can also work. A jigsaw is useful for intricate cuts around door frames.
Tack Hammer or Mallet: For minor adjustments.
Scraper or Putty Knife: For cleaning up any adhesive or debris.
Broom and Vacuum: For keeping the workspace clean.
Inspecting and Preparing Your Subfloor
A clean, flat, and stable subfloor is non-negotiable for any hardwood installation. An uneven or damaged subfloor will lead to problems down the road, like squeaks, gaps, or even cracked planks.
Remove existing flooring: If you have carpet, remove it entirely. If you have old glued-down vinyl or tile, decide if it can serve as a base or if it needs removal.
Check for levelness: Use a long, straight edge or a level. The subfloor should be flat within 1/8 inch over an 8-foot span. Low spots can be filled with leveling compound, and high spots can be sanded down.
Ensure stability: Walk across the subfloor. If you hear or feel any flexing or squeaking, find and secure loose subfloor panels with screws. Drive screws about every 6 inches along joists and 12 inches in between.
Clean thoroughly: Sweep and vacuum until the subfloor is free of all dust, debris, and old adhesive. Dust can interfere with underlayment adhesion and make planks sit unevenly.
Moisture Check: For concrete subfloors, a moisture test is essential. You can use a concrete moisture meter or perform a simple plastic sheet test. Tape a 2×2 foot piece of plastic sheeting tightly to small portions of the concrete. Leave it for 24 hours. If condensation forms on the underside of the plastic or the concrete looks dark, you have a moisture issue that needs addressing, likely with a proper moisture barrier.
Acclimation of Your New Hardwood Floors
This is one of those “genius” steps that many people rush, but it’s vital for the longevity of your new floor. Hardwood is a natural material that expands and contracts with changes in temperature and humidity.
Bring it home: Carefully transport the unopened boxes of flooring to the room where they will be installed.
Let it breathe: Place the boxes flat on the subfloor (not directly on concrete), spaced slightly apart for air circulation.
Wait it out: Follow the manufacturer’s recommendation. This is typically 48-72 hours, but can be longer in very humid or dry climates. This process allows the wood to adjust to your home’s environment, minimizing the risk of warping, gapping, or buckling after installation.
Step 2: Laying the First Row – The Straightest Start
The first row sets the tone for your entire installation. If it’s not straight, the rest of your floor will likely be crooked. Precision here is key!
Planning Your Layout Direction
Hardwood planks are typically laid parallel to the longest wall in the room. This makes the room appear longer and more spacious. However, consider where your main light source is. Laying planks perpendicular to the direction of natural light can help minimize the appearance of any minor imperfections or gaps.
Measure the room: Note the length and width.
Subfloor lines: Use a chalk line to snap two parallel lines across the subfloor, approximately 1/2 inch away from the walls (this accounts for expansion space). These lines will guide your first row.
Starting the Installation
Most click-lock and tongue-and-groove systems have a specific way to start. For floating floors, you usually start with the tongue side facing the wall or the grooved side facing the previous plank. Always refer to your flooring manufacturer’s specific instructions.
1. Prepare the first plank: For floating floors, you might need to remove the tongue from the edge that will face the wall to create a clean, flat surface. Use a pry bar or a handsaw to carefully cut off the tongue.
2. Place the first plank: Position the first plank with the cut edge (or the correct edge according to instructions) against your starting wall, leaving that 1/2 inch expansion gap. The grooved side should face into the room.
3. Connect subsequent planks: Take a second plank and connect its tongue into the groove of the first plank at a slight angle, then carefully lower it. You may need to gently tap it with the tapping block and hammer to ensure a tight fit. Repeat this for the length of the row.
4. Cutting for the end of the row: Measure the distance from the last full plank to the chalk line (remembering the expansion gap). Cut the final plank to fit. Use the pull bar to gently engage its tongue into the groove of the last plank.
5. Use the last piece to start the second row: Save any cut-off piece from the first row if it’s at least 6 inches long. You can use this to start the second row, adding visual interest and minimizing waste.
Step 3: Laying Subsequent Rows – Building Momentum
This is where you’ll really see your floor come together. The key here is to stagger your planks to create a strong, natural-looking pattern.
Staggering Your Planks
A staggered pattern means the end joints of planks in adjacent rows are not aligned. Aim for a random offset, with end joints at least 6 inches apart from those in the rows next to them. This provides structural integrity and a much more pleasing aesthetic.
1. Starting the second row: Use the cut-off piece from the first row if it’s long enough, or start with a new plank cut to a different length. This ensures your end joints are offset from row one.
2. Connecting rows: Angle the tongue of the new plank into the groove of the plank in the previous row. Once seated, gently lower the plank.
3. Tapping planks together: Use your tapping block on the long edge of the plank being installed. Tap gently with your hammer to close any small gaps. You’re aiming for a snug fit without damaging the edges.
4. Working across the room: Continue laying planks, row by row, always ensuring the end joints are well staggered. Keep a constant eye on your chalk lines to ensure your rows remain straight.
Precision Cutting Around Obstacles
You’ll inevitably encounter door jambs, pipes, or other fixed objects. Here’s how to handle them.
Door jambs: The most common method is to slide the plank under the door jamb. Cut the plank to length, then use a handsaw or a jigsaw to carefully cut away the excess part of the tongue where it meets the jamb. You might need to use a tapping block and pull bar from the side to seat it properly.
Pipes: Measure carefully and mark the center of the pipe on the plank. Use a drill to create a hole slightly larger than the pipe diameter. Then, cut from the edge of the plank to the hole with a jigsaw. This allows you to fit the plank around the pipe. You can then use small scraps to fill any gaps.
Irregular shapes: For things like fireplace hearths or built-in shelves, you’ll want to create a template using paper or cardboard. Trace the shape onto your plank and carefully cut it out with a jigsaw.
Step 4: The Final Rows and Finishing Touches
The end is in sight! These last few steps ensure a clean, professional look.
Installing the Last Row
The last row is often the trickiest because space is limited, and you’ll mostly be using the pull bar.
1. Measure and cut: Measure the width of the remaining gap, remembering to account for the 1/2 inch expansion space from the wall. If the remaining planks are too wide to fit, you’ll need to rip them lengthwise (cut them down the long edge).
2. Using a pull bar: Place the pull bar between the plank and the wall. Hook the bar onto the edge of the plank and gently tap the other end with your hammer to pull the plank snug against the previous row.
3. Final plank: For the very last plank, measure and cut it to fit. You might need to angle it in and use the pull bar to tap it into place.
Installation Methods: Nail-Down vs. Glue-Down vs. Floating
While this guide focuses on a beginner-friendly method, understanding other options helps appreciate why floating is often recommended for DIYers.
| Method | Description | Best For | Pros | Cons |
| :———– | :——————————————————————————— | :——————————————————- | :——————————————————- | :————————————————————————- |
| Floating | Planks interlock and are not attached to the subfloor. | DIY beginners, engineered or laminate floors. | Easiest, fastest, less messy, good for renters. | Can be noisy, not suitable for all wood types, requires underlayment. |
| Nail-Down| Planks are secured to a wood subfloor with flooring nails driven at an angle. | Solid hardwood, plank widths over 3 inches. | Very secure, stable, traditional look, long-lasting. | Requires specialized nailer/compressor, only works on wood subfloors. |
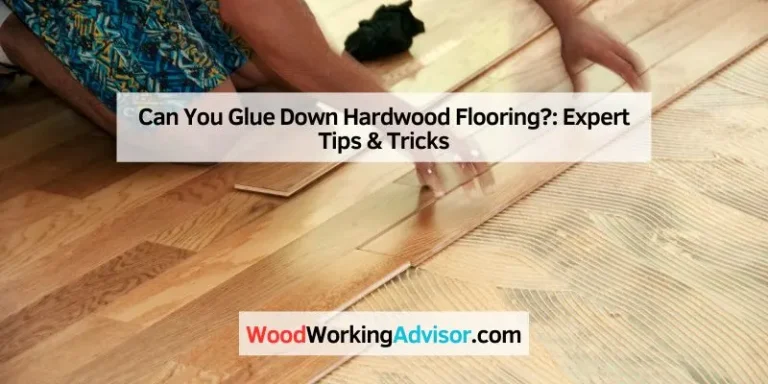
| Glue-Down| Planks are adhered directly to the subfloor using a special flooring adhesive. | Engineered hardwood, below-grade installations, concrete. | Very quiet, smooth, no risk of squeaks, good for concrete. | Messy, requires specific adhesives, more difficult to remove later. |
For most beginners tackling a DIY project, the floating method using click-lock engineered hardwood is the most forgiving and accessible. It bypasses the need for expensive specialized tools like flooring nailers and makes corrections much simpler.
Step 5: Trim and Transition – The Professional Polish
You’ve laid the floor, now it’s time to make it look like a pro did it. The trim and transitional pieces are where rough edges become refined beauty.
Installing Baseboards and Quarter Round
Baseboards cover the expansion gap between the flooring and the wall. Quarter round (a small, curved piece of molding) is often used in front of the baseboard to conceal any remaining small gaps, especially if walls aren’t perfectly straight.
1. Remove old baseboards (if necessary): Carefully pry off old baseboards if they are in the way.
2. Install new baseboards: Nail new baseboards to the wall stud behind the flooring. Be careful not to nail into the floating floor itself!
3. Use quarter round: Nail the quarter round to the baseboard (not the floor!) to cover the expansion gap. Many prefer using a brad nailer for this.
Creating Transitions
Where your new hardwood floor meets another flooring type (tile, carpet, another wood floor, or a doorway), you’ll need a transition strip.
T-molding: Used when two floors of the same height meet.
Reducer: Used when your hardwood meets flooring of a lower height.
End cap: Used at thresholds or to finish edges against a patio door.
These transition strips are typically secured to the subfloor with adhesive or small finish nails, not directly to the hardwood planks. Always ensure the transition strip is flush with the adjacent flooring. You can find great installation guides for these transition pieces on reputable DIY sites like This Old House or the National Association of Home Builders (NAHB).
Maintenance Tips for Your New Hardwood Floors
To keep your beautiful new floors looking great for years to come, a little regular care is all that’s needed.
Sweep or vacuum regularly: Use a soft-bristle attachment for your vacuum cleaner to avoid scratching the surface.
Clean spills immediately: Use a slightly damp cloth. Avoid excessive water, as it can damage the wood.
Use appropriate cleaners: Stick to pH-neutral hardwood floor cleaners recommended by your flooring manufacturer. Avoid abrasive cleaners, waxes, or polishes unless specifically directed.
Protect high-traffic areas: Use area rugs in hallways, entryways, and under furniture in dining areas.
Use furniture pads: Place felt pads on the legs of all furniture to prevent scratches.
* Trim pet nails: Keep pet nails trimmed to minimize scratching.
Conclusion
And there you have it! You’ve successfully navigated “how to hardwood floor installation” using a method designed for clarity and ease. You’ve transformed your space with the timeless beauty and durability of hardwood. Remember, the key to a successful DIY project like this is preparation, patience, and following each step carefully. Don’t be afraid to revisit sections or take breaks. The confidence you’ll gain from completing this project is just as valuable as the stunning new floor beneath your feet.