How to Inlay Silver into Wood: Wire, Sheet and Epoxy Methods
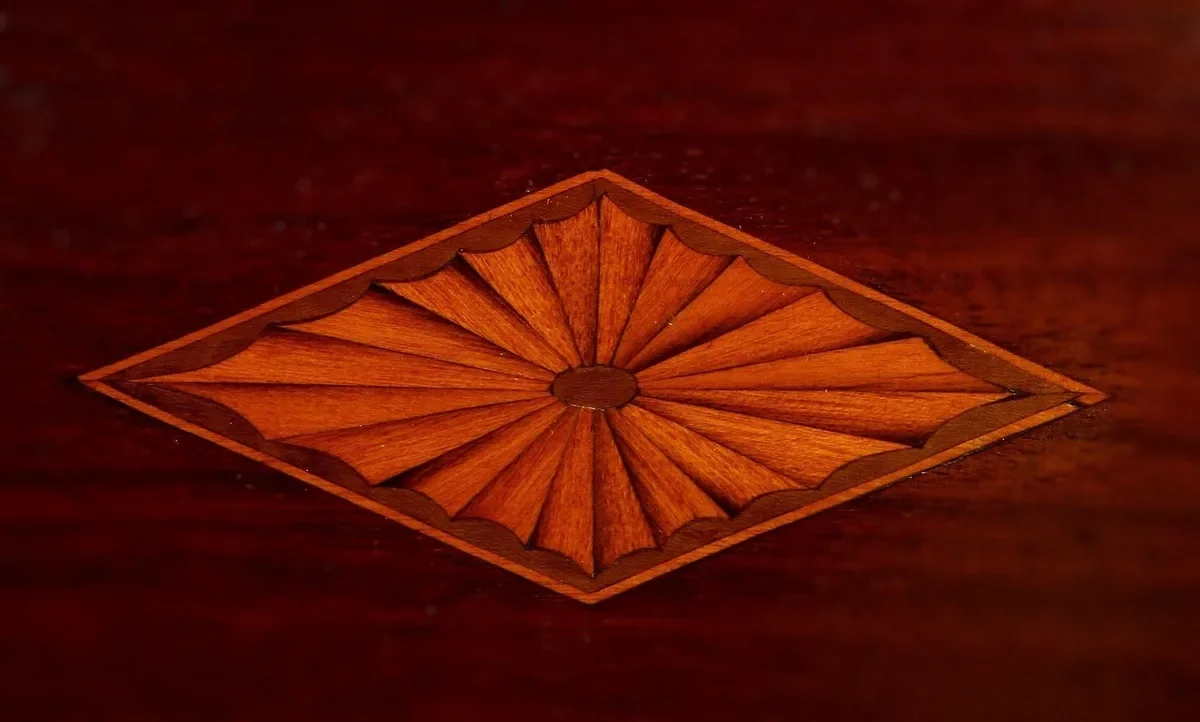
To inlay silver into wood, cut a groove or pocket slightly deeper than the metal is thick, set soft fine silver into it with slow-curing epoxy (or hammer it into an undercut groove), then plane and sand the surface flush. Fine silver wire suits lines and scrollwork, and silver sheet suits shapes. This is cold-metal work, so there is no soldering or melting involved.
Most beginner guides skip the part that decides whether the inlay looks crisp or messy: the metal has to be soft, the groove has to be clean, and the wood has to be sealed before the adhesive goes in. This guide covers the three practical methods, how wide to cut the groove for common wire sizes, how to flush the metal without smearing it into the grain, and what to do about tarnish and dust safety.
Tools and Silver Stock for Inlay
Best Saw Kit for Cutting Silver Inlay
 |
Megacast 3-in-1 Jeweler’s Saw Set: $23.45 A frame, a V-slot bench pin and a pack of fine blades let you cut silver sheet into inlay shapes that fit a routed or chiseled pocket.
|
You need five things: silver stock, a way to cut a clean groove, a way to cut the metal, an adhesive, and something to flush it. For the groove, a small router with a fine straight bit works for straight and gently curved lines (see our guide to inlaying wood with a router), while a sharp chisel and a knife handle tight corners. For cutting the metal itself, use a jeweler’s saw for sheet and small flush-cutting snips for wire. If you are unsure between a jeweler’s saw and a coping saw, our jeweler’s saw vs coping saw comparison explains the difference.
Fine silver or sterling: which is better for inlay?
Use fine silver. Fine silver is 99.9 percent silver, while sterling is 92.5 percent silver alloyed with copper (the standard sterling definition). Woodworkers and bladesmiths who inlay silver wire consistently report that fine silver is softer and easier to seat than sterling, so it deforms into the groove instead of springing back. Sterling is the common assumption because it is the jewelry standard, but for inlay the harder alloy is a disadvantage, not a benefit.
Wire gauge and groove width
Wire is sold by American Wire Gauge (AWG). The diameters below are standard conversions, and the groove widths are rule-of-thumb starting points that you should test on scrap first.
| Wire gauge (AWG) | Diameter (mm) | Diameter (in) | Groove for epoxy-set wire | Groove for hammered wire |
|---|---|---|---|---|
| 16 | 1.29 | 0.051 | About 1.4 mm wide | About 1.0 mm wide, undercut |
| 18 | 1.02 | 0.040 | About 1.1 mm wide | About 0.8 mm wide, undercut |
| 20 | 0.81 | 0.032 | About 0.9 mm wide | About 0.6 mm wide, undercut |
| 22 | 0.64 | 0.025 | About 0.7 mm wide | About 0.5 mm wide, undercut |
For epoxy setting, the groove is just wider than the wire so there is room for adhesive. For hammered setting, the groove is narrower than the wire and the wire is struck down so the soft metal spreads sideways and locks under the shoulders of the groove. Either way, cut the depth so that roughly two thirds to three quarters of the wire sits below the surface before flushing, leaving material to plane off.
Three Ways to Set Silver into Wood
| Method | Best for | How it holds | Main risk |
|---|---|---|---|
| Epoxy-set wire or sheet | Curves, shapes, and wide lines | Slow-curing epoxy fills the gap and bonds to roughened metal | Epoxy squeeze-out staining open-pored wood |
| Hammered wire (dry set) | Thin straight or gently curved lines | Soft wire is struck into a narrow, slightly undercut groove and mechanically locks | Splitting the groove edge in brittle or ring-porous wood |
| Silver powder or filings in epoxy | Irregular fills, cracks, veins | Metal particles suspended in clear epoxy | Reads as gray metallic paste, not solid silver; fine dust hazard |
For a first project, choose epoxy-set wire. It forgives small groove errors because the adhesive fills the gap, and it works in any wood. Hammered wire looks the crispest but needs a very clean groove.
Prepare the Wood
Pick a close-grained hardwood such as maple, cherry, walnut or mahogany. Very open-pored woods like oak let epoxy soak into the pores and leave dark stains beside the silver. One trick reported by woodworkers who inlay metal: before cutting the groove, seal the surface with a wash of about four parts water to one part liquid hide glue. Once dry, any epoxy that squeezes out sits on the sealer instead of sinking into the pores. Then sand to your final grit before inlaying, because sanding after can smear the silver.
- Draw the design lightly in pencil, or use a marking knife for wire lines so the groove has a crisp edge.
- Test-cut the groove on a scrap of the same species, since grain direction changes how cleanly a bit or chisel cuts.
- Set the depth stop on the router or mark the chisel depth with tape so the groove bottom is even.
- Keep the groove bottom flat and free of loose chips; a small chisel or a dental pick clears corners.
Prepare and Cut the Silver
Soft metal is the secret. If the silver has been work-hardened, anneal it: heat it to a dull red glow and quench it in water, then dry it. Do this well away from your wooden workpiece, on a fireproof surface, with tongs, and with nothing flammable nearby, because the metal will be hot enough to scorch wood and burn skin. Never heat the silver while it sits in the groove.
- Wire: file one side into a shallow V so the wire seats at the bottom of the groove without prying the wood fibers apart, then roughen the sides with a file or coarse abrasive so the epoxy has tooth.
- Sheet: transfer the shape, pierce and saw it with a jeweler’s saw, then file the edge square. Trace the finished shape onto the wood with a knife and cut the pocket to that line.
- Fit check: the metal should drop in with light finger pressure. A gap wider than a hair shows in the finished piece.
Set the Silver with Epoxy
Mix a small batch of slow-setting two-part epoxy, because fast epoxy starts gelling before you can seat a long wire. For details on which epoxies bond to wood and what to expect, see can you use epoxy on wood. Wear nitrile gloves, work with ventilation, and keep the mixing area away from food, since uncured epoxy can irritate skin and some people become sensitized to it after repeated contact.
- Wipe the groove and the roughened metal with denatured alcohol to remove oils and let it dry.
- Apply a thin bead of epoxy in the groove with a flat wooden paddle, such as a shaped skewer.
- Start at one end and press the silver down, working along the length so air is pushed ahead of the metal.
- Seat the metal gently with a hammer head or a wooden block. You only need it firmly bottomed out, not driven hard.
- Clean squeeze-out with a damp-alcohol swab now, while it is liquid, rather than sanding hard epoxy later.
- Let it cure fully, typically overnight, before any flushing.
For a hammered set, skip the epoxy: cut a narrow groove, use a small chisel or a knife to undercut each shoulder slightly, place the annealed wire, and tap it down along its length with a small hammer or punch until it is below the surface and has spread to fill the groove.
Flush, Sand and Finish
Because fine silver is soft, it smears. Remove the bulk with a sharp plane or scraper set fine. Woodworkers who inlay metal recommend a steel-soled plane, since a brass-bodied plane is too soft and can chatter or mar. Then switch to sanding blocks, working with the grain and stopping at your final grit. Expect silver dust to gray the surrounding pale wood if you overdo the sanding, so change abrasive often and vacuum between grits. Finally, buff the silver by hand with a soft cloth.
Keep an eye on tarnish: silver reacts with sulfur in air and turns dark over time. A clear topcoat such as lacquer or a hard wax over the whole surface, silver included, slows this down. If you want a bright look on something that will be handled, plan on occasional polishing with a soft cloth and a silver polish, applied carefully so it does not stain the wood.
Dust and Fume Safety
- Metal dust: OSHA sets the permissible exposure limit for silver metal dust and fume at 0.01 mg/m3 over an 8-hour average (OSHA Table Z-1). Hand-sawing and light filing produce little airborne dust, but wear a dust mask when filing or sanding metal, work over a tray to catch filings, and vacuum instead of blowing dust off.
- Wood dust: sanding hardwoods creates fine dust that is a respiratory irritant, so use a dust mask or extraction on the sanding steps.
- Epoxy: nitrile gloves and ventilation, as above, and no sanding of uncured epoxy.
- Hot metal: only if you anneal. Use tongs, a heat-safe surface and eye protection, and keep the flame away from the workpiece and finishing products.
- Sharp parts: jeweler’s blades and wire ends are sharp. Wear safety glasses when sawing and cover the ends of stock when carrying it.
Common Silver Inlay Mistakes
- Using wood glue. Wood glue is meant for wood-to-wood joints and does not form a reliable bond to smooth metal, so use epoxy, or set the metal mechanically.
- Using hard sterling. It resists seating and springs back, so switch to fine silver.
- Skipping the sealer. Epoxy stains that soak into open pores are nearly impossible to remove.
- Sanding too early or too coarse. This drags silver across the wood. Finish-sand the wood first, then flush the metal lightly.
- Not testing on scrap. Every species cuts differently, and a scrap test costs minutes.
If an inlay comes loose or a section cracks later, see our guide to repairing inlay in wood. For decorative strips and banding rather than metal, see how to make wood inlay strips.
Frequently Asked Questions
Can you inlay silver into any wood?
Most closed-pore hardwoods such as maple, cherry, walnut and mahogany work best because they cut a clean groove and do not soak up epoxy. Open-pored woods like oak can work if you seal the surface first. Very soft or splintery woods make weak groove walls, so hammered wire tends to fail in them.
What glue holds silver in wood?
Slow-curing two-part epoxy is the usual choice because it fills small gaps and bonds to roughened metal. Wood glue does not bond reliably to smooth silver. Cyanoacrylate can hold tiny pieces but leaves little working time and can stain the wood.
Should you use fine silver or sterling silver for inlay?
Fine silver is generally easier because it is softer and seats without springing back. Sterling silver is 92.5 percent silver alloyed with copper, which makes it harder and more resistant to hammering into a groove.
How deep should the groove be for silver wire inlay?
Cut the groove so roughly two thirds to three quarters of the wire diameter sits below the surface, leaving the top to be planed or sanded flush. Test the depth on a scrap of the same wood before cutting the real piece.
How do you keep silver inlay from tarnishing?
Silver tarnishes as it reacts with sulfur in the air. Sealing the whole surface with a clear lacquer or hard wax slows it, and a soft cloth with a silver polish removes tarnish that does form. Apply polish carefully so it does not stain the surrounding wood.
Conclusion
Inlaying silver into wood comes down to soft fine silver, a clean groove, sealed wood, and slow epoxy. Practice the epoxy-set wire method on scrap first, then move on to sheet shapes and hammered lines. Take the safety steps seriously, keep sanding gentle, and finish the surface to slow tarnish.
Sponsored / affiliate links. As an Amazon Associate I earn from qualifying purchases. I may earn additional commission from eligible campaigns.