How to Install Engineered Hardwood Floors (Floating, Glue & Nail)
Engineered hardwood floors install using one of three methods — floating, glue-down, or nail/staple-down — and the right one depends on your subfloor, not preference. Skipping subfloor prep or the door-trim step causes gaps and squeaks that only show up months later, not on install day. This guide covers all three methods, the NWFA subfloor flatness spec (3/16″ over 10 feet), the door-casing step most tutorials skip, and how long to wait before moving furniture back.
Tools and Materials You’ll Need
Best Installation Kit Pick
ROBERTS 10-26 Floor Install Kit (Spacers, Block, Pull Bar) – $17.41
Covers the exact 3 tools this guide’s floating and glue-down steps call for — tapping block, pull bar, and 30 wedge spacers for holding the expansion gap along the wall.
- Best for: small to mid-size rooms, first-time DIY installs
- Why we picked it: ROBERTS is an established flooring-tool brand and this kit has the 3 pieces this guide’s steps actually use
- Main drawback: plastic spacers and tapping block are light-duty — order a spare block for a whole-house job
Compare more installation kit options
 Option 1 WORKPRO Flooring Tool Kit – $23.39
|
 Option 2 REXBETI Flooring Installation Kit – $19.99
|
 Option 3 Goldblatt Professional Installation Kit – $34.99
|
As an Amazon Associate we earn from qualifying purchases.
Beyond the engineered hardwood planks and underlayment, most installs need a few dedicated tools: a tapping block and pull bar to join planks without denting the edges, spacers to hold a consistent expansion gap, a miter saw or flush-cut saw for trimming, a moisture barrier if your subfloor is concrete, and a rubber mallet for glue-down or nail-down work. Renting a flooring nailer adds cost if you’re only doing the nail/staple method once.
Installation Overview: 6 Steps
- Acclimate the planks: Let the engineered hardwood sit in the room for the time your manufacturer specifies so it stabilizes to local humidity before you cut a single board.
- Measure and order material: Calculate square footage and add 10% for waste, cuts, and future repairs.
- Prep the subfloor: Clean, level, and dry the subfloor, and confirm it meets the flatness tolerance for your chosen method.
- Trim door casings and lay underlayment: Undercut door trim so planks slide beneath it, then roll out the underlayment.
- Install using your chosen method: Float, glue, or nail/staple the planks according to your subfloor type.
- Finish the edges: Add transition strips and baseboards, then let the floor settle before moving furniture back.
Preparation Steps
Start by measuring your space accurately. Use a tape measure to find the length and width of the room. Multiply these numbers to get the total square footage. Always add an extra 10% for waste and mistakes.
Before prepping the subfloor, confirm the planks have finished acclimating to the room — installing before moisture content stabilizes is a common cause of gaps later. Preparing the subfloor is essential for a successful installation: it must be clean, dry, and level, with any holes or cracks filled in first.
📊 The subfloor must be flat to within 3/16″ over any 10-foot span (1/8″ over 6 feet for concrete) before glue-down or nail-down installation — sand high spots and fill low spots with a leveling compound until it passes. — Source: National Wood Flooring Association, 2020
Do You Need to Trim Door Casings Before Installing Engineered Hardwood?
Yes, in almost every room with a doorway. Undercut door casings and jambs about 1/16″ higher than the thickness of your new flooring plus underlayment, using a flush-cut (dovetail) saw laid flat against a scrap of the flooring as a depth guide. Skipping this step forces you to scribe and notch each plank around the door frame instead, which is slower and leaves a rougher fit than sliding the plank cleanly underneath.
Installation Methods Overview
The floating method lets engineered hardwood expand and contract freely, since planks interlock without glue or nails — the same click-lock system covered in our click flooring installation guide. In the glue-down method, adhesive secures planks directly to the subfloor for added stability and reduced hollow-sounding footsteps. The nail/staple-down method fastens planks to a wooden subfloor and needs a pneumatic flooring nailer, which is why it’s rarely the first choice for a one-room DIY job.
| Method | Works Over | Best For |
|---|---|---|
| Floating | Concrete, plywood, radiant heat | First-time DIYers, fastest install |
| Glue-down | Concrete or plywood | Quietest feel, most stable underfoot |
| Nail/staple-down | Wood subfloor only | Traditional feel, needs a flooring nailer |
Step-by-Step Floating Installation
Begin by laying the first planks against the wall. Ensure they fit snugly and level, and leave a 1/2″ expansion gap along every wall using spacers — this gap prevents buckling from humidity changes and gets hidden later by baseboards or transition strips.
Next, join planks using the tongue-and-groove method: align the tongue of one plank with the groove of another and press or tap down gently with a tapping block until they click into place. For cuts, measure carefully, use a saw for straight cuts, and always wear safety glasses.

Glue-Down Installation Guide
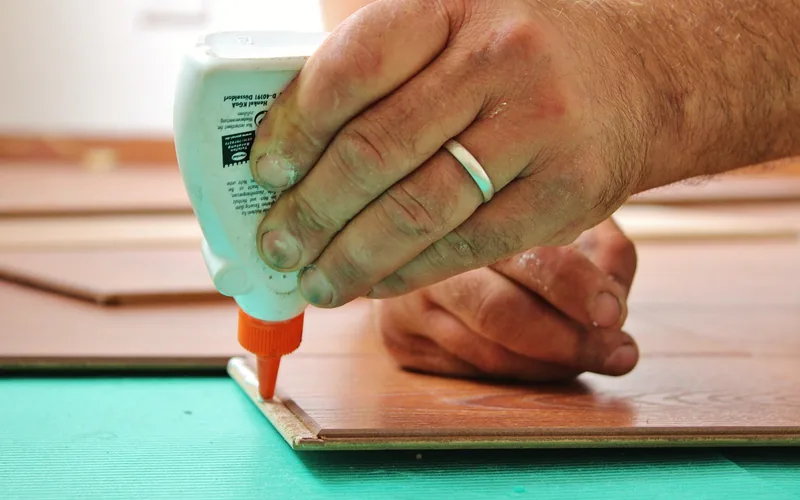
Apply adhesive evenly on the subfloor with a notched trowel, spreading only enough to cover a small area at a time so it doesn’t skin over before you set the planks. Place planks onto the wet adhesive, align them tightly, and press firmly for a strong bond. Wipe away excess glue with a damp cloth before it dries, or it leaves sticky spots that trap dirt for months.
Nailing/Stapling Down the Planks
This method requires a plywood subfloor — never nail or staple directly into concrete. Choose fasteners rated for engineered hardwood and long enough to secure the planks without piercing through the wear layer. Place fasteners every 6 to 8 inches along the tongue edge, checking with a straight edge and level as you go so the run stays flat and gap-free.
Finishing Touches
Install baseboards and trim to hide the expansion gap: measure the walls, cut baseboards to fit, secure with nails or adhesive, and fill any gaps with caulk. Add transition strips at doorways and between different flooring types to manage expansion where two floors meet.
Give glue-down installations 24 to 48 hours to cure, and floating floors at least a few hours to settle, before moving heavy furniture back — loading the floor too soon can telegraph dents and press adhesive out of the joints. Finish with a sweep or vacuum, then a damp mop with a gentle cleaner.
“The floors that end up with gaps by winter almost never failed because of bad installation technique — they failed because someone skipped acclimation or moved furniture back onto a glue-down floor the same afternoon it was installed.”
Common Mistakes to Avoid
- Skipping acclimation: Installing planks straight out of a hot delivery truck or a cold garage causes them to expand or shrink after installation, opening gaps.
- Ignoring subfloor flatness: A subfloor outside the 3/16″-per-10-foot tolerance telegraphs through as squeaks and uneven joints, even with premium flooring.
- Using too small an expansion gap: Less than 1/2″ at the walls can cause buckling when humidity rises in summer.
- Forgetting to undercut door casings: Butting planks against untrimmed trim leaves a visibly rough, gapped fit at every doorway.
- Moving furniture back too soon: Loading a glue-down floor before the 24-48 hour cure window can dent planks and push adhesive out of the seams.
Frequently Asked Questions
Is It Better to Glue or Float an Engineered Wood Floor?
Floating is often better for quick installation and ease of use since it eliminates glue and drying time. Glue-down provides more stability and a quieter underfoot feel but takes more effort and a 24-48 hour cure before you can walk on it freely. Choose based on your subfloor, timeline, and comfort with the extra work.
Do You Put Anything Under Engineered Hardwood?
Yes, always install engineered hardwood over an underlayment. It provides moisture protection, reduces noise, and levels out minor subfloor imperfections, which extends the lifespan of the flooring above it.
Can You Install Engineered Hardwood Yourself?
Yes. With the tools above, basic skills, and manufacturer instructions, a floating installation is very achievable as a weekend DIY project. Glue-down and nail-down jobs are still doable but reward some prior flooring experience.
What Is the Most Common Method of Installing Engineered Wood Floors?
The floating method is most common for DIY installs because it allows planks to expand and contract freely, works over concrete, plywood, or radiant heat, and needs no adhesive or nail gun.
How Flat Does My Subfloor Need to Be for Engineered Hardwood?
The National Wood Flooring Association sets the tolerance at 3/16″ of variation over any 10-foot span (1/8″ over 6 feet for concrete slabs). Sand down high spots and fill low spots with a leveling compound before installing if your subfloor falls outside that range.
Do I Need to Trim Door Casings Before Installing Engineered Hardwood?
In almost every doorway, yes. Undercut the casing about 1/16″ higher than your flooring plus underlayment thickness with a flush-cut saw so the plank can slide cleanly underneath instead of being notched around it.
Conclusion
Installing engineered hardwood comes down to matching the method to your subfloor, respecting the acclimation period and expansion gap, and not rushing the cure time at the end. Get those details right and the floor should stay flat and tight for years with basic care. For more on choosing between flooring types before you buy, see our wood flooring guide.
Sponsored / affiliate links. As an Amazon Associate I earn from qualifying purchases. I may earn additional commission from eligible campaigns.