Wood Accent Wall Ideas: Shiplap, Board-and-Batten & Reclaimed Wood
Shiplap, board-and-batten, herringbone panels, slatted screens, and reclaimed barn wood are the five most reliable wood accent wall styles for a first DIY project – each uses straightforward, beginner-safe cuts you can finish in a weekend.
Most idea lists stop at “pick a style and start nailing.” This guide covers the five styles plus three details that actually decide whether the finished wall looks intentional and holds up: which direction the boards run (it changes how tall or wide the room feels), whether reclaimed material needs inspecting before it comes indoors, and how a panel’s weight should change your mounting method. The techniques below also work across species – pine, oak, cedar, and reclaimed barn wood each have their own look and trade-offs, so pick the wood first, then the pattern.
Why Wood Accent Walls Are a DIY Must-Do
Real wood brings something a can of paint can’t replicate: real depth, texture, and a built-in sense of quality, even from a single wall. For a first project, it helps to start with one genuinely well-reviewed, easy-to-install product instead of guessing at material in a big-box aisle.
Best Peel-and-Stick Real Wood Pick
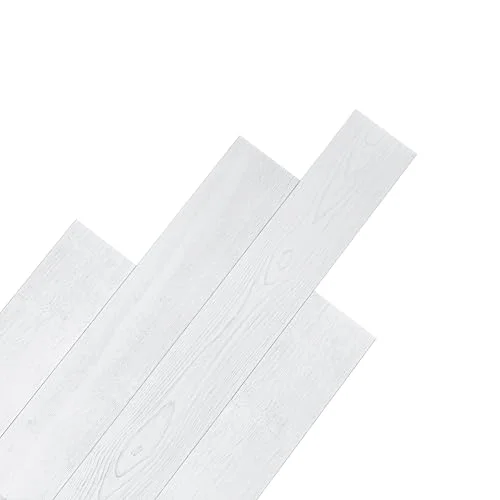 |
Luxdecor Real Wood Wall Planks, White Shiplap 10-Pack – $60.32 A real solid-pine peel-and-stick shiplap pack that matches the beginner-friendly shiplap method covered in style #1 below.
|
The Benefits of Going Woody
- Adds Architectural Interest: It breaks up boring, flat drywall, creating immediate visual focal points.
- Increases Perceived Value: Well-executed woodwork always looks expensive, even when using affordable materials.
- Warmth and Texture: Wood naturally softens a room, making it feel instantly more inviting and cozy.
- Beginner-Friendly Scale: It’s a defined project that offers huge payoff without overwhelming you with a whole-room renovation.
Essential Prep Work: Get Ready for Success
Before we pick up a single piece of lumber, good preparation is the secret handshake of successful DIY. Skipping this step is how most beginner projects go sideways. We need a solid plan, the right tools, and a safe workspace.
Step 1: Planning and Measuring
Choosing the right wall is half the battle. Typically, the best accent wall is the one facing the main entry to the room or the wall behind the biggest piece of furniture, like your sofa or bed. Measure twice, cut once – you’ve heard it, now live by it!
- Determine the height and width of your wall precisely.
- Note the location of outlets, switches, and vents. These will need holes cut into your wood panels.
- Sketch out your design. Even a simple drawing helps you visualize material needs.
Step 2: Tool Checklist – Keep It Simple
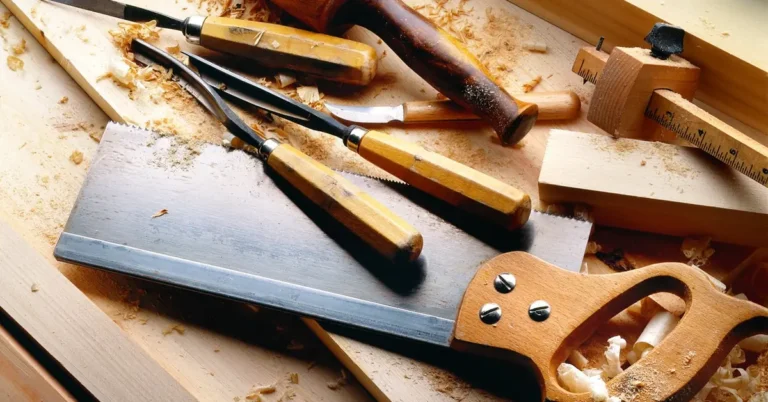
You don’t need a professional shop to tackle these projects. For most of these styles, a few core tools will get you started safely and effectively. Always remember your safety gear; eye protection is non-negotiable!
| Essential Tool | Why You Need It |
|---|---|
| Tape Measure & Pencil | Accurate marking is crucial for clean lines. |
| Miter Saw (or Circular Saw + Guide) | For making straight, square, and angled cuts. A miter saw makes this much easier. |
| Stud Finder | To securely anchor your wood panels to the wall studs, ensuring your wall won’t fall down later. |
| Level (Torpedo or Long) | Keeps your boards perfectly horizontal or vertical. This is key to professionalism. |
| Nail Gun (Brad Nailer) or Hammer/Finishing Nails | For attaching the wood securely to the wall framing. |
Top 5 Beginner-Friendly Wood Accent Wall Ideas
These five styles are popular for a reason: they look fantastic but use straightforward cuts and installation methods perfect for your first big DIY wall project.
1. The Timeless Shiplap Look
Shiplap is perhaps the most popular choice right now. It’s characterized by long, horizontal planks with a slight overlap, creating a clean, rustic, or modern farmhouse feel, depending on the finish.
Installation Tips for Shiplap
The magic of shiplap is that the boards overlap, which hides minor imperfections in your cuts. Use a simple spacer (like a nickel or a specific wood shim) between each board to ensure consistent gaps. If you are using interlocking boards instead, see this tongue and groove shiplap installation guide for acclimation time and blind-nailing specs.
- Where to Buy: For an easy start, look for pre-milled pine shiplap or even MDF (Medium-Density Fiberboard) shiplap panels at your local home improvement store.
- Layout: Start at the bottom center of the wall, working your way out to the edges. This helps balance any necessary awkward cuts near corners.
- Fastening: Nail into the studs wherever possible, using finish nails or brad nails. If you hit a tough spot between studs, consider using strong construction adhesive in addition to or instead of nails, as recommended by building standards for paneling (you can check resources like the Fine Homebuilding website for advanced fastening tips).
- Finishing: Paint it white for classic farmhouse charm or stain it light oak for a coastal vibe.
2. The Structured Board and Batten
Board and batten offers vertical lines that draw the eye upward, making ceilings feel higher. It consists of wide vertical boards (the “boards”) with thin trim pieces (the “battens”) overlaying the seams.
This style is fantastic for dining rooms or entryways because it adds structure without the full commitment of covering the entire wall in planks.
How to Create Board and Batten Panels
- Base Layer: Install your vertical base boards (usually 1×6 or 1×8 lumber boards) running from the floor/baseboard up to the chair rail height (or ceiling height if you are covering the whole wall). Keep the spacing consistent – often 12 to 16 inches apart.
- Battens: Once the base boards are up, use thinner strips of wood (1×2 or 1×3) and center them directly over the gap where two vertical boards meet. This hiding act is what creates the signature shadow line.
- Sealing Seams: Use painter’s caulk to gently run a bead where the batten meets the board. This step makes the whole thing look like one solid, custom-built piece rather than separate boards nailed together.
3. Herringbone: Texture With a Twist
If you want a huge “wow” factor, consider a wood herringbone pattern. This involves cutting many small, identical rectangular pieces and assembling them in a repeating V-shape. While this requires more precise, repetitive cuts, the result is stunning geometric sophistication.
Simplified Herringbone Approach
For your first try, do not try to cut all the angles piece by piece directly on the wall. That’s frustration waiting to happen!
- Build Panels: Construct manageable sections of the herringbone pattern on your workbench or garage floor using wood glue and clamps first.
- Cut Consistency: Ensure every piece is exactly the same size, perhaps 4 inches by 8 inches. The angle cut on the ends of each piece needs to be a perfect 45 degrees.
- Install Panels: Once a panel section is dry and rigid, lift it onto the wall, check it with your level, and nail it securely into the studs. Repeat until the wall is covered.
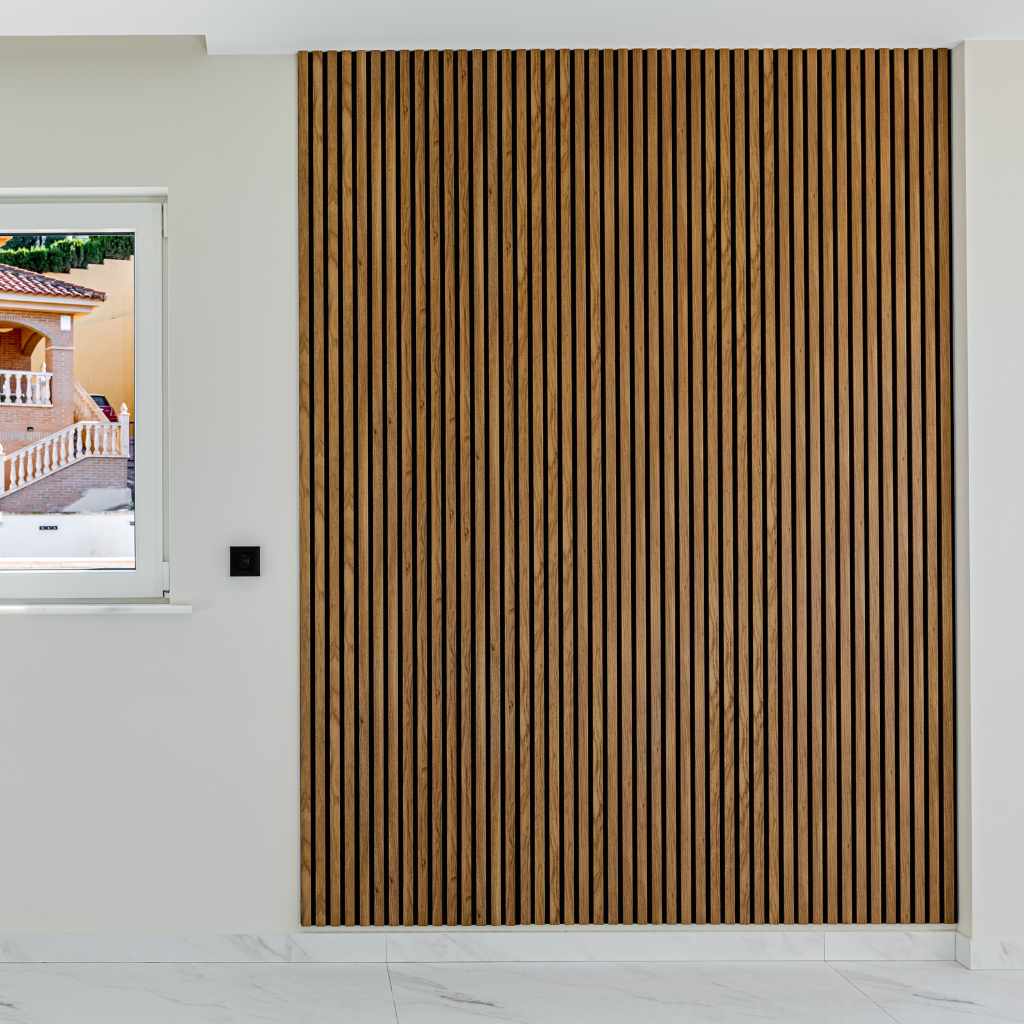
4. Modern Slatted Wall (Screen Style)
This is a very contemporary take on vertical wood panelling, using thin, evenly spaced wood slats. It works wonderfully as a feature behind a TV or bed. It looks complex, but it’s very easy if you focus on consistent spacing.
Key Tool Tip: Use a consistent spacer block (e.g., a 1/2-inch thick piece of scrap wood) that you set between every slat. This ensures that every single piece of wood you install is perfectly spaced without constant measuring.
5. Rustic Reclaimed or Barn Wood
If you love texture and history, reclaimed wood is the answer. It might not be uniform in width or color, which is exactly the charm! You can often find thin siding panels made from actual reclaimed barn wood.
Pro Tip for Beginners: Dealing with authentic reclaimed wood can sometimes mean dealing with old nails or uneven thickness. If you are worried about splitting, pre-drill your nail holes using a drill bit slightly larger than your finish nail shaft. This gives the nail a smooth path, preventing cracks in the old, dry wood.
For finding genuine, safe reclaimed materials, always look for reputable suppliers who treat and de-nail their wood. You can research best practices for material sourcing safety through organizations like the Occupational Safety and Health Administration (OSHA) regarding handling older building materials.
Practical Considerations Most Idea Lists Skip
The style you pick matters, but three practical details decide whether the finished wall reads as intentional and stays solid for years.
Plank Orientation Changes How the Room Feels
This is a real interior-design principle, not just preference: horizontal boards (classic shiplap) lead the eye side to side, making a narrow room feel wider. Vertical boards (board and batten, slatted screens) lead the eye up, making a standard 8-foot ceiling feel taller. Herringbone does both at once, which reads busier and more formal. If your room already feels long and narrow, skip horizontal planks; if it feels boxy and low, go vertical.
Inspect Reclaimed or Pallet Wood Before It Comes Indoors
Beyond checking for old nails, inspect reclaimed or pallet-sourced wood for a wood-boring-insect history before it comes indoors. Look for small, round exit holes and fine, powdery frass (sawdust-like debris) along seams and end grain – signs of past or active beetle activity. Pallet wood should carry a stamped “HT” (heat-treated) mark under ISPM-15 rules, but don’t trust the stamp alone; it can be misapplied, so a physical check still matters. When in doubt, quarantine the wood in a garage or shed a while before installing it against interior framing.
Match Mounting Method to Panel Weight
Thicker, solid real-wood boards (3/4-inch stock and up) are heavy enough that nails or screws into studs must be the real structural connection, with adhesive only as a supplement. Thin veneer or shiplap-style panels, including peel-and-stick options like the pick above, are light enough for an adhesive-assisted install (peel-and-stick backing plus a few brad nails for insurance) without needing a stud behind every seam. Relying on adhesive alone for heavy solid boards is a common cause of a wall that looks fine on install day and fails within a year. If you are repurposing leftover hardwood or engineered flooring instead of dedicated panel stock, treat it as the heavy end of this scale – our guide to mounting flooring on a wall covers the adhesive and cleat hardware that flooring’s extra weight needs.
Finishing Touches: Making Your Wood Pop
The finish you choose dictates the entire mood of your accent wall. Don’t rush this part; it’s where craft turns into art.
Choosing Your Stain or Paint Color
The color should complement, not fight with, the main wall colors and the flooring.
- Light & Airy: Whitewash or very pale gray stains keep the room feeling open while adding texture. Great for small rooms.
- Warm & Cozy: Medium to dark walnut or cherry stains are traditional and excellent in living rooms or studies.
- Bold Statement: Painting the wood a deep charcoal gray, navy blue, or forest green creates a dramatic, modern focal point.
Mastering the Finish Application
If you are staining, always test your chosen stain on a scrap piece of the same wood first. Wood drinks up stain differently!
For a painted finish on shiplap or board and batten, you must address the seams. Use a paintable caulk along all vertical and horizontal seams where two pieces meet. After the caulk dries, give the entire wall a very light sanding with 220-grit sandpaper to knock down any rough spots. Then, apply your primer and two topcoats of high-quality interior paint.
Troubleshooting Common Beginner Hurdles
Every woodworker hits snags. Here are common issues and my reassuring advice on how to fix them without tearing the wall down.
Challenge 1: My boards are not perfectly level/plumb.
The Fix: This happens when your studs aren’t perfectly straight, or you started slightly crooked. Don’t panic! If the first board is off by a fraction, adjust the second board by that same fraction more over the distance. If the error gets bigger, stop. Pull the last board you installed, re-check your level reference point, and restart the installation from an area where you are certain you are plumb.
Challenge 2: I can see the nail heads showing.
The Fix: This is usually only a problem if you missed the stud. If you hit drywall without proper bracing, the nail might “pop” out later. If it’s just slightly raised, you can use a hammer or nail set to gently tap the head just below the surface (this is called “setting” the nail). Then, fill the tiny divot with wood filler colored to match your final finish. If you are painting, wood filler works perfectly!
Challenge 3: The wood is warping or cupping after installation.
The Fix: This is usually due to moisture changes or not fastening the wood tightly enough everywhere. If the warp is minor, applying strong construction adhesive between the board and the wall framing at regular intervals can help pull the board flat against the wall as it cures. Heavy items (like books or weights) placed against the board for 24 hours can also help hold it in place while the adhesive sets.
Material Comparison: Pine vs. MDF vs. Plywood
Choosing the right foundational material for your accent wall makes installation easier and affects the final look. Here is a quick breakdown for beginners:
| Material | Pros for Beginners | Cons for Beginners |
|---|---|---|
| Solid Pine (e.g., “select” grade boards) | Easy to cut, takes stain beautifully, widely available. | Can warp or twist if not kept flat during storage; pricier than MDF. |
| MDF Paneling/Shiplap | Very straight, budget-friendly, perfect surface for paint. | Heavy, susceptible to water damage (not for bathrooms), dulls blades faster. |
| Plywood (Sanded Birch/Pine) | Extremely stable, great for large sheets or geometric patterns. | Edges need careful finishing (edge banding or trim) to hide layers. |
Safety First: Always Respect Your Tools
I can’t stress this enough: woodworking is rewarding, but safety comes first. Before you start cutting any wood for your accent wall, take five minutes to review basic tool operation. A moment of caution saves hours of repair!
When using your miter saw, stand to the side, never directly behind the blade. Ensure the piece of wood is firmly pressed against the fence and the base before starting the cut. Secure smaller pieces with clamps to prevent kickback. Remember, if you feel uncomfortable making a cut, stop, take a breath, and re-evaluate the setup. Safety isn’t a suggestion; it’s the foundation of good craftsmanship.
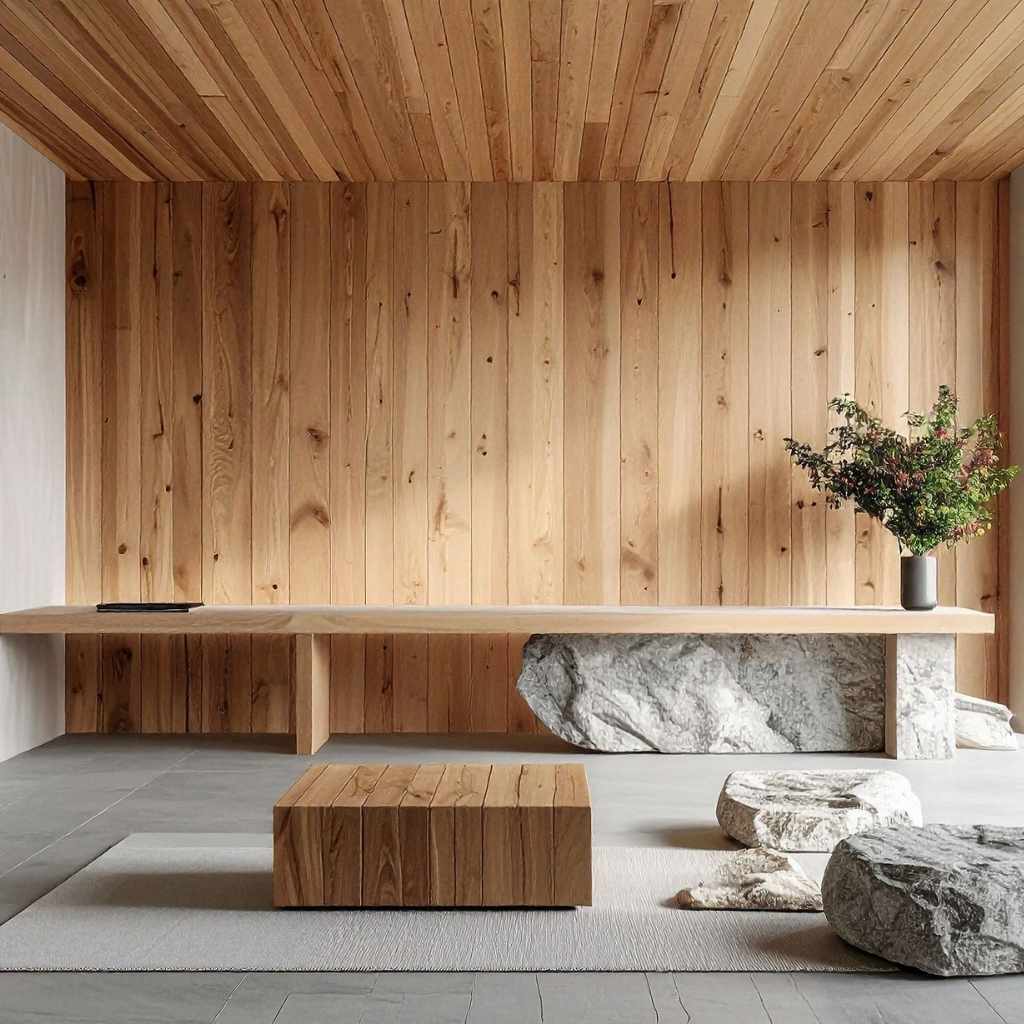
Frequently Asked Questions (FAQ) for Your Wood Accent Wall
Do I have to remove my baseboards or trim before installing an accent wall?
A: Generally, no! For board and batten, you install the battens over the existing baseboards or simply leave a gap at the bottom and re-install the baseboard on top of the wood panels later. For shiplap, it’s easiest to install the shiplap first, then cut the top edge of the baseboard slightly or use quarter-round molding to cover the small gap where the shiplap meets the floor.
How do I handle outlets and light switches when installing planking?
A: Always turn off the power at the circuit breaker first! Use your stud finder to mark the stud locations, then mark the center of the outlet box on your wood panel. You can use a jigsaw to carefully cut a square hole slightly larger than the electrical box. Once the wood is installed, you must purchase “extra-long switch plate covers” at the hardware store. These extended covers bridge the small gap between the wood surface and the existing electrical box.
Is wood accent wall installation difficult for an absolute beginner?
A: Not at all! Styles like horizontal shiplap are incredibly forgiving because the wood overlaps. The hardest part is making straight, square cuts, which you can do well with a patient approach and a simple miter box or saw guide. The satisfaction of finishing that first wall builds huge confidence for future projects!
Should I use construction adhesive or just nails on the drywall?
A: For the best long-term results and to prevent future bulging or warping, you should always use both if installing directly onto drywall: finish nails driven into the wall studs coupled with a quality construction adhesive (like Liquid Nails or PL Premium) applied in an ‘S’ pattern onto the back of the wood panel. This anchors the panel firmly to the entire wall surface, not just the few studs you hit.
Sponsored / affiliate links. As an Amazon Associate I earn from qualifying purchases. I may earn additional commission from eligible campaigns.