How to Install Tongue and Groove Shiplap (72-Hr Acclimation Rule)
Tongue and groove shiplap needs 72 hours to acclimate in the install room before you drive a single nail. Skip that step and the boards gap or crack as they adjust to indoor humidity. Blind-nail through the tongue at a 45-degree angle with 18-gauge, 1.5 to 2-inch brad nails so every fastener stays hidden. This guide covers wall prep, cutting and staggering boards, correct nail spacing, and finishing so the wall does not telegraph every seam within a year.
This post contains affiliate links. Insert your Affiliate Disclosure reusable block here.

What Is Tongue and Groove Shiplap?
Tongue and groove shiplap is wood paneling milled with a protruding tongue on one long edge and a matching groove on the other, so each board locks into the next instead of overlapping like traditional lap-style shiplap. The interlock keeps the seam flush and boards aligned without a visible gap between courses. It installs on walls or ceilings, over drywall or bare studs, and takes paint or stain the same way solid pine or poplar boards do. Shiplap is one of the most popular wood accent wall ideas for exactly this reason: it covers minor wall flaws while adding real texture.
Materials and Tools You Need
Buy enough tongue and groove shiplap boards to cover the wall area plus 10% for cutoffs and mistakes. If you would rather rip your own boards than buy pre-milled shiplap, see how to make shiplap boards with a table saw for the exact rabbet-cutting steps.
Materials
- Tongue and groove shiplap boards (measured area + 10%)
- 18-gauge brad nails, 1.5 to 2 inches long
- 1×2 furring strips, if installing over an uneven or bowed drywall surface
- 1/4-inch spacers for the expansion gap at floor, ceiling, and adjoining walls
- Wood filler matched to your finish
- Primer (if boards are unfinished) and paint or stain
Tools
- Tape measure and a chalk line or laser level
- Stud finder
- Miter saw or circular saw
- 18-gauge pneumatic or cordless brad nailer
- Hammer, as a backup for tight corners
- Sandpaper and a caulk gun
|
Best Brad Nailer Pick 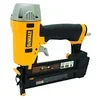 |
DEWALT Brad Nailer Kit, 18GA, 5/8-Inch to 2-Inch – $102.35 Drives 18-gauge brad nails from 5/8 to 2 inches, deep enough to blind-nail through the tongue without splitting the board. That is the exact nailing method this guide walks through.
|
As an Amazon Associate we earn from qualifying purchases.
Acclimate the Boards and Prep the Wall
Stack the shiplap boards in the room where they will be installed and let them sit for 72 hours before cutting or nailing anything. Wood shiplap absorbs or releases moisture to match the room’s humidity; installing it straight off the truck is the single most common cause of gaps and cracked boards showing up weeks later.
📊 72 hours is the minimum acclimation window manufacturers recommend for interior wood paneling before installation. Source: Arauco Shiplap Installation and Handling Guide
While the boards acclimate, prep the wall. Wipe off dust with a damp cloth and let it dry. Scrape any loose paint or wallpaper, fill holes and cracks with spackle, and sand smooth once dry. Use a stud finder to mark every stud location, then snap a level chalk line near the floor to give the first row a straight reference. If the wall is drywall with an uneven or bowed surface, screw 1×2 furring strips into the studs first and nail the shiplap into the strips instead of directly into the drywall.
Measure, Cut, and Stagger the Boards
Measure the wall’s height and width and multiply for total square footage, then add 10% for cutoffs. Most tongue and groove shiplap sells in 8-foot lengths; see this guide to 8-foot pine shiplap plank sizing and coverage to work out how many boards a wall actually needs.
Only cut a few boards at a time. Walls are rarely perfectly square, so each row can need a slightly different length. Stagger the end joints from row to row, the same way you would stagger seams in hardwood flooring, so no vertical line of joints lines up down the wall. Leave a 1/4-inch gap at the floor, ceiling, and any adjoining wall to give the wood room to expand; baseboard or trim covers this gap once the wall is finished.
Installing the First Board
- Snap the reference line: Use the level chalk line from wall prep to mark exactly where the bottom edge of the first board sits.
- Position the first board: Set it groove-side down against the line, leaving a 1/4-inch gap at the adjoining wall for expansion. Shim behind it if the wall is slightly out of plumb.
- Blind-nail the board: Drive an 18-gauge brad nail through the base of the tongue at a 45-degree angle into each stud, so the groove of the next board hides the nail head.
- Recheck level: Confirm the board is still level before moving to the next one; every board after this locks onto this reference.

Nailing Technique: Spacing and Blind-Nailing
Use 16- or 18-gauge finish or brad nails, 1.5 to 2 inches long, and drive them through the tongue of each board into the stud at a 45-degree angle. This is blind-nailing: the groove of the next board slides over the nailed tongue and hides every fastener, so nothing shows on the finished wall.
Space nails every 12 to 24 inches along each stud. For 6-inch and 8-inch wide boards, drive three nails per stud; for 10-inch and 12-inch boards, use four. Keep nails at least an inch from the board’s end to avoid splitting, and check each board is snug against the previous one before moving on, since a gap here compounds across the whole wall.
“The acclimation step is the one people skip because it feels like nothing is happening. On the installs where we shortcut it, gaps showed up at the first seasonal humidity swing. Now boards sit in the room a full three days before we cut anything.”
Finishing Touches: Filling Nail Holes and Painting or Staining
Press wood filler into any visible nail holes or seam gaps, let it dry fully, then sand lightly so the filler blends with the surrounding wood. In a pinch, wood glue mixed with fine sawdust also works as a filler for small holes.
If the boards are unfinished, prime first for even color coverage, then apply two coats of paint or stain with a brush or roller in long, even strokes. Painting the boards before installation, where practical, saves time and gives more even coverage than painting in place; just plan on a light touch-up coat over filled nail holes and any seams after the wall is up. For more design direction on where shiplap works best in a room, see these wood paneling living room ideas.
Shiplap vs. Nickel Gap vs. Traditional Overlap
| Style | Board Edge | Typical Reveal | Best For |
|---|---|---|---|
| Traditional shiplap | Rabbeted, overlapping | 1/8 to 3/16 inch shadow line | Classic farmhouse look; hides minor wall flaws |
| Nickel gap shiplap | Square edge, spaced | Exactly 1/16 inch (a nickel’s width) | Modern, uniform reveal on flat walls |
| Tongue and groove (this guide) | Interlocking | No visible gap; flush seam | Tightest seams; best on high-traffic or moisture-prone walls |
How to Maintain a Shiplap Wall
Dust shiplap with a dry microfiber cloth or a vacuum brush attachment, and wipe with a barely damp cloth only when needed. Avoid soaking the seams with water or cleaning solution since moisture can work into the tongue and groove joints and cause swelling. Check the wall once a season for new gaps, especially near heat vents or bathrooms, and touch up caulk or paint before a small gap turns into a visible crack.
Common Mistakes to Avoid
- Skipping acclimation: Installing boards straight from the store causes gaps or cracks once they adjust to room humidity.
- Nailing too close to the edge: This splits the tongue; keep nails at least an inch from board ends.
- No expansion gap: Boards installed tight to the floor or ceiling can buckle when they expand seasonally.
- Not staggering seams: Aligned end joints from row to row create a visible, weak-looking seam line.
- Wrong nail gauge: Nails heavier than 18-gauge leave visible holes that filler cannot fully hide.
Frequently Asked Questions
How long does shiplap need to acclimate before installation?
Let tongue and groove shiplap acclimate for at least 72 hours in the room where it will be installed. In very dry or very humid climates, extend that to a full week so the moisture content matches the room before you cut or nail anything.
Can you install tongue and groove shiplap over drywall?
Yes. Nail tongue and groove shiplap directly into the studs through existing drywall using 18-gauge brad nails. If the drywall surface is uneven or bowed, screw 1×2 furring strips into the studs first and nail the shiplap into the strips instead.
What size nails do you use for shiplap?
Use 18-gauge brad nails between 1.5 and 2 inches long, driven through the base of the tongue at a 45-degree angle into the stud. This blind-nailing method hides every nail head under the next board’s groove.
Do you need a gap between shiplap boards?
Tongue and groove boards interlock flush with no reveal between them. The only gap needed is a 1/4-inch expansion space where the boards meet the floor, ceiling, or an adjoining wall, which trim or baseboard covers once installed.
Should I paint shiplap before or after installing it?
Priming and painting boards before installation is faster and gives more even coverage than painting in place. Plan on one light touch-up coat after installation to cover filled nail holes and any tight seams.
Can shiplap be installed on a ceiling?
Yes, the same tongue and groove method works overhead. Nail into the ceiling joists at the same 45-degree angle through the tongue, and temporarily support each board with a brace while fastening since gravity works against you.
Conclusion
Tongue and groove shiplap rewards patience more than skill: let the boards acclimate for 72 hours, prep a level starting line, and blind-nail through the tongue at 12- to 24-inch spacing, and the wall goes up with no visible fasteners and no gaps. Rush the acclimation step or skip the expansion gap, and the same installation shows problems within a season. Follow the sequence above in order and the result should look and hold up the same way it did the day you finished it.
Sponsored / affiliate links. As an Amazon Associate I earn from qualifying purchases. I may earn additional commission from eligible campaigns.