How to Make an Arch Out of Wood: 3 Building Methods That Actually Work
To make an arch out of wood, pick one of three real construction methods based on your radius: lamination bending for a strong curve down to about a 2-foot radius, kerf-bending for tight decorative curves, or a segmented “bricklayer’s arch” build for anything wider than a doorway. Calculate the radius first, then cut and glue accordingly.
Most tutorials treat “build a wood arch” as one technique, but a 3-foot garden arbor and an 8-foot structural doorway arch are built completely differently, and using the wrong method for the span is the single biggest reason DIY arches crack, sag, or end up looking like a stack of straight boards forced into a curve. Below is how to figure out which method fits your project, the actual math for laying out an accurate curve, and the step-by-step for each build style.
Which Type of Wood Arch Are You Building?
Before touching a saw, identify which of these three shapes and construction approaches you actually need, because each has a different failure point:
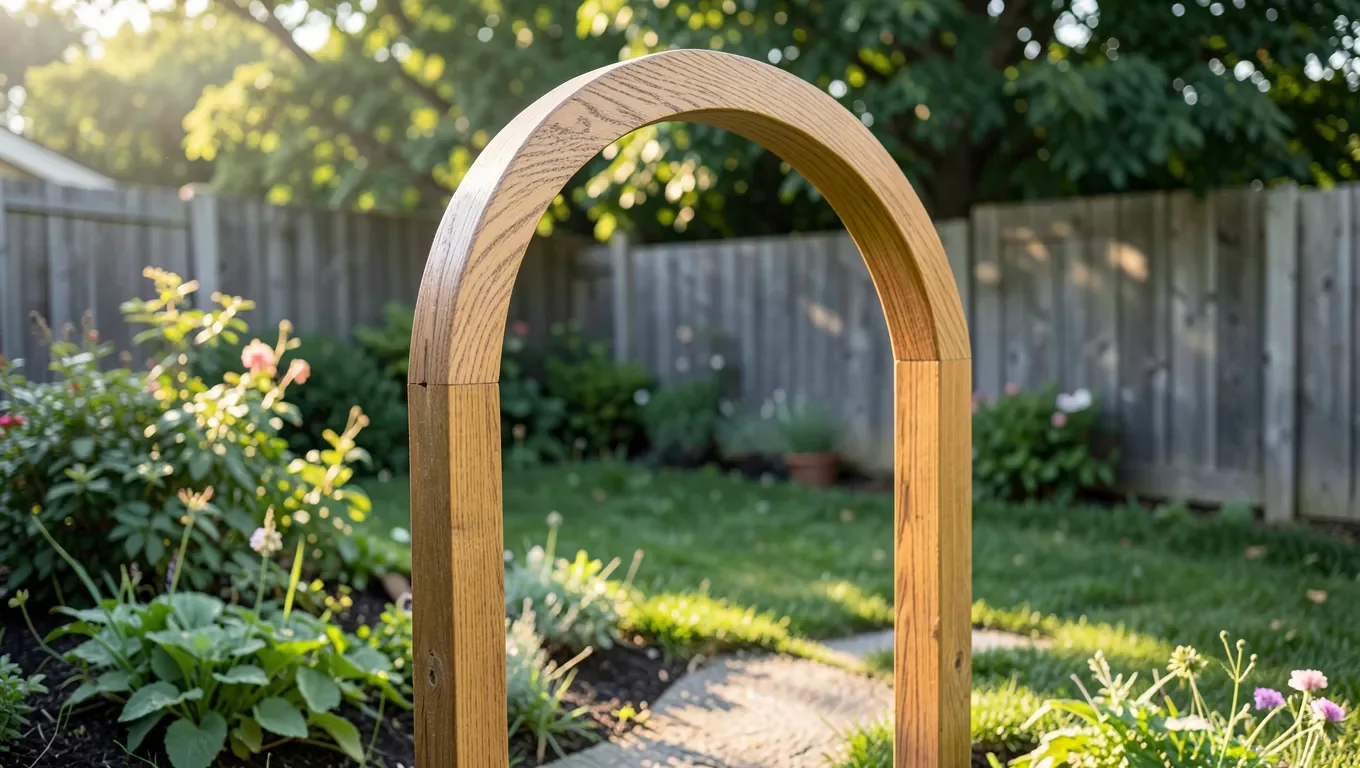
- Roman/semicircular arch – a true half-circle, most common for garden arbors and trellises. Easiest to lay out with a trammel because the radius equals half the width.
- Gothic/pointed arch – two intersecting arcs meeting at a peak instead of one continuous curve. This is what people searching “pointed arch buildings” usually mean; it’s built from two separate segmented curves joined at the apex, not one bent piece.
- Elliptical/segmental arch – a shallower, flatter curve (rise less than half the span), typical over interior doorways and windows where you don’t have full headroom for a semicircle.
A decorative garden arch under about 4 feet of span can usually be kerf-bent or laminated from a single species. Anything load-bearing, wider than a standard doorway, or installed as a structural opening (not just a freestanding trellis) should use the segmented method described further down – it’s slower, but it’s the only one of the three that reliably holds weight over a wide opening.
Best Clamp Set for Arch Lamination
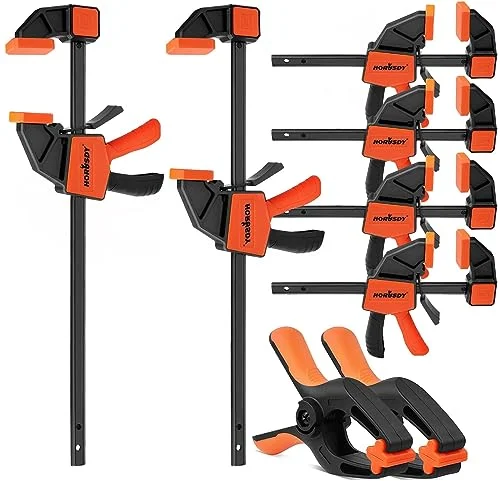 |
HORUSDY 8-Pack Bar Clamp Set – $32 A laminated arch needs even pressure across the whole curve at once, and this set gives you six 6-inch clamps plus two 12-inch clamps to distribute that clamping force before the glue skins over.
|
Calculating the Radius Before You Cut Anything
Skipping this step is why most first-time arches come out lopsided. You need two measurements: the chord (the straight-line width of the opening) and the rise (how tall the curve stands above that straight line at its center). Once you have both, the radius is:
Radius = (Rise ÷ 2) + (Chord² ÷ (8 × Rise))
Example: a 36-inch-wide arch with a 12-inch rise gives Radius = (12 ÷ 2) + (36² ÷ (8 × 12)) = 6 + 13.5 = 19.5 inches. Set a trammel (or a pencil on a string pinned at the center point) to that 19.5-inch radius and swing your arc directly onto the wood or a plywood template – that’s a far more accurate curve than sketching by eye, which is the step most old tutorials skip entirely.
Method 1: Segmented (Bricklayer’s) Arch
This is the method for anything structural or wider than about 4 feet. Instead of bending one piece, you cut multiple wedge-shaped segments from straight stock so their outer edges follow the curve, then glue and dowel them into rings.
- Draw your calculated radius onto a plywood template using the trammel.
- Divide the arc into 5-7 equal segments (fewer segments means more wasted wood per board; more segments means a smoother curve but more joints).
- Trace each wedge segment onto 3/4-inch stock and cut with a bandsaw or jigsaw, angling the blade slightly if you want two laminated rings offset for extra strength (this is how staircase stringers and real structural arches are typically built).
- Sand each segment’s mating edges flush on a disc sander before glue-up – gaps here telegraph through the whole curve.
- Glue and dowel or biscuit-join the segments into a complete ring, clamping across each joint individually rather than trying to clamp the whole ring at once.
For a doorway or opening that people will actually walk through, build two identical rings and laminate them face-to-face with the joints staggered – this is what keeps a segmented arch from splitting along a single glue line under load.
Method 2: Bent Lamination
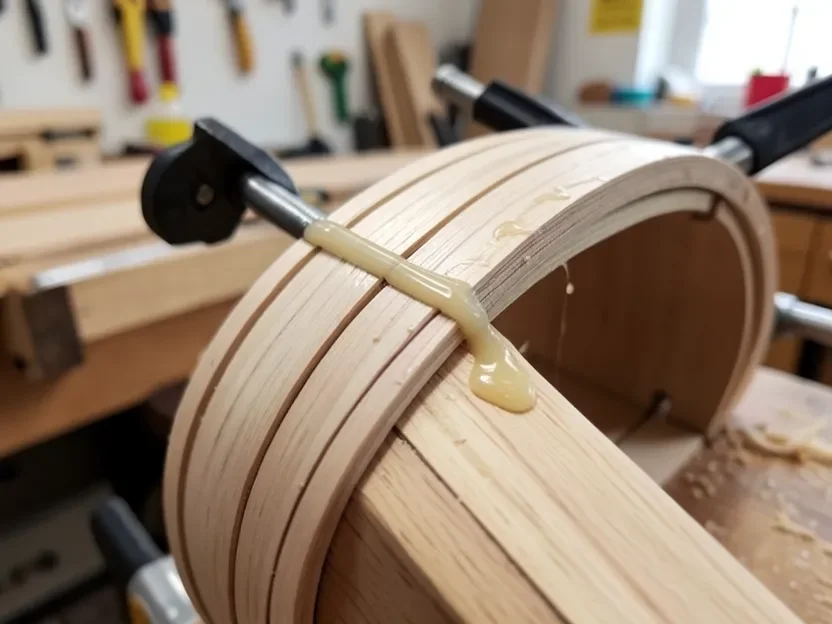
Lamination bending gives you the strongest continuous curve without any wedge joints, and it’s the method furniture makers use for chair backs and rocker rails. Rip your stock into strips about 1/8-inch thick – thin enough to bend around your calculated radius without snapping. White oak, ash, and cedar bend well; avoid pine and fir for tight curves, they tend to fracture at the outer fibers.
Build (or buy) a bending form cut to your exact radius from MDF or plywood, apply a slow-cure glue like Titebond III to each strip face, stack 6-10 strips, and clamp the whole stack against the form working from the center outward so glue doesn’t pool at one end. Leave it clamped for a full 24 hours – pulling clamps early is the most common reason a laminated arch springs back flatter than intended once released.
Method 3: Kerf-Bending
Kerf-bending is the fastest way to get a curve, but it’s decorative-strength only – don’t use it for anything load-bearing. Cut a series of closely spaced parallel slots (kerfs) across the back face of a single board, most of the way through the thickness but not all the way, then bend the board around your form; the kerfs close up and let the wood flex. Space the kerfs about 3/8 to 1/2 inch apart for a moderate curve, closer together for a tighter radius, and back the bent board with a thin veneer or plywood skin glued to the kerfed face once it’s curved – this is what actually gives it enough rigidity to hold its shape once unclamped.
Safety and Setup
Bandsaws and jigsaws cutting curved wedge segments kick back less than a table saw would on the same cut, but you still want push blocks and a stable featherboard when trimming segment edges. Wear safety glasses and hearing protection throughout, and keep a dust mask on hand for sanding the mating joints – that’s the step that generates the most fine dust in this whole process. Clear your bending form and workbench of clutter before a lamination glue-up specifically, because you’ll have a limited open-glue-time window and don’t want to be hunting for a dropped clamp.
Finishing and Weatherproofing
For an outdoor arch, an exterior spar urethane or marine varnish holds up far better than interior polyurethane because it’s formulated to flex with wood movement from humidity swings without cracking its film. Apply 2-3 thin coats, sanding lightly between coats with 220-grit. For an interior structural arch trim piece, a standard wipe-on oil or lacquer is fine since it won’t see the same moisture cycling. Re-coat an exterior arch every 1-2 years – the end grain at the base of the posts is where weather damage starts first, so pay extra attention there.
Installing a Freestanding Garden Arch
Set posts at least 18-24 inches into the ground in concrete footings, below your local frost line if you’re anywhere that gets hard freezes, since frost heave is what eventually racks a shallow-set arch out of square. Check both posts for plumb before the concrete sets, then attach the arch itself with galvanized lag bolts and structural brackets rather than screws alone – wind load on a wide arch acts like a sail, and screws alone will work loose over a season or two.
Common Mistakes
- Skipping the radius math and eyeballing the curve, which is why so many DIY arches end up visibly lopsided from one side to the other.
- Using kerf-bending on something load-bearing. It looks fine until weight or wind load finds the weak kerfed face.
- Not backing off clamps slowly. A laminated arch released all at once can spring and crack right at the glue line closest to the clamp you removed last.
- Picking a species that doesn’t bend well for the radius you need – a 2-foot radius in stiff pine will fight you the whole glue-up; the same radius in ash or white oak bends with far less resistance.
Frequently Asked Questions
What’s the strongest method for a structural wood arch?
The segmented (bricklayer’s) method built as two staggered-joint rings laminated face-to-face is the strongest for anything load-bearing or wider than a doorway. Bent lamination is nearly as strong for narrower spans but relies on one continuous glue-up rather than distributed joints.
How do I calculate the radius for a wood arch?
Measure the chord (straight-line width) and the rise (height of the curve at its center), then use Radius = (Rise ÷ 2) + (Chord² ÷ (8 × Rise)). Set a trammel to that radius to scribe an accurate arc instead of sketching the curve by eye.
What wood bends best for a laminated arch?
White oak, ash, and cedar all bend well when ripped into thin strips for lamination. Pine and fir tend to fracture at the outer fibers on tighter curves, so they’re better suited to kerf-bending or straight segmented cuts instead of bent lamination.
How long does it take to build a wooden arch?
A small kerf-bent decorative arch can be done in an afternoon. A bent-lamination arch needs a full 24-hour clamp cure on top of the cutting and glue-up time, so plan on two days minimum. A segmented structural arch with two staggered rings is the longest, often spread across several evenings between cutting, dry-fitting, gluing, and finishing.
Conclusion
The method you choose should come from the span and the load, not just what looks easiest. Calculate the radius first, pick lamination or segmented construction for anything structural, and save kerf-bending for purely decorative curves. Get those two decisions right and the actual cutting and gluing is straightforward from there.
Sponsored / affiliate links. As an Amazon Associate I earn from qualifying purchases. I may earn additional commission from eligible campaigns.