How to Make Arched Wood Beams: Layout, Lamination, Limits
To make an arched wood beam, cut a plywood form to the curve you want, rip thin strips of straight-grain wood, coat every strip with glue and clamp the stack tight around the form until it cures. That method is called bent lamination, and it is how most woodworkers make a curved beam that keeps its shape.
This guide keeps the layout math, the strip sizes and the honest limits in one place, because most arched-beam tutorials skip them. One note before you start: everything here is written for decorative and light-duty beams. If the beam will carry a roof, floor or ceiling, treat this as background and have an engineer specify it.
Decorative vs Structural Arched Beams
Best Glue for Bent Lamination
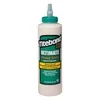 |
Titebond III Ultimate Wood Glue, 16 oz A waterproof, water-cleanup PVA glue with a longer assembly time than standard yellow glue, which gives you extra minutes to spread glue on every strip and get the clamps on.
|
The first decision is what the beam has to do. A decorative arched beam hangs from or fastens to the ceiling framing and only carries its own weight. A structural arched beam carries roof or floor loads, and that is a different job with different materials, glue and inspection.
A common assumption, including one in earlier versions of this article, is that an arch always spreads weight evenly and reduces stress on the walls. It does not, at least not for free. A true arch carries load mainly through compression and pushes outward at its supports. Unless those ends are held by heavy abutments or a tie across the span, the arch tries to spread and push the walls apart. That is why a curved beam that looks structural should never be assumed to be one, and why the ends of any load-carrying arch need an engineer.
| Type | What it is | Difficulty | Best use |
|---|---|---|---|
| Bent lamination | Thin strips glued and clamped around a form | Moderate: needs a form, glue, many clamps | Decorative beams, curved trim, arches that must be one piece |
| Stacked plywood arcs | Curved layers cut from plywood, glued face to face | Easier: needs a bandsaw or jigsaw | Painted or veneered faux beams, cased openings |
| Kerf-bent or segmented | Cuts or short segments that follow the curve | Easy to moderate | Small arches; see our wood arch guide |
| Engineered glulam | Factory-laminated with structural adhesive and quality control | Not a DIY build | Anything that carries load: buy it, with an engineer specifying it |
Work Out the Curve Before You Cut
You do not need a compass the size of a room. If you know the span (the straight-line distance between the beam ends, called the chord) and the rise (how high the arch peaks above that line), the radius follows from simple geometry.
Radius = (span squared / (8 x rise)) + (rise / 2). Use that radius to draw the curve on your form with a string and pencil, a thin flexible batten held by nails, or a trammel on a long stick.
| Span | Rise | Radius | Arc length (strip length) | Radius to strip thickness at 1/4 in | At 1/2 in |
|---|---|---|---|---|---|
| 72 in | 12 in | 60 in | 77 in | 240 to 1 | 120 to 1 |
| 96 in | 12 in | 102 in | 100 in | 408 to 1 | 204 to 1 |
| 96 in | 18 in | 73 in | 105 in | 292 to 1 | 146 to 1 |
| 120 in | 18 in | 109 in | 127 in | 436 to 1 | 218 to 1 |
| 120 in | 24 in | 87 in | 132 in | 348 to 1 | 174 to 1 |
Cut every strip a few inches longer than the arc length so you can trim the ends square after the glue cures. The last two columns show how gentle a typical ceiling arch really is. A bend with a radius hundreds of times the strip thickness is a mild curve for wood, which is why even 1/2 inch strips often work for large arches. Tight curves are different, so test a strip on the form before you rip a whole stack. Whether a strip survives a given bend depends on the species, the grain and the moisture, so we are not quoting a single safe number.
Materials and Tools
- Wood for the strips: straight-grain, knot-free stock. Oak, ash and maple bend well in thin strips, while pine is easier to work but a bit weaker. Our how to bend wood guide compares the wood-bending methods if you want alternatives to lamination.
- Form: two or three layers of 3/4 inch plywood cut to the curve, with the layers glued and screwed together so the form does not flex under clamp pressure.
- Clamps: plan on a clamp roughly every 6 to 8 inches along the beam, on both faces if possible. Fewer clamps mean gaps between strips.
- Glue: an interior beam works with a good waterproof PVA. The wood glue types and cure times guide explains the differences.
- Strip cutting: a table saw with a good push setup, or a bandsaw. See how to rip thin strips safely before you cut a stack of narrow stock.
- Extras: wax paper or packing tape on the form so glue does not bond the beam to it, a roller or glue brush, a scraper for squeeze-out, a stiff plane or sander, and gloves.
How to Make a Laminated Arched Beam, Step by Step
- Draw the curve. Lay out the radius on a sheet of plywood and cut it with a jigsaw or bandsaw, then sand the edge smooth. Any bump in the form shows up in the beam.
- Build the form. Stack and screw two or three matching plywood pieces so the form is stiff, and add cross blocks so clamps have flat places to bite. Cover the face with wax paper or clear packing tape.
- Rip the strips. Cut all strips from the same board where you can so grain and color match. Plane or sand the faces so they are flat and clean, since the glue joint is only as good as the surface.
- Dry-fit first. Bend the whole stack around the form without glue and place every clamp where it will go. This tells you whether the strips are thin enough, and it lets you fix problems before the glue starts setting.
- Glue every joint. Spread a thin, even coat on the face of every strip. Work quickly, but do not skip the coverage at the edges, because dry spots become gaps.
- Clamp from the middle out. Start at the center of the arch and work toward both ends so glue and air squeeze out ahead of the clamps. Tighten evenly until you see a thin bead of squeeze-out along every joint.
- Let it cure. Leave the beam in the form for at least the time on the glue bottle, and a full day is a safe habit. Removing it early is the most common cause of extra spring-back.
- Release, trim and finish. Scrape off the glue, cut the ends square and sand. Test your stain on a scrap first, since glue lines can resist stain.
For a wider look at the technique, including vacuum bags and mold design, see our bent lamination guide. For a thin decorative skin, bending veneer without cracking covers a related method.
Spring-Back and Other Surprises
- Spring-back: a laminated beam straightens slightly when the clamps come off, so the finished arch is flatter than the form. Build a short test piece from the same strips and glue, measure how much it opens up, then build the real form with a slightly tighter curve.
- Glue creep: standard PVA glues can slowly deform under long-term load, which is one reason they are fine for decoration and questionable for a member that carries weight. Structural laminated timber is glued with adhesives chosen and tested for that job.
- Moisture: strips that are wetter or drier than the room they will live in can move after the beam is installed. Let the stock reach the room conditions before ripping.
- Weight: a solid 3-1/2 by 5-1/2 inch beam 8 feet long has about 1.07 cubic feet of wood, which is roughly 45 to 55 pounds in oak or 30 to 40 pounds in pine. Plan fasteners into framing, not drywall, and get help to lift it.
Installing a Decorative Arched Beam
- Find the ceiling joists or blocking with a stud finder, mark them and plan every fastener into solid framing. Do not rely on drywall anchors for anything heavy.
- Use a cleat or hidden bracket at each end and through-screws into framing along the beam, then fill the holes or hide them with trim.
- Check the curve against the layout on the ceiling first, and shim gaps instead of pulling the beam tight against an uneven surface.
- If the beam is meant to actually support something, or sits under a load-bearing structure, stop and call a licensed engineer.
Finishing and Care
Sand along the grain through 120 then 180 grit, wipe off the dust and apply stain or clear finish. On oak, ash and other open-grain woods, seal the end grain lightly, since it soaks up finish faster than the faces. For upkeep, dust regularly, check the glue lines a few times a year for any opening, and keep the beam out of damp spaces unless you used an exterior-rated glue and finish.
Frequently Asked Questions
How thick should the strips be for an arched wood beam?
Thin enough to bend around your form without cracking. Test-bend one dry strip around the form first. Gentle arches, with a radius of several feet, tolerate strips around 1/4 to 1/2 inch thick, while a tight arch needs thinner strips. If the test strip cracks or splinters, go thinner.
Can I use a laminated arched beam to carry a roof or floor?
Not on your own judgment. A curved beam behaves differently from a straight one, and the strength depends on the wood, the glue, the lamination pattern and how the ends are supported. Have a licensed engineer or an engineered-lumber supplier size and specify any arched beam that carries load.
What is the easiest way to make a decorative arched ceiling beam?
Laminate thin strips of wood or bending plywood around a plywood form, then clamp until the glue cures. If you want to avoid clamps and forms, you can instead stack and glue plywood arcs cut on a bandsaw or with a jigsaw, then hide the plywood edges with veneer, trim or paint.
Why did my arched beam straighten out after I took it off the form?
That is called spring-back. Laminated wood relaxes a little when the clamps come off, so the finished curve is usually slightly flatter than the form. Make a test piece first and build the form with a slightly tighter curve to compensate.
Conclusion
An arched beam is a good weekend project if you treat it as a decorative piece: get the curve right with the radius formula, use thin straight-grain strips, clamp from the middle out and test a spare piece for spring-back. Keep structural claims out of it, and let an engineer decide anything that carries load.
Sponsored / affiliate links. As an Amazon Associate I earn from qualifying purchases. I may earn additional commission from eligible campaigns.