How to Mix Two-Part Epoxy for Wood Repairs: 7 Steps
Wrong ratio, sloppy mixing, or damp wood usually leaves the patch soft, sticky, or dead early. I start with a clean, dry cavity, measure the resin and hardener exactly as labeled, and mix only a small batch I can place before it kicks.
What you’ll need
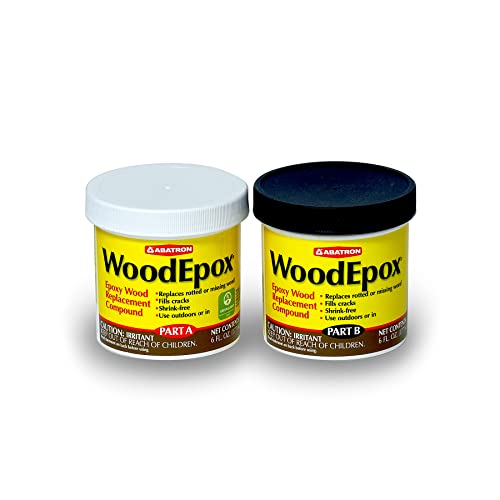


- Two-part epoxy resin and hardener matched to the product label
- Measuring cup or scale, plus separate containers for each part
- Mixing sticks
- Putty knife
- Vacuum
- Chisel
- Sandpaper, starting around 80-grit
- Cleaning rags and a dry brush
- Optional wood consolidator for punky but still present wood
According to Two-Part Epoxy Resin: Discover the Clear Strength of Two-Part… — Some general-purpose epoxy use can be eyeballed for 1:1 ratios, but structural work should be measured precisely.
What two-part epoxy does in wood repairs
Two-part epoxy resin and hardener create an irreversible chemical cure after mixing, so they can be used for bonding, filling, and sealing cracked, rotted, or gappy wood. I use consolidator first when the surrounding wood is soft but not gone. If the wood is crumbly all the way through, epoxy filler has little to bite into.
What happens after resin and hardener meet
Part A is the resin and Part B is the hardener. The hardener starts cross-linking, and the batch begins a countdown called pot life. That window can be quite short on some repair epoxies, so batch size and workflow matter as much as measurement.
When epoxy is the right repair
Epoxy fits repairs where wood still has shape: edge breakouts, surface rot, checks, knot voids, and split trim. It is a poor match for wood that is damp, greasy, loose, or missing so much structure that a splice or replacement may be smarter. I use consolidator first when a screwdriver can probe the surface but the wood still stays put.
How do you prepare damaged wood first?
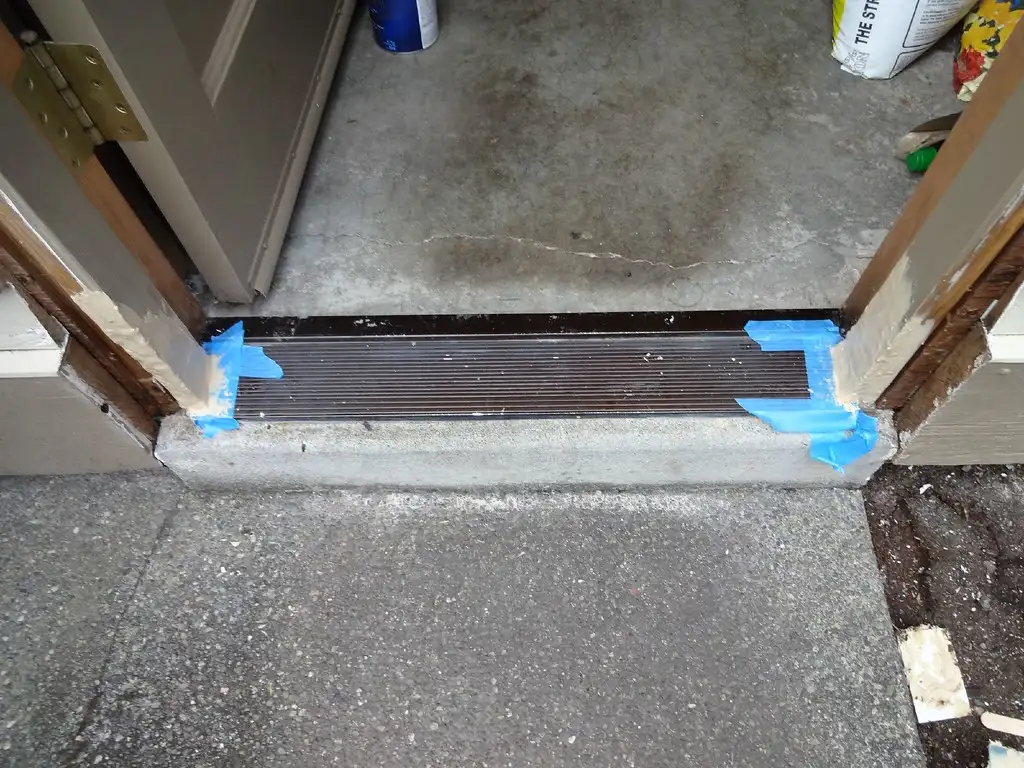
Remove loose rot, dust, and crumbly fibers before any mix leaves the cup. Dry the cavity, then shape it so the patch has sound walls to lock into. Epoxy bonds best to clean, dry, solid wood, not to powder or trapped moisture.
Prepare the cavity in this order
- Vacuum the repair area until dust stops lifting from corners.
- Chisel out soft and decayed fibers until the edge feels firm.
- Dry the wood completely before any filler goes in.
- Apply consolidator only where the wood is punky but still present.
- Re-shape the opening so the epoxy will key into solid sides.
Why prep changes cure quality
Dirty or damp wood can make a patch look fine on day one and fail later. Trapped moisture can weaken the bond, and loose fibers act like a release layer. If rotten dust stays in the cavity, the epoxy may stick to the dust instead of the wood.
How do you measure the mix ratio correctly?
Measure the mix ratio exactly as the label states, and confirm whether that ratio is by volume or by weight. Do not assume those methods are interchangeable. For structural work, separate containers and a measuring cup or scale reduce ratio drift, especially on small batches.
Measure without contamination
Two-part epoxy systems are stored in separate containers, so keep each component in its own measuring cup or on its own scale tare. A single dirty stick can carry resin into the hardener or the other way around. That small error can change the cure.
| Mix ratio | How it is usually stated | What to confirm | Common risk |
|---|---|---|---|
| 1:1 | Equal parts | By volume or by weight | Eyeballing can drift on small batches |
| 2:1 | Two parts resin to one part hardener | Use the same measuring method for both parts | Wrong method gives a soft or brittle patch |
| 4:1 | Four parts resin to one part hardener | Use separate marks or a scale | Off-ratio mix may never cure fully |
How do you mix epoxy without ruining the batch?
Blend the parts until the color and texture are even, scraping the sides and bottom of the cup as you go. Mix only what you can apply within pot life. Large batches heat faster, which shortens working time and can make the epoxy kick before placement.
Mix in two passes
- Stir in the original cup until streaks disappear.
- Scrape the sides and bottom every few strokes.
- Pour onto a clean board and remix for 30 seconds.
- Stop as soon as the color looks even.
Why batch size matters
Heat builds faster in a deep cup than in a thin spread. That can cut usable time and create a sudden exotherm in small cavity work. For deep voids, I mix several small batches instead of one large one. A small mix is easier to place and less likely to overheat.
How do you apply epoxy into cracks and voids?
Press the mix into the repair with a putty knife so it reaches corners, end grain, and tight edges. Overfill a little, then shape later. Deep voids often need staged fills or thin layers to limit trapped air and heat buildup.
Place the repair in layers when needed
- Force epoxy into the lowest part of the void first.
- Work it into corners with the putty knife edge.
- Add the next layer only after the first one settles.
- Build slightly proud of the surface for later sanding.
How to fill deep voids without trapping air in epoxy
Pack the material from one side of the cavity and push air out as you go. End grain and sharp corners trap bubbles easily. Thin lifts help because they let air escape before the next layer goes in. If a void is deep, resist the urge to fill it all at once.
How long do you mix epoxy before using it?
Mix until the batch is fully uniform, which can take a couple of minutes in the cup plus a short remix on a clean board. The goal is even chemistry, not a blended look. Streaks or marbling can leave soft spots and weak cure lines.
Use cure timing as a workflow limit
Pot life limits how long the mix remains workable, and cure time tells you when the repair is ready to shape. Cure time can vary quite a bit depending on the product and thickness. Thicker fills usually need longer.
When can you sand epoxy after a wood repair?
Wait for full cure before sanding. Start shaping with a coarse grit, then move to finer grits for smoothing. If the paper gums up, the patch is still soft. Sanding early can pull the repair apart or smear uncured material across the surface.
What happens if epoxy is mixed in the wrong ratio?
A wrong ratio can leave the repair sticky, rubbery, brittle, or soft, and the failure may show up only after the patch has been sanded. Too much hardener can also create extra heat and brittleness. The safest fix is to remove the failed mix and start over with a measured batch.
Mix-and-repair troubleshooting checklist
| Failure sign | Likely cause | Fix |
|---|---|---|
| Sticky or soft patch | Wrong ratio or incomplete mix | Scrape out the bad epoxy and rematch the ratio exactly |
| Crumbly or brittle patch | Too much hardener or poor substrate | Remove loose material, dry the wood, and start with a labeled ratio |
| Bubbles or voids | Overmixed air or poor packing | Pack in thin lifts and press with a putty knife |
| Patch pulled away | Damp wood or dirty repair area | Vacuum, chisel, and dry the cavity before reapplying |
| Sanding gums up | Cure not finished yet | Wait longer before sanding and check for a hard surface |
If that didn’t work, try this next
- Cut out all failed epoxy with a chisel.
- Vacuum the cavity again to remove dust and crumbs.
- Let the wood dry fully before any new mix.
- Check the label for ratio by volume or by weight.
- Mix a fresh small batch and test the cure in a scrap cup.
Common mistakes
Guessing the ratio, mixing more than can be used in pot life, skipping prep on rotten wood, sanding too early, and using one tool for both parts are the usual failure points. Each one turns a repair problem into a cure problem, and cure problems are harder to fix after the patch has set.
How to avoid them
- Read the label before opening the containers.
- Measure resin and hardener separately.
- Mix only a small batch for the current repair.
- Remove all loose rot and dust first.
- Wait for full cure before sanding or finishing.
Prevention: Label the measuring tools for resin and hardener, and keep a separate stir stick for each part. That small habit prevents cross-contamination and ratio drift on the next repair.
Frequently asked questions
How do you mix two-part epoxy for wood repairs?
Measure each part exactly as the label states, stir until the color is even, then scrape the cup sides and bottom before a short remix on a clean board. Use only a small batch that fits your pot life, because once mixed the cure cannot be reversed.
What ratio should two-part epoxy be mixed at?
Use the product’s stated ratio, which is often 1:1, 2:1, 4:1, or another manufacturer-specific proportion. Do not swap volume for weight unless the label says that method is allowed. The hardener must match the resin ratio exactly or the repair may fail.
How much epoxy can you mix at once before it kicks?
Mix only what you can place within the stated working time, especially on small void repairs. Deep cups and large batches heat up faster and shorten pot life. For most wood repairs, several small mixes are often safer than one large one.
Can you add extra hardener to make epoxy cure faster?
No. Extra hardener can leave the repair brittle, overheated, or still uncured in spots. Keep the ratio on the label and let cure time do the work. If speed matters, choose a product with a shorter stated working time instead of changing the mix.
Do you need to measure epoxy by volume or weight?
Measure it the way the manufacturer specifies, because volume and weight are not always interchangeable. A 2:1 volume ratio is not the same as a 2:1 weight ratio unless the label says so. Separate containers or a scale help keep the mix exact.
What kind of wood damage should be repaired with epoxy instead of wood filler?
Use epoxy when the wood still has enough sound structure to hold a bond, such as cracked trim, localized rot, and open voids. Use consolidator first if the wood is soft but not missing. Replace the part when the damage is too deep to leave a stable substrate.
Sponsored / affiliate links. As an Amazon Associate I earn from qualifying purchases. I may earn additional commission from eligible campaigns.