Laminate Countertop Cutter: Best Tool for a No-Chip Cut
A laminate countertop cutter is really three different tools depending on the cut: a circular saw with a 60-tooth carbide blade for straight rips, a jigsaw for interior cutouts, or a hand shear like the Klenk MA72500 for trimming narrow strips — using the wrong one is the #1 cause of chipped edges. Cut from the underside with a fine-tooth blade, or the decorative side chips within the first few inches. This guide covers which tool fits which cut, the exact technique that prevents chipping, and how to fix a cut edge before it’s installed.
Note that this is a different tool from a laminate flooring cutter, which shears plank flooring to length rather than trimming countertop sheet stock — see that guide if you’re cutting floor planks instead.
What Tool Actually Cuts a Laminate Countertop?
Best Laminate Trim Shear Pick
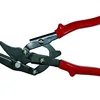
Klenk MA72500 Straight Cut Laminate Shear – $41.18
This is the hand-shear option covered above — it takes a 1/8″ track out as it cuts, which is exactly the narrow-strip and edge-banding trim work a router or circular saw is overkill for.
- Best for: trimming narrow strips and edge banding without setting up a power tool
- Why we picked it: purpose-built for plastic laminate specifically, not a repurposed tin snip or utility knife
- Main drawback: not a substitute for a circular saw on a full-width sheet rip cut
As an Amazon Associate we earn from qualifying purchases.
There isn’t one single “laminate countertop cutter” — the right tool depends on the cut you’re making:
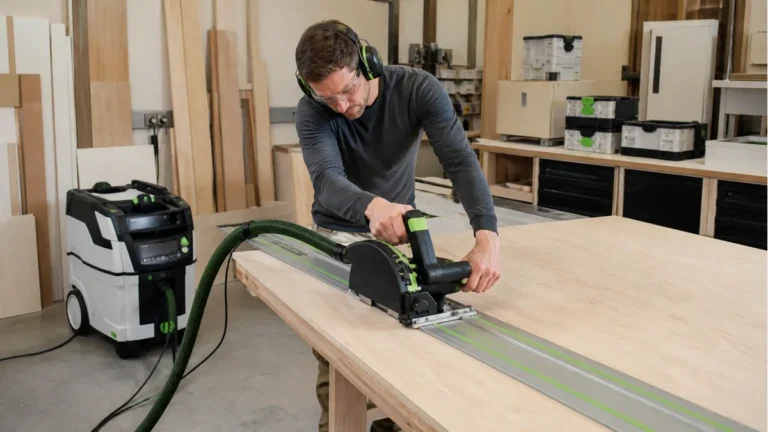
- Circular saw — best for long, straight rip cuts across a full sheet. Use a fine-tooth carbide blade with around 60 teeth; fewer teeth (24T-40T framing blades) tear the decorative layer instead of shearing it.
- Jigsaw — best for interior cutouts (sink openings, cooktop cutouts) and curved edges. Drill a starter hole at each corner before plunging the blade in, and use a fine-tooth downstroke laminate blade to limit chipping on the top face.
- Router with a flush-trim bit — the standard finishing step after bonding laminate to a substrate. The bit’s bearing rides the substrate edge while the cutter trims the overhanging laminate flush — this is what gives a factory-glued seam its clean edge.
- Hand shear (e.g. Klenk MA72500) — the fastest option for trimming narrow strips or edge banding by hand, with no power tool, dust, or setup time. It removes a roughly 1/8″ wide track as it cuts, so it’s a trim tool, not a straight-rip tool for a full sheet.
For a full sheet destined for a substrate, most installers rough-cut oversized with a circular saw or jigsaw, bond it, then flush-trim with the router — that two-step process is what actually produces a professional edge, not any single tool used alone.
How to Cut Laminate Without Chipping (Step by Step)
- Mark the cut line on the decorative (top) side, then run a strip of painter’s or masking tape along the line — this alone measurably reduces surface chipping with any tool.
- Score the tape line with a utility knife before cutting if using a circular saw; it gives the blade a clean edge to follow instead of tearing into the finish.
- Flip the sheet laminate-side down when cutting with a circular saw or standard jigsaw blade. Both tools cut on the upstroke, so the underside of the material is what tears — keeping the decorative face down puts the tear-out where it won’t show.
- Cut slightly oversized (about 1/8″–1/4″ proud of the final line) if the piece will be bonded to a substrate, then finish with a router and flush-trim bit for the exact final edge.
- For a hand shear like the Klenk MA72500, cut from the decorative side instead — the single cutting blade is designed to shear into the finish face, not the underside, on this tool type.
- Clear debris and check the edge for stray chips; a quick pass with a fine file or 220-grit sandpaper cleans up any remaining rough spots before installation.
Comparing the Cutting Options
| Tool | Best Cut Type | Typical Price | Chip Risk (with correct technique) |
|---|---|---|---|
| Circular saw, 60T carbide blade | Long straight rips | $40–$150 (blade extra) | Low |
| Jigsaw, fine-tooth blade | Interior cutouts, curves | $50–$150 | Low–Medium |
| Router + flush-trim bit | Final edge trim after bonding | $80–$200 + bit | Very low |
| Klenk MA72500 hand shear | Narrow strips, edge banding | ~$41 | Low |
Common Mistakes That Cause Chipped Edges
- Using a framing blade. A standard 24T–40T wood-framing blade tears laminate’s brittle melamine surface instead of shearing it — always switch to a fine-tooth (60T+) blade rated for laminate or plastics.
- Cutting decorative-side-up with a saw or jigsaw. Both tools cut upward into the material, so the top face is what chips; flip the sheet for these two tools specifically (the hand shear is the opposite — see the steps above).
- Skipping the tape line. A strip of tape along the cut line supports the surrounding fibers and measurably reduces chip-out, and it costs nothing.
- Ignoring thermal expansion at installation. Laminate expands and contracts with temperature; leave a small expansion gap at seams and edges rather than cutting pieces bone-tight.
- Rushing the cut. Feeding the tool too fast is the single most common cause of tear-out regardless of which tool or blade is correct.

Maintenance and Care
Clean finished laminate countertops with a soft cloth and warm, soapy water — harsh abrasives or ammonia-based cleaners dull the surface over time. Wipe up spills promptly to avoid staining at seams, use a cutting board rather than cutting directly on the surface, and keep blades and shear jaws clean of laminate dust and adhesive residue so future cuts stay accurate.
Frequently Asked Questions
What is a laminate countertop cutter?
“Laminate countertop cutter” isn’t one specific tool — it’s a category covering whichever tool matches the cut: a circular saw with a fine-tooth carbide blade for straight rips, a jigsaw for cutouts, a router with a flush-trim bit for the final bonded edge, or a hand shear like the Klenk MA72500 for narrow trim strips.
How do you use a laminate countertop cutter?
Mark and tape the cut line, then cut with the sheet flipped decorative-side down for a circular saw or jigsaw (both cut on the upstroke, so the underside takes the tear-out) — or decorative-side up for a hand shear, which is built to shear into the top face. Cut slightly oversized if the piece still needs a router flush-trim pass after bonding.
What materials can a laminate countertop cutter cut?
These tools are built for plastic laminate (Formica-type) sheet stock. A circular saw or jigsaw with the same fine-tooth blade will also cut the plywood or MDF substrate underneath, but a hand shear like the Klenk MA72500 is laminate-only — it won’t cut through wood substrate.
Can you cut laminate countertops without a specialized cutter?
Yes — a circular saw or jigsaw already in most toolboxes handles laminate fine once fitted with a fine-tooth (60T+) blade rated for laminate or plastics. A specialized hand shear just makes narrow trim cuts faster and dust-free; it isn’t required for a straight rip cut.
For related projects, see how to handle bonding laminate with contact adhesive, how to finish with painting a laminate countertop, and layout ideas for a laminate countertop island.
Conclusion
There’s no single best laminate countertop cutter — match the tool to the cut: a 60-tooth carbide blade in a circular saw for straight rips, a jigsaw for cutouts, a router and flush-trim bit for the final bonded edge, and a hand shear like the Klenk MA72500 for narrow trim work. Tape the line, cut on the correct side for your tool, and go slow — that combination prevents nearly every chipped edge.
Sponsored / affiliate links. As an Amazon Associate I earn from qualifying purchases. I may earn additional commission from eligible campaigns.