How Do You Replace a Ryobi Miter Saw Fence?
A Ryobi miter saw fence replacement means swapping the bent or worn metal rail that backs up your workpiece — part #089041009005 for the TS1345L, a different part for the TSS120L or P551. Using the wrong part number is the most common mistake, since fences are not interchangeable across Ryobi saw families. This guide covers picking the correct part, removing and installing it, and squaring it to the blade before your first cut.
Quick Answer
A slightly loose fence can often be re-tightened and squared without buying a part. Replace the fence instead if it’s visibly bent, cracked, or the bolt holes are too worn to hold it steady — a bent fence will never read square no matter how you adjust it, since the metal itself is warped.
What Is a Ryobi Miter Saw Fence?
Best Ryobi Fence Replacement Pick
Fence & Extension for Ryobi TSS120L / TSS121 / TSS121T 12″ Miter Saw
A direct-fit replacement for the exact 12″ sliding compound miter saws covered in this guide — no cutting or drilling required.
- Best for: TSS120L, TSS121, and TSS121T owners replacing a bent or worn fence
- Why we picked it: matches the exact model numbers this guide covers, avoiding the part-mismatch mistake described above
- Main drawback: won’t fit the smaller TS1345L or P551 — check your model plate before ordering
Compare more fence & squaring options
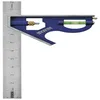 Option 1 IRWIN 12″ Combination Square, Stainless Steel
|
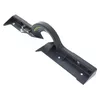 Option 2 OEM Fence #089240034010 for Ryobi TSS702
|
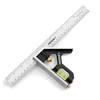 Option 3 Arrow 12″ Combination Square with Bubble Level
|
As an Amazon Associate we earn from qualifying purchases.
A miter saw fence is the flat metal rail behind the blade that a workpiece rests against for a straight, repeatable cut. Ryobi miter saws like the TS1345L (10″) and TSS120L/TSS121 (12″ sliding models) all use fences, but the parts are model-specific — a TS1345L fence will not bolt onto a TSS120L. Replacing a bent or loose one restores accurate cuts for projects like shelves or picture frames.
Why Replace Your Ryobi Miter Saw Fence?
A damaged fence causes crooked cuts. Signs you need a replacement:
- Bent fence: it won’t align with the blade no matter how you adjust the bolts.
- Loose bolts: the fence wiggles during cuts even after tightening.
- Worn surface: scratches or dents throw off wood placement.
What Causes a Miter Saw Fence to Bend or Loosen?
Three causes come up most often in Ryobi and other miter saw repair forums: a kicked-back workpiece striking the fence hard enough to warp the metal, a factory defect from the metal-curing process during manufacturing, and elongated bolt-mounting holes that don’t stay aligned once the fence has been loosened and retightened a few times. If your fence bent from a kickback, check the blade guard and lower blade for damage too before you cut again.
Tools and Materials You’ll Need
You don’t need much to replace a Ryobi miter saw fence:
- Replacement fence: buy the exact part for your model — #089041009005 for TS1345L/TS1344L, a different fence assembly for TSS120L/TSS121. Check Home Depot or eReplacementParts.
- Screwdriver: a Phillips #2 works for most Ryobi models.
- Wrench: usually 5mm, often stored on the saw itself.
- Combination square: to verify the fence is 90 degrees to the blade after installing.
- Safety glasses: protect your eyes from dust.
Table 1: Tools and Estimated Costs
| Tool/Material | Purpose | Cost (USD) |
|---|---|---|
| Replacement Fence | Replaces damaged part | $20-$60 |
| Phillips Screwdriver | Removes old fence | $5-$10 |
| 5mm Wrench | Tightens bolts | $5-$15 |
| Combination Square | Checks fence-to-blade alignment | $10-$25 |
| Safety Glasses | Protects eyes | $5-$10 |
Step-by-Step Guide to Ryobi Miter Saw Fence Replacement
Here’s the process, step by step:
- Unplug the saw: pull the plug before touching any bolts.
- Remove the old fence: loosen the mounting bolts with the screwdriver — most Ryobi models use two bolts per side.
- Clean the base: wipe away sawdust so the new fence sits flat against the table.
- Attach the new fence: line it up with the bolt holes and snug the bolts — don’t fully tighten yet.
- Square the fence to the blade: set the miter angle to 0°, place a combination square flat against the fence with the ruler extending toward the blade, and slide it until it touches the blade body, not the teeth — the teeth are set outward and will give a false reading. Move the fence until there’s no gap, then tighten the bolts fully without letting the fence shift.
- Test a cut: plug in the saw and cut a scrap piece to confirm the fence holds square.
If you’d rather watch the process than read it, this video walks through fixing a bent compound miter saw fence step by step:
Benefits of Replacing the Fence
A squared fence makes your cuts accurate again for projects like picture frames or crown molding. It’s also far cheaper than a new saw — a replacement fence runs $20-$60 versus $150-$300+ for a new miter saw. Once the new fence is squared, results are immediate: no more shimming trim to compensate for a wobbly cut.
Drawbacks and Alternatives
Replacing the fence costs money and takes time, and OEM fences for older or discontinued Ryobi models can be hard to find. One low-cost alternative is a wooden “sacrificial” fence: screw a straight piece of scrap wood to the existing fence for extra support — it’s cheap but less durable than a metal replacement and won’t fix a fence that’s already bent. A more capable alternative is an aftermarket fence system like a Kreg precision track and stops kit, which clamps onto your existing fence and adds repeatable stop positions without replacing the OEM part. For a fence that’s simply beyond saving, upgrading to a new saw is the last resort, but it’s the most expensive option by far.
Table 2: Replacement vs. Alternatives
| Option | Cost | Pros | Cons |
|---|---|---|---|
| OEM Replacement Fence | $20-$60 | Accurate, durable, model-matched | Hard to find for discontinued models |
| Sacrificial Wood Fence | $5-$15 | Cheap, easy to add | Won’t fix a bent fence, less precise |
| Kreg Track/Stops Kit | $40-$100 | Repeatable stops, works with most fences | Doesn’t replace a damaged OEM fence itself |
| New Saw | $150-$300+ | Fresh warranty, newer features | Expensive for a fence-only problem |
Common Mistakes to Avoid
- Not checking the model number first: fences vary by model — confirm yours (TS1345L, TSS120L, TSS121, or another) before ordering, since parts are not interchangeable across families.
- Over-tightening bolts: this can bend the new fence. Tighten snugly, not as hard as possible.
- Skipping the squaring step: an unaligned fence ruins cuts even with a brand-new part. Always check against the blade body with a square before your first real cut.
My Personal Tips for Success
- Buy OEM parts: Ryobi’s official parts, sourced through eReplacementParts or Home Depot, fit perfectly the first time.
- Keep a spare: storing an extra fence means a quick swap instead of a delayed project the next time one bends.
- Clean regularly: sawdust buildup under the fence can throw off alignment over time — wipe the base weekly.
“My first Ryobi fence swap took about 25 minutes, most of it spent squaring the fence to the blade rather than the actual bolt-and-swap part — that step is where the accuracy actually comes from.”
Safety Tips for Miter Saw Use
- Wear safety glasses: dust and debris can fly during cuts.
- Unplug before adjusting: never touch the fence or bolts with the saw plugged in.
- Use a stable surface: a wobbly saw stand can throw off your squaring check and cause accidents.
Table 3: Safety Gear
| Item | Purpose | Typical Cost |
|---|---|---|
| Safety Glasses | Eye protection | $5-$10 |
| Work Gloves | Hand protection | $10-$15 |
| Dust Mask | Lung protection | $5-$10 |
Where to Find Ryobi Miter Saw Fence Parts
Finding the right fence for your exact model matters more than finding the cheapest one:
- Home Depot: stocks common Ryobi parts and ships fast.
- eReplacementParts: model-specific fences with parts diagrams, useful for confirming you have the right one.
- Amazon: search by your exact model number, not just “Ryobi miter saw fence” — a TS1345L fence and a P551 fence are not the same part.
- eBay: useful for discontinued models, but check seller ratings first.
If you’re not sure which model you have, check the rating plate on the saw’s base or motor housing — it’s more reliable than guessing from memory. For general adjustment issues that aren’t fence-related (bevel angle, miter detents), see our guide on how to adjust a Ryobi miter saw. If you’re working on a different Ryobi model, our miter saw parts replacement guide and miter saw parts list cover the same model-matching principle for other brands.
My Experience with Ryobi Miter Saws
Ryobi miter saws are affordable and capable for DIY work, but their fences can bend if a workpiece kicks back hard or the saw takes a hit in storage. Replacing the fence on a trim project made the difference between guesswork and clean, repeatable cuts. If you’re cutting anything with tight-fitting joints — picture frames, crown molding — a squared fence isn’t optional. See our miter saw hub for more Ryobi maintenance and upgrade guides.

Conclusion
Replacing a Ryobi miter saw fence comes down to two things: ordering the exact part for your model, and squaring it to the blade body before you trust it with a real cut. Skip either step and a brand-new fence will cut just as crooked as the bent one it replaced.
Frequently Asked Questions
What is a Ryobi miter saw fence replacement?
A Ryobi miter saw fence replacement swaps out a damaged or bent fence for a new, model-matched part. The fence keeps wood steady for straight cuts, so a new one restores accuracy for projects like shelves or frames. Always confirm your saw’s model number before ordering, since fences are not interchangeable between Ryobi families.
How do I know if my fence needs replacing?
Look for visible bends, persistent wobble even after tightening the bolts, or scratches and dents deep enough to affect wood placement. If cuts are consistently crooked and squaring the existing fence doesn’t fix it, the fence itself is likely bent and needs replacing rather than adjusting.
Where can I buy a Ryobi miter saw fence?
Home Depot, eReplacementParts, Amazon, and eBay all carry Ryobi fence parts. Search by your exact model number — TS1345L, TSS120L, TSS121, or P551 — since the fences are not interchangeable. eReplacementParts also provides parts diagrams to confirm you’re ordering the right one.
Are Ryobi miter saw fence parts interchangeable between models?
No. A TS1345L fence (part #089041009005) will not fit a TSS120L or TSS121, and a P551 fence (part #080001020008) is sized for that saw’s smaller 7-1/4″ blade, not a 10″ or 12″ model. Always match the part number to your saw’s exact model, printed on the rating plate.
How long does it take to replace the fence?
Removing the old fence and installing a new one typically takes 20-30 minutes, including cleaning the base. Budget extra time for the squaring step — checking the fence against the blade body with a combination square and adjusting until there’s no gap is what actually determines cut accuracy.
Is it worth replacing the fence or should I buy a new saw?
Replacing the fence is far cheaper — $20-$60 versus $150-$300+ for a new saw — and is worth it if the motor, blade, and other components still work well. A wooden sacrificial fence or a Kreg track/stops kit are lower-cost alternatives, but neither fixes a fence that’s already bent.
How do I align the new fence properly?
Set the miter angle to 0 degrees, place a combination square flat against the fence with the ruler extending toward the blade, and slide it until it touches the blade body — not the teeth, which are set outward and give a false reading. Move the fence until there’s no gap, then tighten the bolts without letting it shift, and confirm with a test cut on scrap wood.
Sponsored / affiliate links. As an Amazon Associate I earn from qualifying purchases. I may earn additional commission from eligible campaigns.