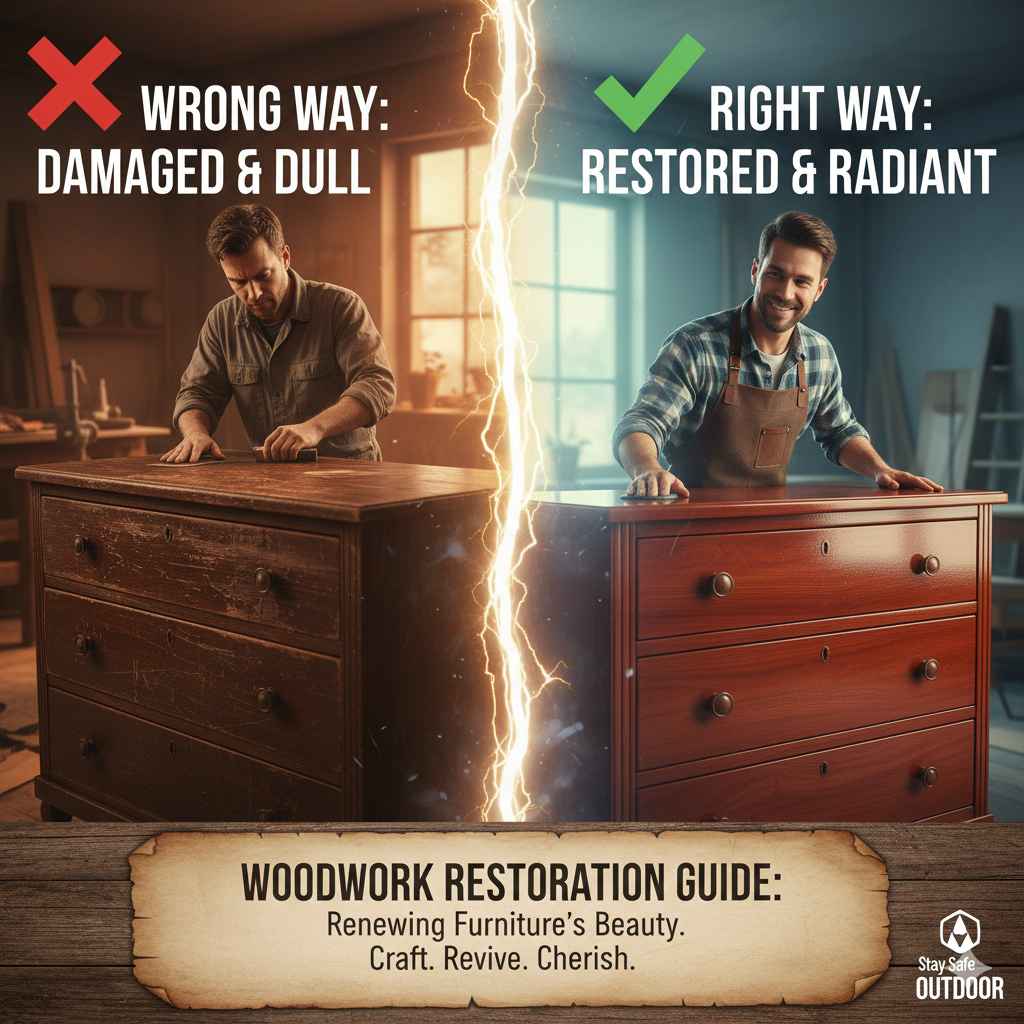
Woodwork Restoration Guide: Renewing Furniture’s Beauty
If you’ve ever thought about fixing up old furniture, you’ve probably heard about the Woodwork Restoration Guide: Bring Furniture Back. It sounds common because lots of people have pieces they’d love to fix. But, it can seem tough at first because there are so many steps and tools. Don’t worry, though! This guide will show you how to do it, step-by-step, making it super easy. We’ll start with how to check what your piece needs.
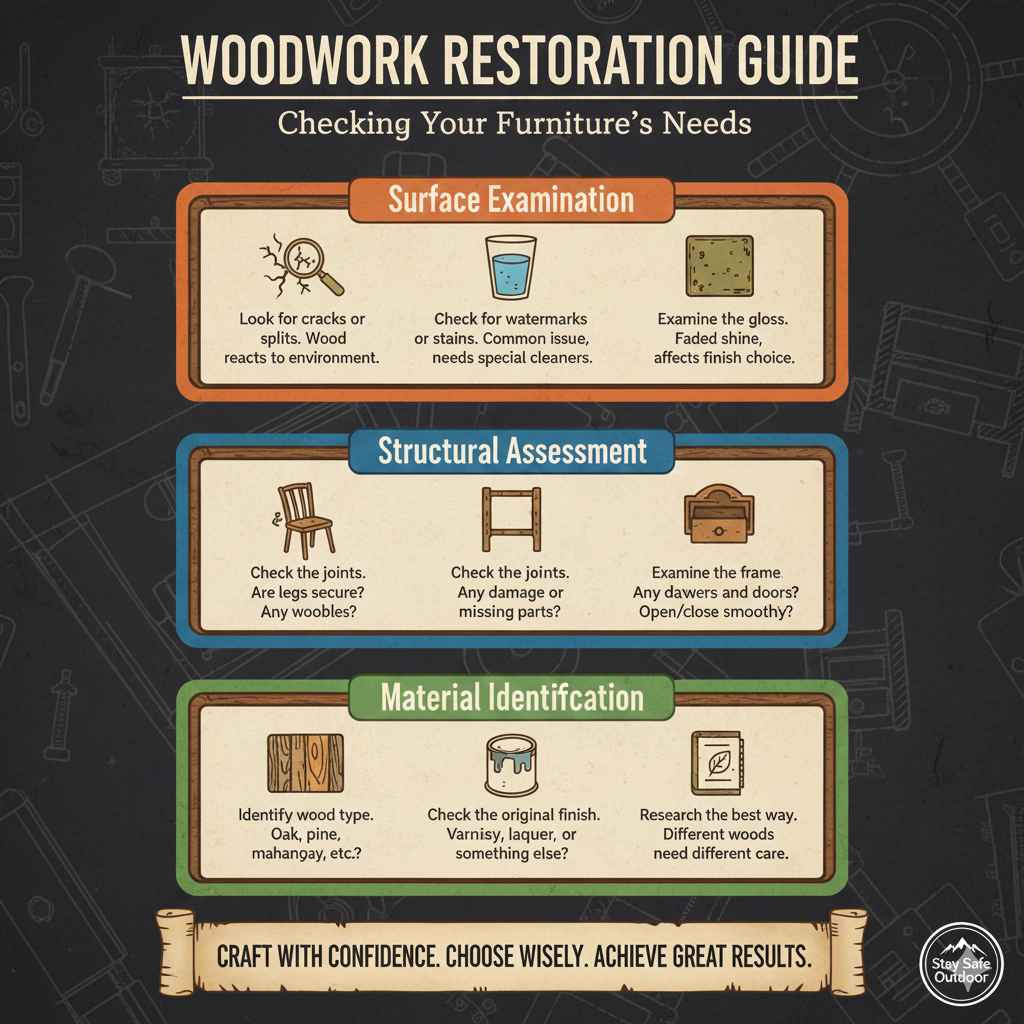
Checking Your Furniture’s Needs
Before you begin the exciting project of restoring a piece of furniture, it’s really important to know what you are dealing with. This first step is all about observing and figuring out what needs to be done. Think of it like a detective work for wood! It helps you get ready with the correct tools and products. This initial assessment ensures your restoration work is effective and keeps you from having to do extra work down the road. It ensures your efforts match the piece’s needs, leading to the best outcome.
Surface Examination
The first thing to look at is the surface. Look closely at the finish of your furniture. Is it cracked, peeling, or missing in spots? Do you see rings from drinks or other stains? The appearance tells you a lot. Different types of finishes, like varnish or lacquer, react differently to time and damage. This affects what you need to do for the restoration. For example, if the finish is flaking, it needs to be completely removed. On the other hand, if there are only surface scratches, it may just need a touch-up. Good observation guides your next steps.
- Look for cracks or splits. These show how the wood is reacting to its environment. They may mean the wood has dried out or been damaged.
- Check for watermarks or stains. These are common issues, often from spills. They might require special cleaners or techniques to remove.
- Examine the gloss. Has it faded or lost its shine? This helps you pick the right finish for restoration.
Consider the age and style of the furniture. Older pieces, for example, may have finishes that are easily damaged. You might need to adjust your methods to protect the piece. Modern furniture often uses different materials and finishes than older pieces, affecting your restoration strategy. By carefully checking the surface, you are finding out what is needed to make the furniture look its best again.
Structural Assessment
Next, it’s key to make sure the furniture is sturdy. Wobbly legs, loose joints, or cracks in the frame are not just cosmetic problems. They show that the structure of the piece may be weak. This type of check involves giving the furniture a gentle shake and looking for any movement or instability. You also need to look at how the pieces connect. Are the joints tight? If not, do they need to be re-glued or reinforced? Repairing structural problems is as important as fixing surface damage. Without this, your restored furniture may look good but be unstable or break easily.
- Check the joints. Are the legs secure? Are there any wobbles?
- Examine the frame. Is there any damage or missing parts?
- Test the drawers and doors. Do they open and close smoothly? Are there any missing pieces?
Proper structural assessment may also require a few extra tools. Simple tools like clamps, wood glue, and screws are your best friends here. When working with older pieces, the original joinery might be complex. Knowing how to deal with these will improve the result. By checking the furniture’s structure before starting, you set a foundation for a long-lasting restoration.
Material Identification
Knowing what type of wood your furniture is made of is very important. Different types of wood have their own character and need different treatment. For example, some woods are harder and more durable than others. This changes how you approach sanding and finishing. To find out the wood type, look at the grain pattern and color. Researching the wood type helps you choose the right products. Using the wrong products can be damaging and ruin the entire project. For example, certain cleaners can be too harsh for some delicate woods.
- Identify the wood type. Is it oak, pine, mahogany, or something else?
- Check the original finish. Is it varnish, lacquer, or something else?
- Research the best way to clean and restore that wood. Different woods need different care.
Often, you can research the wood online, or compare it with examples you can find. Sometimes, you might need help from an expert to fully identify the wood, especially for rarer or older pieces. Remember, the wood’s condition and the original finish determine the best methods for restoration. Correct material identification protects the furniture and makes sure the restoration looks its best and lasts for a long time.
Choosing Your Tools and Supplies for Woodwork Restoration Guide: Bring Furniture Back
Having the correct tools and supplies is crucial for a successful furniture restoration project. It’s like having the right ingredients to cook a great meal! Choosing quality items that are right for the job makes the work easier and gives you better results. This part involves picking the right tools for tasks like sanding, cleaning, and applying finishes. It also includes selecting the right restoration products for the wood. You’ll also learn the different items you’ll need.
Basic Tools
Some tools are essential for any woodwork project. These tools make sure your work is precise and effective. They help with everything from surface preparation to assembling furniture pieces. You don’t need to purchase everything right away. Start with the basics and gather more tools as your skills grow. These will be your go-to items. They will also improve the quality of your restorations.
- Sandpaper. Several types of sandpaper with different grit sizes are needed. Start with coarse grit for removing old finishes and scratches, and use fine grit for smoothing the wood.
- Sanding Block. This helps hold the sandpaper and makes sanding easier.
- Putty Knives or Scrapers. Used for removing old finishes, paint, and filler.
- Clamps. They help keep parts of the furniture together while the glue dries, especially important when fixing joints.
These basic tools allow you to start restoring wood furniture. As you gain more experience, you might need to add other tools. This could include power sanders for faster work or specialized tools for specific types of furniture. You might also need brushes, rags, and a dust mask. Make sure you also have some protective gloves and eyewear.
Cleaning Supplies
Before you start restoring wood, you must clean it thoroughly. Cleaning removes dirt, grease, and old wax, which helps the new finish stick. It improves the restoration results and extends the life of the restored piece. There are different types of cleaning supplies, and each is used for a different purpose. Using the right cleaning products is a key part of woodwork restoration. It preps the furniture surface for repair and refinishing.
- Wood Cleaner. These cleaners are designed to remove dirt without harming the wood. You can find them at most hardware stores.
- Degreaser. If the furniture has greasy spots, a degreaser will help remove them.
- Mineral Spirits. This is used to remove wax, grease, and some old finishes.
- Rags. Soft, clean rags are very important for cleaning.
When you clean, always test the cleaning product in a hidden area first. This makes sure it does not damage the wood or the old finish. Always work in a well-ventilated area, and wear gloves to protect your skin. Remember, a clean surface is a crucial part of a great finish. Good cleaning makes the furniture look and feel better.
Finishing Materials
Choosing the right finish is an important part of furniture restoration. This choice impacts the final look and how long it lasts. Different finishes, such as varnish, lacquer, and paint, have unique qualities and are used for various purposes. Knowing about the different types of finishes helps you choose the correct one. It also helps you get the desired look and protection for your furniture.
- Varnish. Varnish creates a clear, hard protective layer. It’s often used on tables, desks, and chairs.
- Lacquer. Lacquer dries quickly and gives a clear, smooth finish. It is often used on furniture that needs a lot of protection.
- Paint. Paint is useful for furniture that needs color or a different texture. It can be used for both decorative and protective purposes.
- Wood Stain. Wood stain adds color to the wood while still showing the wood grain.
Before you apply a new finish, it is important to prepare the surface. Sand the wood, remove any dust, and apply a primer if needed. Always work in a well-ventilated space. Protect yourself with safety gear such as gloves, eye protection, and a respirator. Remember, selecting the correct finish ensures your restored furniture is protected and looks beautiful.
Sanding and Surface Prep in a Woodwork Restoration Guide: Bring Furniture Back
Sanding and surface preparation are among the most important steps in restoring wood furniture. This part makes sure the wood is ready for finishing and makes the final product look great. This also removes old finishes, scratches, and any imperfections, which creates a smooth surface. Proper surface preparation will let the finish bond correctly. It also improves the furniture’s look and durability. Doing this step correctly will set you on the path to success.
Sanding Techniques
Sanding is a key skill in furniture restoration. There are a few different techniques you can use. Starting with the correct sandpaper grade is very important. This ensures a smooth surface. It is very important to use the correct technique. Doing it wrong could ruin the project. Understanding the right methods gives you the power to renew wood surfaces properly.
- Hand Sanding. This works well for small areas and detailed work. You can use a sanding block to make it easier.
- Power Sanding. Power sanders can save time, but it is important to use them with care. Too much sanding can cause damage.
- Use the correct grit. Start with a coarse grit to remove old finishes and move to finer grits to smooth the wood.
- Sand with the grain. Always sand in the same direction as the wood grain.
When sanding, remember to clean the dust often. This helps you get a better finish. A dust mask is good for your health, and gloves protect your hands. If you have an intricate piece, you may need to use some specialized techniques. Always practice sanding on a hidden spot first to be sure you are not causing damage. Take your time, and the results will be beautiful.
Filling Imperfections
Filling imperfections like dents and scratches is an important part of restoration. These imperfections can ruin the look of your piece, but they are also easily fixed. You need the right materials to fill these imperfections. After filling them, it is important to sand the surface again. Doing this well makes the finish look great and makes your work last longer.
- Wood Filler. Use wood filler to repair dents, scratches, and holes.
- Putty Knives. They are used to apply the filler smoothly and evenly.
- Sand the filler. After the filler is dry, sand the area until it is smooth and even with the surrounding surface.
For large areas, use wood filler that matches the wood’s color. This creates a seamless finish. For small scratches, you can often use a wood putty stick to fill them quickly. Always let the filler dry completely before sanding. Use a very fine grit sandpaper to smooth the repaired area. Filling imperfections can improve your restoration project. You can change damaged furniture into beautiful, lasting pieces.
Stripping Old Finishes
Stripping old finishes is sometimes needed when restoring old furniture. This is a vital step when the old finish is cracked, damaged, or no longer wanted. You can use different methods to remove old finishes. The right method ensures you remove the old finish without damaging the wood. This clears the way for a fresh, new look. It preps the surface for the next steps.
- Chemical Strippers. Chemical strippers remove finishes, like varnish and paint.
- Heat Guns. Heat guns soften the finish so you can scrape it off.
- Scrapers. Use scrapers to carefully lift off the softened finish.
When you use chemical strippers, always wear gloves, eye protection, and work in a well-ventilated place. Test the stripper on a small spot before doing the whole piece. Use heat guns carefully. Hold them a safe distance from the wood to prevent burning. Remember, a good job stripping the old finish is important for a great finish. It reveals the beautiful wood underneath.
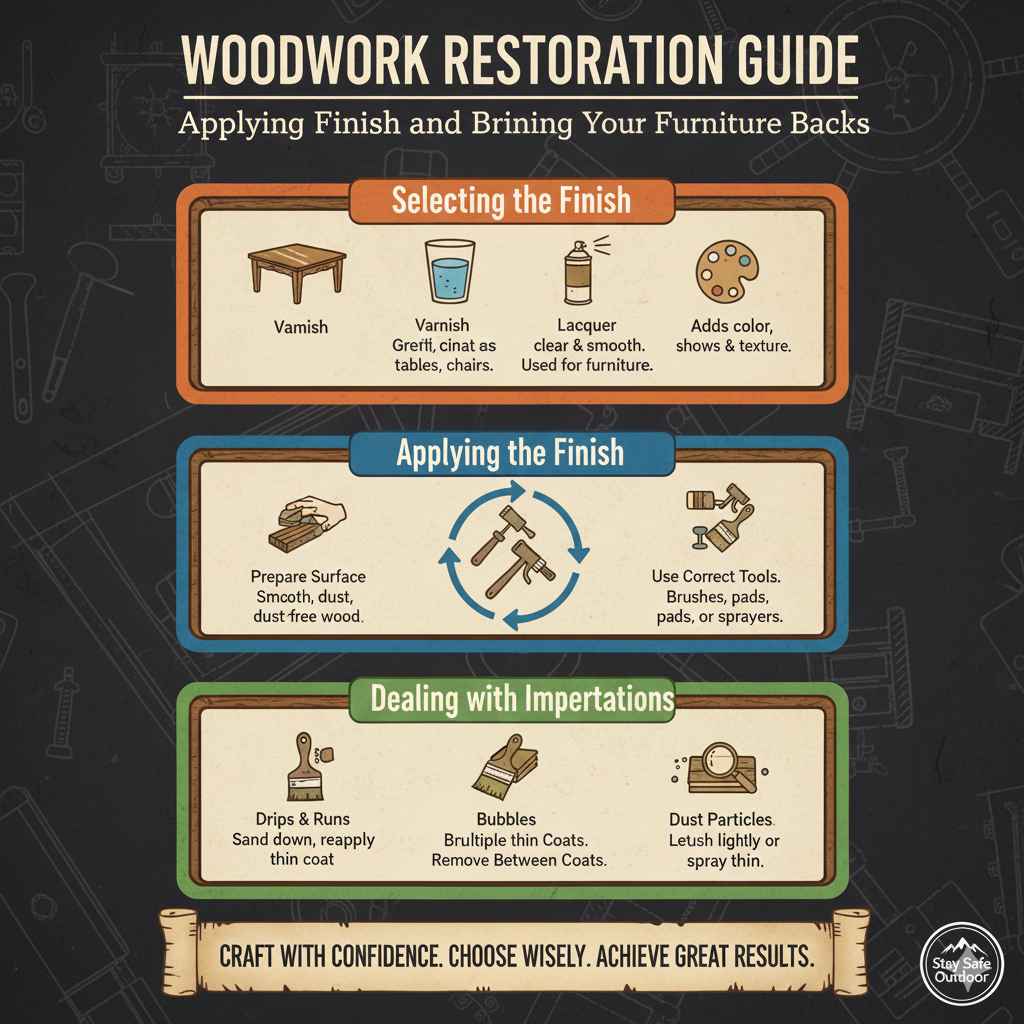
Applying Finish and Bringing Your Furniture Back
Applying the finish is the most rewarding part of the restoration. This gives your furniture a beautiful look. This step not only enhances the furniture’s appearance but also protects it from damage. Choosing the right finish, preparing the surface correctly, and applying the finish with care are essential for good results. You’ll make your furniture look beautiful and make it last for years. You are almost finished!
Selecting the Finish
Choosing the right finish is essential. The type of wood, the style of the furniture, and how you will use the furniture all play a role in making a selection. Different finishes have different looks. Consider what will protect the furniture best. Thinking through these points ensures your final product has the look and protection it needs.
- Varnish. Varnish gives a hard, protective surface that is great for tables and chairs.
- Lacquer. Lacquer dries fast and gives a clear, smooth finish often used for furniture.
- Paint. Paint offers color and texture.
- Stains. Stains add color while showing the wood grain.
Always consider the look you want to achieve. Do you like a glossy finish or something more natural? Consider how much protection the piece needs. Furniture in busy areas will need a more durable finish. If you aren’t sure, it is a good idea to research the pros and cons of each finish. Think about the room where the furniture will be located. By doing this, you’ll choose the correct finish to protect and beautify your restored furniture.
Applying the Finish
Applying the finish properly is critical to get a perfect finish. The process involves more than just brushing on the coating. Preparing the surface, using the right tools, and applying the finish evenly are all important. This step requires patience and the right methods. Using the right techniques ensures that the final result looks perfect. You want to make sure the work you do lasts for many years.
- Prepare the Surface. Make sure the wood is smooth and free of dust.
- Use the correct tools. Use brushes, pads, or sprayers, depending on the finish you choose.
- Apply thin coats. It’s better to apply multiple thin coats than one thick one.
- Sand between coats. Lightly sand between coats to remove imperfections.
When you apply the finish, make sure you work in a dust-free area. Follow the instructions on the finish can for drying times and other guidelines. If you are new to the task, practice on a scrap piece of wood first to get the feel of the finish. Be patient and take your time. This will give your furniture the best look.
Dealing with Imperfections
Even if you are careful, imperfections can still happen. Drips, bubbles, or dust particles can show up, but they do not mean failure. These imperfections can often be fixed. Knowing how to fix them makes sure your restored furniture looks its best. The ability to fix these issues is part of the restoration skill set.
- Drips and runs. Sand them down with fine grit sandpaper and reapply a thin coat.
- Bubbles. Try to get rid of bubbles by brushing lightly or spraying in thin coats.
- Dust particles. Let the finish dry completely and then sand lightly to get rid of them.
The key is to catch imperfections early. By taking care of small issues when they happen, you can save yourself a lot of work later. If you do make a mistake, do not worry. You can always sand down the finish and start again. Use these methods to perfect your final finish. The furniture will be beautiful.
Frequently Asked Questions
Question: What do I do if I find a lot of insect damage?
Answer: For insect damage, assess the severity. Small holes can be filled with wood filler. If the damage is more widespread, consider using a wood hardener or a professional pest control service before you begin your restoration.
Question: How can I tell if a piece of furniture is valuable?
Answer: Research similar pieces online or consult with a furniture appraiser. Look for maker’s marks, unusual features, or the type of wood used. The age, style, and condition also affect the value.
Question: What’s the best way to remove old glue from joints?
Answer: Soften old glue with a heat gun or by applying warm water. Then, use a chisel or scraper to remove the softened glue carefully. Make sure the surfaces are clean before re-gluing.
Question: How often should I wax my finished furniture?
Answer: Wax your furniture once or twice a year, or as needed, to keep it looking shiny and protected. The frequency depends on use and conditions.
Question: What should I do if my furniture has a strong odor after restoration?
Answer: Allow the furniture to air out in a well-ventilated area for several days. You can also use activated charcoal or baking soda to absorb odors. If the odor persists, investigate the source and address it accordingly.
Final Thoughts
The journey to restore furniture with the Woodwork Restoration Guide: Bring Furniture Back is a rewarding one. It’s about taking something old and making it look beautiful again. You now know the basics, from the first look at your furniture to choosing the right tools, sanding, filling any imperfections, and finally, applying the perfect finish. You have explored the steps required to restore furniture to a beautiful condition. These skills can revitalize any piece. It takes time and effort, but the outcome is really satisfying. Now you have a skill you can use to give new life to older items. With each project, your skills will grow. Are you ready to begin? Go get started!