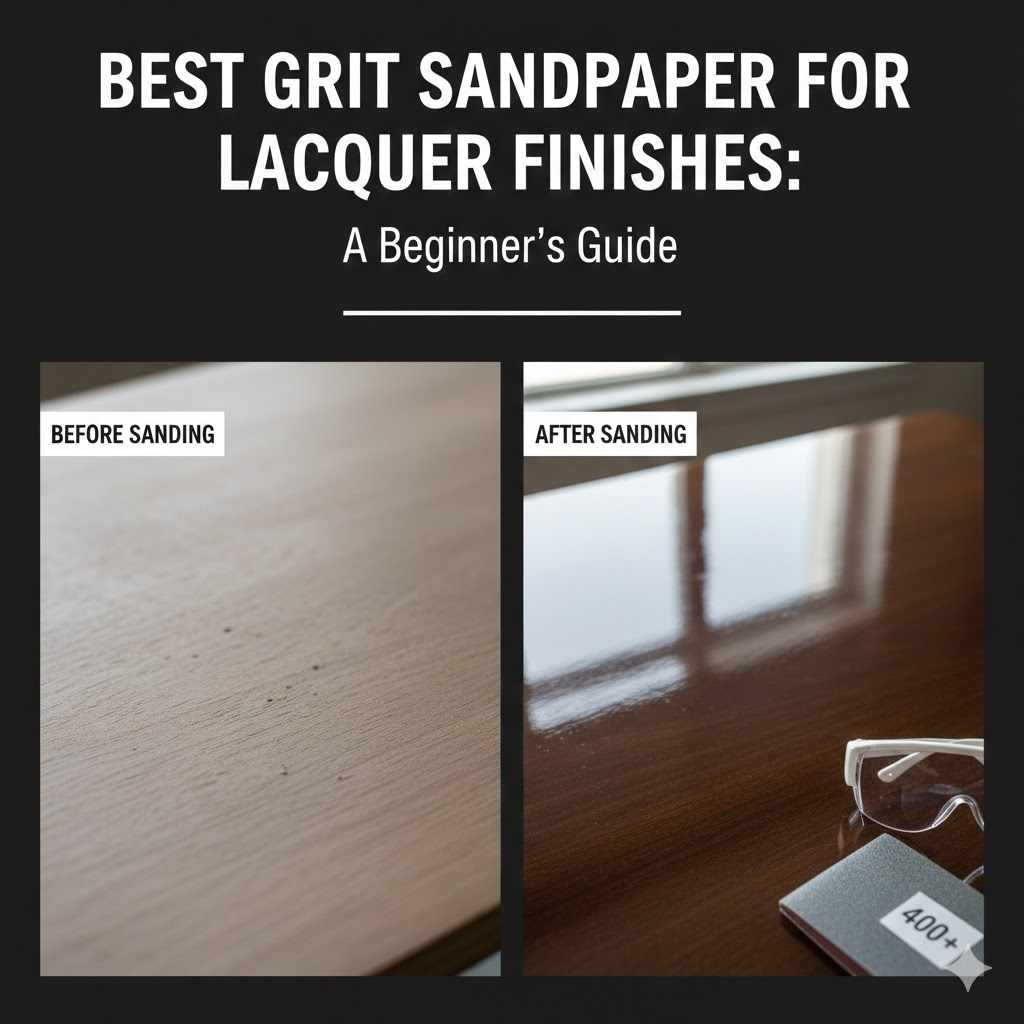
Best Grit Sandpaper for Lacquer Finishes: A Beginner’s Guide
Figuring out the Best Grit Sandpaper for Lacquer Finishes can be tricky when you’re just starting. It’s common to get confused about the different grit numbers and what they mean for your project. Don’t worry, many people feel the same way! This guide will help you understand sandpaper grit, choosing the right type for your lacquer, and how to get a smooth, professional finish, step by step. Let’s start with the basics of what you’ll need.
Choosing the Right Sandpaper for Your Project
Selecting the right sandpaper is a key part of any woodworking project, especially when working with finishes like lacquer. The number on the sandpaper tells you how coarse or fine it is. A lower number means the sandpaper is rougher, and a higher number means it’s finer. For lacquer, you’ll need a range to get a good result. Knowing the differences between sandpaper types and grits helps you get the best outcome for a smooth finish on your project. The proper choice of sandpaper will also increase the lifespan of your project and reduce the effort you need to put in.
Understanding Sandpaper Grit Numbers
Sandpaper grit numbers are a system that measures the size of the abrasive particles on the sandpaper. These numbers range from very low (like 60 grit) to very high (like 2000 grit and above). The grit number indicates how many abrasive particles fit on a square inch of the sandpaper. Lower numbers have fewer, larger particles, and are used for removing a lot of material quickly. Higher numbers have more, smaller particles, making the surface smoother. Getting to know what grit numbers mean is key to a smooth lacquer finish.
Coarse Grit (60-100 grit): These grits are very rough and are used for removing significant amounts of material. They’re great for stripping old finishes, leveling out rough surfaces, and quickly shaping wood.
Using a coarse grit on lacquer can be useful when you need to remove imperfections, such as drips or runs in the lacquer. The grit’s aggressiveness allows it to quickly cut into the finish. Be cautious, though, since coarse sandpaper can easily leave deep scratches if not used carefully. Always follow up with finer grits to remove these scratches and refine the surface.
Medium Grit (120-180 grit): This range removes smaller imperfections. You can use it after you’ve used coarse grit, smoothing the surface further. Medium grit is also good for preparing wood for a finish, helping the finish adhere properly.
In the context of lacquer, medium grit is often employed after the initial sanding stages to further refine the surface. The purpose is to remove any scratches left by the coarse sandpaper and begin to smooth the surface in preparation for finer grits. Applying a medium grit is essential for getting rid of any imperfections that might be visible after the first pass, helping achieve a consistent texture and better adhesion of subsequent lacquer coats. This step helps provide a clean foundation, boosting the final appearance and feel of the finished product.
Fine Grit (220-320 grit): Fine grit is used for the final smoothing before applying the finish. It gets rid of any remaining scratches and prepares the surface perfectly. This grit helps you get the smoothest possible surface on your project.
Fine grit sandpaper is essential when working with lacquer because it preps the surface for the final, polished look. This grit removes minuscule scratches left by medium grits, making the surface smooth for lacquer application. A clean, smooth surface is key for clear, even lacquer coverage and a professional finish. It allows the lacquer to spread uniformly and gives the final product a nice feel. This stage is key to avoiding defects like bumps or imperfections, ensuring a great result on your woodworking or refinishing projects.
Very Fine Grit (400-600+ grit): Very fine grit is used for polishing and buffing the finish after it has dried. This will result in a super smooth and glossy finish. You’ll often see this grit used for car paint and fine furniture.
Very fine grit sandpaper is what takes your lacquer finish to the next level, giving it a brilliant, professional look. It’s perfect for removing any minor imperfections, like dust particles or slight imperfections, after the lacquer has dried. This type of sandpaper gives a smooth surface and creates a reflective shine. Careful use of very fine sandpaper can make your project look like it was finished by experts, achieving a surface that is both visually appealing and smooth to the touch. This step is a must for any project where the end result is a highly polished, flawless surface.
Types of Sandpaper for Lacquer
Not all sandpaper is created equal, especially when it comes to finishing. Different types of sandpaper are designed for various materials and uses. For lacquer finishes, you’ll need to know which ones work best. The type of sandpaper you use has a direct effect on how the lacquer looks and how durable it is. Choosing the right kind of sandpaper will prevent scratches and give you a better overall finish.
Aluminum Oxide: This is a very common type of sandpaper. It’s great for both wood and metal, and it lasts a long time. It works well for most steps in the lacquer process because it removes material efficiently. It is a good choice for general sanding tasks, including preparing wood for lacquer and smoothing out imperfections.
Aluminum oxide sandpaper is an excellent all-around option for lacquer projects. It’s durable, resists clogging, and offers a good balance between cutting speed and finish quality. It can be used from the initial sanding of raw wood to the final smoothing of the lacquer. Aluminum oxide is the workhorse of sandpaper for a reason. This makes it a great choice for both beginners and experienced woodworkers.
Silicon Carbide: This type of sandpaper is extra fine and is perfect for wet sanding. Wet sanding means you use water or a lubricant with the sandpaper. Silicon carbide sandpaper is excellent for polishing and creating a smooth finish on lacquer. It is great for the final smoothing of the lacquer and helps to eliminate any scratches and get a shiny surface.
Silicon carbide sandpaper is known for creating the smoothest finishes. It’s often used in wet sanding, where water helps reduce friction and keeps the sandpaper from clogging. It’s especially useful for working on the final coats of lacquer, giving a glass-like shine. Using silicon carbide is one of the ways that professionals achieve perfect, glossy finishes.
Stearated Sandpaper: This is a type of sandpaper that has a special coating that helps prevent clogging. This is very helpful when sanding lacquers since lacquer can build up on the sandpaper quickly. It can extend the life of the sandpaper and give you a better surface.
Stearated sandpaper is an excellent choice for lacquer because it’s designed to reduce clogging. The stearate coating acts like a lubricant, helping to keep the sanding process running smoothly. This type of sandpaper can be a good choice because it prevents the sandpaper from becoming quickly blocked by lacquer particles. This means it requires fewer sandpaper changes and leads to a more even finish. It is often used in situations where the finish might gum up the paper easily, such as sanding a wet lacquer.

Sanding Techniques for a Smooth Lacquer Finish
The right sandpaper is only half the battle. Knowing how to use it is just as key. The correct sanding techniques ensure that you get a smooth, professional finish. Poor techniques can cause scratches, uneven surfaces, and a finish that doesn’t look as good. These techniques cover both dry and wet sanding, providing you with a step-by-step approach to perfect your lacquer finish.
Dry Sanding Versus Wet Sanding
Sanding with or without water has a huge impact on your results. Both dry and wet sanding have their advantages, so understanding when to use each is important. The right method depends on the step in your process and what you want to achieve. Choosing between dry and wet sanding can influence the smoothness of the final product and the ease of the process. This will help you get the best outcome for your project.
Dry Sanding: This involves using sandpaper without any water or lubricants. It’s generally used for the initial sanding stages, such as preparing raw wood or leveling out the first coats of lacquer. Dry sanding removes material quickly and is good for getting rid of rough spots and imperfections.
Dry sanding is often the first step in the lacquer process. It’s done to quickly remove rough spots and create a smooth surface. It’s best suited for tasks like preparing the raw wood or sanding between coats of lacquer. It can be more aggressive than wet sanding, removing a lot of material rapidly. This technique is great for working on initial surface preparation or when fast material removal is needed.
Wet Sanding: This involves using water or a lubricant with the sandpaper. Wet sanding reduces friction and helps prevent clogging of the sandpaper. It’s often used for final smoothing and polishing, especially with very fine grits. It produces an incredibly smooth surface and is ideal for achieving a high-gloss finish.
Wet sanding is usually the final step in finishing. It creates a super smooth surface and is perfect for polishing the lacquer. Water acts as a lubricant, reducing friction, and stopping the sandpaper from clogging. Wet sanding creates a surface that is very smooth. It’s often used for the final touches to get a glossy and reflective surface on your project.
Step-by-Step Sanding Process
Using the right process is essential for achieving the perfect lacquer finish. Following a step-by-step guide can help ensure that you don’t miss any key steps. This method is helpful for both experienced woodworkers and those new to lacquer finishes. The key is to progress smoothly from rough to fine grits, ensuring each step builds upon the last for a great finish. You will find that this will help you get better results.
-
- Prepare the Surface: Start by ensuring the wood is clean and free of any debris. Fill any holes or imperfections with wood filler and let it dry completely.
Preparing the surface is the first, essential step. Begin by making sure your wood is dust-free and clean. Any imperfections, like holes or cracks, need to be filled with wood filler and allowed to dry. This base work ensures that the subsequent layers of lacquer will go on smoothly, with no bumps or flaws. Taking the time to do this correctly gives you a great start.
-
- Initial Sanding (Coarse Grit): Use a coarse grit (120-180) to remove any rough spots or imperfections. Sand with the grain of the wood, applying even pressure.
Use a coarse grit to level the surface. Start by sanding with the grain of the wood, using consistent pressure. This stage takes away any roughness and removes imperfections. This step sets the stage for a smooth finish and removes any initial irregularities. Be sure to remove all the dust before going to the next stage.
-
- Intermediate Sanding (Medium Grit): Switch to a medium grit (220-320) to smooth out the scratches from the coarse grit. Sand with the grain until the surface feels even.
Following the first pass with a medium grit removes scratches. Again, sand in the direction of the wood grain, making sure that the surface is even. This step will smooth out any marks from the initial sanding, creating a uniform surface for the final coats of lacquer. Feel the surface after each pass to identify any uneven spots.
-
- Final Sanding (Fine Grit): Using a fine grit (320-400), gently sand the surface to prepare it for the lacquer.
This is the final stage before applying the lacquer. Use a fine grit sandpaper. Sand lightly, ensuring to remove any remaining scratches and create an even surface for the lacquer to adhere to. The goal is to make sure your project is smooth to the touch and ready for finishing. Clean away all dust before proceeding.
-
- Apply Lacquer: Apply the first coat of lacquer, allowing it to dry completely according to the manufacturer’s instructions.
Once you are done sanding, it’s time to add your lacquer. Ensure the area is well-ventilated, and wear appropriate safety gear. Apply the first coat of lacquer evenly, following the directions for application. Let it dry completely. This base layer will help build the finish and get you ready for further sanding and coating.
-
- Sanding Between Coats (Optional, but Recommended): After the first coat has dried, lightly sand with a very fine grit (400-600) to remove any imperfections. Repeat this process between each additional coat.
After the first coat is dry, lightly sand it with a very fine grit to remove any imperfections, such as dust particles. This step ensures a smooth surface for each additional coat. Repeat this process after each coat for the best result. This step is key for a flawless finish.
-
- Wet Sanding (Final Coats): Wet sand the final coat with a very fine grit (600+) to achieve a mirror-like finish. Use water or a lubricant to keep the sandpaper from clogging.
For the final touch, wet sand the last coat with a very fine grit. Use water or a lubricant to keep the paper from clogging and to get a glossy surface. The water will reduce friction, giving a very smooth result and a perfect surface.
-
- Polishing (Optional): If desired, polish the surface with a rubbing compound and a polishing pad.
This step brings the lacquer to its greatest shine. Apply a rubbing compound and use a polishing pad to buff the surface. This step can remove any slight imperfections and create a bright, reflective finish. This will ensure that your project will have a brilliant shine.
Best Grit Sandpaper for Different Lacquer Applications
The right sandpaper is important in achieving the best results with various types of lacquer finishes. Different types of lacquer, such as clear, colored, and spray-on lacquers, each have their own needs when it comes to sanding. Understanding the specific sanding requirements for each type ensures the best results for your project. Knowing the appropriate grit ranges and techniques for each application helps you get the finish you want.
Clear Lacquer
Clear lacquer is a favorite because it shows off the wood’s natural beauty. It’s often used on furniture, cabinets, and other woodworking projects. Sanding clear lacquer involves a specific process to highlight the clarity of the wood grain. This helps to create a durable, attractive finish. Getting the sanding right with clear lacquer means the grain is showcased.
Preparation: Begin with a medium grit (180-220) to smooth any imperfections. Ensure the wood is completely clean.
Start with a medium grit sandpaper to smooth imperfections on the wood. Clean the wood before applying the first coat. Proper preparation is very important for clear lacquer. This ensures your project is clean and prepares it for the first coat of lacquer.
Between Coats: Sand lightly between coats using a fine grit (320-400) to remove any dust nibs or imperfections.
Use a fine grit between coats to remove dust and make the surface even. This is a must-do step for a smooth, clear finish. Sand lightly to not cut through the finish. Repeat this process between all coats.
Final Smoothing: Wet sand the final coat with a very fine grit (600+) for a crystal-clear, glossy finish. Polishing can enhance the shine.
The final step is to wet sand. Use a very fine grit to remove tiny imperfections. This will give the lacquer a crystal-clear, smooth, glossy finish. Polishing can add a greater shine, if you desire.
Colored Lacquer
Colored lacquer adds color and protection to wood surfaces. From bold colors to subtle shades, colored lacquer provides both visual appeal and durability. Using the right sandpaper ensures that the color is evenly applied and the finish is smooth. Correct sanding also helps create the desired look for the project, whether it is modern, classic, or unique. This creates a surface that is both beautiful and functional.
Initial Sanding: Start with a medium grit (180-220) to prep the wood and eliminate imperfections.
Start with medium grit sandpaper. Make sure the wood is clean and free of any issues. This step ensures that the color goes on smoothly. This is key for creating an even-looking finish.
Between Coats: Gently sand between coats with a fine grit (320-400) to remove dust and promote adhesion.
Sand gently between coats, using a fine grit, to remove dust and bumps and to help with adhesion. This is a key step for a smooth finish and a consistent color. Taking the time to do this correctly creates a polished surface.
Final Sanding: Wet sand with a very fine grit (600+) for an even color and smooth feel. Polishing will enhance the shine.
For the final step, wet sand with a very fine grit to create an even color and a nice feel. This step ensures that the surface is perfectly smooth. Polishing can give the final surface a great shine.
Spray-On Lacquer
Spray-on lacquer is a fast and efficient way to apply a finish, especially for large surfaces or complex shapes. It gives a smooth, consistent finish that is a favorite of both pros and hobbyists. Proper sanding is key to ensure a smooth, professional result. This means choosing the right grits and techniques to enhance the appearance and the lifespan of the lacquer. Getting this right guarantees you an even and perfect surface.
Surface Prep: Use medium grit (220-320) to remove any imperfections on the wood before applying the first coat.
Begin by sanding the wood using medium grit sandpaper. This preps the surface, getting rid of any flaws, and making it even. Preparing the surface well is key to making sure that the spray-on lacquer looks smooth and professional. Proper preparation will ensure great results.
Between Coats: Lightly sand with a very fine grit (400-600) between coats to create a smooth surface for the next layer.
After each coat, lightly sand using a very fine grit. This helps remove any imperfections, like dust particles, and ensures the next layer of lacquer will adhere properly. This will result in an even and professional-looking finish.
Final Polish: Wet sand with a very fine grit (600+) and polish to achieve a professional, glass-like finish.
Wet sand the final coat with a very fine grit to get a glossy finish. You can use polishing to get a very smooth result. This step gives the surface a professional, glass-like appearance. It’s the final touch for a great-looking project.
Common Mistakes to Avoid
When working with lacquer and sandpaper, some mistakes can ruin your project. These errors can lead to an uneven finish, scratches, or a dull look. Being aware of these issues helps you prevent them and get a better result. Learning from these mistakes makes sure you achieve the best outcome.
Using the Wrong Grit
One of the biggest mistakes is using the wrong grit sandpaper for the job. Using a grit that is too coarse can lead to deep scratches that are hard to remove. A grit that is too fine might not be effective at removing imperfections. Matching the sandpaper grit to the specific stage of the lacquer process is important. Choosing the right grit ensures that the finish is even, and the surface looks great. Choosing the correct grit is a core principle to a smooth finish.
Too Coarse: Using sandpaper that is too rough can cause deep scratches. These scratches can be tough to remove, and it can ruin the look of the project. Always move in progression from rougher to finer grits.
Sandpaper that is too coarse can leave deep marks. Starting with sandpaper that is too rough can be detrimental. Always start with a lower grit and change as the surface gets smoother. Make sure you don’t use a rough grit on the final coats. This will help make sure that the finish is smooth and perfect.
Too Fine: If you use a grit that is too fine too early, it might not remove imperfections. You’ll waste time and effort, and you won’t get the desired smoothness. Starting with an appropriate grit ensures that you remove all imperfections.
Using sandpaper that is too fine too early in the process won’t remove imperfections. Use a medium grit at the start to get rid of problems. Then, you can move to finer grits as you get closer to the final coats. By starting with the correct grit, you will be able to remove all defects. This will give you the best finish.
Skipping Grits: Going from coarse to very fine grits without the right steps can cause an uneven finish. Each grit removes scratches left by the previous one, and skipping steps makes this process inefficient. A smooth, even progression is essential.
Skipping grits can cause problems with your finish. If you move directly from coarse grit to very fine grit, you will not remove all imperfections. The result will be an uneven finish. Moving from coarse to fine grits will give you the best outcome. The correct progression ensures that each grit works effectively. It also gives you a smooth and beautiful surface.
Sanding Too Aggressively
Sanding with too much pressure or for too long can harm your finish. It is important to be cautious when working on lacquer projects. Using the right sanding pressure and time will ensure that you don’t damage your project. A light touch and proper technique result in a polished and professional look.
Applying Too Much Pressure: Applying too much pressure can dig into the finish, causing uneven areas or cutting through the lacquer entirely. It’s best to use gentle, even strokes.
Applying too much pressure during sanding can cause damage. Using even strokes and gentle pressure is key to avoid removing too much lacquer and creating a smooth finish. Be aware of the amount of pressure you are applying. Use gentle strokes and let the sandpaper do the work.
Sanding for Too Long: Excessive sanding can remove too much finish, especially on thinner coats. This can lead to a surface that is uneven or worn. It can also reduce the protective qualities of the lacquer.
Sanding for too long can remove the finish. It’s key to know when to stop sanding to keep the lacquer coating intact. You can check the progress frequently to make sure you achieve the right balance. Over-sanding can cause uneven surfaces or remove the protective properties.
Not Sanding With the Grain: Sanding against the grain can create scratches. Always sand in the same direction as the wood grain to maintain a smooth surface. It’s essential to follow the wood’s natural lines for the best results.
Make sure you sand with the grain of the wood. Sanding against the grain can create scratches. Sanding with the grain ensures a smooth and finished result. Always sand in the same direction as the wood’s natural lines. Doing this ensures that your finish will look smooth.
Not Using Proper Safety Measures
When you’re sanding, safety is a must. Fine particles can be released into the air and cause health problems. Following safety guidelines prevents any health issues. Proper safety measures make sure that you can work safely and get the best results.
Not Wearing a Respirator: Sanding produces dust particles that can be harmful. Always wear a respirator to protect your lungs. This will help prevent any respiratory issues.
Sanding causes dust that can be bad for your lungs. Wearing a respirator is essential. A respirator will filter out the particles, letting you sand safely. Using a respirator will prevent health problems and ensure your safety during sanding.
Poor Ventilation: Work in a well-ventilated area to remove dust and fumes. This helps prevent inhaling dust and lacquer fumes, which can cause health issues. Ventilation is key for a healthy environment.
Sanding in a well-ventilated area is key to keeping you safe and healthy. This helps get rid of dust and fumes. If possible, work outside or in an area with good air circulation. Good ventilation ensures that you are breathing clean air and reduces the risk of respiratory problems.
Improper Handling of Materials: Dispose of used sandpaper and lacquer properly. Following safe disposal practices keeps your work environment clean and prevents environmental hazards. Dispose of materials correctly and know local regulations.
Proper disposal of sandpaper and lacquer is important. Dispose of materials in the correct way to keep your work environment clean. Knowing local regulations and following them will keep you safe. Following these steps helps maintain a safe workspace.
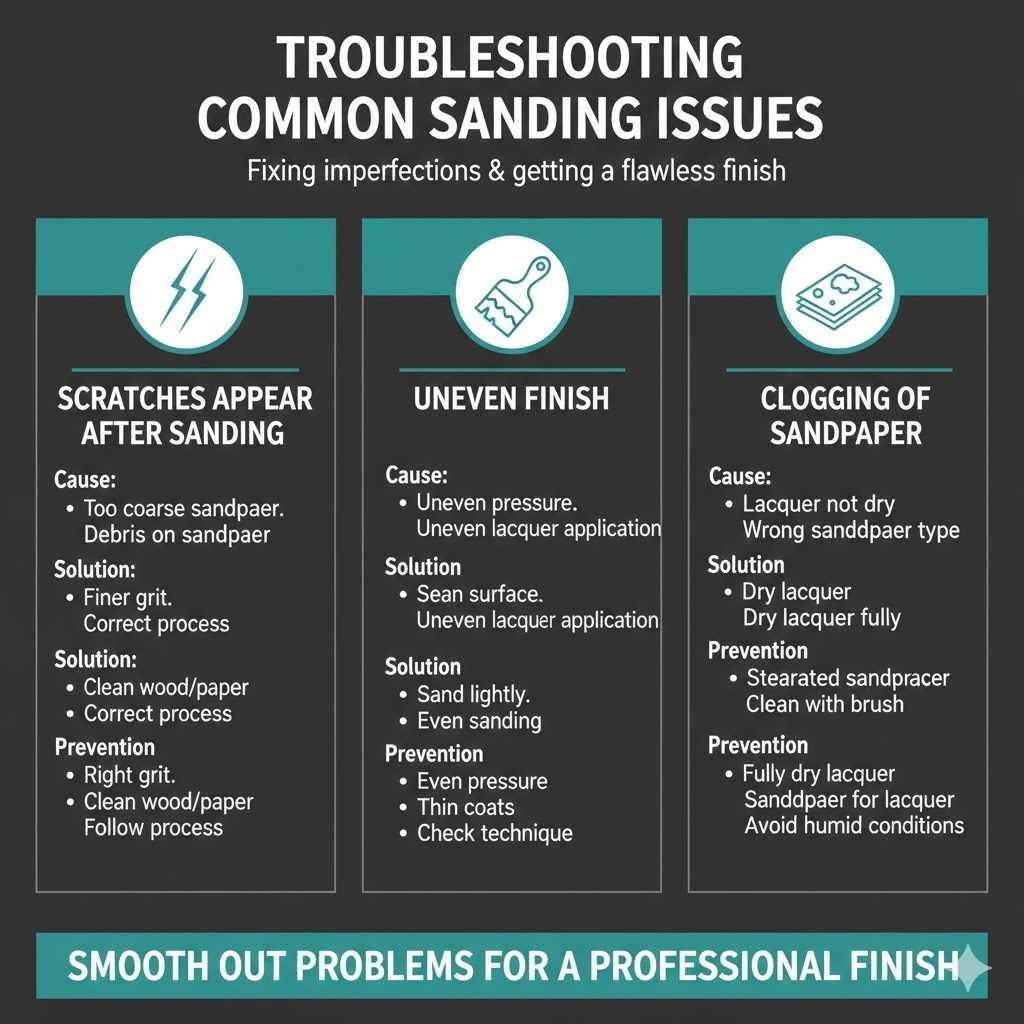
Troubleshooting Common Sanding Issues
Even with careful preparation, problems can happen when sanding. Understanding how to handle these issues will help you fix them. Whether it’s scratches, uneven spots, or other imperfections, knowing the right approach can salvage your project. Here’s a look at some common issues and their solutions.
Scratches Appear After Sanding
Scratches can appear at different stages of the sanding process. Sometimes, they’re from using the wrong grit. Other times, they could be from debris. Finding the source of these scratches will allow you to fix them. Knowing what causes scratches will help you correct them.
Cause: Using sandpaper that is too coarse or continuing with the same grit for too long. Debris on the sandpaper.
Scratches often result from using sandpaper that is too coarse. Sanding with the same grit for too long can also cause them. Make sure that the surface is clear from any debris. Debris can scratch the surface during sanding. Be sure that your workspace is clean, and the sandpaper is free from grit. This will help to prevent scratches from occurring.
Solution: Switch to a finer grit to remove scratches. Clean the surface and the sandpaper. Ensure you are using the correct sanding process.
If you see scratches, switch to a finer grit to get rid of them. Clean the surface. This will remove any small particles. Review your sanding process. If scratches still appear, you can check that you are using the right steps. Doing this will eliminate scratches from your project.
Prevention: Always start with the right grit. Clean the wood and sandpaper frequently. Always follow the right sanding process.
You can prevent scratches by using the right grit at the start. Frequently clean the wood and the sandpaper to get rid of any debris. Also, ensure you follow the correct sanding process. These steps will reduce the chance of scratches during your project.
Uneven Finish
An uneven finish makes the project look unprofessional. This is a common issue that can result from a range of issues. Understanding what causes an uneven finish will help you fix it. These issues can result from several causes. Identifying and fixing the root cause will restore your project’s balance.
Cause: Uneven sanding pressure. Applying too much or too little lacquer.
An uneven finish can be the result of a variety of things. Uneven sanding pressure, for instance, can lead to areas where the lacquer is not smooth. This is key to having a smooth finish. Uneven lacquer application can also cause issues. This might involve applying too much or too little in some areas. Consistent pressure and even application will ensure a great result.
Solution: Sand the uneven areas lightly to level them. Apply the lacquer evenly in thin coats. Ensure you sand the project evenly.
If you see an uneven finish, sand the areas with a light hand to even it out. Apply the lacquer in thin coats. You can also re-sand the project to smooth it out. Make sure that you sand the project evenly to remove any imperfections. Doing this will give you an even finish.
Prevention: Apply even pressure when sanding. Apply lacquer in thin, even coats. Check your technique and make sure you do not use too much pressure.
To prevent an uneven finish, use even pressure when sanding. You should also apply the lacquer in thin coats. The goal is a uniform surface. Doing this will prevent the finish from becoming uneven. Always ensure that you are checking your technique. Then you can make sure that you don’t use too much pressure.
Clogging of Sandpaper
Clogging can slow down the sanding and affect the finish. It makes your work less effective. The right techniques and sandpaper choices can reduce this problem. Taking the time to prevent clogging will improve your results.
Cause: Sanding lacquer before it is completely dry. Using the wrong type of sandpaper.
Clogging can happen if you sand before the lacquer has dried completely. The particles stick to the paper. You can also clog the paper if you use the wrong type of sandpaper. The paper may not have the right coating to prevent particles from sticking. Check that your lacquer has completely dried before sanding. Then, choose the right type of sandpaper.
Solution: Allow the lacquer to dry fully before sanding. Use stearated sandpaper. You can also clean the sandpaper with a brush.
If clogging happens, allow the lacquer to dry completely before sanding. Use a stearated sandpaper, which is designed to prevent clogging. Regularly brush off the sandpaper. These steps can help improve the performance of your sanding process. Choose the right sandpaper for the project. Be certain that your lacquer is dry before you start sanding.
Prevention: Ensure the lacquer is fully dry. Choose sandpaper that is made for lacquer. Avoid sanding in humid conditions.
To avoid clogging, make sure your lacquer is dry before sanding. Use sandpaper that is made for lacquer. Avoid sanding in humid conditions, which can increase the chance of clogging. These measures will ensure the sandpaper stays clean and efficient. These steps will help you achieve a good finish.
Frequently Asked Questions
Question: What grit sandpaper should I start with for sanding lacquer?
Answer: For most projects, start with 180-220 grit sandpaper to remove imperfections and prep the surface.
Question: What is the best grit for sanding between lacquer coats?
Answer: Use a fine grit, usually 320-400, for sanding between coats to remove any imperfections.
Question: Can I use the same sandpaper for both dry and wet sanding?
Answer: Yes, you can. However, silicon carbide sandpaper is often preferred for wet sanding due to its ability to perform well with water or lubricants.
Question: How can I tell if I’ve sanded enough?
Answer: The surface should feel smooth to the touch, and all scratches from the previous grit should be gone.
Question: What should I do if the lacquer finish has runs or sags?
Answer: Let the lacquer dry, then sand the area with a medium to fine grit until the imperfection is gone. Reapply the lacquer.
Final Thoughts
Mastering the Best Grit Sandpaper for Lacquer Finishes is not hard once you understand the steps. You’ve explored grit numbers, sandpaper types, and the right sanding techniques. Remember that choosing the right grit is key for the initial sanding. Wet and dry sanding methods also help in getting a smooth finish. From clear to colored lacquer and spray-on finishes, the proper techniques can make a big difference in how your project looks. Be mindful of common errors and learn how to fix any issues that come up. With practice and attention to detail, you will soon get great results. So, start with the right tools, follow the steps, and enjoy the process. Good luck, and have fun!