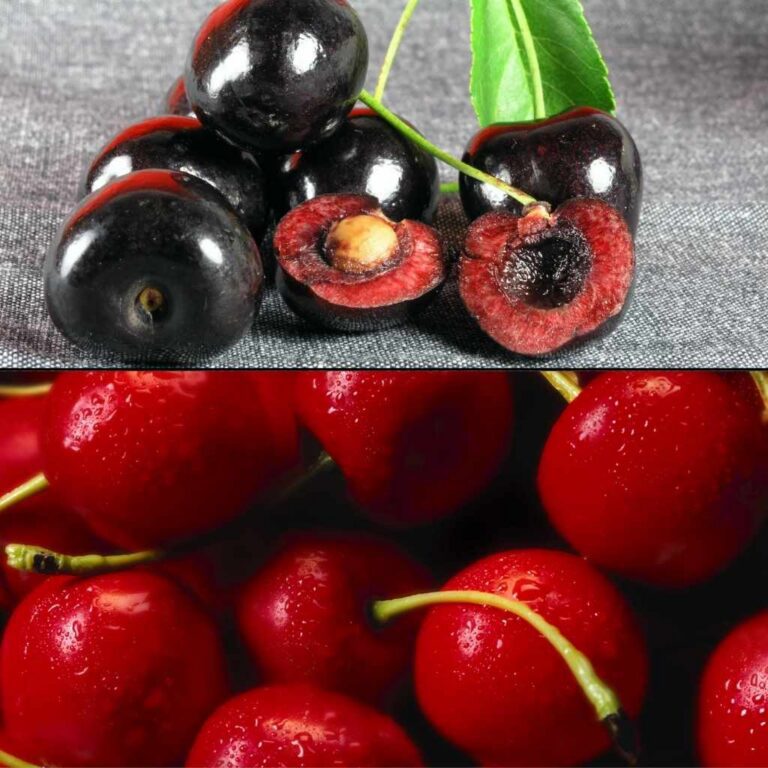
Can I Can Cherry Tomatoes At Home? Beginner Friendly Guide
Canning cherry tomatoes at home is possible using either a boiling water bath method for pickled or acidified tomatoes, or a pressure canning method for plain tomato pulp, ensuring safety through proper acidity levels or high temperatures.
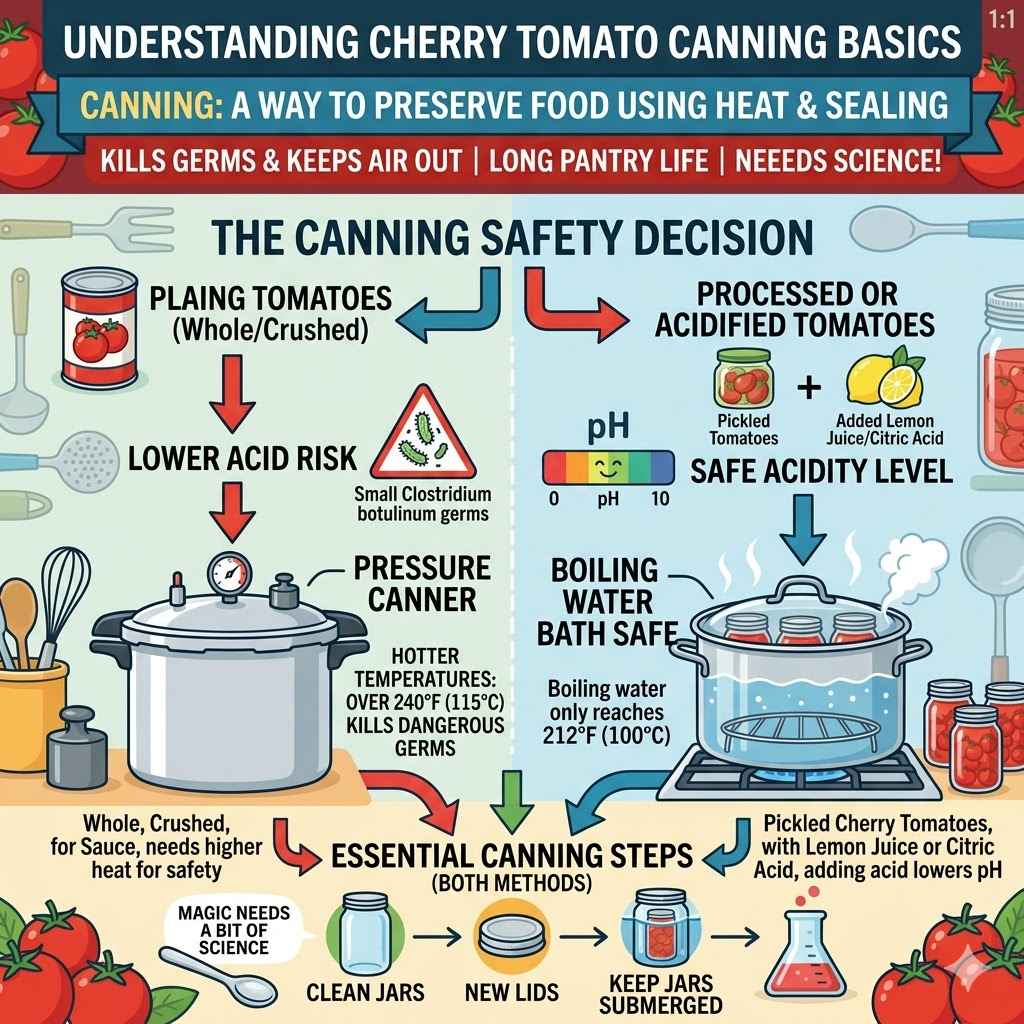
Understanding Cherry Tomato Canning Basics
Canning is a way to preserve food. It uses heat. This heat kills tiny germs.
It also seals food in jars. This keeps air out. Air can make food go bad.
So, canning keeps food fresh for a long time. It’s like magic for your pantry. But this magic needs a bit of science.
Especially for low-acid foods like tomatoes. Tomatoes are mostly water. They also have some acid.
But not always enough acid. This is super important for safety. Germs called Clostridium botulinum can grow.
They like low-acid places. They don’t need air to grow. They can make a deadly poison.
This is why canning tomatoes needs care. We need to make sure they are safe.
There are two main ways to can at home. One is a boiling water bath. The other is a pressure canner.
For plain tomatoes, especially lower-acid ones, a pressure canner is best. This is because it gets hotter than boiling water. It reaches temperatures over 240°F (115°C).
This kills those dangerous germs. Boiling water baths only reach 212°F (100°C). That’s hot enough for high-acid foods.
Things like fruits and pickles. But not plain tomatoes. However, we can make tomatoes safe for a boiling water bath.
We do this by adding acid. We can add lemon juice or citric acid. We can also make them into a pickle.
Pickling adds vinegar. Vinegar is very acidic. This makes the boiling water bath safe for them.
So, the first big decision is how you want your canned tomatoes. Do you want plain, whole cherry tomatoes? Or maybe crushed ones for sauce?
If so, you’ll need a pressure canner. Do you want pickled cherry tomatoes? Or maybe tomatoes packed with added lemon juice?
Then a boiling water bath can work. Both methods need clean jars. They also need new lids.
And they need a way to keep jars submerged. Either in boiling water or under pressure. Knowing this helps you choose the right path.
My Cherry Tomato Canning Adventure: A Lesson Learned
I remember my first summer with a huge cherry tomato plant. It was a monster! Every day, it produced more tiny, sweet gems than I could eat.
I was so excited. I wanted to have that taste in winter. I’d seen pretty jars of tomatoes on Pinterest.
They looked so simple. So, I grabbed some jars from the store. I washed them out.
I put some tomatoes in. I topped them with water. Then I put them in a big pot.
I boiled them for a bit. I thought, “That’s canning, right?” I felt so proud. The jars looked nice on the shelf.
But then winter came. I opened a jar. The tomatoes looked okay.
But the taste… it was off. And a little voice in my head whispered, “Is this safe?” That worry stayed with me. I threw the jar out.
It was a waste. But it taught me a big lesson. Canning isn’t just putting food in a jar.
It’s about science. It’s about safety. I learned I needed the right tools and methods.
I learned I had to follow recipes exactly. That was the moment I decided to really learn about safe canning. And that’s how I ended up with my trusty pressure canner.
The Boiling Water Bath Method for Cherry Tomatoes
Let’s talk about the boiling water bath. This is the simpler method. It feels less intimidating.
But it has rules. Strict rules. Remember, plain tomatoes are not acidic enough.
They can be risky. So, we must add acid. This is non-negotiable.
We use either bottled lemon juice or citric acid. For cherry tomatoes, we usually pack them into jars. Then we add liquid.
This liquid is often water. But it must have the added acid. Or, we can make them into pickled tomatoes.
This means using vinegar.
What You’ll Need:
- Fresh cherry tomatoes
- Canning jars (pint or quart size)
- New canning lids and bands
- Boiling water bath canner (a large pot with a rack)
- Jar lifter
- Funnel
- Ladle
- Bottled lemon juice (NOT fresh, because acidity can vary)
- Or, citric acid
- Or, white vinegar (for pickled tomatoes)
- Water
- Timer
- Clean towels
Getting Ready:
First, wash your jars. Wash them really well. Then, place them in your boiling water bath canner.
Fill the canner with water. Bring the water to a simmer. This heats the jars.
It helps them not break when hot food goes in. Wash your lids. Make sure they are clean.
Do not boil the lids. Just keep them warm. Wash your cherry tomatoes.
Make sure they are firm and ripe. Remove any stems.
Packing the Jars:
Now, fill your hot jars. You can pack them loosely. Or you can pack them firmly.
Be gentle. You don’t want to crush them too much. Leave about 1 inch of space at the top.
This is called headspace. For each pint jar, add 1 tablespoon of bottled lemon juice. For each quart jar, add 2 tablespoons of bottled lemon juice.
If you use citric acid, use 1/4 teaspoon per pint. Use 1/2 teaspoon per quart. Stir it in gently.
Adding Hot Liquid:
Next, add hot water. Use boiling water. Pour it over the tomatoes.
Fill the jar. Leave 1/2 inch of headspace. This is important.
It helps create a good seal. Use a clean damp cloth. Wipe the rim of the jar.
Make sure it’s clean. This is crucial for sealing. Place a warm lid on the jar.
Screw on the band. Just fingertip tight. Do not overtighten.
Overtightening can stop air from escaping. This can cause seals to fail.
The Boiling Process:
Place the filled jars in your canner. Make sure the water covers the jars by at least 1 inch. Bring the water to a rolling boil.
Once it’s boiling hard, start your timer. Process pints for 15 minutes. Process quarts for 20 minutes.
Adjust time for altitude if needed. For example, in Denver, you’d add more time.
Cooling and Checking Seals:
When time is up, turn off the heat. Carefully remove the jars. Use a jar lifter.
Place them on a towel-lined counter. Let them sit undisturbed for 12 to 24 hours. You’ll hear them pop.
That’s the sound of sealing. After 24 hours, check the seals. Press the center of the lid.
If it doesn’t flex or pop, it’s sealed. Remove the bands. Wash the jars.
Store them without the bands. This helps you see if a seal breaks later.
Boiling Water Bath Quick Check
Key for Safety: Add acid (lemon juice or citric acid) to every jar. Always use bottled lemon juice. Check your altitude.
Follow processing times exactly. Wipe jar rims clean. Use new lids.
Pickled Cherry Tomatoes (Boiling Water Bath):
Pickling is a great way to use the boiling water bath. For pickled cherry tomatoes, you’ll use vinegar. A common brine is 1 part vinegar to 1 part water.
You can add spices like dill, garlic, and peppercorns. Pack tomatoes firmly into jars. Add your spices.
Pour hot vinegar brine over them. Leave 1/2 inch headspace. Process in a boiling water bath.
Pints for 10 minutes. Quarts for 15 minutes. Again, adjust for altitude.
The Pressure Canning Method for Plain Cherry Tomatoes
Now, let’s talk about the method for plain, unadulterated tomatoes. This is where the pressure canner shines. It’s a bit more involved.
But it’s the safest way for non-acidic foods. It reaches higher temperatures. This means it kills more types of bacteria.
Including the botulism spores. If you want plain canned tomatoes for sauces, soups, or stews, this is the method you want.
What You’ll Need:
- Fresh cherry tomatoes
- Canning jars (pint or quart size)
- New canning lids and bands
- Pressure canner (with a gauge or weight)
- Jar lifter
- Funnel
- Ladle
- Water
- Timer
- Clean towels
- Optional: Salt for flavor
Getting Ready:
Wash your jars, lids, and bands as before. Place jars in the pressure canner. Add the amount of water your canner manual says.
Usually 2-3 inches. Bring the water to a simmer. Keep jars warm.
Wash your cherry tomatoes. Remove stems. You can leave them whole.
Or you can lightly crush them.
Packing the Jars:
Fill your hot jars with cherry tomatoes. Pack them firmly. You can add 1/2 teaspoon of salt per pint.
Or 1 teaspoon per quart. This is for flavor only. It does not affect safety.
Leave 1 inch of headspace.
Adding Hot Liquid:
You can either use boiling water or boiling tomato juice. Some people like to blanch their tomatoes first. This means dipping them in boiling water for 30 seconds.
Then into cold water. Then peel them. This is optional.
If using boiling water, pour it over the tomatoes. Leave 1 inch of headspace. If using boiling tomato juice (from previous batches or juicing some tomatoes), use that.
Wipe the jar rims clean with a damp cloth. Place a warm lid on the jar. Screw on the band.
Fingertip tight.
The Pressure Canning Process:
Place the filled jars in the pressure canner. Make sure there’s enough water as per your canner’s instructions. Close the canner lid.
Follow your canner’s specific instructions for venting. You need to let steam escape for about 10 minutes. This removes air from the canner.
Air can lower the temperature. Once vented, put on the weight or close the vent.
Now, bring the canner up to pressure. The required pressure depends on your canner type. Dial gauge canners need 11 PSI (pounds per square inch).
Weighted gauge canners need 10 pounds of pressure. Keep the pressure steady. Do NOT let it drop below the required amount.
If it drops, you must start the processing time over.
Process pints for 15 minutes. Process quarts for 20 minutes. Remember to adjust for altitude.
If you are above 1,000 feet, you’ll need to increase pressure. Check your canner’s manual. Or a reliable canning chart.
Pressure Canning – Essential Steps
Vent First: Always vent steam for 10 minutes before closing. Maintain Pressure: Watch your gauge closely. Never let pressure drop below target.
Start Timer After Pressure: Begin timing only when the correct pressure is reached. Altitude Adjustments: Always check and adjust for your elevation.
Cooling and Checking Seals:
When the processing time is done, turn off the heat. Let the canner cool down naturally. Do NOT try to speed this up.
For weighted gauge canners, wait until the pressure is fully released. For dial gauge canners, wait until the dial reads zero. Carefully remove the weight or open the vent.
Then, slowly open the canner lid, tilting it away from you.
Let the jars sit in the canner for another 10 minutes. This helps prevent siphoning (liquid loss). Then, carefully remove the jars with a jar lifter.
Place them on a towel-lined counter. Let them cool undisturbed for 12 to 24 hours. Check seals as described for the boiling water bath method.
Real-World Context: Why These Methods Matter
When we talk about canning, we’re talking about creating a safe environment for food preservation. Think about how food spoils. It’s usually because of mold, yeast, or bacteria.
These tiny organisms need certain conditions to grow. They need air, moisture, and the right temperature. Canning aims to remove these conditions.
The heat kills active organisms. The seal keeps new ones out. And the lack of air stops others from growing.
Tomatoes are a bit tricky. They have a pH between 4.0 and 4.6. This is considered acidic.
But it’s on the border. Some canning experts say they are acidic enough for boiling water bath. But many reliable sources, like the USDA, recommend adding acid.
Or using a pressure canner for plain tomatoes. This is to be extra safe. The risk of botulism is low.
But the consequences are severe. So, it’s better to err on the side of caution.
Consider the environment where these germs thrive. Clostridium botulinum grows best in low-acid, oxygen-free environments. This is exactly what a sealed jar can become.
If the temperature during processing isn’t high enough, these spores can survive. They can then produce a toxin. This toxin is heat-resistant.
Even reheating canned food might not destroy it if it was formed. That’s why the precise temperatures and times are so critical.
Your habits also play a role. Using old jars, reusing lids, or not following recipes precisely can all lead to problems. The quality of your tomatoes matters too.
Use fresh, firm, unblemished tomatoes. Avoid overripe ones. They break down too much and can affect the seal.
Tomato Acidity Chart (Approximate pH)
| Food Item | Approximate pH | Canning Method |
| Most Fruits (Apples, Berries) | 2.9 – 3.9 | Boiling Water Bath |
| Pickles, Sauerkraut | 3.1 – 4.5 | Boiling Water Bath |
| Tomatoes (most types) | 4.0 – 4.6 | Boiling Water Bath with added acid OR Pressure Canning |
| Carrots, Corn, Beans, Meats | 4.6 – 7.0 | Pressure Canning Only |
Note: pH can vary slightly. Always follow tested recipes.
User Behavior and Canning:
Think about it this way. When you bake a cake, you follow a recipe. You measure flour and sugar carefully.
Canning is similar. It’s a scientific process. You need to measure the acid.
You need to time the boiling or pressure. You need to ensure the seal is good. If you skip steps, you risk the food.
Or worse, your health.
Design of Equipment:
The design of your canner is key. A boiling water bath needs to hold enough water to cover jars. A pressure canner needs a precise mechanism to build and maintain pressure.
Using a regular stockpot for pressure canning is dangerous. It cannot reach the necessary temperatures. And it has no safety features for pressure.
What This Means for Your Cherry Tomatoes
So, what’s the takeaway for your delicious cherry tomatoes? It means you have options, but safety must come first. If you love the taste of plain tomatoes, and you don’t have a pressure canner, you might consider buying one.
They aren’t as scary as they seem. In fact, many home cooks find them quite straightforward once they get used to them. Having a pressure canner opens up a world of safe canning for vegetables, meats, and plain tomatoes.
If a pressure canner isn’t in the cards right now, focus on what you can safely do with a boiling water bath. This means making pickled cherry tomatoes. These are fantastic.
They are tangy, sweet, and great in salads or as a snack. You can also can them with added lemon juice or citric acid. This makes them suitable for sauces or stews.
Just be absolutely sure you’re adding the correct amount of acid for the jar size. And use a recipe from a trusted source.
When it’s Normal:
It’s normal for jars to seal. You’ll hear the popping sound. It’s normal for the lids to be concave (curved inward) after cooling.
It’s normal for pickled tomatoes to have a tangy, vinegary taste. It’s normal for tomatoes canned with added lemon juice to have a slightly brighter taste.
When to Worry:
You should worry if a jar does not seal. The lid should be tight. If it flexes when you press it, it’s not sealed.
You should also worry if the lid looks bulging. Or if there is leakage around the rim. Never eat food from a jar with a broken seal.
If the food looks moldy or smells off, discard it. Always trust your senses. When in doubt, throw it out.
This is the golden rule of canning.
Simple Checks:
- Check the seal: Press the lid center. If it moves, it’s not sealed.
- Inspect the jar: Look for bulging lids or leakage.
- Smell the food: Any off smell is a bad sign.
- Examine the appearance: Mold or strange colors mean discard.
For safety, always refer to up-to-date canning guides. Websites like the National Center for Home Food Preservation (NCHFP) are excellent resources. They provide tested recipes and methods.
These are based on extensive research by scientists.
Don’t Forget Altitude!
Why it Matters: Water boils at a lower temperature at higher altitudes. This means regular boiling water bath times might not be long enough. Pressure canners also need adjustments.
They need higher pressure settings.
General Rule:
- Boiling Water Bath: Add 1 minute per 1,000 feet above sea level.
- Pressure Canner: Check your canner’s manual. You usually need to increase pressure, not time. For example, some manuals might suggest 12 PSI for a weighted gauge at higher altitudes.
Always check reliable sources for specific altitude adjustments for your region and canner type.
Quick Tips for Success
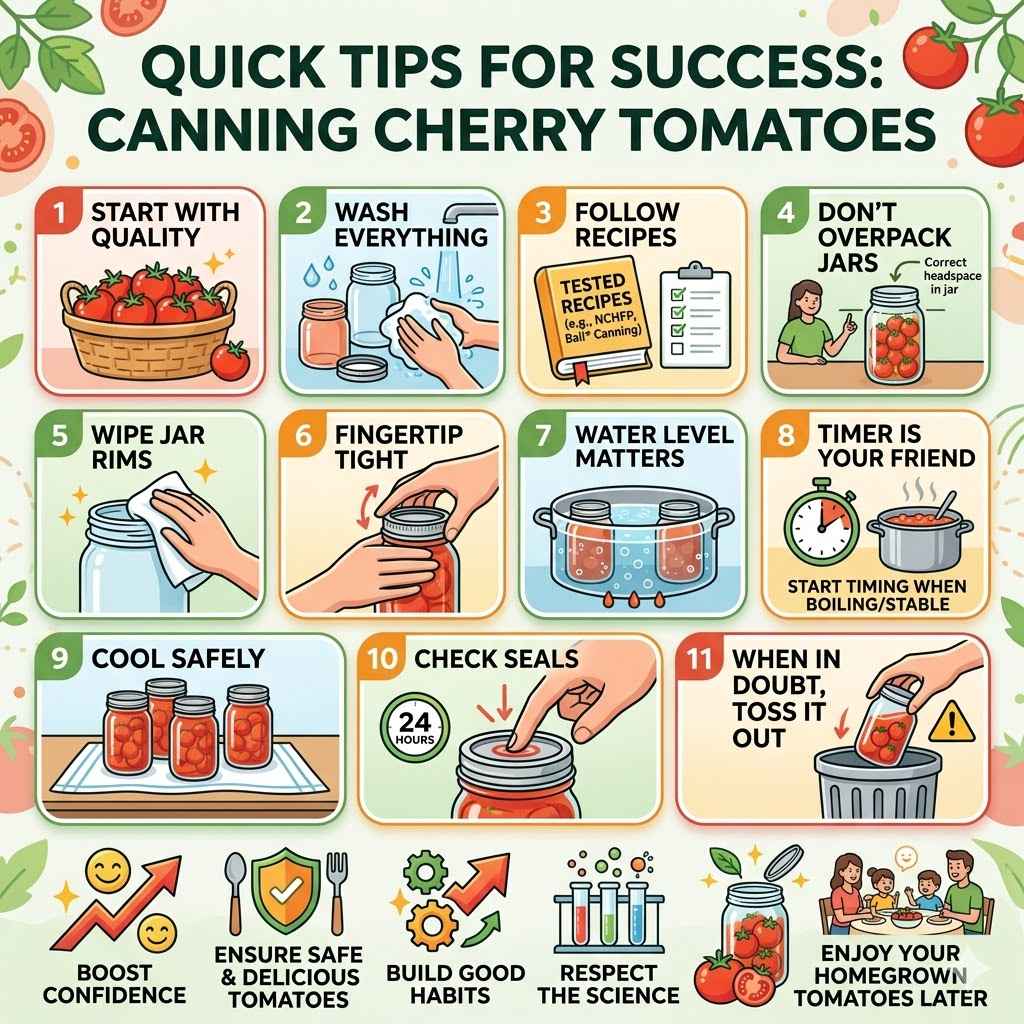
Here are some simple tips to make your cherry tomato canning experience smoother:
- Start with Quality: Use fresh, firm, unblemished cherry tomatoes.
- Wash Everything: Jars, lids, bands, and your hands should be clean.
- Follow Recipes: Use tested recipes from reputable sources like the NCHFP or Ball® Canning.
- Don’t Overpack Jars: Leave the correct headspace.
- Wipe Jar Rims: A clean rim is essential for a good seal.
- Fingertip Tight: Don’t crank down the bands too hard.
- Water Level Matters: Ensure jars are covered adequately in the canner.
- Timer is Your Friend: Start timing only when the water is boiling or pressure is stable.
- Cool Safely: Let jars cool undisturbed.
- Check Seals: Always check seals after 24 hours.
- When in Doubt, Toss it Out: Never risk consuming food that might be unsafe.
These simple steps will boost your confidence. They also help ensure your canned tomatoes are safe and delicious. It’s about building good habits.
It’s about respecting the science. You’ll feel so good opening a jar of your own homegrown tomatoes later.
Frequently Asked Questions About Canning Cherry Tomatoes
Can I can plain cherry tomatoes without adding anything?
It is generally not recommended to can plain cherry tomatoes without adding acid (like bottled lemon juice or citric acid) if using a boiling water bath. For plain tomatoes without added acid, a pressure canner is the safest method. This is because tomatoes are on the border of being acidic enough, and adding acid or using higher heat ensures safety by preventing the growth of harmful bacteria like botulism.
What is the best way to can cherry tomatoes for sauce?
For canning cherry tomatoes to be used in sauces later, the safest and most recommended method is using a pressure canner. This ensures the tomatoes reach temperatures high enough to destroy harmful bacteria. You can pack them whole or lightly crushed, add a little salt for flavor if you like, and process them according to tested pressure canning guidelines for tomatoes.
How much lemon juice do I need per jar of cherry tomatoes?
For a boiling water bath method using added acid, the standard recommendation is 1 tablespoon of bottled lemon juice per pint jar (approximately 16 oz) and 2 tablespoons of bottled lemon juice per quart jar (approximately 32 oz). Always use bottled lemon juice, as its acidity is standardized. If using citric acid, use 1/4 teaspoon per pint or 1/2 teaspoon per quart.
Can I reuse canning lids for cherry tomatoes?
No, it is critical to use new canning lids for every batch of home-canned food. Canning lids have a sealing compound that creates the airtight seal. This compound is designed for single use. Reusing old lids can lead to seal failures, putting your preserved food at risk of spoilage and potential health hazards.
My cherry tomato jar lid popped up after cooling. Is it still safe?
If a jar lid pops up after cooling, it means the seal has failed. Food from a jar with a broken seal is not safe to eat. Spoilage bacteria can enter the jar. You should refrigerate the contents immediately and use them within a few days, or discard them to be safe. Always check seals before storing.
What’s the difference between pickling cherry tomatoes and canning them plain?
The main difference lies in the added ingredients and thus the canning method. Pickling cherry tomatoes involves brining them in vinegar and spices. This high acidity makes them safe for a boiling water bath. Canning plain cherry tomatoes usually means just tomatoes (and maybe salt) packed in water or their own juice. Because they are less acidic, these require a pressure canner for safe preservation.
Final Thoughts on Your Tomato Harvest
Canning cherry tomatoes is a rewarding skill. It allows you to savor your garden’s bounty all year. Remember that safety is the number one priority.
Understand the difference between methods. Always follow tested recipes. Your efforts will pay off.
You’ll have delicious, home-canned tomatoes. They’ll be ready for soups, salads, or just to enjoy. Happy canning!