Can Shellac Be Painted Over: Proven Solutions
Yes, you can absolutely paint over shellac! With the right preparation, painting over a shellac finish on wood is a straightforward project. This guide will walk you through the simple steps to ensure your paint job adheres beautifully, avoiding common mistakes and giving your furniture a fresh new look.
Have you ever encountered a beautiful wooden piece that’s finished with shellac and wondered if you could change its color with paint? Maybe you’ve inherited a piece, or perhaps your design style has changed. It’s a common question among DIYers: “Can shellac be painted over?” The good news is, yes, it can! Shellac is a wonderfully versatile finish, but painting over it does require a specific approach to ensure your new paint adheres well and the finish lasts. Trying to paint directly over shellac without proper preparation can lead to peeling paint, a sticky surface, or a finish that just doesn’t look quite right. But don’t worry, with a few simple steps, you can transform that shellac-coated furniture into a masterpiece. We’ll guide you through everything you need to know, step-by-step, to get a smooth, lasting paint finish.
Why Painting Over Shellac Can Be A Concern
Shellac is a natural resin derived from the lac bug. It dries very quickly and creates a hard, protective finish. While it’s fantastic for sealing wood and providing a base for other finishes, its smooth, non-porous surface can sometimes make it tricky for new paint to grip onto. This is why proper preparation is key! Without it, paint might chip, peel, or scratch off easily. It’s not that shellac itself is a bad surface to paint over; it’s just that it needs a little help to create a strong bond with your chosen paint. Think of it like trying to stick tape to a perfectly smooth, polished surface – it might slide right off. We need to give that tape something to cling to!
Understanding Shellac and Paint Adhesion
Paint needs a surface to “key” into – meaning it needs tiny imperfections or a slightly roughened texture to create a strong bond. Shellac, in its natural state, is very smooth. Think of it like glass. If you try to paint directly onto glass, the paint will likely rub off. However, if you lightly scuff the glass, the paint has something to hold onto. The same principle applies to shellac. We’re not trying to completely remove the shellac; we just need to create a surface that the paint can adhere to effectively. Modern paints and primers are designed with adhesion in mind, but they work best when given a fighting chance, especially over glossy and non-porous finishes like shellac.

Step-by-Step Guide: Painting Over Shellac
Ready to transform your shellac-finished piece? Follow these straightforward steps to ensure a beautiful and durable paint finish.
Step 1: Clean the Surface Thoroughly
Before you do anything else, cleanliness is crucial. Any dirt, grease, wax, or residue on the shellac surface will prevent the primer and paint from adhering properly. Don’t skip this step – it’s foundational!
- Gather your supplies: You’ll need a mild detergent (like dish soap), warm water, clean cloths or sponges, and a separate bucket for rinsing.
- Wash the piece: Mix a small amount of mild detergent with warm water. Dampen a clean cloth (don’t saturate it) and wipe down the entire surface of the shellac.
- Rinse thoroughly: Use a separate cloth dampened with plain water to wipe away any soap residue. It’s important to remove all traces of detergent.
- Dry completely: Pat the surface dry with a clean, lint-free cloth. Allow the piece to air dry completely, which might take an hour or two depending on humidity. Make sure there’s no lingering moisture.
Step 2: Lightly Sand the Shellac
This is the most important step for ensuring paint adhesion. You aren’t trying to remove the shellac, just scuff up its smooth surface so the primer has something to grip.
- Choose your sandpaper: Use fine-grit sandpaper. A grit of 150 to 220 is usually perfect. Avoid anything coarser, as it can create deep scratches that will show through your paint.
- Sand gently: Lightly sand the entire surface you plan to paint. Use gentle, even pressure and sand in the direction of the wood grain if possible. The goal is to create a dull, matte finish, not remove the shellac.
- Inspect your work: The original gloss of the shellac should disappear. If you see shiny spots, continue sanding them until they look dull.
- Clean off dust: After sanding, wipe the surface down thoroughly with a tack cloth or a slightly damp cloth to remove all sanding dust. Dust is the enemy of a smooth paint finish!
Tip: A good tack cloth is invaluable here. Tack cloths are sticky and pick up even the finest dust particles that regular cloths might leave behind. You can find them at any hardware or paint store.
Step 3: Apply a Quality Primer
Primer acts as a bridge between the shellac and your paint. It ensures better adhesion, helps block any potential stains from bleeding through, and provides a consistent base color for your topcoat.
- Choose the right primer: For shellac, a high-adhesion or stain-blocking primer is recommended. Look for primers labeled for use on glossy surfaces or as a bonding primer. Many oil-based or shellac-based primers are excellent for this, as they are formulated to stick to slick surfaces. Water-based (latex) primers can also work, but make sure it’s specifically designed for adhesion on challenging surfaces. A good choice might be a shellac-based primer, which is essentially re-applying a similar type of finish that paint can easily adhere to.
- Apply the first coat: Use a good quality synthetic brush or a foam roller for a smooth finish. Apply thin, even coats. Don’t try to cover everything in one thick coat; multiple thin coats are always better.
- Allow proper drying time: Check the primer can for drying times. It’s essential that the primer is fully cured before you paint over it, not just dry to the touch.
- Lightly sand between coats (optional but recommended): Once the primer is completely dry, you can lightly sand it again with very fine-grit sandpaper (220-320 grit). This will knock down any minor imperfections, brush strokes, or dust nibs, ensuring an ultra-smooth surface for your paint. Wipe with a tack cloth afterwards.
- Apply a second coat of primer: For extra assurance of coverage and adhesion, especially if the original shellac color was dark or your new paint color is very light, a second primer coat can be beneficial.
Step 4: Apply Your Paint
Now for the fun part! With your surface properly prepped and primed, applying your paint will be much easier and the results will be far superior.
- Choose your paint: Most types of paint can be applied over a properly primed surface. Latex or acrylic paints are common choices for furniture and DIY projects due to their ease of use and cleanup. For added durability, especially on high-traffic items, consider a paint with a built-in topcoat or a durable enamel.
- Apply thin coats: Just like with primer, apply your paint in thin, even coats. This prevents drips and ensures a smooth, consistent finish.
- Use the right tools: A high-quality synthetic brush will give you a smooth finish for edges and details, while a foam roller or a fine-nap roller is great for larger, flat surfaces.
- Allow adequate drying time: Each coat of paint needs sufficient drying time as per the manufacturer’s instructions. Rushing this can lead to imperfections.
- Sand lightly between coats (optional but highly recommended): After the first coat of paint is dry, you can lightly sand any rough spots with very fine-grit sandpaper (320-400 grit), then wipe with a tack cloth. This step makes a big difference in the final smoothness of your paint job.
- Apply multiple coats: Most projects will require at least two coats of paint to achieve full coverage and a rich color. A third coat might be needed for very vibrant or dark colors.
Step 5: Apply a Topcoat (Optional but Recommended for Durability)
While many modern paints are quite durable on their own, an extra protective layer can shield your paint job from wear and tear, making it last even longer.
- Choose a topcoat: Options include a clear brush-on polyurethane, a spray-on clear coat, or even a furniture wax. For painted surfaces, water-based polyurethanes are often preferred as they are less likely to yellow over time, especially if you’ve used a light-colored paint.
- Apply thinly: Apply the topcoat in thin, even coats, following the manufacturer’s instructions.
- Allow full curing: Topcoats often take a significant amount of time to cure fully (not just dry to the touch). Check the product instructions for the recommended curing period before putting the piece back into regular use.
Tools and Materials You’ll Need
Gathering the right supplies before you start will make the process much smoother. Here’s what you’ll typically need for painting over shellac:
| Category | Supplies | Notes |
|---|---|---|
| Cleaning | Mild dish soap or degreaser | For removing grease and dirt |
| Clean cloths or sponges | For washing and rinsing | |
| Lint-free cloths | For drying | |
| Sanding | Fine-grit sandpaper (150-220 grit) | For scuffing shellac; 320-400 grit for primer/paint |
| Sanding block (optional) | For even pressure | |
| Dust Removal | Tack cloth | Essential for removing fine dust |
| Priming | High-adhesion or stain-blocking primer | Oil-based or shellac-based primers are excellent choices |
| Synthetic bristle brush or foam roller | For smooth application | |
| Painting | Your chosen paint (latex, acrylic, enamel) | Select based on desired finish and durability |
| Synthetic bristle brush or fine-nap roller | For smooth coats | |
| Topcoat (Optional) | Clear polyurethane, varnish, or furniture wax | For added protection |
| Applicator for topcoat | Brush or cloth, depending on product |
Common Mistakes to Avoid
Even with the best intentions, a few common pitfalls can derail your project. Knowing about them can help you sidestep them entirely.
- Skipping the cleaning step: Trying to prep a greasy or dirty surface is a recipe for disaster. Paint won’t stick to grime.
- Sanding too aggressively: Using sandpaper that’s too coarse can create unsightly scratches that show through your paint. You’re just trying to de-gloss, not remove everything.
- Not sanding at all: This is the number one reason paint fails to adhere to shellac. The smooth surface needs to be roughed up for the paint to grip.
- Using the wrong primer: Some primers just aren’t designed to stick to slick surfaces like shellac. Always choose a primer known for good adhesion.
- Applying paint too thickly: Thick coats dry unevenly, can sag, and take much longer to cure. Thin, multiple coats are always best.
- Not waiting for proper drying/curing times: Applying new coats too soon or using the piece before the paint or topcoat is fully cured will lead to damage and a poor finish. Patience is a virtue here!
When Shellac Might Be Difficult to Paint Over
While usually paintable, there are some scenarios where shellac might present more of a challenge:
- Heaving build-up of shellac: If the shellac finish is very thick and has been applied in countless layers over many years, it might be more prone to peeling if not perfectly adhered. In extreme cases, you might consider sanding back more aggressively or even using a chemical stripper, but for most DIYers, careful prep is usually sufficient.
- Contamination underneath the shellac: If the wood was contaminated with wax or oil before the shellac was applied, these contaminants could potentially bleed through or affect adhesion, even after prepping the shellac surface. This is why thorough cleaning in Step 1 is so vital.
- Unknown previous finishes: If you’re unsure if the finish is only shellac, or if other finishes have been applied over or mixed with it, testing your preparation steps in an inconspicuous area is wise. Sometimes, a finish might be a varnish or lacquer that looks like shellac but behaves differently.
For most standard shellac finishes, the method described above will be perfectly effective. If you suspect a very old or complex finish, a small test area is always a good idea. You can learn more about wood finishes from resources like the Forest Products Laboratory, a division of the U.S. Forest Service, which provides extensive research on wood and its treatments.
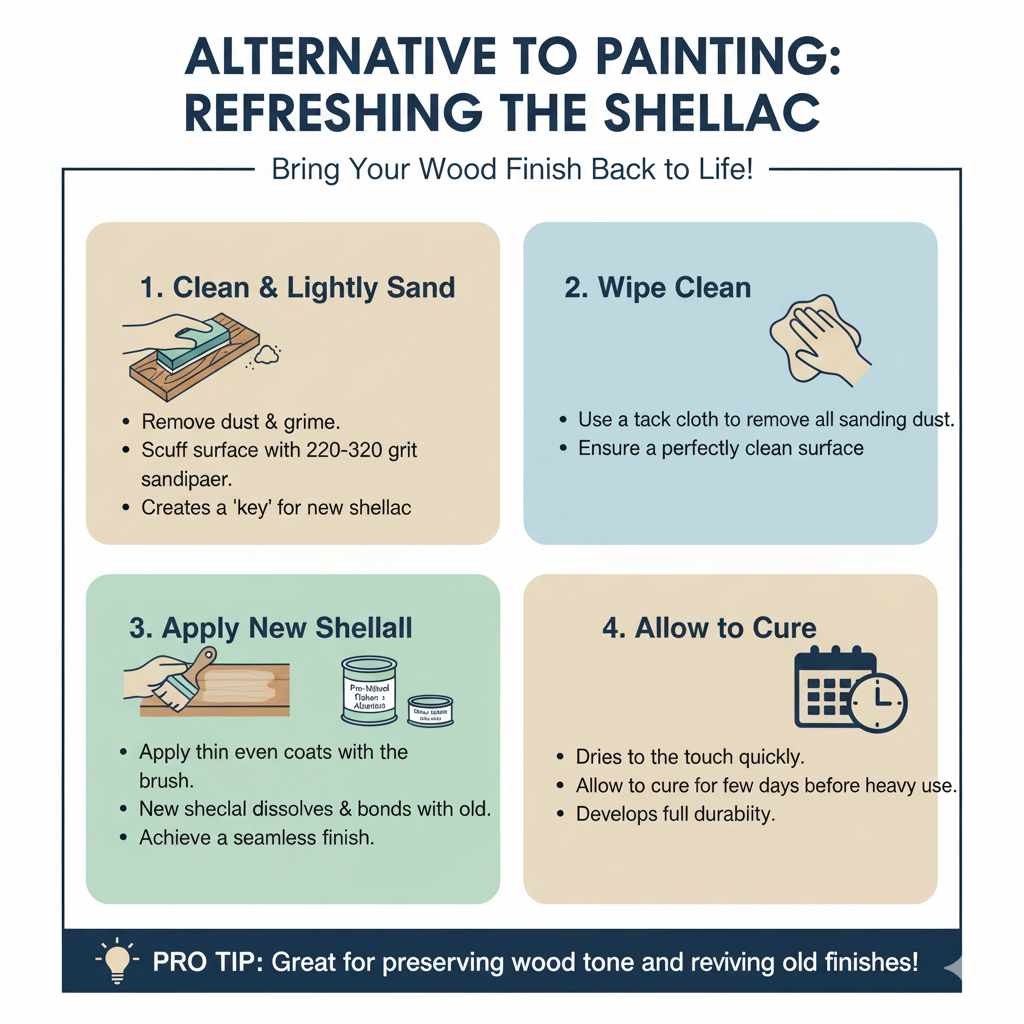
Alternative to Painting: Refreshing the Shellac
If you decide painting isn’t the right route for your piece, or if you love the wood’s tone but want to refresh the finish, you can often reapply shellac. Shellac is unique in that new shellac will dissolve and bond with old shellac, creating a seamless finish. Here’s a quick overview:
- Clean and lightly sand: Clean the piece as you would for painting, then lightly scuff the surface with fine-grit sandpaper (220-320 grit) to ensure good adhesion of the new shellac.
- Wipe clean: Remove all dust with a tack cloth.
- Apply new shellac: You can buy pre-mixed shellac in cans or buy flakes and mix them with denatured alcohol yourself. Apply thin coats with a good quality brush or a “French polish” technique for a high-gloss finish.
- Allow to cure: New shellac dries very quickly to the touch, but it’s best to let it cure for a few days before heavy use.
This is a great option if you want to maintain the traditional look of shellac while updating its sheen or covering minor dings.
Frequently Asked Questions (FAQ)
Q1: Can I paint over old shellac?
Yes, you can paint over old shellac, provided you clean the surface thoroughly and lightly sand it to create a dull finish. This prepares the surface for primer and paint adhesion.
Q2: Do I need to prime before painting over shellac?
Absolutely. Priming is a critical step. A good quality primer will ensure your paint adheres properly, prevent any underlying stains from bleeding through, and give you a uniform base for your topcoat.
Q3: What kind of sandpaper should I use on shellac?
Use fine-grit sandpaper, typically between 150 and 220 grit. The goal is to lightly scuff and de-gloss the surface, not to remove the shellac or create deep scratches.
Q4: Can I use latex paint over shellac?
Yes, you can use latex paint over shellac, but only after you have properly cleaned, sanded, and applied a suitable primer designed for adhesion on slick surfaces.
Q5: My shellac finish is sticky. Can I paint over it?
A sticky shellac finish might indicate it hasn’t fully cured or is reacting to something. It’s best to allow it to cure completely. If it remains sticky, you may need to lightly sand it again and ensure it’s clean before priming. Sometimes, a light wash with denatured alcohol can help if it’s still tacky due to incomplete drying, but test in a hidden spot first.
Q6: Will the paint eventually peel if painted over shellac?
If the shellac is properly cleaned, scuffed, and primed with a suitable bonding primer, the paint should adhere well and not peel. Following all the steps in this guide significantly minimizes the risk of peeling.
Q7: Can I skip sanding if I use a special “grip” primer?
While some primers are advertised as adhering to glossy surfaces without sanding, it is ALWAYS recommended to lightly sand shellac. Shellac is often problematic for adhesion, and sanding provides a mechanical key that even the best primers benefit from. Skipping sanding is a common cause of paint failure on slick finishes.