Can You Use Joint Compound On Plywood Walls? Here’S How
Joint compound is a key player in home finishing. Most people know it as “mud.” It’s used for drywall. It fills seams and covers screws.
This makes walls look smooth. Plywood is different. It’s made of wood layers.
These layers are glued together. Plywood is strong and stable. But its surface is not always perfectly smooth.
It can have grain. It might have small gaps.
Using joint compound on plywood aims for a smooth, paintable surface. This is often desired for a clean look. It can hide the wood grain.
It can also cover up any minor imperfections. The goal is to make the plywood look like a solid wall. It’s about achieving a uniform finish.
Can You Use Joint Compound on Plywood Walls?
Yes, you can use joint compound on plywood walls. However, it requires more prep work than drywall. Plywood is more flexible and porous than drywall. This means it can expand and contract more. It also absorbs moisture differently. Proper sealing and priming are crucial. You’ll also need more coats of compound. This helps create a smooth, uniform surface that hides the wood grain. It’s not a simple patch-and-paint job. It needs care.
The Process: Making Plywood Wall-Ready
Getting plywood ready for joint compound isn’t hard. It just takes a few extra steps. Think of it as giving the plywood a good base.
This base helps the compound stick. It also stops the wood from causing problems later.
First, clean the plywood well. Make sure it’s free of dust and dirt. Any grit will show up later.
Sanding is also a good idea. Lightly sand the entire surface. This breaks up any smooth or glossy spots.
It gives the compound something to grip. Wipe away all the sanding dust. A tack cloth works great for this.
Next, consider sealing the plywood. This is important. Plywood can sometimes “bleed” through.
This means oils or tannins from the wood can seep into the compound. This can cause stains. A good oil-based primer or stain blocker is your friend here.
Apply it evenly. Let it dry completely. This seals the wood.
It stops those bleeds.
You might also need to fill any visible gaps or knots. Small ones can be filled with a wood filler. Larger ones might need a different approach.
Once the primer is dry, you’re ready for the first coat of joint compound.
Applying Joint Compound: Tips for Success
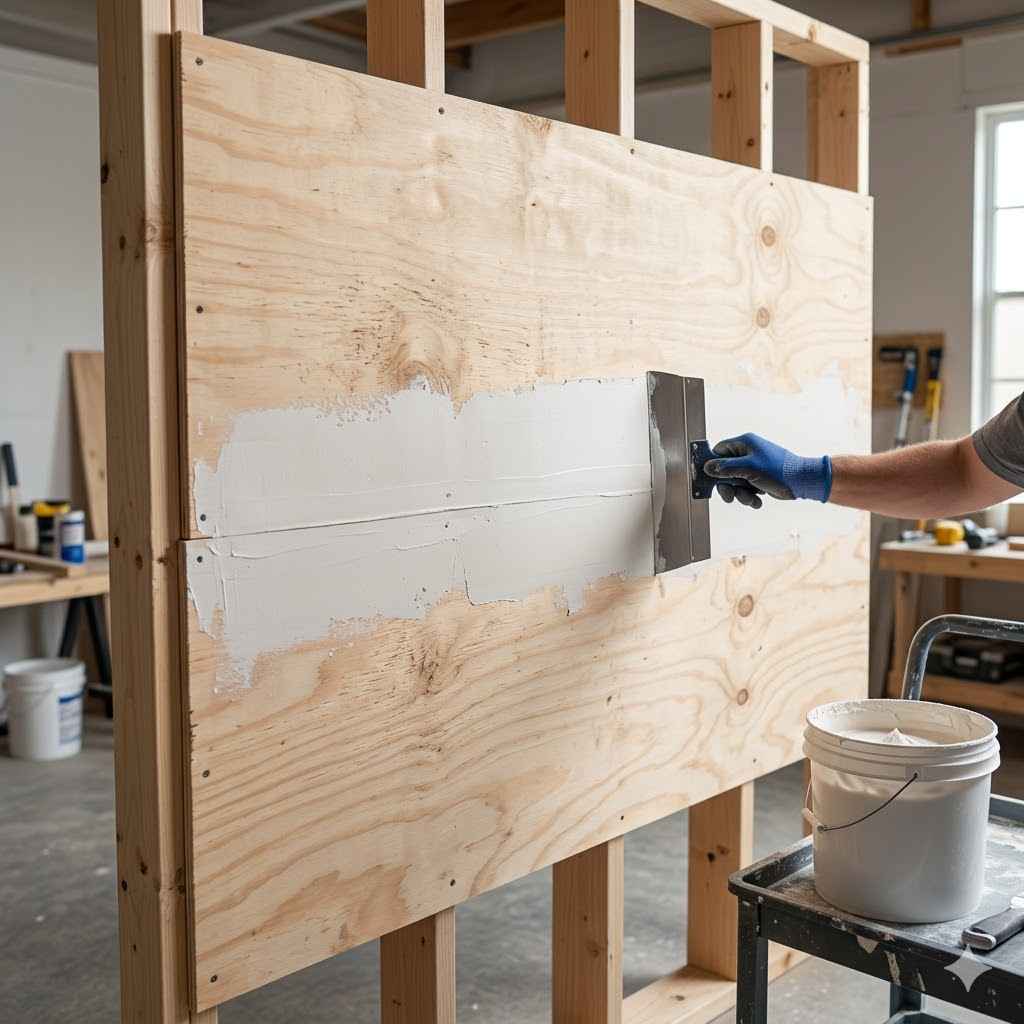
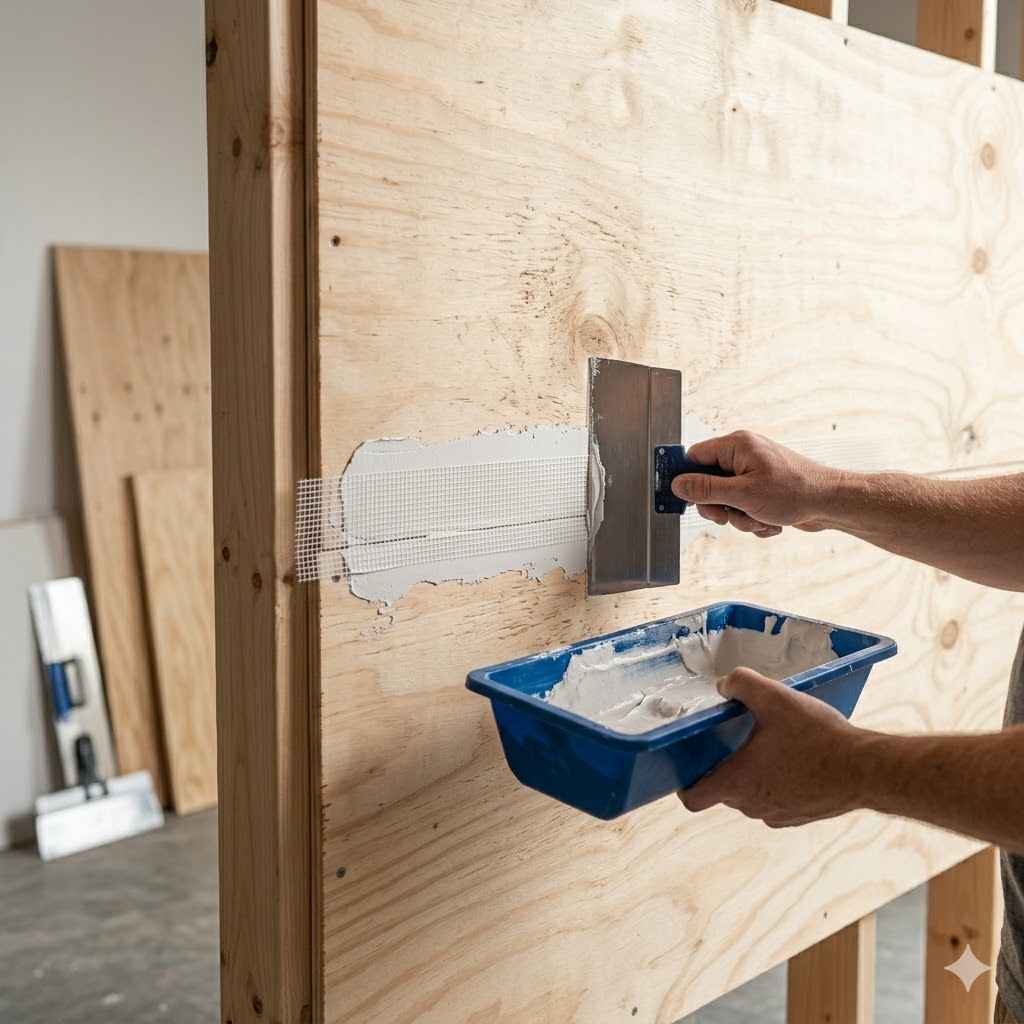
Applying joint compound to plywood needs patience. It’s not like drywall where you’re just covering seams. Here, you’re covering the whole face.
This is called “full-coating” or “skimming.”
Start with a thin layer. Use a wide drywall knife or trowel. Spread the compound evenly.
Try to keep the layer as thin as possible. The goal is to even out the surface. Don’t try to make it perfect on the first pass.
You’re just filling the bigger dips and hiding the wood grain.
Let this first coat dry completely. This can take many hours, or even overnight. Drying time depends on humidity and temperature.
Once it’s dry, inspect your work. You’ll likely see areas that still need more. You might see some grain peeking through.
You might see some low spots.
Lightly sand the dried compound. Again, wipe away all dust. Then, apply a second, thin coat.
Feather the edges well. This means making the edges of the compound very thin so they blend into the plywood. This makes the next coat look smoother.
You might need a third coat. This is common. Each coat should be thinner than the last.
The idea is to build up a smooth surface. Always let each coat dry fully. Then, sand it smooth.
Dust removal is key after every sanding step.
Sanding: The Key to a Smooth Finish
Sanding is where the magic happens. But it can also create a lot of dust. Always wear a dust mask.
Eye protection is a good idea too. For large areas, a pole sander can help. For smaller spots, a sanding sponge is useful.
Use medium-grit sandpaper for the first few coats. Think 120-grit. This removes high spots.
It smooths out trowel marks. After the final coat of compound, switch to a finer grit. Use 180 or 220-grit sandpaper.
This gives you that super smooth feel. You want it ready for paint. It should feel like glass.
Don’t over-sand. You don’t want to sand through the compound to the wood again. Just smooth out the lumps and bumps.
After your final sanding, vacuum up as much dust as you can. Then, wipe the wall with a damp cloth or a tack cloth. This gets the last bits of fine dust off.
A clean surface is vital for paint.
Priming and Painting Plywood Walls
Once your joint compound is sanded smooth and dust-free, you’re almost done. The final steps are priming and painting. This seals the compound.
It gives your paint a good base to stick to. It also ensures the color looks even.
Use a good quality primer. A water-based latex primer is often fine here. But if you had any concerns about bleed-through earlier, an oil-based primer is a safer bet.
Apply the primer evenly. Let it dry completely according to the can’s instructions. Check for any missed spots or rough areas after priming.
After the primer dries, you might want to do a very light sanding. This is a light touch-up. It catches any imperfections you might have missed.
Wipe away the dust again. Then, you’re ready for paint. Apply your chosen paint in thin, even coats.
Two coats are usually best for full coverage.
Quick Plywood Wall Prep Checklist
- Clean the plywood surface.
- Lightly sand the entire wall.
- Wipe away all dust.
- Apply a quality stain-blocking primer.
- Let primer dry completely.
- Apply thin coats of joint compound, sanding between coats.
- Use fine-grit sandpaper for the final smooth finish.
- Wipe away all dust after final sanding.
- Apply a second coat of primer.
- Let primer dry.
- Paint the wall with your chosen color.
Why Not Just Use Drywall?
Drywall is the standard for interior walls. It’s designed for this job. It comes in large sheets.
It’s relatively inexpensive. It’s easy to cut and hang. And joint compound is made to work seamlessly with its paper face and gypsum core.
Plywood, however, is a wood product. It’s often used for sheathing. It’s used for subflooring.
It can be used for decorative walls. But its properties are different from drywall. It can warp.
It can expand and contract with humidity changes. These movements can sometimes cause the joint compound to crack. This is less common with drywall.
Drywall is also fire-resistant. Plywood is flammable. For interior wall applications where fire safety is a major concern, drywall is the preferred choice by building codes in many areas.
Potential Problems and How to Avoid Them
Even with careful work, issues can pop up. One common problem is cracking. This can happen if the plywood moves too much.
Or if the joint compound layers are too thick. Or if it wasn’t allowed to dry fully between coats.
To avoid cracking:
- Use thin coats of compound.
- Let each coat dry completely.
- Consider using a flexible caulk along edges and corners if movement is expected.
- Ensure the plywood is well-supported and not prone to flexing.
Another issue is adhesion. If the plywood isn’t prepped right, the compound might not stick well. This is why cleaning, light sanding, and priming are so important.
Skipping these steps is asking for trouble.
Discoloration or “bleed-through” is another concern. This is when something from the wood travels into the compound. It can look like yellow or brown stains.
A good stain-blocking primer is the best defense. Apply it generously. Make sure it covers everything.
When to Choose Alternatives to Joint Compound on Plywood
Scenario: You want a rustic or natural wood look.
Best Choice: Leave the plywood finish exposed. Use a clear sealant or stain. You might use a wood conditioner first.
Scenario: You need a very durable, impact-resistant wall surface.
Best Choice: Consider wood paneling, decorative metal sheets, or even a thicker wainscoting application. These are harder to damage.
Scenario: You are in a high-moisture area like a bathroom or kitchen and want a seamless look.
Best Choice: While joint compound can be used with lots of care and proper sealing, consider other materials. Waterproof panels or tiles are a safer, more reliable option.
Alternatives to Full Coating Plywood
What if you don’t want to skim coat the entire plywood wall? There are other ways to finish it.
One option is using wood filler for seams only. If your plywood has large gaps between panels, you can fill them. Use a wood filler that dries hard.
Sand it smooth. Then, you can paint over the whole wall. The seams will be filled, but the wood grain will still show.
This gives a more natural, textured look.
Another idea is to use thin decorative panels over the plywood. You could install beadboard panels. Or you could use a thin layer of authentic wood veneer.
These cover the plywood surface. They give a new look without needing a full mud job.
Wallpaper is also an option. A good quality wallpaper can cover plywood. It hides the grain and any minor imperfections.
Make sure the plywood surface is smooth enough for the wallpaper to adhere well. Proper prep is still key.
Contrast: Full Skim Coat vs. Seam Filling
| Full Skim Coat | Seam Filling Only |
| Goal: Completely smooth, uniform surface like drywall. | Goal: Hide gaps between panels, keep wood texture visible. |
| Effort: High. Multiple coats, extensive sanding. | Effort: Medium. Focus on seams, less overall sanding. |
| Look: Seamless, modern, ready for any paint color. | Look: Textured, natural wood feel, rustic charm. |
| Durability: Can be less durable if underlying plywood flexes. | Durability: Wood texture can hide minor wear better. |
When is Plywood a Good Choice for Walls?
Plywood walls aren’t always about covering them up. Sometimes, the plywood itself is the desired finish. Think of modern or industrial decor.
The visible wood grain and texture can be a feature. In these cases, you’d want to enhance, not hide.
For a natural wood look, clean the plywood well. Sand it smooth. Then, use a clear coat or a light stain.
This brings out the wood’s natural beauty. It protects it. It’s much simpler than using joint compound.
Plywood is also great for utility areas. Garages or workshops can benefit from its durability. You might paint it for a cleaner look.
Or leave it as is. It withstands bumps and scrapes better than a fully plastered wall.
In some DIY projects, plywood acts as a great base. You might add wainscoting. Or you might cover it with tile.
It provides a solid, stable surface to attach other materials to. It’s a versatile building material.
Real-World Application: My First Plywood Mud Job
I remember my first attempt at putting joint compound on a plywood wall. It was a small accent wall in a guest room. I wanted it smooth and painted a deep blue.
I thought, “How hard can it be?” I watched a few videos. I bought a big bucket of all-purpose joint compound.
I cleaned the plywood. I even gave it a light sanding. But I skipped the primer.
I figured it would be okay. I slapped on the first coat. It was thick in places.
It was thin in others. The wood grain poked through. It looked lumpy.
I let it dry. Then I sanded. Oh, the dust!
It was everywhere. I applied a second coat, trying to smooth things out. It was better, but still not great.
I ran into a problem with a knot in the plywood. It seemed to be bleeding through the compound. I was getting frustrated.
This was taking way longer than I expected.
After a third coat and more sanding, it was finally almost smooth. I learned my lesson. The next time, I made sure to prime.
I used thinner coats. I was much more patient. And I realized that for a truly flawless finish on plywood, it’s a commitment.
My Plywood Skim Coating Journey: A Timeline
Day 1: Morning – Prep Work
Cleaned plywood. Light sanding. Wiped down all dust.
Applied first coat of oil-based stain-blocking primer. Felt good about being thorough!
Day 1: Afternoon – First Coat of Mud
Applied a thin, even coat of joint compound. Focused on filling minor gaps and starting to hide the grain. Left it to dry overnight.
Day 2: Morning – Sanding & Second Coat
Lightly sanded the dried compound. Wiped away dust. Applied a second, even thinner coat.
Feathered edges carefully. Another overnight dry.
Day 3: Morning – Final Sanding & Touch-ups
Sanded with fine-grit paper until it felt super smooth. Checked for imperfections. Applied a few tiny touch-ups where needed.
Thoroughly dusted again.
Day 3: Afternoon – Final Prime & Paint Prep
Applied a final coat of primer. Let it dry. The wall looked like a dream!
Ready for paint.
What This Means for Your Project
If you’re looking at plywood walls and want a smooth, painted finish, understand the effort involved. It’s not a weekend warrior job if you want it done right. It requires patience and attention to detail.
For simple repairs or small areas, it’s manageable. But for an entire room, consider if the end result is worth the labor. Are you looking for a quick fix, or a long-lasting, perfect finish?
Your goal will guide your choice.
If you decide to go for it, remember the key steps: proper cleaning, sealing, thin coats of compound, thorough drying, and careful sanding. These are non-negotiable for success. Don’t skip the primer!
Is It Normal for Plywood to Show Grain?
Yes, it is absolutely normal. Plywood is made of wood layers. The natural texture and grain of the wood are part of its character. Unless it’s a very high-end, sanded plywood with a very tight grain, you will see it.
This is why people choose to cover it if they want a smooth, drywall-like finish. If you like the wood look, it’s beautiful just as it is!
When to Worry About Your Plywood Wall Finish
You should worry if the joint compound starts to crack and peel. This is a sign of a bigger problem. It could be moisture.
It could be the plywood expanding and contracting too much. It could be that the compound wasn’t applied correctly.
If you see significant sagging or warping in the plywood itself, that’s a concern. Joint compound won’t fix structural issues with the wall. You might need to reinforce the plywood or address the underlying cause of the movement.
Also, if you notice mold or mildew growth. This indicates a moisture problem that needs to be dealt with immediately. Joint compound and paint are not waterproof.
They can trap moisture. This can lead to bigger issues.
A simple check is to tap the wall. Listen for hollow sounds. This might mean the compound isn’t well adhered.
Or there’s a gap behind it. Small imperfections are normal. But major structural or adhesion issues need attention.
Quick Fixes and Tips for Plywood Walls
For minor surface issues on plywood walls that you want to paint, here are some quick tips:
- Spot Repair: For small dings or scratches, use a light spackle or wood filler. Sand smooth and touch up with primer and paint.
- Texture Spray: If you can’t get the smoothness perfect, consider a textured spray paint. This can hide minor imperfections in the compound or wood grain.
- Caulk Lines: For very crisp, clean lines where the wall meets the ceiling or trim, use paintable caulk. This fills tiny gaps and creates a seamless look.
- Sandpaper Grit: Always start sanding with a medium grit and finish with a fine grit for the smoothest surface.
- Dust Control: A shop vacuum with a good filter attached to your sander (if possible) makes a huge difference in dust.
Frequently Asked Questions
Can I use regular spackle instead of joint compound on plywood?
Spackle is best for very small holes and cracks. Joint compound is much stronger and better for larger areas or full wall coverage on plywood. For a whole wall, joint compound is the way to go.
How many coats of joint compound do I need on plywood?
This depends on the plywood surface. Most often, you will need at least two to three thin coats. Some very rough plywood might need more.
The goal is to build up a smooth surface.
What is the best way to prime plywood before using joint compound?
Use a good quality stain-blocking primer, preferably oil-based. This seals the wood and prevents tannins from bleeding through the joint compound and paint. Apply it evenly and let it dry completely.
Can I paint directly on plywood without joint compound?
Yes, you can paint directly on plywood. However, the wood grain and any imperfections will show. You need to prep the surface well by cleaning, sanding, and priming it.
It will not have the smooth, seamless look of a joint-compound-finished wall.
Will joint compound hide the plywood texture completely?
With enough thin coats and careful sanding, joint compound can completely hide the plywood texture and grain. It takes patience and practice to achieve this level of smoothness.
Is joint compound on plywood durable in the long run?
It can be durable if applied correctly on a stable plywood surface. However, plywood is more prone to expansion and contraction than drywall. This movement can sometimes lead to cracking of the joint compound over time, especially in humid environments or if the plywood isn’t properly secured.
Conclusion: A Smooth Finish is Achievable
So, yes, you can absolutely use joint compound on plywood walls. It’s a great way to achieve a smooth, paintable surface. But it’s a project that asks for your attention.
Proper prep work, like priming and sealing, is your best friend. Applying thin, even coats of compound and sanding with care will lead to a beautiful result. Be patient.
Enjoy the process, and your walls will thank you for it.