How to Build a Miter Saw Table (DIY Plans + Dimensions)
A solid miter saw table needs a recessed center section, level with the saw’s cutting deck, flanked by two support wings held at 34 to 36 inches high with at least 2 inches of clearance on each side of the saw base. Skip this and long boards sag, throwing off every angle cut. This guide covers the frame and cut list, the recessed-center layout, and the dust-collection details most plans skip.
What You Need: Materials, Tools, and Cut List
Best Miter Saw Stand Pick
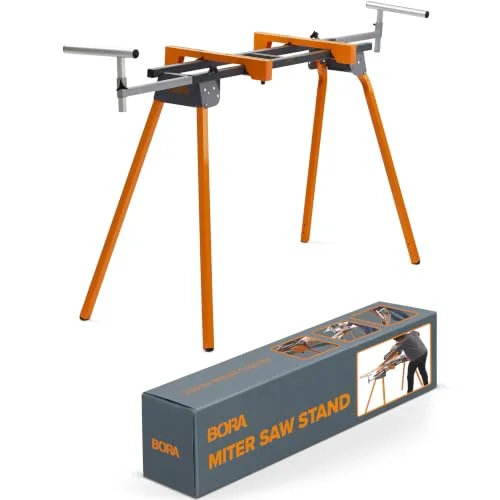 |
BORA Miter Saw Stand PM-4000, Universal Fit – $91.23 If you’d rather skip the build, this folding stand gives you the same wing-support concept from this guide without cutting a single board.
|
As an Amazon Associate we earn from qualifying purchases.
Most miter saw tables use 3/4-inch plywood for the top and support wings, with a 2×4 frame underneath. Check your plywood with a tape measure before buying — a lot of “3/4-inch” sheet goods actually measure closer to 23/32 inch, which throws off tight-tolerance joints if you don’t account for it.
- 3/4-inch plywood or MDF — tabletop, wings, and center platform
- 2×4 lumber — frame, legs, and support beams
- Wood glue and corrosion-resistant screws — 1 1/4-inch for plywood, 2 1/2-inch for framing
- Miter saw mounting bolts or quick-release brackets — to secure the saw to the center platform
- Measuring tape, speed square, and a level — for layout and alignment checks
- Circular saw or table saw — to break down full sheets of plywood
- Drill/driver and clamps — for assembly
- Optional: locking casters, shop vacuum hose adapter, stop-block hardware
Rip the plywood and cut the 2x4s to length with your miter saw before assembly — having every piece cut and labeled first speeds up the build considerably. For angle setup and calibration tips before you start cutting, see our full miter saw guide hub.
Miter Saw Table Dimensions: Height, Depth, and Wing Length
A miter saw table works best at 34 to 36 inches high — the same range as a standard kitchen counter or shop workbench, which keeps material transfers between the two comfortable. Taller woodworkers can go up to 38 inches; test with your saw in its lowest cutting position before committing to a height.
| Dimension | Typical Range | Why It Matters |
|---|---|---|
| Bench height | 34–36 in. (up to 38 in.) | Matches counter height, comfortable for most adults |
| Table depth | 24–30 in. | Clears the saw base and rear swing on 10″ and 12″ sliding saws |
| Wing length (each side) | 36–60 in. | Supports long boards without an outfeed stand |
| Clearance beside saw base | 2 in. minimum, each side | Prevents the saw housing from binding against the fence |
These numbers come from cross-checking build plans from several established shop-furniture sources against typical 10–12 inch compound and sliding miter saw footprints — use them as a starting range, then confirm against your specific saw’s base dimensions before cutting the frame.
Building the Base and Frame
Start by cutting and assembling the base using plywood and 2x4s, then square it up before attaching the top. Sand the edges smooth before the top surface goes on.
Measuring and Cutting the Wood
- Measure your miter saw’s base — length, width, and the location of its mounting holes — before sizing the center platform.
- Cut the plywood or MDF to the dimensions from the table above using a circular saw or table saw, keeping cuts square.
- Mark and cut the notch or drop-down opening in the center platform where the miter saw base will sit, level with the wings.
Step-by-Step Frame Assembly
- Attach the legs: Position the pre-cut 2×4 legs at each corner of the base and secure with screws and wood glue, checking each leg is plumb.
- Add support beams: Cut and attach beams between the legs to reinforce the base, using screws or corner brackets.
- Install a lower shelf (optional): Add a shelf between the beams for blade storage or a shop vacuum.
- Attach the top surface: Set the wings and center platform on the frame, check for level side-to-side, and secure with screws driven from underneath.

Setting Up the Recessed Center Section
The recessed center platform is the detail most beginner builds skip — and it’s the one that determines whether your cuts come out square. Build the table in three sections: a left wing, a right wing, and a center platform recessed slightly below them, sized to hold the miter saw. The wing tops must sit exactly level with the saw’s own cutting deck, not the saw’s housing or base plate.
If the wings sit even 1/8 inch proud of the saw deck, long boards ride up onto the wing and the cut drifts off-angle. If they sit low, the board droops into the gap. Check this with a straightedge laid flat across the saw deck and both wings before you final-fasten anything.
Mounting the Saw
Most saws bolt down through their base using the same holes meant for a factory stand. Use quick-release mounting brackets if you want to swap the saw out later, or bolt it down permanently with lock washers if the table is dedicated to one saw. Leave the minimum 2-inch clearance on each side of the base so the housing doesn’t bind against the fence when you tilt for bevel cuts.
“After building several shop tables over the years, the recessed center is the one step I see skipped most — and it’s the one that actually matters. A wing that’s proud of the saw deck by even a hair will rock a long board and throw the whole cut off.”
— Md Meraj, Woodworking Advisor
Fence Alignment: Keeping It Square to the Blade
The wings being level with the saw deck only solves half the accuracy problem. The fence on each wing — the raised edge a long board rests against — also has to run perfectly perpendicular to the blade’s travel path. If the fence angles even slightly out of square, every board you butt against it gets pushed a fraction off-line before the blade ever touches it, and that error compounds on long trim runs where a 1/16-inch lean at the fence becomes a visible gap at a corner joint.
Check fence-to-blade squareness with a framing square before you final-fasten the wings: set the saw to 0 degrees, lower the blade (unplugged) until it just touches the table, and butt the square against the fence and the blade body. Shim behind the fence on either wing until the gap closes evenly across the full length, then drive the fasteners. Recheck it any time you add or swap a fence board — a fence that’s true on day one can still creep out of square if the mounting screws work loose.
Building vs. Buying: When a Portable Stand Makes More Sense
A built-in table is the better long-term setup for a fixed shop, but a folding portable stand is worth considering if you move the saw between job sites or have limited storage space. Portable stands trade the recessed-center rigidity of a built table for quick setup and roller support. If you want to compare a few different table and stand design styles before committing to one build, see our roundup of free miter saw table plans.
| Built-In Table | Portable Stand | |
|---|---|---|
| Best for | Fixed home or garage shop | Job sites, small shops, shared spaces |
| Setup time | One-time build | Folds up in under a minute |
| Rigidity | Highest — bolted frame | Good, varies by model and load rating |
| Storage footprint | Permanent | Collapses flat or rolls away |
Adding Dust Collection and Storage
Efficient dust collection keeps the workspace clean and protects your lungs from fine sawdust. Build a simple dust hood behind the saw’s blade guard and connect it to a shop vacuum with a hose adapter sized to your saw’s dust port — most compound miter saws use a 1 1/4 or 2 1/2-inch port.
For storage, add drawers, open shelves, or bins below the wings to keep spare blades, stop blocks, and safety gear within reach. A lower shelf between the legs also adds weight low in the frame, which helps stability when cutting long boards on one wing.
Safety Checks Before You Cut
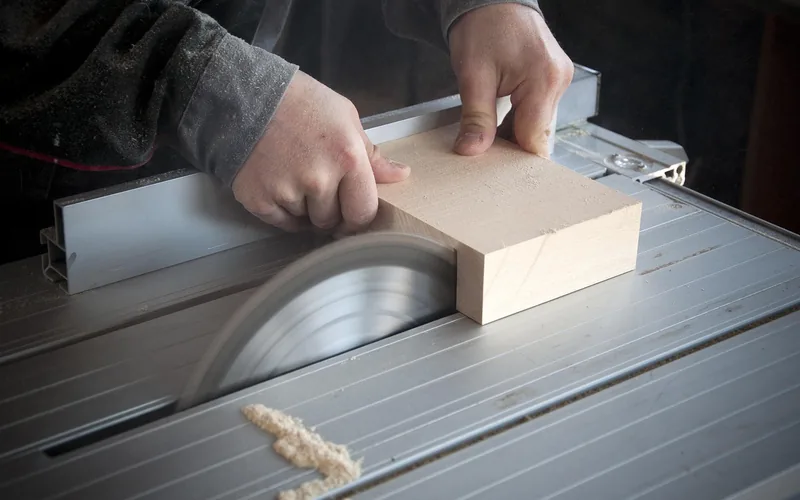
Before using a new miter saw table, confirm the frame doesn’t rock, the saw is bolted down tight, and both wings are level with the cutting deck. Wear safety glasses and hearing protection every time, and keep hands and push sticks clear of the blade path when trimming short offcuts.
Recheck bolt tightness and wing alignment every few months — vibration from regular use loosens fasteners over time, and a wing that’s drifted out of level will start throwing off angle cuts the same way a poorly built one would.
Common Mistakes to Avoid
- Skipping the recessed center: Wings level with the saw base instead of the cutting deck cause long boards to rock and drift off-angle.
- Trusting “3/4-inch” plywood labels: Actual thickness often runs closer to 23/32 inch — measure before cutting mating joints.
- Building the wings too short: Anything under 36 inches per side won’t support an 8-foot board without an outfeed stand.
- No dust port planning: Retrofitting a dust hood after the frame is built is far harder than routing the hose path during assembly.
Frequently Asked Questions
What materials are needed to make a miter saw table?
You’ll need 3/4-inch plywood or MDF for the top and wings, 2×4 lumber for the frame, wood glue, corrosion-resistant screws, and mounting hardware for the saw. Safety goggles and hearing protection are essential for the build and for regular use afterward.
What height should a miter saw table be?
Most miter saw tables work best at 34 to 36 inches, matching standard counter and workbench height. Taller woodworkers can go up to 38 inches — test with your saw in its lowest cutting position before finalizing the leg length.
How much clearance do I need on each side of the saw base?
Leave a minimum of 2 inches of clearance on each side of the saw’s base within the recessed center platform. This keeps the saw housing from binding against the platform edge when you tilt it for bevel cuts.
What plywood thickness works best for a miter saw table?
3/4-inch plywood is the standard choice for the tabletop, wings, and center platform. Check the actual thickness with calipers or a tape measure first, since many “3/4-inch” sheets measure closer to 23/32 inch.
Can a beginner build a miter saw table?
Yes. Building a miter saw table is a good starter project — the cuts are mostly straight lines and the joinery is simple screws and glue. Follow the dimension ranges above, double-check that the wings sit level with the saw deck, and take your time squaring the frame.
How do I check that the fence is square to the blade?
Set the saw to 0 degrees, lower the unplugged blade until it just touches the table, and hold a framing square against the fence and the blade body on each wing. Shim behind the fence until the gap closes evenly along its full length before you drive the final fasteners, and recheck it whenever you replace a fence board.
Conclusion
A miter saw table earns its keep the first time you cross-cut a long board without it sagging mid-cut. Get the recessed center level with the saw deck, keep the wings at 34 to 36 inches, and build in dust collection from the start, and the table will outlast several saws mounted on it. If a built-in table doesn’t fit your space, the free workbench plans and portable stand picks above cover the alternatives.
Sponsored / affiliate links. As an Amazon Associate I earn from qualifying purchases. I may earn additional commission from eligible campaigns.