Hardwood Floor Gaps: Proven Fixes
Hardwood floor gaps between planks can be safely and effectively filled using simple DIY methods like wood filler, caulk, or custom wood strips for a seamless, beautiful finish.
Seeing gaps appear between the planks of your beautiful hardwood floors can be a bit concerning. It’s a common issue, often caused by changes in humidity, and thankfully, it’s usually straightforward to fix. Don’t worry if you’re new to DIY; I’m here to guide you through proven methods that will restore your floors and boost your confidence. We’ll tackle these gaps together, step by step, so your home looks its best.
Understanding Hardwood Floor Gaps: The Why and What
Hardwood floors are living things. They expand and contract with changes in temperature and humidity. This natural movement is the primary reason why gaps can appear between the planks. In drier months, wood loses moisture and shrinks, creating small spaces. In more humid times, it absorbs moisture and swells, often closing those gaps again. However, sometimes the gaps remain.
Other factors can contribute, such as improper installation, loose subflooring, or even issues with the wood itself. While a small gap might not seem like a big deal, it can collect dust, debris, and even be a tripping hazard. Plus, it can affect the overall aesthetic of your stunning floors. The good news is, with a few basic tools and some patience, you can make these gaps a thing of the past.
Types of Gaps and When to Worry
Slight Gaps (1/16 to 1/8 inch): These are the most common and usually harmless, often appearing seasonally. They are generally easy to address with simple filling techniques.
Moderate Gaps (1/8 to 1/4 inch): These are more noticeable and might require slightly more involved solutions. They can still be a DIY project, but ensure the wood is stable before filling.
* Large Gaps (over 1/4 inch): Significant gaps can indicate a more serious problem, like warped boards or subfloor issues. It’s wise to consult a professional flooring installer or a structural engineer before attempting a DIY fix for very large gaps. You can find more information on wood movement and flooring issues on resources like the National Wood Flooring Association.
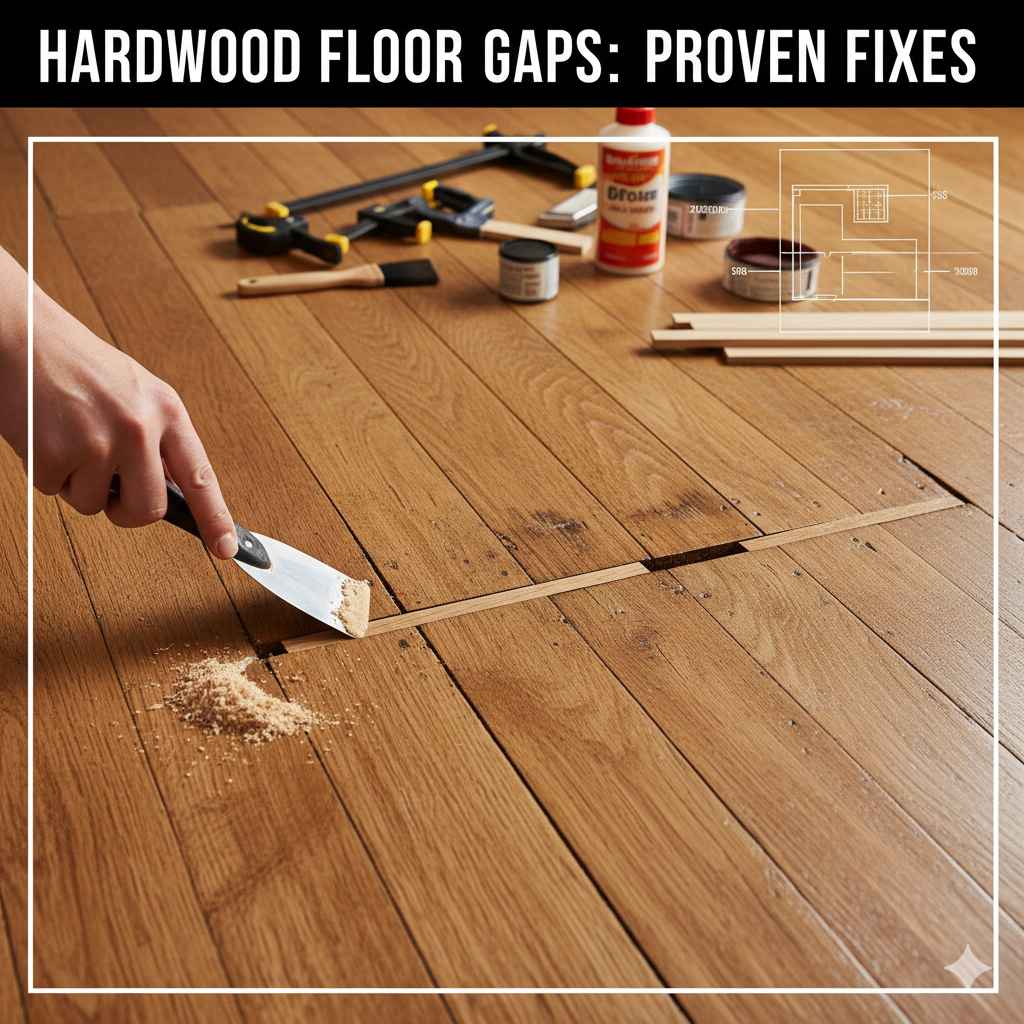
DIY Fixes for Hardwood Floor Gaps: Your Step-by-Step Guide
Let’s get our hands dirty! These methods are designed for common gap sizes and are perfect for beginners. Remember, safety first! Always wear safety glasses and, if sanding, a dust mask.
Method 1: Wood Filler – The Quick & Easy Fix
Wood filler is your go-to for small to medium gaps. It’s like a putty that hardens and can be sanded and stained to match your floor. Choosing the right color is key!
When to Use: For gaps up to 1/4 inch, where the wood hasn’t warped significantly.
What You’ll Need:
- Wood filler (in a color that matches your floor, or a neutral color you can stain)
- Putty knife or scraper
- Fine-grit sandpaper (150-220 grit)
- Damp cloth
- Vacuum cleaner
- Optional: Wood stain and a small artist’s brush (if your filler is neutral)
Steps:
- Clean the Gap: Use a vacuum cleaner to thoroughly remove all dust and debris from the gap. A stiff brush or even a thin screwdriver can help dislodge stubborn dirt. A clean surface ensures the filler adheres properly.
- Apply the Filler: Using your putty knife, press the wood filler firmly into the gap. Overfill slightly, as the filler will shrink a little as it dries. Work the filler in both directions to ensure it’s packed tightly.
- Smooth and Level: Scrape off any excess filler that sits above the surrounding floor surface. Aim to make it as flush as possible with the floor.
- Let it Dry: Allow the wood filler to dry completely according to the manufacturer’s instructions. This can take anywhere from a few hours to overnight. Rushing this step can lead to cracking or an uneven finish.
- Sand Smooth: Once dry, gently sand the filled area with fine-grit sandpaper. You want to create a perfectly smooth transition between the filler and the wood. Be careful not to oversand and create a dip.
- Clean Up: Vacuum away all sanding dust. Wipe the area with a slightly damp cloth.
- Stain (If Necessary): If you used a neutral-colored filler, now’s the time to match your floor color. Apply a small amount of wood stain with an artist’s brush, feathering the edges to blend. You might need a few thin coats. Let each coat dry completely. Test stain on a scrap piece of wood (or a hidden area of your floor) first to ensure a good match.
Method 2: Wood Glue and Sawdust – The Natural Match
This is a fantastic eco-friendly and wallet-friendly method that uses materials you might already have. It creates a filler that naturally matches your floor’s wood type.
When to Use: For small to medium gaps (up to 1/4 inch) where you have sawdust from your specific flooring material.
What You’ll Need:
- Wood glue (water-based PVA glue)
- Fine sawdust (collected from sanding your specific wood floor, or a matching species)
- Small mixing container
- Putty knife or scraper
- Fine-grit sandpaper (150-220 grit)
- Damp cloth
- Vacuum cleaner
Steps:
- Gather Sawdust: If you don’t have any from previous work, you can gently scrape a small amount of dust from the edge of a plank or from a less visible area. The finer the dust, the better it will blend.
- Mix the Paste: In your container, mix a small amount of wood glue with enough sawdust to create a thick paste. Aim for a consistency slightly thicker than peanut butter. It should be workable but not runny.
- Clean the Gap: As with the wood filler method, thoroughly vacuum the gap to remove all loose debris.
- Apply the Mixture: Use your putty knife to press the sawdust-glue paste firmly into the gap. Pack it in well.
- Smooth and Level: Scrape off any excess paste, trying to make it level with the surrounding floor.
- Let it Cure: Allow the mixture to dry and cure completely. Wood glue typically takes at least 24 hours to reach full strength.
- Sand and Clean: Once cured, sand the filled area smooth with fine-grit sandpaper. Vacuum and wipe clean with a damp cloth. This method often blends so well that no staining is needed.
Method 3: Wood Grout or Caulk – For Flexibility and a Seamless Look
Wood grout or flooring caulk is specifically designed for wood floors. It remains flexible, which can be beneficial as wood continues to move slightly. It’s also available in various colors.
When to Use: For small to medium gaps, especially if you’re concerned about continued wood movement or if the gap is near baseboards where a slight flexibility is needed.
What You’ll Need:
- Wood grout or flooring caulk (color matched to your floor)
- Caulking gun (if using a tube)
- Putty knife or damp cloth
- Painter’s tape (optional, for neat lines)
- Fine-grit sandpaper (if needed for smoothing)
Steps:
- Prepare the Area: Clean the gap thoroughly by vacuuming. If you want to ensure very clean lines and avoid getting caulk on the surrounding planks, apply painter’s tape along the edges of the gap.
- Load the Gun (if applicable): Insert the caulk tube into the caulking gun. Snip the tip at a 45-degree angle to create a bead size that fits the gap.
- Apply the Caulk/Grout: Apply a steady, continuous bead of caulk or grout directly into the gap. Aim to completely fill it without excessive overflow. If you’re using a hand-applied grout, use a small tool or your finger (wet with water for easier smoothing) to press it in.
- Smooth the Bead: Immediately after application, use a damp cloth or a putty knife to smooth the caulk/grout, pressing it into the gap and wiping away any excess. Remove the painter’s tape while the caulk is still wet for the cleanest finish.
- Let it Cure: Allow the caulk or grout to dry and cure fully, as per the manufacturer’s instructions.
Method 4: Wood Strips or Dowels – For Larger or Deeper Gaps
For wider-than-usual gaps or when you want a very robust and permanent fix, inserting custom-cut wood strips or dowels is an excellent option. This method requires a bit more precision but offers a professional look.
When to Use: For gaps larger than 1/4 inch, or when you want a visually integrated fix. This is also great for any gaps, as it provides a durable solution and matches the wood perfectly.
What You’ll Need:
- Hardwood scraps or dowels that match your floor species and color
- Measuring tape
- Table saw or miter saw (for precise cuts)
- Wood glue
- Clamps or heavy weights
- Chisels (for cleaning up the gap edges)
- Sandpaper (various grits, including a finishing grit)
- Vacuum cleaner
- Optional: Finish (polyurethane, oil, etc.) that matches your floor
Steps:
- Measure and Cut: Carefully measure the width and depth of the gap. Cut your hardwood scrap into thin strips or dowels that are slightly wider and longer than the gap. This allows for a tight fit and sanding flush later. For a table saw, you can set the fence to the exact width. For dowels, ensure they are the correct diameter.
- Clean and Prepare the Gap: Use a chisel to carefully clean out any debris or rough edges from the gap to create a clean surface for the glue. Vacuum thoroughly.
- Dry Fit: Test the fit of your wood strip or dowel in the gap. It should be snug. If it’s too tight, you may need to shave a little off the sides. If it’s too loose, you might need to try another piece or consider using a filler mixed with glue where the strip is too loose.
- Apply Wood Glue: Apply a generous amount of wood glue to the sides and bottom of the gap, and also to the edges of your wood strip.
- Insert and Clamp: Carefully insert the wood strip or dowel into the gap. Ensure it’s seated well. If using a strip, you may need to lightly tap it in with a rubber mallet. Apply clamps or place weights on top of the strip to ensure it’s pressed firmly into the gap and stays flush with the floor. Wipe away any excess glue that squeezes out with a damp cloth.
- Cure Time: Let the glue dry and cure completely, usually 24 hours. The clamps/weights should remain in place.
- Sand Smooth: Once the glue is fully cured, remove the clamps/weights. Carefully sand the wood strip flush with the surrounding floor. Start with a medium grit and progress to a fine grit for a smooth finish. Feather the sanding to blend the repaired area.
- Finish (If Needed): If your repair involves a new piece of wood that needs matching, you may need to apply a matching finish. Clean the area of all dust, then apply your floor’s finish (polyurethane, oil, etc.) to the repaired section.
Choosing the Right Fix: A Quick Comparison
Here’s a handy table to help you decide which repair method is best for your situation:
| Method | Best For Gap Size | Ease of Use | Appearance Match | Durability | Pros | Cons |
|---|---|---|---|---|---|---|
| Wood Filler | Small to Medium (up to 1/4″) | Easy | Good (if color matched or stained) | Moderate | Quick, readily available, good for minor imperfections. | Can shrink, may crack over time, color matching can be tricky. |
| Wood Glue & Sawdust | Small to Medium (up to 1/4″) | Easy | Excellent (natural match) | Moderate | Inexpensive, eco-friendly, blends naturally. | Requires matching sawdust, can be messy, needs adequate drying time. |
| Wood Grout/Caulk | Small to Medium (up to 1/4″) | Easy | Good (available in colors) | Moderate (flexible) | Flexible, easy to apply, good for areas with movement. | May not look as “wood-like” as other options, can get dirty. |
| Wood Strips/Dowels | Medium to Large (1/4″+) | Moderate to Difficult | Excellent (exact match) | High | Very durable, seamless integration, perfect for wider gaps. | Requires precise cutting, more tools needed, time-consuming. |
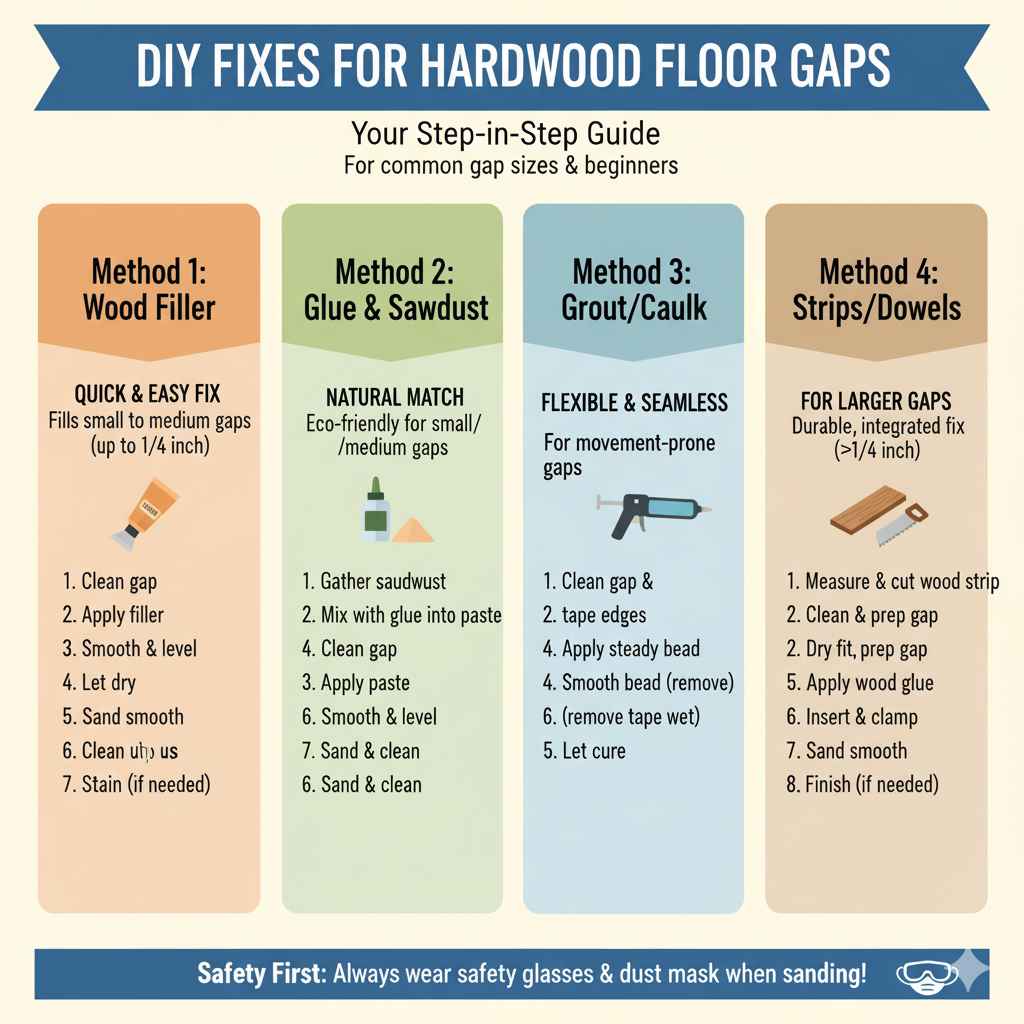
Maintenance and Prevention: Keeping Gaps at Bay
Once you’ve fixed those gaps, you’ll want to keep your floors looking great. Regular maintenance is key to preventing future issues and protecting your investment.
Humidity Control: This is the most crucial factor. Your hardwood floors will thank you for maintaining a consistent humidity level year-round, ideally between 35% and 55%. Use a humidifier in dry winter months and a dehumidifier in humid summer months. A good quality hygrometer can help you monitor levels.
Proper Cleaning:
- Always dust mop or vacuum regularly to remove grit that can scratch the finish.
- Use cleaning products specifically designed for hardwood floors. Avoid excessive water or steam mops, as moisture can seep into the wood and cause further expansion or damage. Check out Consumer Product Safety Commission for general home safety tips related to flooring.
Avoid Extreme Temperature Fluctuations: While you can’t control the weather, try to avoid drastic and rapid changes in your home’s temperature, as this also impacts humidity and wood movement.
Protective Measures:
- Use floor mats at entryways to catch dirt and moisture.
- Place felt pads on the legs of furniture to prevent scratches and reduce friction.
- Avoid wearing high heels or shoes with hard soles on your hardwood floors.
Frequently Asked Questions About Hardwood Floor Gaps
Q1: How do I know if a gap in my hardwood floor is serious?
Look for the size and stability of the gap. Small, seasonal gaps that open and close are usually not serious. Gaps that are very large (over 1/4 inch), constantly widening, or accompanied by squeaking or cupping/warping of the planks might indicate a structural issue with the subfloor or installation, and it’s best to consult a professional.
Q2: Can I just use any old filler to fix hardwood floor gaps?
No, it’s best to use fillers specifically designed for wood. General-purpose fillers might not adhere well to wood, may not take stain correctly, and could crack or shrink over time, leading to a less durable and less attractive repair. Always opt for wood filler, wood glue and sawdust, or wood grout/caulk.