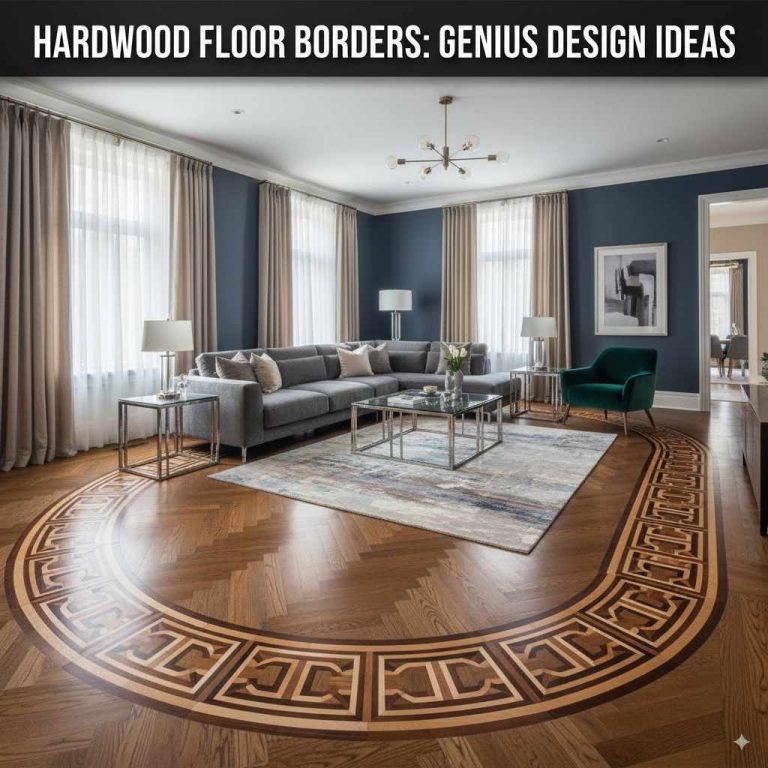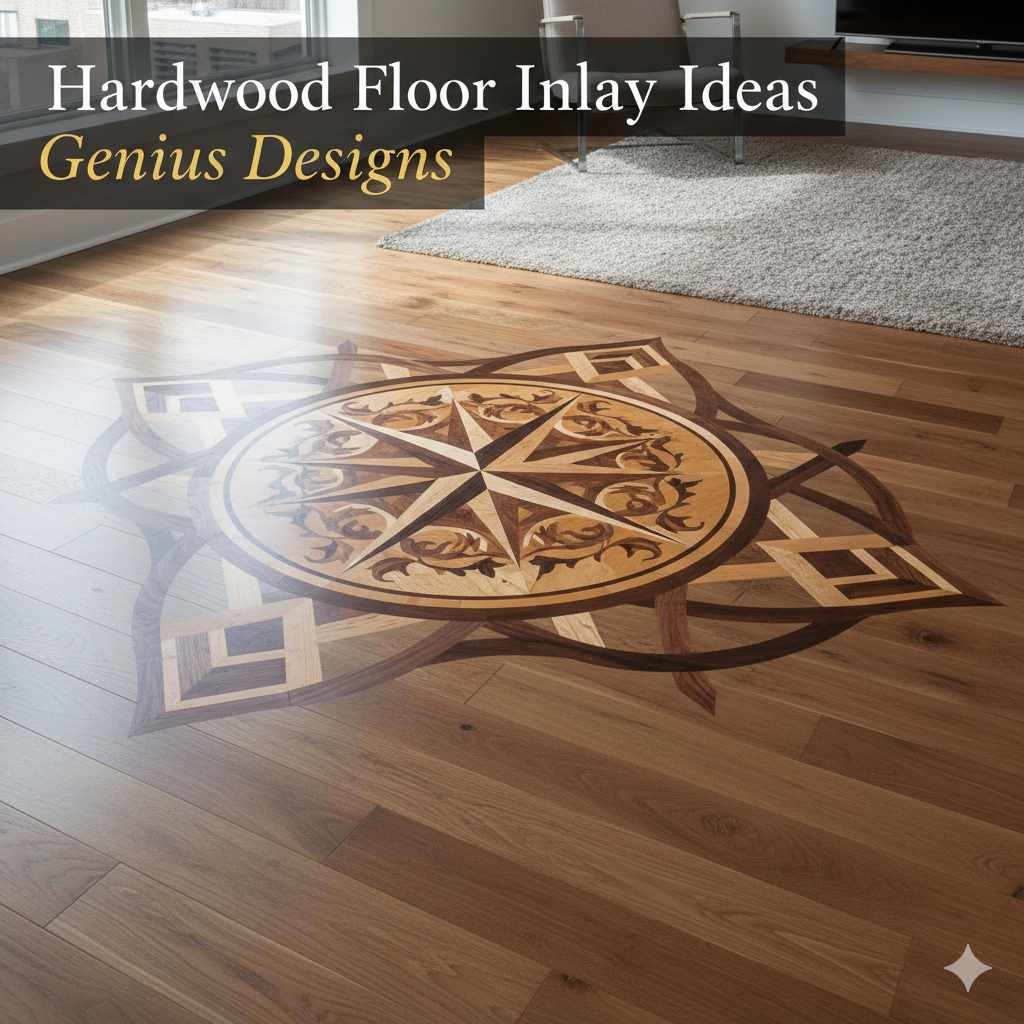
Hardwood Floor Inlay Ideas: Genius Designs
Transform your floors with stunning hardwood floor inlay ideas that add unique personality and value to your home without needing pro skills. Discover beginner-friendly designs and simple techniques to create a truly custom look.
Ever walked into a room and felt that instant ‘wow’ factor just from the floor? That’s the magic of hardwood floor inlay! It’s like adding a piece of art right under your feet. Many people think inlays are only for fancy, expensive homes or require a master craftsman. But what if I told you that with a little planning and the right guidance, you can create beautiful inlays yourself? It’s true!
Wood floor inlays are decorative designs or patterns made from contrasting wood pieces carefully fitted into your existing hardwood floor. They can be simple geometric shapes, intricate borders, or even custom motifs that tell a story. The beauty of an inlay is its ability to elevate the ordinary into something extraordinary, adding character and a personal touch that mass-produced flooring just can’t match. Ready to explore some genius ideas and learn how it’s more achievable than you think?
What is a Hardwood Floor Inlay?
At its heart, a hardwood floor inlay is a design element created by inserting pieces of wood, often of a different color or grain, into a hardwood floor. Think of it like a subtle, built-in mosaic made of wood. These aren’t just glued-on pieces; they are carefully cut and fitted to become an integral part of the floor itself.
The history of wood inlay work is rich, dating back centuries. Artisans have used this technique to create everything from ornate furniture to stunning architectural details. Introducing it into flooring adds a sophisticated touch, allowing homeowners to express their style and enhance their living space in a unique way.
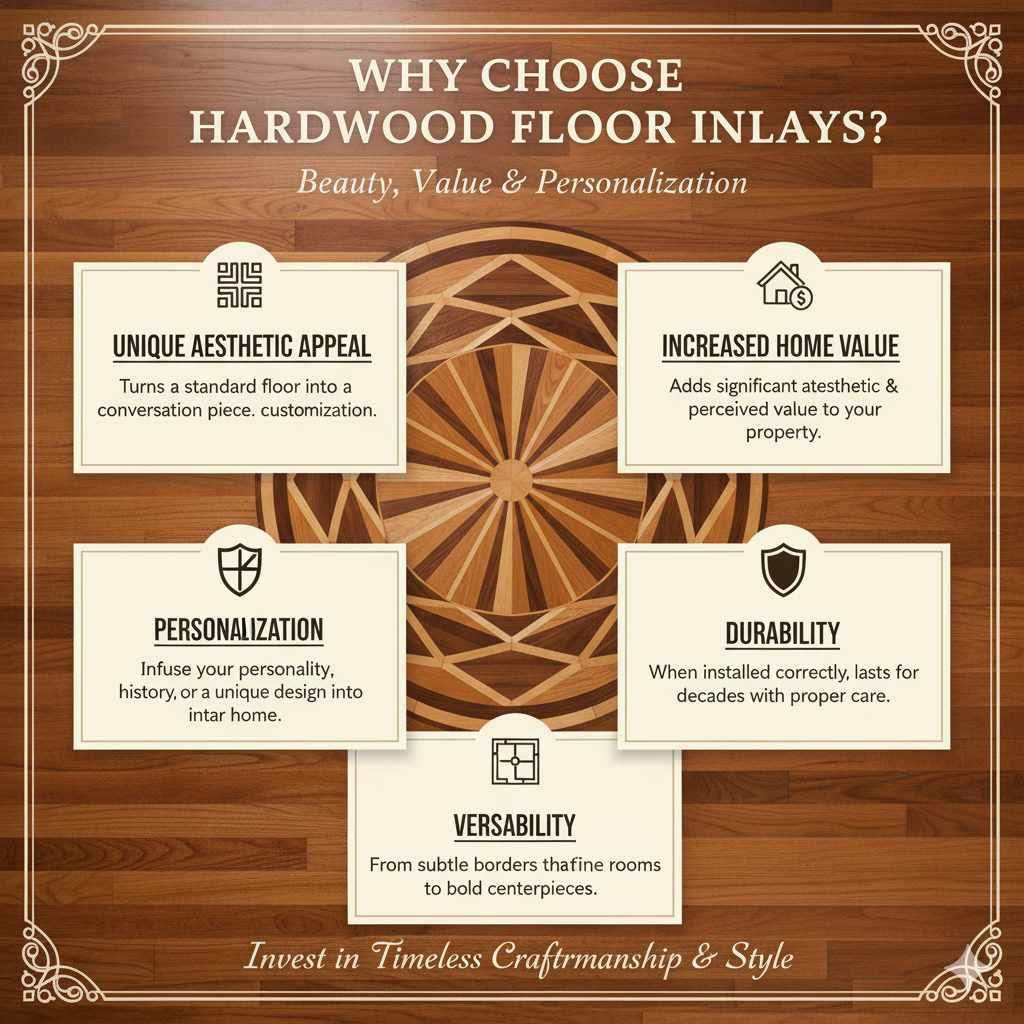
Why Choose Hardwood Floor Inlays?
Beyond their undeniable beauty, hardwood floor inlays offer several compelling reasons to consider them for your home:
- Unique Aesthetic Appeal: Inlays turn a standard floor into a conversation piece. They offer a level of customization unmatched by typical flooring options.
- Increased Home Value: A well-executed inlay can add significant aesthetic and perceived value to your property, making it stand out in the market.
- Personalization: Whether it’s a simple geometric pattern or a family crest, inlays let you infuse your personality and history into your home’s design.
- Durability: When installed correctly, inlays are as durable as the surrounding floor. With proper care, they will last for decades.
- Versatility: Inlays can be used in various ways – from subtle borders that define rooms to bold centerpieces that anchor a space.
Beginner-Friendly Hardwood Floor Inlay Ideas
Getting started with inlays doesn’t mean you need to be a master woodworker. Many stunning designs are surprisingly simple to achieve. The key is to start small and focus on clean cuts and precise fitting. Here are some genius ideas perfect for beginners:
1. Simple Geometric Borders
This is the most accessible entry point for inlay work. A simple border can frame a room, define an area, or accent a doorway.
- Straight Line Borders: Using a contrasting wood strip—like dark walnut against a lighter oak—runnning parallel to walls or doorways is elegant and straightforward.
- Checkerboard Patterns: Alternating small squares of light and dark wood creates a classic, eye-catching effect. This can be done as a small accent, perhaps around a fireplace hearth.
- Corner Accents: Instead of a full border, consider a small geometric inlay, like a triangle or a square, placed precisely in each corner of a room.
2. Accent Dots and Strips
These are subtle yet effective ways to add detail without overwhelming complexity.
- Parquet-Style Dots: Small, circular or square inlays, often in a contrasting wood, can be placed strategically. Think of them as subtle embellishments, perhaps at the intersection of floorboards or in a repeating pattern.
- Running Strips: A thin strip of contrasting wood laid perpendicular to the floorboards can create a visual break and add a modern touch. This can be used to delineate zones within an open-plan space.
3. Simple Motifs
Once you’re comfortable with straight lines, you can try simple shapes.
- Stars: A simple four-pointed or eight-pointed star in a contrasting wood can be a charming focal point, especially in a smaller area like an entryway.
- Diamonds: Elongated diamond shapes arranged in a row or a pattern can offer a touch of classic elegance.
Bringing Your Inlay Ideas to Life: Tools and Materials
You don’t need a professional workshop to create beautiful inlays. With a few key tools and the right materials, you can tackle these projects with confidence.
Essential Tools for Beginners:
- Measuring Tape and Pencil: For accurate layout.
- Jigsaw: Essential for cutting curves and internal shapes. A good quality blade is crucial for clean cuts.
- Circular Saw or Table Saw (optional but helpful): For straight cuts, especially for borders.
- Router and Straight Router Bit: To create consistent grooves for inlay pieces. A plunge router with a plunge straight bit is ideal for precision.
- Chisels: For fine-tuning cuts and cleaning up edges. Sharp chisels are a must.
- Sandpaper (various grits): For smoothing and finishing.
- Wood Glue: For securing inlay pieces.
- Clamps: To hold pieces in place while the glue dries.
- Safety Gear: Safety glasses, ear protection, and dust mask are non-negotiable.
Choosing Your Woods:
Contrast is key for an inlay to stand out. Consider these popular pairings:
| Main Floor Wood (Example) | Contrasting Inlay Wood Ideas | Visual Effect |
|---|---|---|
| Oak (Light/Medium) | Walnut, Wenge, Cherry, Maple (Dark) | Bold, Classic, Rich |
| Maple (Light) | Mahogany, Walnut, Padauk | Elegant, Sophisticated, Warm |
| Cherry (Medium/Reddish) | Maple, Beech, Ash | Subtle, Natural, Harmonious |
| Walnut (Dark) | Maple, Holly, Light Ash | Striking, High Contrast, Modern |
When selecting wood, consider not only color but also grain pattern and hardness. Woods with similar hardness to your existing floor will wear more evenly. You can purchase solid wood for inlays or sometimes find pre-made inlay strips designed for flooring applications.
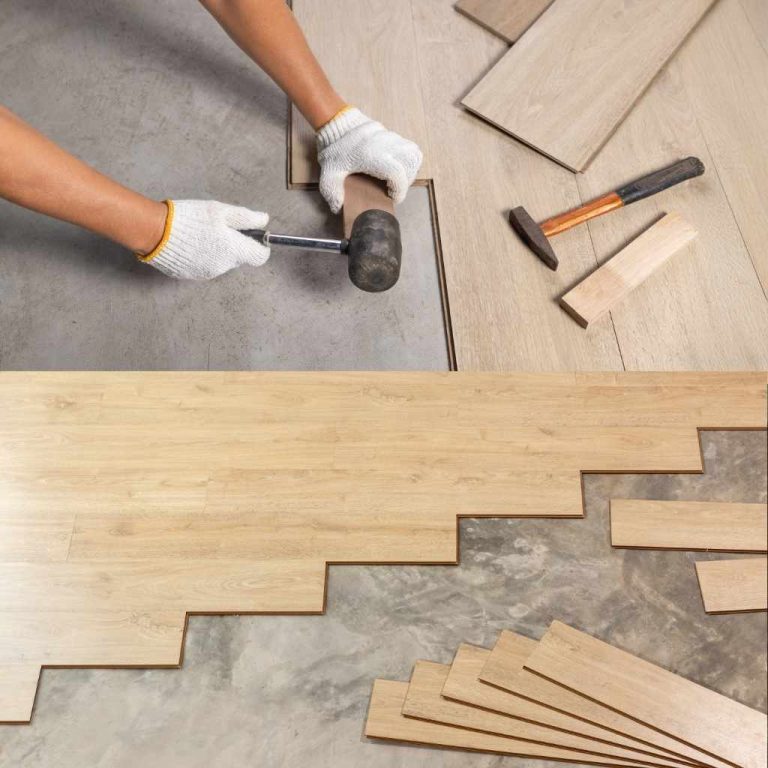
A Simple Step-by-Step Guide: Creating a Basic Geometric Inlay
Let’s walk through creating a simple straight-line border inlay. This process can be adapted for more complex shapes as you gain confidence.
- Plan Your Design: Decide exactly where your inlay will go and its dimensions. For a border, measure the length of the section you want to inlay. For a corner accent, mark out your geometric shape. Accuracy here prevents headaches later.
- Prepare the Substrate: This is the most crucial step for a clean fit.
- For cutting into existing flooring: You’ll need to carefully remove a section of your existing floor. For a border, this means cutting a grove for your inlay material. Use a router with a straight bit set to the exact depth of your inlay wood. If you’re working with planks, you might be cutting out entire planks and replacing them with contrasting ones.
- For new installations: If you’re installing a new hardwood floor, you can create the recess for the inlay before the flooring is laid. This is often easier as you don’t have to cut into an existing finished floor.
- Cut Your Inlay Pieces: Measure and cut your contrasting wood to the precise dimensions needed for your design. For a border, cut strips to length. For geometric shapes, cut them out carefully using a jigsaw or scroll saw. Test fit them in the recess you created. They should fit snugly, but not so tightly that you can’t insert them. A perfect fit is key to a professional look.
- Fit and Secure the Inlay:
- Apply a small amount of high-quality wood glue to the recess and the edges of your inlay pieces.
- Carefully place the inlay pieces into the recess. Ensure they sit flush with the surrounding floor.
- Use clamps or weights to apply gentle, even pressure. You want the inlay to be held securely while the glue dries, but avoid overtightening clamps, which can damage the wood or create gaps.
- Sanding and Finishing: Once the glue is completely dry (check the glue manufacturer’s recommendations, usually 24 hours), it’s time for sanding.
- Start with a medium-grit sandpaper to level any slight high spots between the inlay and the main floor.
- Progress to finer grits (e.g., 120, 180, 220) to achieve a smooth, seamless surface.
- Feather sand the edges gently to ensure a smooth transition.
- Wipe down the entire area to remove dust.
- Apply your chosen finish (e.g., polyurethane, oil-based finish, water-based finish) to match or complement the existing floor. You may need multiple coats, with light sanding between coats.
Advanced Inlay Techniques (for the Adventurous Beginner)
Once you’ve mastered the basics, you can explore more intricate designs. These might require slightly more specialized tools or techniques but are still achievable for a diligent DIYer.
1. Marquetry and Parquetry
These terms are often used interchangeably with inlay, but they refer to specific techniques.
- Marquetry: This involves creating intricate designs using thin veneers of wood, shell, or ivory, which are then applied to a solid object. For floors, this translates to very fine detailing using thin wood strips.
- Parquetry: This refers to geometric patterns created by assembling small blocks or strips of wood. Many of the geometric ideas mentioned earlier fall under this category.
To attempt these, you’ll need very precise cutting tools, often a scroll saw or a band saw, and meticulous attention to detail. Building up complex patterns requires careful planning, often creating sections of the inlay off-site before fitting them into the floor.
2. Intarsia-Style Designs
Intarsia is a technique where different kinds and colors of wood are pieced together to create a picture or pattern, with each piece carved and fitted to the exact depth. For floors, this would involve cutting pieces of wood to create a sculpted, dimensional effect within the inlay, rather than just a flat surface. This is an advanced technique that requires a good eye for depth and detail but can result in breathtaking designs.
3. Incorporating Other Materials
While we’re focusing on wood, advanced inlays can sometimes incorporate small amounts of other durable materials like metal (brass, pewter) or even stone, though this significantly increases complexity.
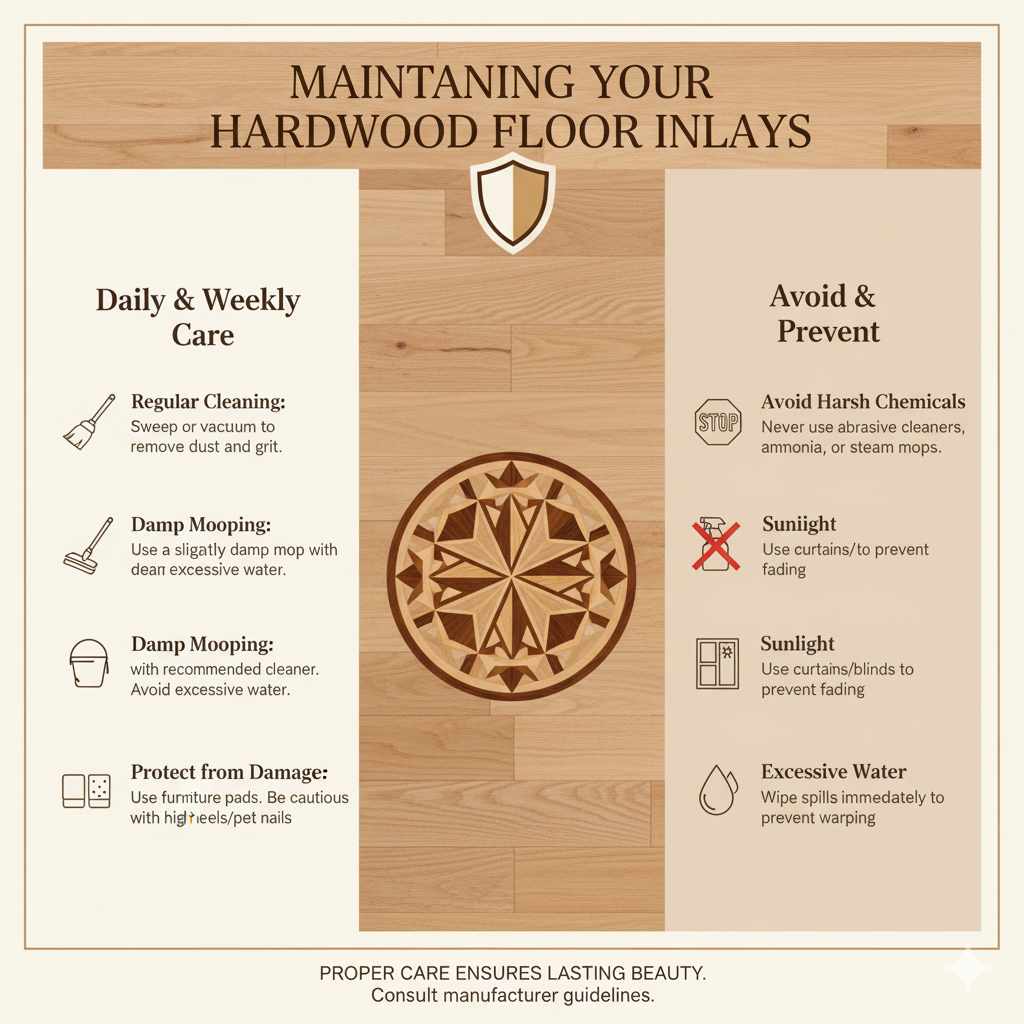
Maintaining Your Hardwood Floor Inlays
The good news is that a well-installed and finished hardwood floor inlay requires the same maintenance as your surrounding hardwood floor. Regular cleaning and proper care will ensure its beauty lasts for years.
- Regular Cleaning: Sweep or vacuum your floors regularly to remove dust and grit, which can scratch the finish.
- Damp Mopping: Use a slightly damp mop with a hardwood floor cleaner recommended by the finish manufacturer. Avoid excessive water, as it can damage hardwood.
- Protect from Damage: Use furniture pads on table and chair legs to prevent scratches. Be cautious with high heels or pet nails, which can also damage the finish.
- Avoid Harsh Chemicals: Never use abrasive cleaners, ammonia-based products, or steam mops on hardwood floors, as they can dull the finish or damage the wood itself.
- Sunlight: Prolonged exposure to direct sunlight can fade wood over time. Use curtains or blinds to protect your floors.
For more tips on hardwood floor care, the National Wood Flooring Association and other reputable sources offer comprehensive guides. Always follow the specific care instructions for the finish applied to your floor.
Frequently Asked Questions (FAQs)
Q1: Can I do hardwood floor inlays myself?
Yes, absolutely! Many beautiful inlay designs, especially simple geometric patterns and borders, are very achievable for DIY enthusiasts with basic woodworking tools and patience.
Q2: What is the easiest type of inlay to start with?
Simple straight-line borders or small corner geometric accents using contrasting wood strips are the easiest for beginners. They require clean straight cuts and precise fitting.
Q3: What woods work best for inlays?
Woods that offer a good color contrast to your main floor are ideal. Popular choices include walnut, cherry, maple, and wenge. It’s also beneficial if the inlay wood has a hardness similar to your main flooring for even wear.
Q4: Do inlays make my floor weaker?
When installed correctly, inlays become an integral part of the floor and do not weaken it. A snug, glued fit ensures durability comparable to the rest of the floor.
Q5: How do I get a perfect fit for my inlay pieces?
Precision is key. Measure carefully, cut accurately, and test fit your pieces frequently. A router is invaluable for creating clean, consistent recesses. Slight adjustments with a sharp chisel or fine sandpaper might be needed for a perfect snug fit.
Q6: What’s the difference between marquetry and parquetry for floors?
Marquetry typically involves using thin veneers for intricate patterns, while parquetry uses small blocks or strips of solid wood to create geometric designs. Both can be adapted for floor inlays.
Q7: Is installing an inlay difficult if my floor is already installed?
Cutting into an existing floor can be more challenging than incorporating an inlay during a new installation. It requires careful routing or cutting to remove a section and create a recess without damaging surrounding boards. However, it’s still very doable with the right tools and caution.
Conclusion
Hardwood floor inlay ideas are a fantastic way to inject personality, elegance, and a custom touch into your home. You’ve seen that beautiful, intricate designs aren’t just for master craftsmen. By starting with beginner-friendly concepts like simple geometric borders or accent dots, and by using the right tools and techniques, you can absolutely create stunning inlays yourself.
Remember to start simple, focus on precise measurements and cuts, and always prioritize safety.