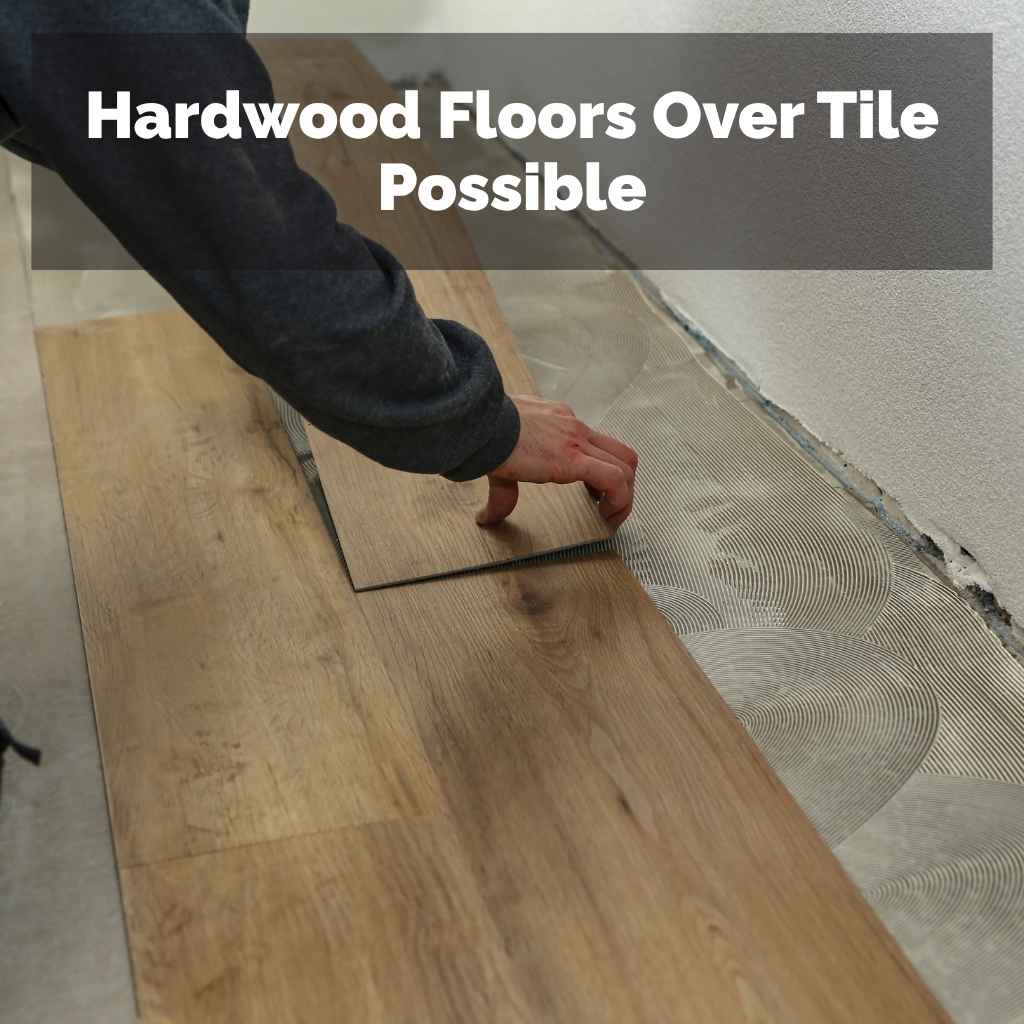
Hardwood Floors Over Tile Possible
This section explores the feasibility of installing hardwood floors directly on top of existing tile. We’ll break down the conditions that make this a viable option and the situations where it’s best to avoid it altogether. Understanding these factors is key to a successful project.
Assessing Your Existing Tile
Before you even think about laying down hardwood, you need to take a good look at the tile you already have. The condition and type of tile play a huge role in whether you can go over it. Loose tiles, cracked tiles, or uneven grout lines can cause big problems later on.
If your tile is damaged, it’s usually better to remove it and start fresh. This ensures a stable base for your new hardwood.
Tile that is well-adhered and lies flat is your best bet. The grout lines should also be filled and smooth. If there are significant gaps, you might need to fill them with a leveling compound.
This creates a smooth surface for the hardwood. You don’t want any bumps or dips under your new floor. These can eventually show through the hardwood or cause it to creak.
Key Considerations for Tile Assessment
- Tile Adhesion: Check if tiles are loose or squeaky. Loose tiles mean the subfloor might be damaged, or the adhesive has failed. You can test this by gently trying to lift edges or tapping them with a rubber mallet. A dull thud indicates a poor bond.
- Grout Condition: Grout lines should be filled and even. Wide or deep grout lines can cause issues. You may need to fill them with a self-leveling underlayment or a suitable patching compound. This creates a consistent surface for the hardwood.
- Tile Type: Some tile materials are better suited for covering than others. Ceramic and porcelain tiles are generally strong and stable. Natural stone tiles can sometimes be uneven and may require more prep work.
- Subfloor Stability: Even if the tile is perfect, the subfloor beneath it matters. A weak or bouncy subfloor will lead to issues with any flooring installed on top, including hardwood.
Preparing the Tile Surface
Once you’ve determined your tile is in good shape, the next step is preparing the surface. This means making sure it’s perfectly clean and smooth. Any dirt, grease, or old adhesive must be removed.
A thorough cleaning with a good degreaser is essential. Then, you might need to use a self-leveling compound, especially if your grout lines are deep or uneven. This compound flows into the low spots and dries to a smooth, flat surface.
This is crucial for a good hardwood installation.
The goal is to create a solid, seamless foundation. Even small imperfections can translate into problems for your new hardwood floors. For example, a slight dip in the tile could cause the hardwood to flex more than it should.
This can lead to squeaks or even damage over time. Think of it like building a house; a strong, level foundation is key to its longevity.
Surface Preparation Steps
- Deep Cleaning: Scrub the tile and grout thoroughly to remove all dirt, grease, and residue. Use a heavy-duty floor cleaner designed for tile.
- Grout Filling: If grout lines are uneven or deep, fill them. Use a product recommended for this purpose, like a cement-based grout caulk or a skim coat of thin-set mortar. Let it dry completely.
- Leveling: For significant unevenness, a self-leveling underlayment is often the best solution. Follow the manufacturer’s instructions carefully for mixing and application. This can add height to your floor, so check door clearances.
- Sanding (Optional): In some cases, a light sanding of the tile surface can help with adhesion of the underlayment or adhesive for the new flooring.
Hardwood Floors Over Tile: Is It Possible or Recommended
This section directly addresses the central question of whether installing hardwood over tile is both possible and a good idea. We will discuss the pros and cons, highlighting situations where this method is generally recommended and when it’s better to avoid it for long-term satisfaction.
When It Is Possible and Recommended
Installing hardwood over tile is often possible and can be recommended when the existing tile is in excellent condition and firmly attached to a solid subfloor. This typically applies to ceramic or porcelain tiles that are perfectly flat, with minimal grout lines or where grout lines have been properly filled and smoothed. The key is creating a stable, monolithic surface that mimics a traditional subfloor.
If your existing tile meets these strict criteria, you can often proceed with installing a new layer of hardwood.
This method saves time and labor by avoiding the demolition of the old floor. It can also be less disruptive to your home. However, success hinges on meticulous preparation.
If the tile is not perfectly adhered or if there are any dips or humps, the new hardwood may not lay flat. This can lead to issues like squeaking, flexing, or even premature wear. Therefore, a thorough inspection and prep work are absolutely essential for this approach to be successful and recommended.
Advantages of Installing Over Tile
- Time and Cost Savings: Avoiding demolition can save significant time and money on labor and disposal fees. This is a major draw for many DIYers and homeowners.
- Reduced Disruption: Tearing out old tile can be very messy and noisy. Installing over it means less dust and disruption to your household activities.
- Maintaining Floor Height: Adding a new layer of flooring directly on top helps maintain your original floor height. This avoids issues with door clearances and transitions to other rooms.
- Preserving Subfloor: If the existing subfloor is in good condition, you avoid potentially uncovering or creating new subfloor issues during removal.
When It Is Not Recommended
There are several situations where laying hardwood over tile is strongly discouraged. The most critical factor is the condition of the existing tile. If tiles are cracked, loose, or uneven, attempting to cover them will likely lead to future problems.
A cracked tile can transmit stress to the hardwood above, causing it to crack or warp. Loose tiles mean the hardwood has no stable base, leading to movement and noise.
Furthermore, if the tile has deep or wide grout lines that cannot be adequately filled and smoothed, it creates an uneven surface. Hardwood needs a perfectly flat plane to lay properly. Even the best hardwood flooring can suffer if installed over an imperfect base.
It’s also not recommended if the existing tile is adhered to a questionable subfloor. If the subfloor itself is weak or has moisture damage, putting more weight on top will only exacerbate the problem.
Warning Signs to Avoid Installation
- Cracked or Chipped Tiles: These indicate stress in the flooring system and will transfer to the hardwood.
- Loose or Hollow-Sounding Tiles: If tiles aren’t firmly bonded, the hardwood will move, leading to squeaks and premature wear.
- Uneven or Damaged Grout: Grout lines that are significantly deep or have fallen out create an uneven surface that’s hard to overcome.
- Warped or Damaged Subfloor: Any issues with the subfloor beneath the tile must be addressed before adding more layers.
- Moisture Issues: If there’s any sign of moisture, it needs to be fixed first, as it can damage both tile and hardwood.
Types of Hardwood and Installation Methods
Not all hardwood flooring is created equal when it comes to installation over existing tile. Engineered hardwood is often the preferred choice. This type of flooring has a layered construction with a real wood veneer on top and a core of plywood or high-density fiberboard underneath.
Its dimensional stability makes it less prone to expanding and contracting with changes in humidity, which is beneficial when installing over another material.
Solid hardwood, which is milled from a single piece of wood, is generally not recommended for installation directly over tile. Solid wood is more sensitive to moisture and temperature fluctuations. Installing it over a tile surface, which can sometimes retain or transmit moisture, increases the risk of warping or cupping.
For engineered hardwood, you have a few installation options: floating, glue-down, or stapling/nailing through a special underlayment.
Engineered Hardwood vs. Solid Hardwood
- Engineered Hardwood: This is the go-to for over-tile installations. Its cross-grain construction makes it very stable. It can withstand more moisture fluctuations than solid wood. Many engineered products are designed for floating or glue-down installations.
- Solid Hardwood: Generally not suitable for installation directly over tile. It requires a solid, stable subfloor like plywood or OSB. Moisture and movement from the tile layer can cause serious damage to solid wood.
Installation Methods Over Tile
- Floating Floor: The engineered hardwood planks are joined together, and the entire floor “floats” above the tile surface. This is typically done with a special underlayment that adds a moisture barrier and cushioning. It’s a popular choice for DIYers due to its relative ease of installation.
- Glue-Down: The engineered hardwood is adhered directly to the prepared tile surface using a strong flooring adhesive. This provides a very secure and stable installation, minimizing movement. It requires careful application of the adhesive to ensure full coverage and no voids.
- Stapling/Nailing (with Underlayment): In some cases, engineered hardwood can be stapled or nailed down, but this is less common when going over tile. It usually requires a specific type of underlayment that can accommodate mechanical fasteners while still providing a buffer.
The Role of Underlayment
Underlayment is a crucial component when installing hardwood floors over tile. It acts as a buffer, helping to smooth out minor imperfections in the tile surface and providing sound dampening. More importantly, it can offer a moisture barrier, which is vital when working over tile that might be susceptible to moisture transmission, especially in areas like kitchens or bathrooms (though hardwood is not typically recommended for very high moisture areas).
Different types of underlayment serve different purposes. Some are designed for floating floors, providing cushioning and a vapor barrier. Others are specifically formulated for glue-down applications, aiding adhesion and moisture protection.
The choice of underlayment will depend on the type of hardwood flooring you choose and the specific requirements of your installation. Always follow the recommendations of both the hardwood manufacturer and the underlayment producer to ensure a warranty-valid installation.
Types of Underlayment
- Vapor Barrier Underlayment: Essential for preventing moisture from the tile or subfloor from reaching the hardwood. This is especially important in basements or areas prone to dampness.
- Sound-Dampening Underlayment: Reduces noise transmission between floors, creating a quieter living environment. This is a nice-to-have feature, especially in multi-story homes.
- Cushioning Underlayment: Provides a softer feel underfoot and can help mask minor imperfections in the subfloor.
- Combination Underlayments: Many modern underlayments offer a combination of these features, providing a vapor barrier, sound reduction, and cushioning in one product.
Let’s look at a practical scenario. Sarah wanted to
Potential Problems and How to Avoid Them
Even with the best intentions, installing hardwood over tile can present challenges. One common issue is moisture. Tile can act as a vapor barrier, trapping moisture underneath.
If this moisture can’t escape, it can cause the hardwood to swell, warp, or even rot. This is why a proper vapor barrier underlayment is so important, especially if you suspect any moisture issues or if installing in a basement or ground-level room.
Another frequent problem is the “tenting” effect. This happens when the hardwood planks are laid over uneven tile or grout lines. The center of a plank might lift slightly, creating a hollow sound or even a visible gap.
This is a direct result of an improperly prepared surface. Taking the time to fill grout lines and use a leveling compound where needed will prevent this. Always check for flatness at multiple points across the room before and during installation.
Common Pitfalls and Solutions
- Moisture Issues: Always use a vapor barrier underlayment. Test for moisture if you have any doubts about the existing tile or subfloor. Avoid installing hardwood in very damp areas like full bathrooms.
- Uneven Surface: Fill grout lines and use self-leveling compound to create a perfectly flat surface before laying hardwood. Check for flatness regularly.
- Adhesive Failure: Ensure you use the correct type of adhesive recommended by both the hardwood and underlayment manufacturers. Follow application instructions precisely, especially regarding spread rate and drying times.
- Gaps Between Planks: This can occur if the subfloor is not stable or if planks are forced together too tightly. Ensure proper acclimatization of the hardwood and follow the manufacturer’s expansion gap recommendations.
- Cupping or Warping: This is often due to moisture imbalance or improper installation. Ensure adequate ventilation and consider a humidifier/dehumidifier in your home.
Alternatives to Installing Hardwood Over Tile
While it’s often possible to install hardwood floors over tile, sometimes other options are more suitable or offer a different aesthetic. One of the most straightforward alternatives is to simply remove the existing tile. This allows you to inspect the subfloor thoroughly and ensure a perfect base for your new hardwood, regardless of its type.
Another excellent option is to install luxury vinyl plank (LVP) or luxury vinyl tile (LVT) over the existing tile. These products are designed to be installed over many existing hard-surface floors, including tile. They are durable, water-resistant, and come in a wide variety of styles that mimic hardwood very effectively.
They are also generally easier to install and maintain than real hardwood, making them a popular choice for many homeowners looking for a budget-friendly and practical update.
Removing Existing Tile
This is the most traditional approach. While it involves more labor and mess, removing the old tile ensures a clean slate. You’ll need tools like a pry bar, hammer, chisel, and possibly a floor scraper.
Start by removing the grout, then carefully pry up each tile. It’s important to clean off any old adhesive thoroughly from the subfloor afterward. This method guarantees a stable and even subfloor, which is ideal for any type of flooring installation.
The debris from tile removal can be significant, so be prepared for cleanup. However, the peace of mind that comes from knowing you have a perfect subfloor is invaluable. You can then install your chosen hardwood using standard methods, confident that it’s supported by the best possible base.
Steps for Tile Removal
- Protect the Area: Cover surrounding areas with plastic sheeting to minimize dust.
- Score Grout Lines: Use a grout saw or utility knife to score the grout lines around each tile.
- Pry Up Tiles: Insert a pry bar or chisel under the edge of a tile and carefully lift it. Work methodically across the floor.
- Scrape Adhesive: Once tiles are removed, scrape away any remaining adhesive from the subfloor using a floor scraper or putty knife.
- Clean Subfloor: Sweep and vacuum the subfloor thoroughly.
Installing Luxury Vinyl Plank (LVP) or Tile (LVT)
Luxury vinyl flooring is a fantastic alternative because it’s designed to be laid over existing hard floors. LVP and LVT are incredibly versatile. They are waterproof or highly water-resistant, making them ideal for kitchens, bathrooms, and basements where moisture is a concern.
They are also very durable and can withstand heavy foot traffic.
Installation is often simpler than hardwood. Many LVP and LVT products use a click-lock system for a floating floor installation, or they can be glued down. They are also more forgiving of minor imperfections in the subfloor compared to hardwood.
This makes them a great option if your tile has slight unevenness that’s difficult to perfectly level. Plus, the aesthetic options are vast, offering realistic wood and stone looks at a lower price point.
Benefits of LVP/LVT
- Water Resistance: Excellent for high-moisture areas.
- Durability: Resists scratches, dents, and stains.
- Ease of Installation: Often DIY-friendly with click-lock systems.
- Cost-Effective: Generally less expensive than hardwood.
- Versatile Looks: Mimics wood, stone, and tile convincingly.
Frequently Asked Questions
Question: Can I install solid hardwood over tile?
Answer: It is generally not recommended to install solid hardwood directly over tile. Solid hardwood is more susceptible to moisture and temperature changes. Installing it over tile can lead to warping, cupping, and other damage due to potential moisture transfer or unevenness from the tile layer.
Engineered hardwood is a much safer choice for this type of installation.
Question: What kind of underlayment should I use for hardwood over tile?
Answer: You should use a high-quality underlayment that includes a vapor barrier and provides some cushioning and sound dampening. The specific type will depend on whether you are floating or gluing down the hardwood. Always check the recommendations from both the hardwood and underlayment manufacturers to ensure compatibility and maintain warranty coverage.
Question: Do I need to remove the grout lines when installing hardwood over tile?
Answer: Yes, you should prepare the grout lines by filling them to create a smooth, even surface. Deep or uneven grout lines can telegraph through the hardwood, causing an uneven appearance or even structural issues over time. A self-leveling compound or a suitable grout filler is often used for this purpose before installing the hardwood.
Question: How much height will adding hardwood over tile add to my floor?
Answer: The added height will be the thickness of the hardwood planks plus the thickness of the underlayment. Engineered hardwood planks typically range from 3/8 inch to 3/4 inch thick, and underlayments can add another 1/8 inch to 1/4 inch or more. This added height can affect door clearances and transitions to other flooring types, so it’s important to measure and plan accordingly.
Question: Is it okay to install hardwood over tile in a bathroom?
Answer: While technically possible with extreme care and proper moisture barriers, it is generally not recommended to install hardwood floors over tile in a full bathroom. Bathrooms experience high levels of moisture and humidity, which can be detrimental to hardwood. Luxury vinyl plank (LVP) or tile (LVT) are much better, more water-resistant options for bathrooms.
Final Thoughts
Installing hardwood floors over existing tile is often achievable. Success hinges on thoroughly assessing your tile, preparing the surface meticulously, and using the right materials like engineered hardwood and a proper underlayment. If your tile is sound and well-adhered, it can be a practical way to upgrade your home’s look and feel.