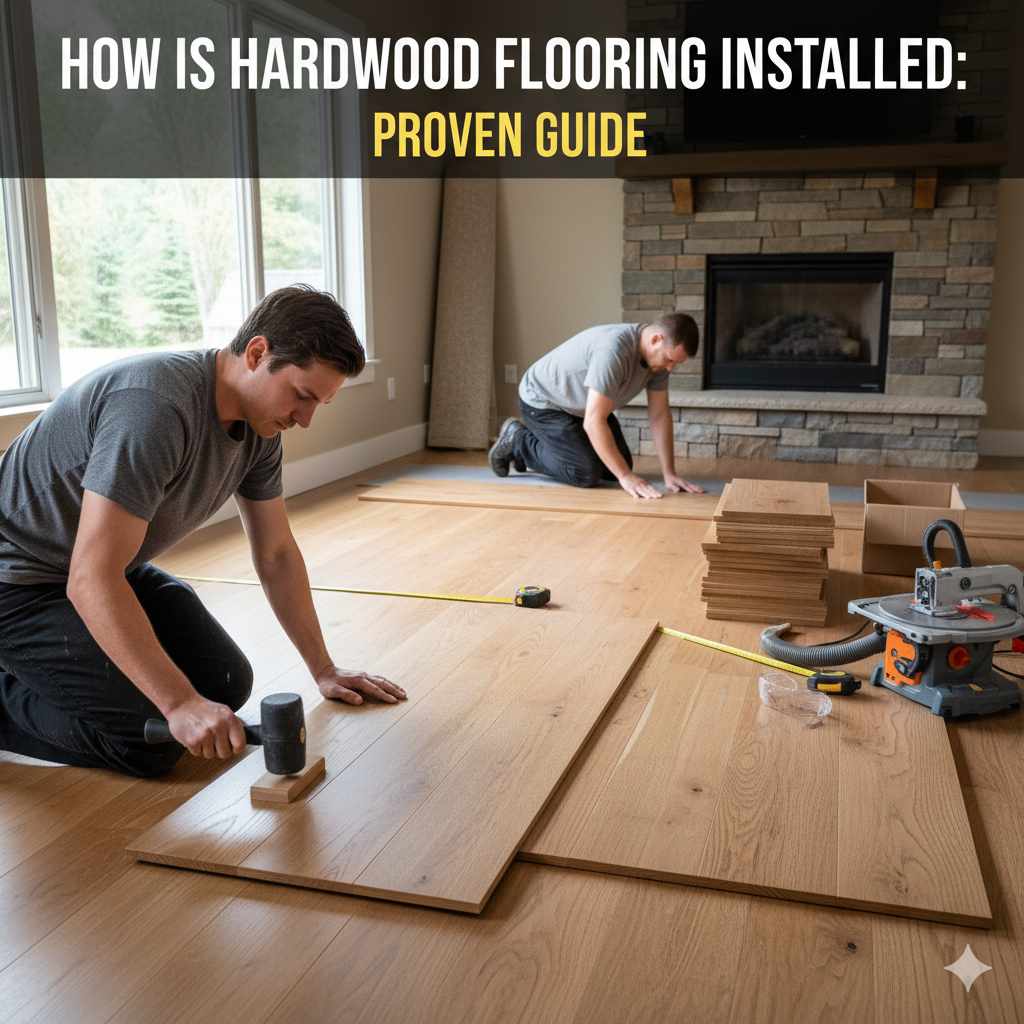
How Is Hardwood Flooring Installed: Proven Guide
Installing hardwood flooring involves preparing the subfloor, acclimating the wood, carefully laying planks using specific tools like a flooring nailer, and finishing with trim. This guide breaks down the process into simple, manageable steps for a beautiful, durable floor you can install yourself, ensuring a professional look with confidence.
Have you ever admired a beautiful hardwood floor and thought, “I could never do that”? Many homeowners feel the same way when it comes to installing hardwood. It’s a project that feels big and a bit intimidating, especially when you’re starting out. But what if I told you that with the right guidance, a few key tools, and a bit of patience, you absolutely can lay a stunning hardwood floor? This guide is here to show you that it’s not only possible but also incredibly rewarding. We’ll walk through each step, making it clear and easy to follow, so you can achieve that dream floor without the professional price tag. Get ready to transform your space!
Your Step-by-Step Guide to Installing Hardwood Flooring
Installing hardwood flooring can seem like a monumental task. The good news is, it’s a DIY-friendly project when you break it down. We’ll cover everything from the crucial preparation stages to the final touches that make your new floor shine. Think of me as your guide in the workshop, here to make sure you have the confidence and knowledge to tackle this project successfully.
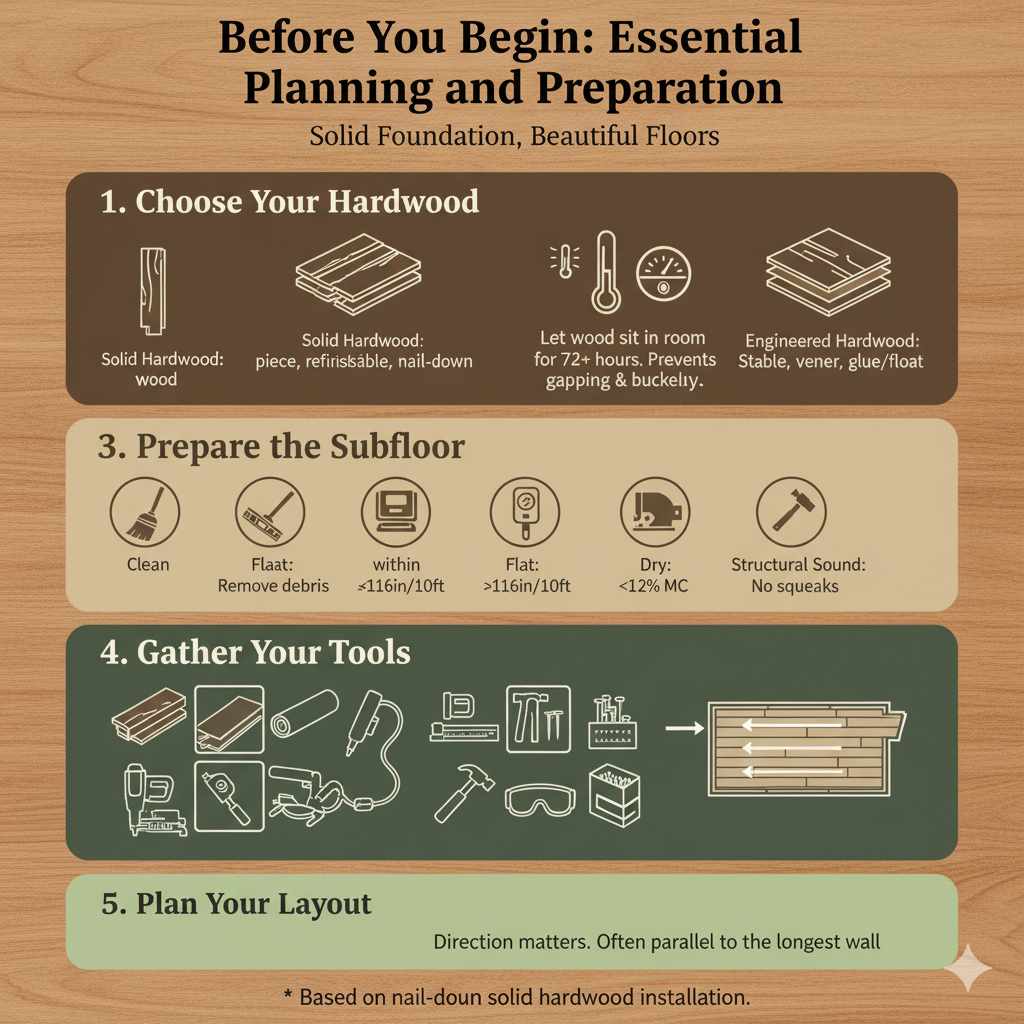
Before You Begin: Essential Planning and Preparation
This is where the magic starts – and it’s not about laying wood yet! Proper preparation is the single most important factor for a successful hardwood floor installation. Skipping these steps can lead to a host of problems down the line, like boards gapping, squeaking, or even warping. Let’s make sure your foundation is solid.
1. Choose Your Hardwood Flooring Wisely
There are two main types of hardwood you’ll encounter:
- Solid Hardwood: These planks are milled from a single piece of wood. They are durable and can be sanded and refinished multiple times, offering a lifetime of beauty. They are typically installed by nailing or stapling to a wooden subfloor.
- Engineered Hardwood: These planks have a core of plywood or high-density fiberboard (HDF) topped with a layer of real hardwood veneer. They are more stable and can be installed in more environments, including below grade or over concrete, and often offer glue-down or floating installation methods.
For this guide, we’ll focus primarily on the common nail-down installation for solid hardwood, which is a traditional and popular method. However, the preparatory steps largely apply to all types.
2. Acclimate Your Flooring
This is non-negotiable! Hardwood is a natural material that expands and contracts with changes in humidity and temperature. Before you even think about opening the boxes, let the wood sit in the room where it will be installed for at least 72 hours (check manufacturer recommendations, as some require longer). This allows the wood to adjust to your home’s environment. Keep the room at your usual living temperature and humidity levels during this time.
Why is this so important? Imagine installing wood that’s too moist in a dry room. It will shrink, leaving gaps between the boards. Conversely, if it’s too dry and the room is humid, it will swell, causing buckling. Acclimation prevents these issues.
3. Prepare the Subfloor
Your subfloor is the foundation for your new hardwood floor. It needs to be:
- Clean: Remove all old flooring, staples, nails, glue, paint, and any other debris. A shop vacuum will be your best friend here.
- Flat: The U.S. Forest Products Laboratory recommends that the subfloor be flat within 3/16 inch over a 10-foot span. High spots can be sanded down, and low spots might need leveling compound. An uneven subfloor will cause the hardwood to creak and can lead to board failure. You can check flatness with a long, straight edge.
- Dry: Moisture is the enemy of hardwood. Ensure your subfloor is completely dry. For basements or slabs, it’s crucial to test for moisture. A general guideline for moisture content in wood subfloors is typically less than 12%, but always check the hardwood manufacturer’s specific requirements. You can use a moisture meter for accuracy.
- Structurally Sound: Ensure your subfloor is securely nailed or screwed down. Loose subfloors will cause squeaking. Check for any soft or damaged areas that need repair.
If you are installing over concrete, you will likely use a plywood underlayment or a specialized vapor barrier and adhesive system, depending on the type of hardwood and your specific situation. For nail-down installations, a plywood subfloor is standard.
4. Gather Your Tools and Materials
Having everything ready before you start will make the process much smoother. Here’s a list of common tools and materials you’ll need:
| Tool/Material | Purpose |
|---|---|
| Hardwood Flooring Boards | Your chosen wood planks (calculate 10-15% extra for waste and cuts). |
| Underlayment/Vapor Barrier | Protects against moisture and can provide some sound dampening (required over concrete, often recommended over wood subfloors). |
| Flooring Nailer (or Stapler) | Specialized tool for driving nails or staples at an angle through the tongue of the board into the subfloor. You can often rent these. |
| Air Compressor | Powers the flooring nailer/stapler. |
| Chop Saw or Miter Saw | For making clean, precise cuts across the width of the boards and trimming ends. |
| Jigsaw | For cutting around obstacles like doorways, vents, or pipes. |
| Measuring Tape & Pencil | For accurate measurements and marking cuts. |
| Pry Bar | To gently adjust boards or remove stubborn ones. |
| Hammer (5 lb. or heavier) | For striking the flooring nailer’s piston and for face-nailing where necessary. |
| Broom & Vacuum | To keep the subfloor and work area clean. |
| Flooring Undercut Saw | Optional, but very helpful for cutting door casings and jambs to allow planks to slide underneath cleanly. |
| Safety Glasses & Work Gloves | Essential personal protective equipment (PPE). |
| Flooring Nails/Staples | Specific fasteners designed for hardwood installation. |
| Wood Chunks/Shim | Small pieces of wood to help secure the first and last boards. |
5. Plan Your Layout
Consider the direction of your boards. Typically, they should run parallel to the longest wall in the room or in the direction of natural light. This makes the room feel larger and more cohesive. Open a few boxes and mix planks from different boxes to ensure a natural variation in color and grain across your floor.
Step-by-Step Installation: Laying Your Hardwood Floor
Now that your subfloor is ready and your wood has acclimated, it’s time to start laying planks. We’ll focus on the nail-down method, which is common for solid hardwood.
Step 1: Install the First Row
This is one of the most critical steps because the straightness of your first row dictates the straightness of your entire floor. You’ll often need to trim the tongue off the edge of the boards that will face the wall. Use a pry bar to gently tap them into place, ensuring the wall gap is consistent.
- Select Boards: Choose your best-looking boards for the first row, as they will be most visible.
- Trim Tongue: For the boards against the wall, use a hammer and chisel or a table saw to carefully remove the tongue side of the board. This allows the groove side to face the wall, ready to accept the next plank.
- Mark Your Line: It might be wise to lightly pencil a chalk line on the subfloor as a visual guide for the straight edge of your first row of boards, especially if your walls aren’t perfectly straight.
- Secure the First Row: Carefully position the first board. Then, place your specialized flooring nailer (some start with face-nailing an inch or two from the wall, or using a special starter board). Drive nails through the face of the board, angled down into the joists. You may need to pre-drill holes if you’re close to the wall. Use small blocks of wood to help snug boards together if needed.
- Stagger Joints: Ensure your board ends don’t line up perfectly with the previous row. Aim for a minimum of a 6-inch stagger, but more is usually better for a natural look and structural integrity.
Step 2: Use Your Flooring Nailer/Stapler
Your flooring nailer is designed to do the hard work for you. It drives a cleat (a special nail) at an angle through the tongue of the board and into the subfloor, securing the plank without damaging its visible surface.
- Position the Nailer: Place the nose of the nailer against the tongue of the plank, making sure it sits flush on both the board and the subfloor.
- Operate the Nailer: Give the tool a firm strike with your hammer (follow the tool’s manual). This drives the cleat.
- Consistent Nailing: Place nails according to the manufacturer’s recommendations, typically every 6-8 inches and at least 1-2 inches from the end of each board.
- Work Across the Room: Continue laying boards, ensuring each one is seated tightly against the previous one before nailing. Place pieces of wood at the end of a row to gently tap boards into place.
Step 3: Staggering and Cutting Boards
Random staggering is key to a beautiful and stable floor. As you approach the end of a row, you might have a piece that’s too long. Cut it to size and use the leftover piece to start the next row, as long as it’s long enough to meet the minimum staggering requirement.
- Measure and Mark: Accurately measure the space needed for the last board in a row. Mark the board with your pencil.
- Cut Carefully: Use your chop saw for straight cuts. Ensure the measuring side faces up on the saw for accuracy.
- Save Off-Cuts: Keep these pieces! They are perfect for starting subsequent rows to achieve random joint staggering. A general rule is that the end joints in adjacent rows should be at least 6 inches apart.
- Fit the Final Board: Gently tap the board into place, ensuring a tight fit against the prior row. Nail it securely.
Step 4: Handling Obstacles and End Joints
Doorways, vents, and unique room shapes are common. Avoid having end joints land directly on these features where possible. You’ll often have to cut boards to fit around them.
- Around Doorways: Use a flooring undercut saw or a hand saw to cut door casings and jambs flush with the wall. This allows you to slide the hardwood plank directly underneath for a clean, professional finish.
- Around Obstacles: For vents or pipes, measure carefully and use a jigsaw to cut the board to fit snugly around them. You might need to use short pieces or even face-nail in tight spots if clearance is an issue.
- Short Ends: When you reach a full row, the last board often needs trimming. Save the off-cut. If it’s long enough (at least 6 inches), it can be used to start the next row. This creates a staggered pattern and reduces waste.
Step 5: The Final Row
The last row is often the trickiest because you have less space to work. You’ll likely need to trim the tongue off the last row of boards to fit them against the wall.
- Measure Precisely: Measure the exact width needed for the last board, accounting for the inevitable gap between it and the wall. You typically lose about ½ inch due to the tongue and groove, plus the expansion gap.
- Trim the Tongue: Trim the tongue off the last row boards that will face the wall.
- Use a Pull Bar: A pull bar is a specialized tool that hooks onto the edge of the board to allow you to pull it tightly against the previous row.
- Face-Nail: You’ll likely need to face-nail the last row (driving nails through the surface of the board). Countersink the nails slightly so they don’t protrude. You can then fill these holes with wood filler that matches your floor color.
Step 6: Finishing Touches
Once all the flooring is laid, it’s time for the final details.
- Install Baseboards and Trim: Reinstall existing baseboards or install new ones. Nail them to the wall, not to the floor, to allow for expansion and contraction. This also covers the necessary expansion gap around the perimeter.
- Install Transition Strips: Use these at doorways, where your hardwood meets different flooring types (like tile), or in any opening. They help create a smooth transition and hide expansion gaps.
- Clean Up: Sweep and vacuum thoroughly. Remove any pencil marks from the floor.
Understanding Different Installation Methods
While we focused on nail-down, it’s good to know about other methods:
- Glue-Down: Often used for engineered hardwood, especially over concrete or commercial spaces. A special adhesive is spread on the subfloor, and planks are pressed into it. This is generally a quieter installation than nail-down.
- Floating: Common for engineered and laminate flooring. Planks are joined together (often with a click-lock system) but not attached to the subfloor. They “float” over a foam underlayment. This is the easiest DIY method but has limitations on where it can be used.
Pros and Cons of Installing Hardwood Flooring Yourself
Like any DIY project, there are advantages and disadvantages to installing hardwood flooring yourself.
| Pros | Cons |
|---|---|
| Cost Savings: You’ll save significantly on labor costs, which can be a large portion of a professional installation budget. | Time Commitment: It takes time and patience, especially for beginners. Don’t underestimate the hours required. |
| Sense of Accomplishment: The satisfaction of completing a beautiful, high-quality project in your home is immense. | Tool Investment/Rental: You might need to purchase or rent specialized tools like a flooring nailer and compressor. |
| Control Over Quality: You can take your time, ensuring each plank is laid perfectly, leading to a superior final result. | Potential for Errors: Mistakes can be costly, leading to wasted material or a floor that needs professional correction. |
| Flexibility: You can schedule the work around your own availability. | Physical Demands: It involves a lot of bending, kneeling, and repetitive motion, which can be physically taxing. |
Maintaining Your New Hardwood Floor
Once your beautiful new floor is installed, proper maintenance will keep it looking gorgeous for years. Regular sweeping or vacuuming (with a hard floor attachment) will remove dirt that can scratch the finish. For damp cleaning, use a wood floor cleaner recommended by the manufacturer and only use a slightly damp mop. Avoid excessive water, as it can damage the wood.
For more detailed care instructions, always refer to your specific flooring manufacturer’s guidelines. Resources like the National Wood Flooring Association (NWFA) offer excellent consumer advice on care and maintenance.

Frequently Asked Questions About Hardwood Flooring Installation
How long does it take to install hardwood flooring?
For a beginner, a single room could take anywhere from 2-4 days, depending on the room’s size, complexity, and your pace. Professionals can often do it much faster, but it’s wise to budget ample time for your first DIY project to ensure quality.