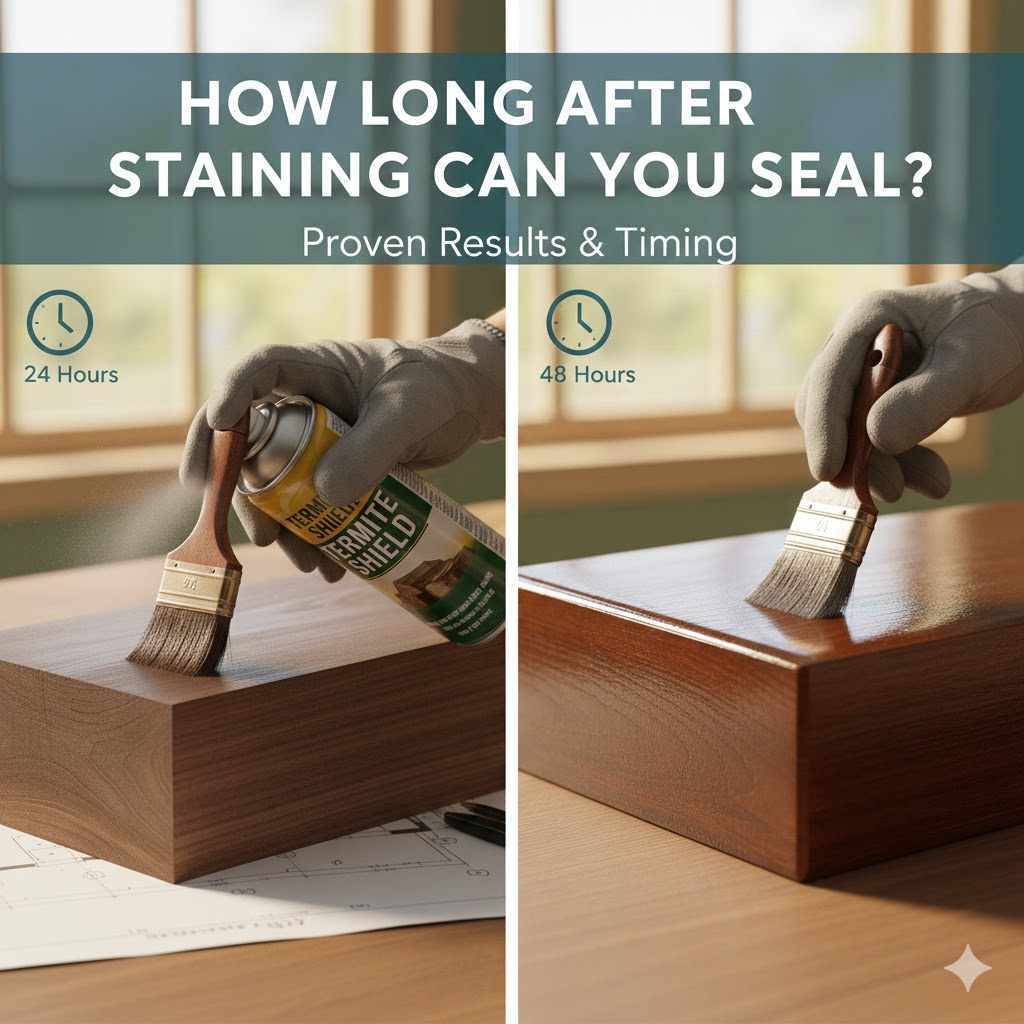
How Long After Staining Can You Seal: Proven Results
The safe wait time after staining wood before applying a sealer is typically 24 to 72 hours, but this depends heavily on the stain type, environmental conditions, and the specific product instructions. Allowing adequate drying time ensures the stain has fully penetrated and flashed off volatile compounds, guaranteeing a smooth, durable, and beautiful finish when you seal it.
Welcome to the workshop! If you’ve just finished applying that beautiful wood stain, congratulations! You’ve done the hard part of coloring the wood. Now, you’re standing there, brush in hand, eager to add the final protective layer—the sealer. But wait! Should you seal it right away? Rushing this step is one of the quickest ways to ruin hours of beautiful staining work. If you seal too soon, your finish might look cloudy, peel, or never cure right. Don’t worry. As your woodworking mentor, I promise to guide you through the exact science and simple waiting times needed for professional-level results every time. We are going to nail down the perfect waiting period so your next project shines!
Why Waiting Before Sealing Is Not Optional (The Science of Curing)
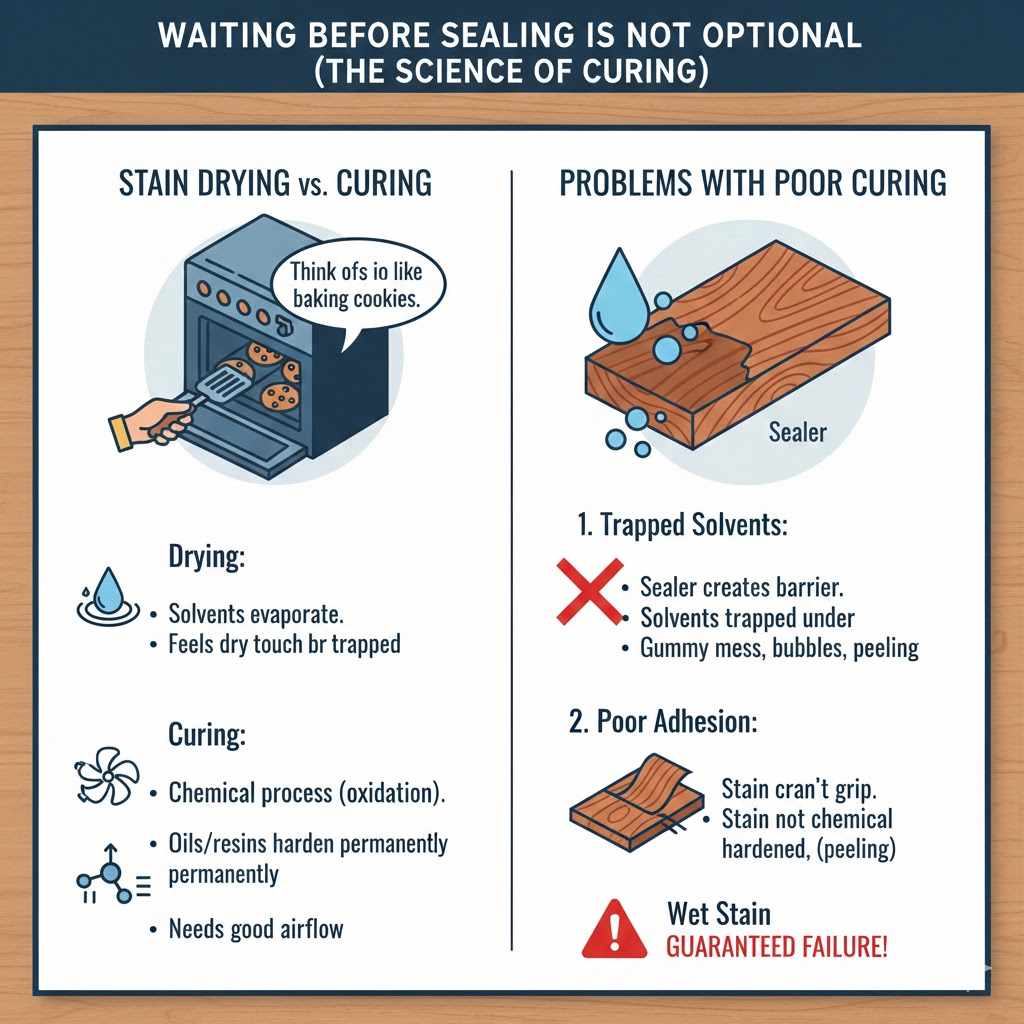
When you apply wood stain, you are not just painting the surface; you are putting oils or dyes into the wood grain. This process needs time to fully set. The waiting period isn’t just about the stain being “dry to the touch”; it’s about curing.
Stain Drying vs. Curing
Think of it like baking cookies. They might look done on the outside, but if you take them out too soon, the middle is gooey.
Drying: This is when the solvents (the liquid carriers in the stain) evaporate. When the stain feels dry, most of the solvent is gone, but some trace amounts remain trapped.
Curing: This is the chemical process where the oils or resins in the stain oxidize (react with the air) and harden permanently. This needs good airflow.
If you apply a sealer (like polyurethane, lacquer, or varnish) over wet or partially cured stain, two big problems happen:
1. Trapped Solvents: The sealer creates an airtight barrier. Any solvent trying to escape from the stain gets trapped under the sealer. This leads to a gummy, sticky mess, or worse, bubbles and delamination (peeling).
2. Poor Adhesion: The sealer cannot properly grip the surface of the stain because the stain itself hasn’t chemically hardened.
Determining the Wait Time: How Long After Staining Can You Seal?
The definitive answer depends almost entirely on the type of stain you used. Always check the manufacturer’s label first—that’s the gospel for that specific product. However, we can break down the common timeframes based on stain category.
1. Oil-Based Stains (Alkyd/Traditional Oil)
Oil-based stains take the longest because they rely on slow oxidation to cure. They create a rich, deep color, but patience is key here.
Minimum Wait: 48 hours.
Recommended Wait: 72 hours (3 full days).
Oil-based products need excellent ventilation. If your shop or workspace is humid or lacks airflow, you absolutely must extend this time to 4–5 days. For interior furniture or detailed cabinetry, 72 hours is the safe sweet spot. For exterior projects exposed to high moisture, waiting until the wood smells completely dry (often closer to 5 days) is better for longevity.
2. Water-Based Stains
Water-based stains dry much faster because water evaporates quickly. This makes them appealing for beginners and quick turnarounds.
Minimum Wait: 24 hours.
Recommended Wait: 24 to 48 hours.
While they dry fast to the touch, it’s still wise to wait the full 24 hours, especially if you applied a thick coat. If you are using a high-quality, thin coat, you might be able to move to sealing within 12 hours if conditions are perfect (low humidity, high temperature). However, sticking to 24 hours eliminates almost all risk.
3. Gel Stains
Gel stains sit mostly on the surface and wipe off the excess. They tend to cure similarly to traditional oil stains, as they often use an oil or alkyd base.
Recommended Wait: 48 to 72 hours.
Since gel stains are often used on challenging woods (like laminate or plywood) where adhesion is already a concern, giving the oil carrier ample time to harden is crucial for sealing success.
4. Penetrating (Wipe-On) Oil Finishes (Dye Stains)
Some products, like certain colored Tung oils or specialized wiping stains, don’t require a separate sealer coat, as they are designed to function as both stain and finish in multiple coats. If you are applying a traditional clear sealer over them, wait at least 48 hours.
The Environment Factor: It’s Not Just About the Can
The timeline provided on the can assumes ideal conditions. In the real world, your garage might be cool, damp, or breezy—all factors that drastically slow down curing time. This is often where beginners go wrong.
Humidity Levels
Humidity is the arch-enemy of curing finishes, especially oil-based stains and oil-based topcoats (like traditional polyurethane).
High Humidity (>70%): Water in the air fights to enter the stain film, slowing down the evaporation of solvents and the chemical reaction (oxidation). You must add at least one full day to the waiting time for every 10% humidity above 50%.
Low Humidity (<30%): Dries faster, but can sometimes cause surface skins to form prematurely before the lower layers dry, leading to trapped solvents later. Be watchful, but shorter wait times are usually acceptable here.
Temperature
Curing speeds up with heat, but too much heat can cause the finish to “skin over” too quickly.
Ideal Curing Temperature: 65°F to 75°F (18°C to 24°C).
Cold Temperatures (<60°F): Dramatically slow down the curing process. If you are working in a cool basement, an oil-based stain might need closer to a week to fully cure.
Airflow
Stain cures through a process that requires fresh air to bring in oxygen (for oil-based stains) and carry away evaporated solvents.
If you are staining something indoors without adequate ventilation (an exhaust fan or open windows), double your expected waiting time.
The Smell Test and Touch Test: Simple Ways to Check Readiness
While manufacturer guidelines are the starting point, experienced woodworkers use their senses to confirm readiness before sealing.
1. The Feel Test (Non-Destructive Check)
Gently place your fingertips on a spot that received a heavier application of stain.
It should feel completely dry, not slightly tacky or oily, even under pressure.
Caution: If you use a water-based stain, you want it dry. If you use an oil-based stain, you want it cured, which feels less oily than just “dry.”
2. The Smell Test (The Best Indicator)
This is perhaps the most reliable non-technical test for oil-based finishes.
If you can strongly smell the characteristic solvent odor (often described as turpentine-like or “chemically”), the stain has not cured.
When the stain is truly ready, the smell should be faint, neutral, or nearly gone. If you can smell it strongly while applying the sealer, you risk a bubbling or soft topcoat.
3. The Rag Test (For Confirmation)
If you applied a traditional oil stain and are nervous, take a clean white rag and wipe a very inconspicuous area—like the underside of a table leg.
If the rag picks up any color whatsoever, the stain is not ready. You must wait longer.
Comparing Sealers: Drying Times Matter for Subsequent Coats
Once the stain is ready, you need to know the recommended wait time before the sealer itself can be recoated. Different sealers have different chemistries.
Here is a quick comparison of how long you should generally wait after applying the sealer before applying the next coat of sealer (or the final topcoat):
| Sealer Type | Wait Time Before Recoat (After Stain Cured) | Key Consideration |
|---|---|---|
| Water-Based Polyurethane | 2–4 hours | Dries fast; light sanding usually needed between coats |
| Oil-Based Polyurethane | 6–12 hours | Much longer curing time between coats |
| Lacquer / Shellac | 30 minutes – 1 hour | Very fast flash-off; quick successive coats |
| Hardwax Oils (e.g., Osmo) | 12–24 hours | Often 1–2 coats on Day 1; wait 24 hours before final buffing or use |
Source Note: These times are typical for general indoor use; always consult the specific technical data sheet for the product you purchased, especially when dealing with professional-grade coatings, as detailed in resources from organizations like the American Coatings Association.
Step-by-Step Guide: Sealing After Staining Like a Pro
Follow these steps to ensure your hard work pays off with a perfect, long-lasting finish.
Phase 1: Application and Initial Drying
1. Apply Stain Evenly: Use your preferred method (rag, brush, sprayer) to apply an even coat of stain.
2. Wipe Excess (If Required): If using an oil-based wiping stain, give it the required dwell time (usually 5–15 minutes), then thoroughly wipe off all excess material. Leftover oil will never fully cure and will ruin your sealer.
3. Begin Initial Cure: Place the project in a location with good airflow and consistent temperature (65–75°F). Do not cover it unless necessary for dust protection.
Phase 2: Monitoring and Testing
4. Check Manufacturer’s Minimum Time: Set a reminder for the shortest recommended wait time (e.g., 24 hours for water-based).
5. Perform Environmental Check: Ask yourself: Is the room dusty? Is it cold (under 60°F)? Is the humidity high? If yes to any, add 24 hours to your expected wait time.
6. Execute Sensory Tests: On Day 2 or 3, perform the Smell Test and the Feel Test. If there is any tackiness or noticeable odor, wait another half-day. It is far better to wait an extra 12 hours than to strip and refinish the whole project.
Phase 3: Preparing for the Seal Coat
7. Light Surface Cleaning (If Necessary): Once fully cured, you can gently dust the surface with a tack cloth or a vacuum with a soft brush attachment to remove any dust that settled during the curing time. Do not use harsh chemicals or solvents.
8. Prep the Sealer: If using polyurethane, stir your can thoroughly for at least two minutes (do not shake, as this creates bubbles!).
9. Apply First Seal Coat: Apply a thin, even coat of your chosen sealer using a high-quality brush, foam applicator, or sprayer, following the manufacturer’s specific instructions for application technique.
Phase 4: Subsequent Coats and Final Cure
10. Wait for Sealer Dry Time: Refer to the table above. For standard polyurethane, wait 6–12 hours until it is dry to the touch and no longer soft.
11. Light Sanding (Recommended Craftsmanship Step): Use 220 or 320 grit sandpaper, very lightly scuff the surface to knock down any dust nibs or high spots. This vastly improves adhesion for the next coat.
12. Recoat: Apply your second seal coat. Repeat steps 10 and 11 if you desire maximum durability (most projects benefit from 3 coats total).
13. Final Cure: Allow the final coat to fully cure according to the can directions (often 3–7 days) before heavy use, although it will be dry to the touch much sooner.
Troubleshooting Common Sealing Mistakes
Even with careful waiting, things can sometimes go slightly sideways. Here is what to do if you encounter issues related to rushing the staining/sealing sequence.
| Symptom After Sealing | Probable Cause | Mentor’s Advice |
|---|---|---|
| Cloudy or milky finish | Trapped solvents or excess moisture in first sealer coat | Common with oil-based finishes sealed too soon in humidity; often requires stripping |
| Peeling or flaking | Poor adhesion; sealer didn’t bond with cured stain | Stain was still active or oily; scrape and restart with longer wait time |
| Soft / tacky topcoat after days | Solvents trapped beneath sealer film | Increase airflow and warmth; if still tacky after a week, strip |
| Color bleeding onto rag | Residual stain still on surface | Wait 12–24 more hours, lightly re-wipe residue without removing stain |
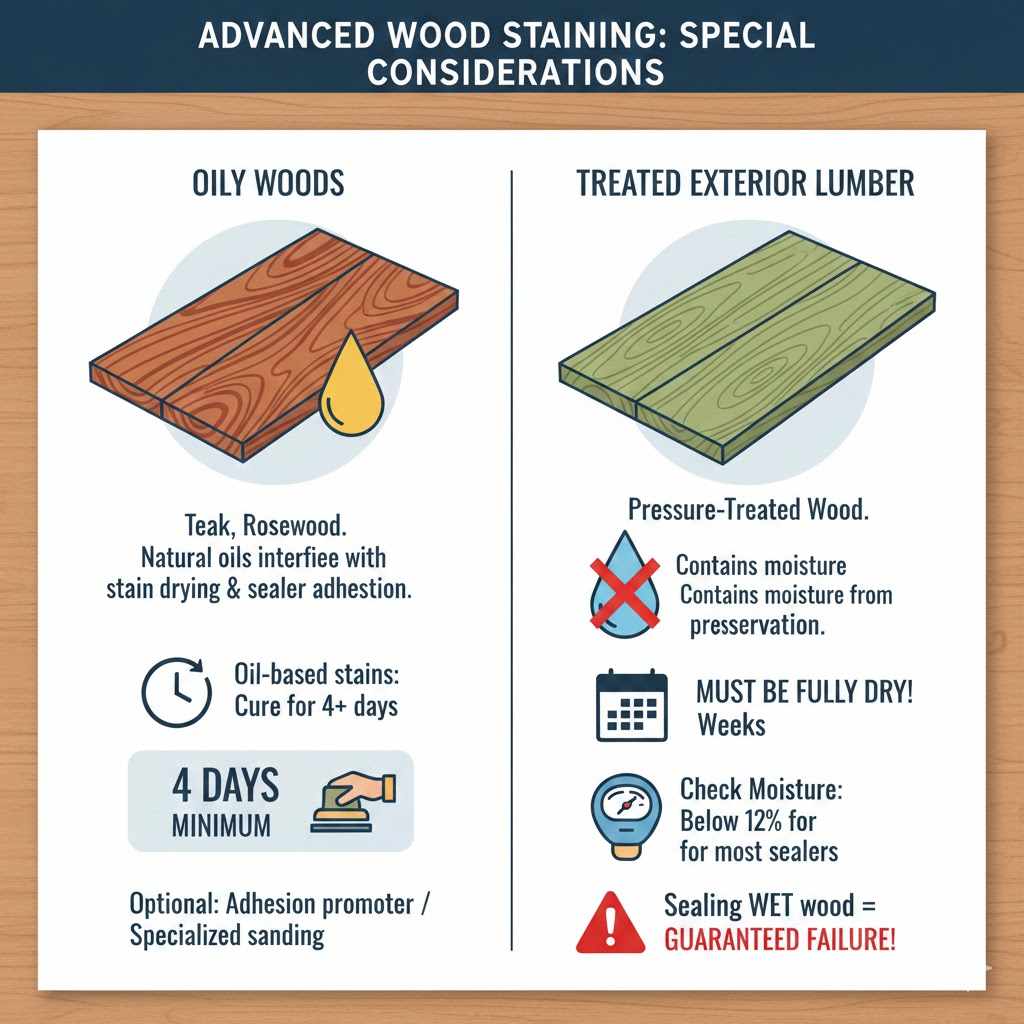
Advanced Considerations for Specific Wood Types
Some woods are naturally more oily or porous than standard pine or oak, and they require special attention regarding the stain cure time.
Oily Woods (e.g., Teak, Rosewood)
These woods contain natural oils that can interfere with both stain drying and sealer adhesion.
Action: Always let oil-based stains cure for 4 days minimum on very oily woods. Sometimes, an adhesion promoter or specialized sanding between stain and sealer (after waiting) is recommended.
Woods Treated with Preservatives (Exterior Lumber)
If you are staining pressure-treated lumber (exterior decks), ensure it is fully dry first—this can take weeks, as the wood needs to shed retained moisture. Sealing wet wood (treated or not) will guarantee failure. Check the wood moisture content if you have a meter, aiming for below 12% for most sealers.
Frequently Asked Questions (FAQ) for Beginner Woodworkers
Q1: Can I seal a water-based stain the same day I apply it?
Generally, no. While water-based stains dry very quickly, it is much safer to wait a minimum of 24 hours. Rushing often causes the sealer to lift or mix with the water-based stain pigments, leading to a muddy look.
Q2: What if I used a very thin coat of oil-based stain? Can I seal sooner?
If the stain looks very light and almost dry within 36 hours, you might get away with sealing after 36 hours, but 48 hours remains the safest bet. Over-thinning doesn’t eliminate the oil cure time needed.
Q3: Is there a specific type of sealer that cures faster over stain?
Yes, water-based topcoats usually offer the fastest recoat times (sometimes as little as 2–4 hours between coats of sealer), which is appealing after a long wait for the oil stain to cure. However, you still must wait for the stain underneath to be fully cured first.
Q4: How do I know if my humidity is too high for curing the stain?
If you don’t have a hygrometer, use the “finger test” on a sealed container of water left out overnight in your workshop area; significant condensation indicates high humidity that will slow curing.
Q5: If I use a pre-stain conditioner, does that change the wait time?
Yes. Pre-stain conditioner needs to dry completely before staining, but after staining, you revert to the cure time specific to the stain you used. The conditioner doesn’t generally speed up the stain cure time itself.
Q6: Can I speed up curing time with a heat gun?
Be very careful. While mild warmth helps evaporation, using direct, intense heat (like a heat gun) can cause the stain to skin over immediately, trapping wet material underneath. Only use low, broad heat if absolutely necessary.
Conclusion: The Confidence of Patience in Finishing
Knowing exactly how long after staining can you seal transforms you from an anxious beginner into a confident craftsman. Remember that staining sets the beauty, but the seal is what guarantees its survival. In woodworking, patience is truly the most powerful tool in your box. By respecting the cure time—be it 24 hours for water-based or 72 hours (or more!) for oil-based—you ensure that the chemicals do their job perfectly, giving you a flawless bond. Take that extra day, smell the wood, feel the surface, and then, and only then, reach for that beautiful topcoat. You’ll be rewarded with a deep, durable, and professional finish that honors the wood and your hard work. Happy crafting!