How to Glue Loose Chair Rungs Back in Place Safely
Use injection repair if the rung is merely loose, the gap is thin, and the joint still lines up; remove the rung only when the joint is crushed, broken, spinning, or you can’t get glue into the socket. Bad repairs split rails, lock the chair crooked, or ruin fragile old parts. I use a symptom-based check first, then pick injection or full removal and glue it the safest way.
What you’ll need


- Wood glue (PVA/carpenter’s glue)
- Clamp with enough reach for the chair geometry
- Deadblow hammer
- Gloves and rags
- Scraper, chisel, or pick for old glue removal
- Marker or painter’s tape for chair labeling
- Drill and 1/8-inch drill bit
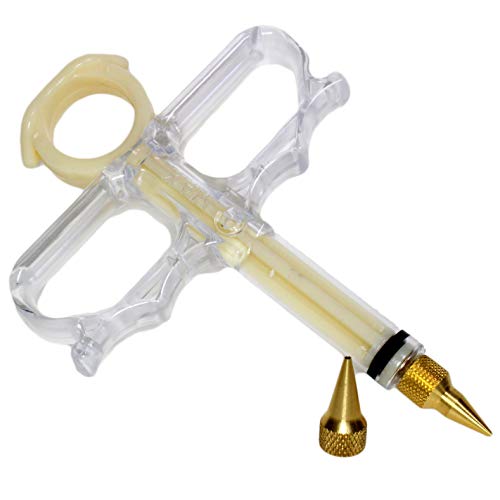
- Glue injector or syringe-style applicator
- Wood plug or matching dowel for the access hole
- Vacuum or brush for debris cleanup
- Optional: hide glue or epoxy for antique or fragile chairs
According to How To Fix a Wobbly Chair By Disassembling & Re-Gluing — The chair-fixing project estimates 2 to 3 hours plus drying time. (source)
How to tell what kind of loose rung you have
Start by deciding whether the rung is only loose, or whether the joint has failed in a way that needs disassembly. A clean, wobbly joint usually means failed glue; a spun, crushed, swollen, or cracked mortise points to a deeper problem. If the chair has visible finish contamination, pegs, upholstery, or hidden fasteners, do not force it apart.
Loose wooden chair rungs are usually failed glue joints, and the repair path depends on whether the joint can come apart without damage. The chair should be checked for hidden screws and nails before anything moves.
Decision chart
| Branch | Exact tools needed | Expected cure window | Red-flag symptoms |
|---|---|---|---|
| Removable rung | Deadblow hammer, clamp, scraper, wood glue, labels, cleanup rags | Clamp until dry; full cure before load | Cracked shoulder, ovalized mortise, glue-starved joint, hidden fastener |
| Pegged rung | Inspection light, marker, drill, clamp, glue injector if needed | Clamp until dry; allow full cure before stressing | Peg will not release, split wood, spinning tenon, no access for glue |
| Upholstered chair | Glue injector, 1/8-inch drill bit, clamp, plug material, drop cloth | Clamp until dry; plug after cure | Staples, tacks, fabric blocking access, visible upholstery movement, finish staining risk |
| Antique or fragile chair | Glue injector, minimal clamping, hide glue or epoxy if appropriate, inspection tools | Follow glue label; give extra cure time before use | Flaking finish, brittle wood, existing repairs, split joints, swollen mortises |
Which repair path should you choose?
Choose full removal only when the rung can come out cleanly and the joint surfaces can be reset. Choose injection when the chair cannot be taken apart without damage, when upholstery blocks access, or when the joint is sound enough to accept adhesive through a small opening. Pegged or fragile chairs usually push the repair toward the least invasive method.
Removable rung
If the rung slides free with controlled tapping, full disassembly is the best option. That lets the old glue be removed and the joint be reset properly. This is the right path when the wood is sound and the fit is still tight enough to clamp correctly.
Pegged rung
A pegged joint can hide a lot of resistance. Stop before forcing it apart. If the peg blocks movement, the safer choice is often a partial repair or injection rather than cracking the mortise or shearing the peg.
Upholstered chair
Upholstery often blocks access to the socket. Favor injection from an underside or hidden point, then plug the hole after cure. Pulling the chair apart may damage fabric, webbing, or tacks.
Antique or fragile chair
Use the least invasive fix first. Antique chair parts can split, and old joints may fail in layers. Hide glue may suit a reversible historic repair, while epoxy is sometimes the better choice when the joint is worn out and the wood no longer accepts normal carpenter’s glue well.
Step 1: Inspect the chair and label every part
Mark every leg, rung, and orientation before anything moves. I put a number and a direction mark on each part, because angled pieces return in one position only. Check for hidden screws, nails, pins, pegs, staples, and finish buildup at the shoulders and mortise edges.
- Wrap each leg and rung with tape and mark its position.
- Inspect the joint line for hidden fasteners before applying force.
- Look for swollen wood, cracked shoulders, ovalized mortises, or waxy finish contamination.
- Choose disassembly only if the joint looks sound enough to reset.
Step 2: Remove the rung only if the joint can safely come apart
When the joint is openable, use a deadblow hammer for controlled separation. It gives a firm strike with less rebound than a rubber mallet, which may bounce and bruise the chair. Once the rung moves, stop and work it free without twisting the wood.
- Support the chair so the load does not rack the frame.
- Tap the joint with a deadblow hammer until it breaks free.
- Avoid a bouncing strike pattern; it splinters shoulders and ovalizes mortises.
- Lift the rung out only after the joint releases evenly.
Step 3: Reglue, clamp, and wait for cure
Use PVA wood glue when the wood is porous, the fit is sound, and the chair is not a special historic case. I reach for it on clean, dry wood where the tenon and mortise still meet well. PVA, often called carpenter’s glue, usually needs clamping to reach full strength and can be water-soluble when wet.
- Scrape or clean out all old glue from the tenon and mortise.
- Test-fit the joint before adding adhesive.
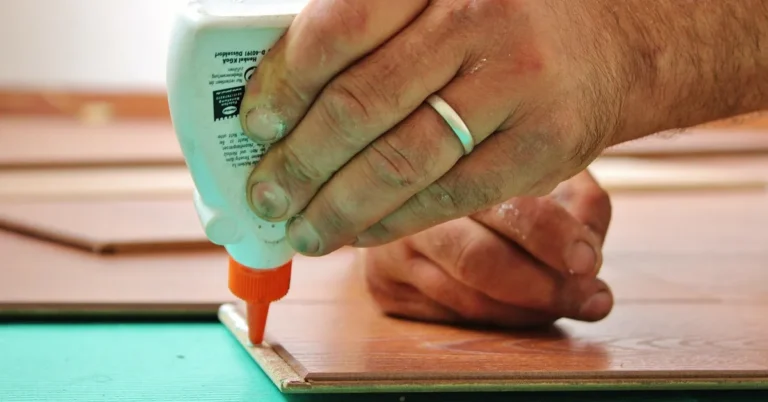
- Brush on fresh wood glue, then seat the rung fully.
- Clamp with enough reach to pull the joint tight without bending the frame.
- Keep the clamp on until the glue has dried, then let the chair sit undisturbed until the glue is fully cured.
- Wipe squeeze-out before it skins over, especially on visible shoulders.
Step 4: Inject glue when the joint will not come apart
Use a glue injector when the joint cannot be disassembled safely. Drill a hidden small hole from underneath when possible, then inject glue into the cavity until it appears at the joint seam. Clamp the joint after injection, and plug the hole once the glue has cured.
- Drill a 1/8-inch access hole where it will not be seen.
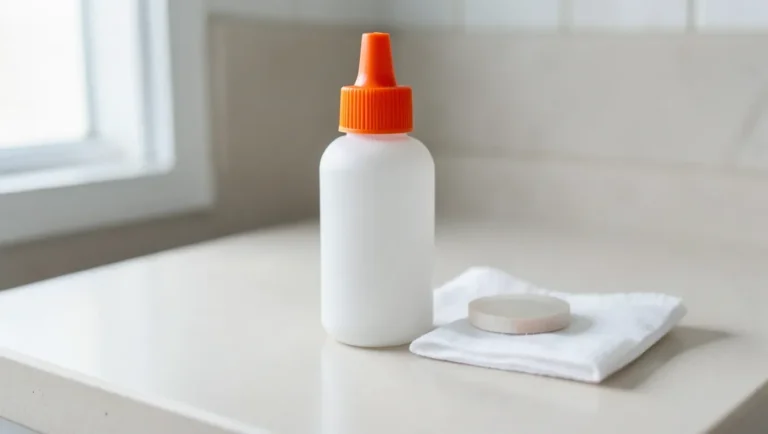
- Load the glue injector with wood glue or the chosen adhesive.
- Inject glue until it appears at the seam.
- Clamp the rung tight while the adhesive cures.
- Plug the hole after cure and trim it flush if needed.
The four-branch repair chart
| Branch | What to do | Tools | Expected cure window | Stop and escalate if… |
|---|---|---|---|---|
| Removable rung | Disassemble, scrape old glue, reglue, clamp | Deadblow hammer, clamp, scraper, wood glue, labels | Clamp until dry; do not load early | Mortise is ovalized, shoulder cracks, or the joint spins in place |
| Pegged rung | Inspect peg first; use partial access or injection if the joint cannot open cleanly | Light, marker, drill, clamp, glue injector | Clamp until dry; allow extra time on tight joints | Peg refuses to move, wood splits, or the repair would enlarge the mortise |
| Upholstered chair | Inject through a hidden hole and plug it after cure | Glue injector, 1/8-inch drill bit, plug, clamp | Clamp until dry; wait for full cure before use | Upholstery blocks access, or the fabric would be damaged by disassembly |
| Antique or fragile chair | Choose the least invasive repair; consider hide glue or epoxy | Inspection light, minimal clamp, injector, chosen adhesive | Follow adhesive cure time; allow longer if the joint is tired | Finish flakes, wood crumbles, or the joint has prior repairs and swelling |
Common mistakes
Skipping old glue removal is the easiest way to make a repair fail. Fresh adhesive tends to bond poorly to crumbly residue. When full disassembly is possible, clean the joint until bare wood is exposed.
Using the wrong glue is another problem. Choose PVA wood glue for clean, porous wood in normal indoor use. For antique or fragile chairs, hide glue or epoxy may fit better. Clamp pressure must match the chair geometry; a clamp that barely reaches will not hold the joint square.
Do not overdrill or place the access hole where it will stare back at you from eye level. Do not leave squeeze-out on visible shoulders, where it can stain the finish. Do not force apart pegged, upholstered, or fragile chairs that should have been injected instead.
If that didn’t work, try this next
If the rung still moves after a normal glue repair, step up only one level at a time. First, check for hidden contamination, especially wax or finish in the mortise. Then inspect for glue starvation or an ovalized socket. If the wood is worn out, a stronger adhesive or a joint rebuild may be needed.
- Disassemble only the affected joint and scrape it clean again.
- Recheck fit; if the mortise is loose, move from PVA to a more suitable adhesive.
- For a fragile or historic chair, switch to hide glue if reversibility matters.
- If the wood is crushed or ovalized, stop and consider joinery repair rather than more glue.
How do you glue a loose chair rung back in place?
Use glue only after you decide whether the joint should come apart or be injected. A clean, removable rung gets scraped, reglued, and clamped. A non-removable joint gets adhesive worked in through a hidden access hole, then clamped until dry and plugged after cure.
Do I need to take the chair apart to reglue the rung?
No. Full removal is best only when the joint can come apart without damage and the old glue can be cleaned off. If the chair is pegged, upholstered, fragile, or simply too tight to separate safely, injection repair is usually the better route.
What glue should I use for a loose chair rung?
PVA wood glue, also called carpenter’s glue, is the normal choice for porous wood and sound joints. It needs clamping and full cure time. For antique or fragile chairs, hide glue is often chosen when reversibility matters, while epoxy can help when the joint is worn and ordinary glue will not hold.
How do I get glue into a chair joint without disassembling it?
Drill a hidden 1/8-inch hole from underneath when possible, then use a glue injector to push adhesive into the cavity. Stop when glue appears at the seam, clamp the rung, and plug the hole after the repair cures. Place the hole where finish and sight lines matter least.
How long should a glued chair rung stay clamped?
Keep the clamp on until the glue dries, then leave the chair out of service until full cure. Exact cure time depends on the adhesive, temperature, and joint fit. If the chair is heavily loaded or the joint is tight, give it extra time before sitting on it.
Can I fix a chair rung that won’t come apart?
Yes. If the joint will not open safely, use glue injection instead of forcing it. Drill a discreet access hole, inject adhesive until it reaches the seam, clamp the joint, and plug the hole after cure. If the wood is cracked or the mortise is ovalized, stop and plan a more involved repair.
What if the rung joint is pegged or upholstered?
Treat both as limited-access repairs. Pegged joints may split if forced, and upholstered chairs can be damaged by full disassembly. In both cases, inspect first, then choose injection or partial access. If the joint is brittle, old, or already repaired, a conservative approach is safer than prying.
How do I remove old glue from chair joints before regluing?
Scrape the joint surfaces back to clean wood before adding fresh adhesive. Use a scraper, chisel, or pick, then vacuum the dust and chips. Old glue left in the mortise can block contact and interfere with the new bond reaching full strength.
Prevention
After the repair, keep the chair dry and avoid overloading it while the joint finishes curing. Water and movement are hard on fresh glue joints, especially where the fit is already worn.
Sponsored / affiliate links. As an Amazon Associate I earn from qualifying purchases. I may earn additional commission from eligible campaigns.