How to Paint Wood Furniture: Prep, Prime & Stop Bleed-Through
Painting wood furniture the right way means cleaning, sanding or deglossing, priming with a stain-blocking primer, and applying two thin coats of paint plus a protective topcoat. On dark woods like cherry, mahogany, or knotty pine, a shellac-based primer is the extra step most guides skip. Skip it and reddish tannin stains can bleed straight through a white or light-colored topcoat.
Below you get the full 12-step process, a primer chooser, recoat and cure times from the maker data sheets, and a lead-paint check to run before you sand any older piece.
How to Paint Wood Furniture: Proven Effortless Steps for Beginners
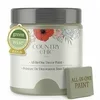
Beginner-Friendly All-In-One Pick
|
Country Chic All-In-One Chalk Paint, Sage Green, Pint, $30.95 A built-in primer and top coat means beginners can skip the separate priming step in this guide for most light-to-medium wood tones, then just add two thin coats.
|
Why Paint Wood Furniture?
You might be wondering why you should paint perfectly good wood. Well, there are many reasons! Sometimes, the wood’s finish is damaged beyond simple repair. Other times, your style has changed, and the current wood tone just doesn’t fit your decor anymore. Painting offers a fast, affordable way to:
- Update outdated styles.
- Match furniture to new color schemes.
- Conceal imperfections in the wood.
- Create a completely new look without buying new furniture.
- Protect the wood from moisture and wear.
Gathering Your Essential Supplies
Before we start, let’s make sure you have everything you need. Having your supplies ready makes the process smooth and prevents interruptions. Here’s a list of what you’ll want to have on hand:
Tools and Materials Checklist
- Screwdriver Set: For removing hardware.
- Drop Cloth or Old Sheets: To protect your workspace from paint drips and dust. You can find good quality drop cloths at most hardware stores.
- Degreaser/Cleaner: A simple all-purpose cleaner or a specialized TSP substitute (Trisodium Phosphate) works well to remove grime.
- Sandpaper: Various grits are crucial for preparation and smoothing. I recommend 120-grit for initial sanding, 180-grit for general smoothing, and 220-grit for a fine finish.
- Sanding Block or Electric Sander: A sanding block is great for smaller pieces and detail work. An orbital sander speeds up the process for larger surfaces.
- Tack Cloths: These sticky cloths are perfect for picking up fine dust after sanding. A clean microfiber cloth can also work.
- Wood Filler (Optional): For filling any holes or deep scratches.
- Primer: A good quality primer is essential for paint adhesion and a smooth finish, especially on dark wood or laminate.
- Paint: Choose a paint formulated for furniture. Latex, chalk paint, or cabinet paints are popular choices.
- Paint Brushes and Rollers: High-quality synthetic brushes for latex paint and foam rollers for a smooth finish.
- Painter’s Tape: To protect areas you don’t want to paint, like hardware or glass.
- Topcoat/Sealer (Optional but Recommended): Polyurethane or a wax finish to protect your painted surface.
- Stir Sticks: For mixing paint thoroughly.
- Gloves and Mask: For your safety.
The Step-by-Step Guide to Painting Wood Furniture
Now, let’s get down to business! Follow these steps for a professional-looking finish you’ll be proud of.
Step 1: Prepare Your Workspace
Find a well-ventilated area. A garage, basement, or even outdoors on a calm day is ideal. Lay down your drop cloth to protect the floor from dust and paint. Gather all your supplies so they are within easy reach.
Step 2: Clean the Furniture Thoroughly
Wood furniture can accumulate layers of dust, grease, and grime. Use a degreaser or a TSP substitute mixed with water to wipe down the entire piece. One exception: Zinsser’s data sheet for its B-I-N shellac primer says to wash with a household ammonia and water solution and not to use TSP, so match the cleaner to the primer you plan to use. For waxy or heavily soiled pieces, start with our wood furniture cleaning guide. Pay attention to crevices. Rinse with a clean, damp cloth and allow it to dry completely. This step is crucial for ensuring your primer and paint adhere properly.
Step 3: Remove Hardware and Disassemble (If Necessary)
Take off knobs, pulls, hinges, or any other hardware. If drawers or doors can be easily removed, it’s often easier to paint them separately. Keep the hardware in a small bag or container so you don’t lose any pieces.
Step 4: Repair Imperfections
Inspect the furniture for any chips, cracks, or deep scratches. Use wood filler to fill these areas. Follow the product’s instructions for application and drying time. Once dry, sand the filled areas smooth, flush with the surrounding surface.
Check for Lead Paint Before You Sand Older Furniture
If the piece is already painted and old, test before you sand. The EPA says about three-quarters of US homes built before 1978 still contain some lead-based paint, and it recommends either hiring a certified inspector or assuming the paint contains lead. Older painted furniture from the same era can carry the same risk. For a small area under 6 square feet, the EPA advice is: if you must sand, wet the area first, sand the minimum needed and clean up thoroughly. It also says to avoid DIY removal of lead-based paint.
Zinsser’s own data sheet carries the same warning: sanding or scraping old paint can release lead dust, so wear a NIOSH-approved respirator and clean up with a HEPA vacuum and a wet mop. Our antique furniture painting guide has a full lead-check step for heirloom pieces. Bare, unpainted or newly built wood is not a lead concern; this applies to old painted finishes only.
Step 5: Sand the Surface
This is arguably the most important step for a durable finish. You don’t need to remove all the old finish, but you do need to create a surface the primer can grip. Start with 120-grit sandpaper to scuff up the surface (see which grit to use before painting wood furniture for the full breakdown). Don’t press too hard; the goal is to dull the sheen and create a slightly rough texture. For detailed areas, you can use folded sandpaper or a sanding sponge. If the furniture is already painted or heavily varnished, you might need to sand a bit more aggressively, but always follow up with finer grits. Once you’ve gone over the whole piece, switch to 180-grit sandpaper for a smoother feel. Finally, use 220-grit for a very smooth finish.
Meraj’s Tip: For intricate carvings or details, consider using fine-grit steel wool (0000 grade) instead of sandpaper. It gets into all the nooks and crannies!
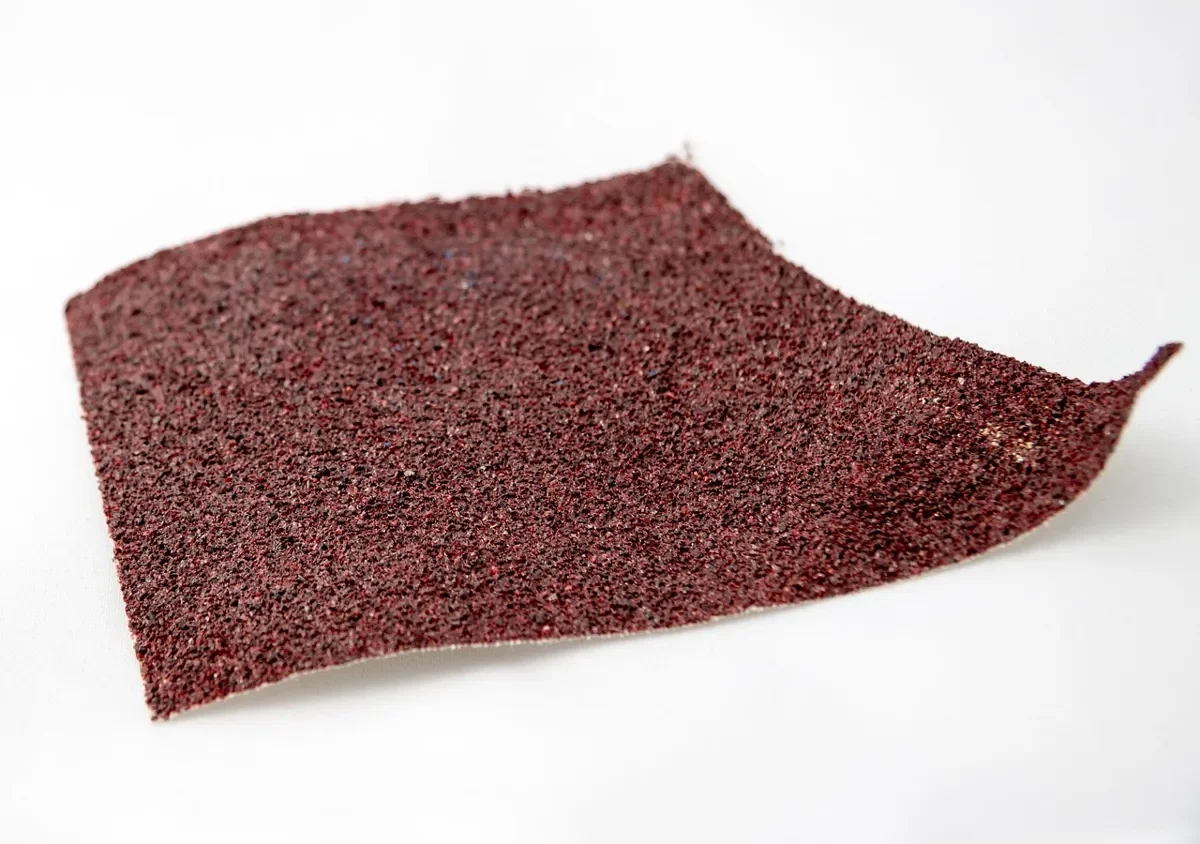
Step 6: Wipe Away Dust
After sanding, your furniture will be covered in a fine layer of dust. This dust must be completely removed before painting. Use a vacuum cleaner with a brush attachment to get into corners. Then, wipe the entire piece down with a tack cloth. Tack cloths are sticky and grab even the tiniest dust particles. If you don’t have a tack cloth, a dry microfiber cloth can work, but you may need to wipe it down with a slightly damp cloth afterward and let it dry completely.
Step 7: Apply a Primer Coat
Primer acts as a binder, ensuring your paint adheres well and provides a uniform base color, especially if you’re painting over a dark stain or a glossy finish. Apply a thin, even coat of primer using a brush or roller. Work in the direction of the wood grain. If you notice any drips or uneven spots, lightly sand them once the primer is dry, then wipe again with a dry cloth. Allow the primer to dry completely according to the manufacturer’s instructions. For some very dark woods or when painting with light colors, a second coat of primer might be beneficial.
Here’s a table to help you choose the right primer:
| Type of Wood/Finish | Recommended Primer | Why it’s recommended |
|---|---|---|
| Dark Stains, Veneers, Laminates | High-hiding, stain-blocking primer (oil-based or water-based) | Prevents dark undertones from bleeding through to the topcoat. Excellent adhesion. |
| High-Tannin Wood (Cherry, Mahogany, Knotty Pine) | Shellac-based primer (e.g., Zinsser B-I-N) | Seals tannins that water-based primers can let bleed through; one coat blocks most stains and a second is added if any stain shows through. |
| Previously Painted (Light Color) | Water-based (latex) primer | Good adhesion, dries quickly, easy cleanup. |
| Raw/Unfinished Wood | Water-based (latex) primer | Seals the wood, prevents uneven absorption of paint. |
| Melamine or MDF | Specialty adhesion primer or oil-based primer | These materials can be tricky to get paint to stick to. A specific primer is key. |
Zinsser B-I-N data sheet numbers: dries to the touch in 20 minutes, recoats in 45 minutes, reaches full adhesion and hardness in 1 to 3 days, and should not be thinned. It is applied between 0 and 90°F with relative humidity below 70%. Source: Zinsser B-I-N Shellac Base Primer technical data sheet (BIN-03)
How to Paint Dark Wood Furniture Without Bleed-Through
This is the single most common way a furniture-painting project goes wrong, and it’s the step most tutorials gloss over. Woods high in natural tannins (cherry, mahogany, oak, and knotty pine especially) contain water-soluble pigments that a standard latex or water-based primer cannot fully seal. Days or even weeks after you’ve finished painting, those tannins can migrate up through the paint film and show up as pink, yellow, or brownish blotches, especially under white or pale colors.
- Use a shellac-based primer, not just a water-based one. A shellac primer such as Zinsser B-I-N forms a hard, solvent-based film that locks tannins, old stains, smoke odor, and knots in place, something a standard latex primer alone often can’t do on high-tannin wood.
- Don’t skip sanding to “bare wood” on cherry or mahogany without priming immediately. Exposed bare tannin-rich wood left unprimed, even briefly, is the main trigger for bleed-through once paint goes on.
- Plan for a second primer coat when going dark-to-light. The maker says one coat of B-I-N blocks most stains and some need a second; over a dark stain or dark tannin wood under a white topcoat, let the first coat dry (45 minutes minimum) and add a second before any paint goes on.
- Watch for it 24-72 hours after painting, not just right away. Bleed-through is often invisible immediately after the final coat and appears as the paint fully cures over the next day or two. If you see a faint blotch forming, that area needs another shellac-primer coat before more paint goes back on.
Meraj’s Tip: If you’re painting a piece you know is cherry, mahogany, or has visible knots, just start with a shellac-based primer instead of testing a water-based one first and hoping. It costs a little more up front but saves you from repainting the whole piece after bleed-through shows up under a finished coat.
Step 8: Apply the First Coat of Paint
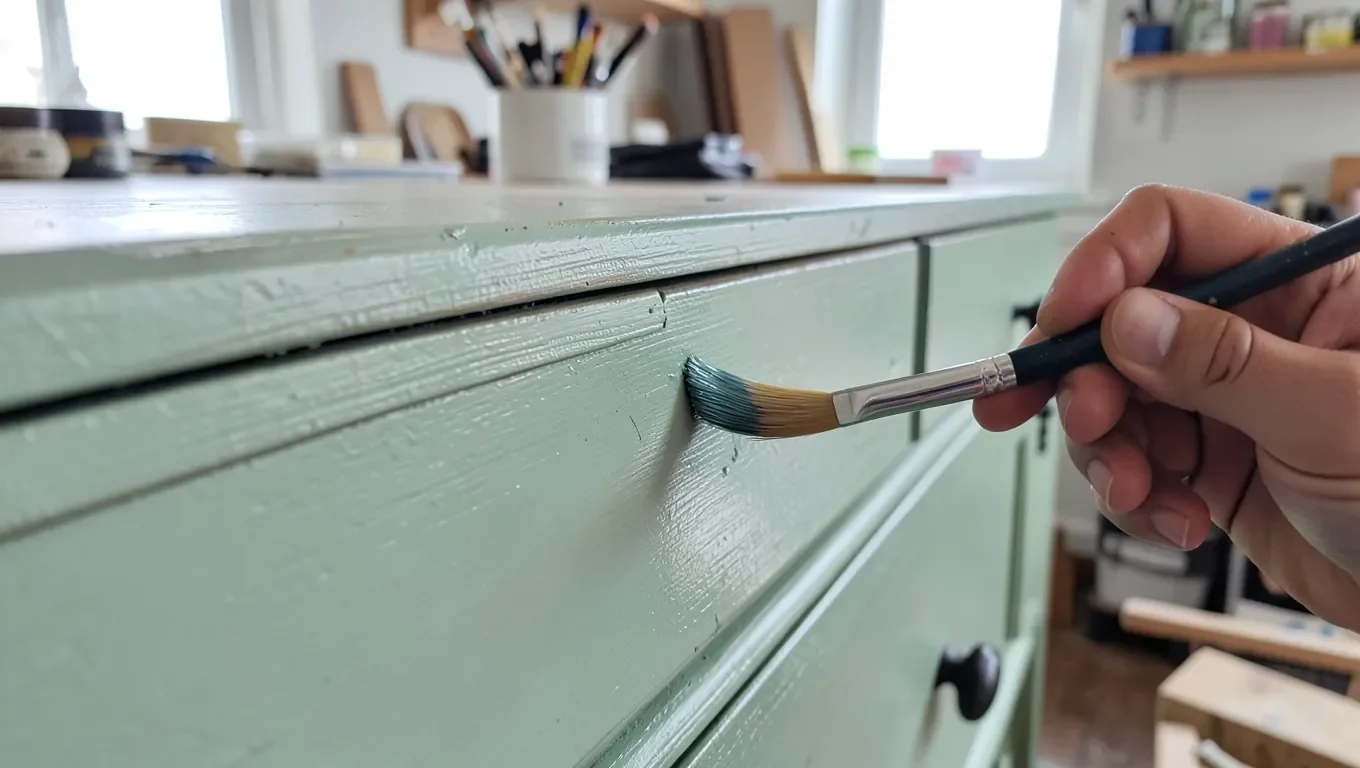
Stir your paint thoroughly. Don’t shake it, as this can create air bubbles. Apply a thin, even coat of your chosen furniture paint. Work in smooth strokes, following the direction of the wood grain. For flat surfaces, a foam roller can provide a very smooth, lint-free finish. For more detailed areas, use a good-quality synthetic brush. Avoid applying the paint too thickly, as this can lead to drips and an uneven texture.
Step 9: Sand Lightly Between Coats
Once the first coat of paint is dry to the touch (check the paint can for recommended drying times), it’s time for a very light sanding. Use 220-grit sandpaper or fine-grit steel wool. This might feel counter-intuitive, but this step is the secret to a super smooth finish! It knocks down any tiny bumps or imperfections and ensures the next coat adheres perfectly. After sanding, wipe thoroughly with a damp cloth or tack cloth to remove all dust. For grit by coat stage and paint type, see our guide to sanding between coats of paint.
Step 10: Apply Additional Coats of Paint
Apply a second thin coat of paint, just as you did the first. Again, work in the direction of the grain. Allow it to dry completely. Repeat the light sanding and dusting process between each coat. Most projects will require two to three coats of paint for full coverage and a rich color. Don’t rush this process; patience is key to a great result.
Step 11: Apply a Topcoat or Sealer (Optional but Recommended)
Once your final coat of paint is dry, consider applying a protective topcoat. This is especially important for high-traffic items like tabletops, dresser drawers, or chairs that get a lot of use. A water-based polyurethane or a furniture wax will add durability, protect against scratches and spills, and give your painted furniture a professional finish. Apply thin, even coats, allowing each to dry thoroughly as per the manufacturer’s instructions. You might need one to two coats of a water-based polyurethane, or three to four thin coats of wax.
Step 12: Reattach Hardware and Enjoy!
Once the paint and topcoat are fully cured (this can take a few days to a couple of weeks, depending on the paint and environment), it’s time to put the hardware back on. Gently reattach knobs, pulls, and hinges. Now, step back and admire your beautiful, refreshed piece of furniture!
Dry, Recoat and Cure Times: What the Data Sheets Say
The wait between coats is the most common thing beginners guess at, and it varies from 45 minutes to 16 hours depending on the product. These figures come from the makers’ technical data sheets at roughly 70 to 77°F; cooler or more humid rooms add time.
| Product | Dry to touch | Recoat | Full cure or hardness |
|---|---|---|---|
| Zinsser B-I-N shellac primer | 20 minutes | 45 minutes | 1 to 3 days |
| Rust-Oleum Chalked brush-on paint | 30 minutes | After 2 to 4 hours | 2 to 4 hours dry |
| Sherwin-Williams ProClassic acrylic-alkyd semi-gloss | 1 to 2 hours | 4 hours | Sheen stated at 24 hours and 30 days |
| Benjamin Moore Advance waterborne alkyd semi-gloss | 4 to 6 hours | 16 hours | Up to 30 days; avoid heavy abrasion for 3 to 5 days |
Rust-Oleum spray lines add a trap: recoat within 1 hour or wait 48 hours. Our Rust-Oleum drying time table lists each product line. Treat a painted piece as lightly usable after a day but delicate for days to weeks; tabletops and chair seats are where a too-early return to use shows first.
Choosing the Right Paint for Your Project
Selecting the right paint is half the battle. Here’s a quick rundown of popular choices for painting wood furniture:
- Latex Paint (Water-Based): Versatile, easy to clean up, and available in countless colors and finishes (matte, satin, semi-gloss). Requires a good primer.
- Chalk Paint: Known for its matte, chalky finish. It often requires minimal prep work (sometimes no sanding!), but typically needs a wax or polycrylic topcoat for durability.
- Milk Paint: Similar to chalk paint in its matte finish and minimal prep. It can chip for a distressed look or be sealed for a smoother finish.
- Acrylic Paint: Good for smaller decorative pieces or craft projects: see our comparison of the best paint pens for wood for detail and lettering work on smaller pieces. For larger furniture, you’ll want a more durable paint designed for furniture.
- Enamel Paint: Offers a durable, hard finish. Can be oil-based or water-based. Oil-based enamels provide excellent durability but have longer drying times and stronger fumes.
For most beginners, a good quality latex paint or a furniture-specific acrylic enamel with a satin or semi-gloss finish offers a great balance of durability, ease of use, and beautiful results.
Tips for a Flawless Finish
Even with the best instructions, a few extra tips can make a big difference. Remember these:
- Work in thin coats. This is the golden rule. Thick paint is prone to drips and an uneven texture.
- Follow the grain. Always paint and sand in the direction of the wood grain.
- Don’t rush drying times. Allow each coat to dry completely before moving to the next step or applying more paint.
- Good lighting is your friend. Make sure you can see what you’re doing clearly to avoid missed spots or drips.
- Invest in quality tools. Good brushes and rollers make a significant difference in the final look.
Paint Finishes: Matte, Satin, Semi-Gloss, and Gloss
The finish you choose can dramatically alter the look and feel of your painted furniture. Here’s a quick breakdown:
| Finish | Appearance | Durability & Best For |
|---|---|---|
| Matte | Non-reflective, flat appearance. Hides imperfections well. | Lower durability; best for decorative pieces or where durability isn’t a primary concern. Needs good topcoat for any wear. |
| Satin | A soft sheen, slightly reflective. A popular choice for furniture. | Good durability, offers some washability. Ideal for most furniture, from dressers to tabletops. |
| Semi-Gloss | Noticeably shiny, reflects more light. | Very durable and easy to clean. Great for high-use items like kitchen chairs, highchairs, or kids’ furniture. |
| Gloss/High-Gloss | Very shiny, mirror-like finish. Highlights every surface detail. | Most durable and easiest to wipe clean. Best for statement pieces or furniture that needs maximum protection. Can highlight imperfections if not applied perfectly. |
Troubleshooting Common Painting Problems
Even with the best preparation, things can sometimes go awry. Here are a few common issues and how to fix them:
- Paint Not Sticking: Usually, this is due to inadequate cleaning or sanding, or using the wrong primer for the surface. Clean, sand (if possible), and re-prime with an appropriate primer.
- Drips and Runs: Applied paint too thickly. Lightly sand down the drip, wipe clean, and reapply paint in thin coats.
- Brush Marks Visible: Used a low-quality brush or applied paint too heavily. Sand lightly, wipe clean, and use better brushes with thin coats. A foam roller can also help on flat areas.
- Paint Sticking to Sandpaper: Sanding too aggressively or using the wrong grit. Try a finer grit sandpaper and lighter pressure.
- Uneven Color: Inconsistent paint application or not enough coats. Ensure even coverage and apply additional coats as needed, sanding and cleaning between them.
Frequently Asked Questions (FAQs)
Do I have to sand wood furniture before painting?
Yes, sanding is crucial. It creates a key for the primer and paint to adhere to. Even if using chalk paint, a light scuff sand is often recommended for better adhesion and a longer-lasting finish.
Can I paint over varnish or stain without sanding?
Sometimes. Bonding primers such as Zinsser B-I-N are made to stick to glossy surfaces, and the maker states excellent adhesion without scuff sanding. The surface still has to be clean, dry and free of wax and grease, and a light scuff sand is cheap insurance on tabletops and chair seats that get heavy use. Test an inconspicuous spot first.
What’s the best type of paint for furniture?
For beginners, water-based latex paints or furniture-specific acrylic enamels are excellent choices. They offer durability, ease of use, and easy cleanup.
How many coats of paint do I need?
Typically, two to three thin coats are sufficient for good coverage. However, this can vary depending on the paint color, the original color of the furniture, and your chosen paint finish.
Why is my white paint turning pink or yellow over wood?
This is tannin bleed-through, and it happens most on cherry, mahogany, and knotty pine. Water-based primers often can’t fully block these natural pigments, so they migrate up through the topcoat over the following days. The fix is a shellac-based primer like Zinsser B-I-N, applied in two coats before you paint, especially when going from a dark stain to a light or white color.
How long should I wait between coats of paint on furniture?
It depends on the product: 45 minutes for Zinsser B-I-N primer, 2 to 4 hours for Rust-Oleum Chalked brush-on paint, and 4 to 16 hours for the semi-gloss enamels in the table above. Always check your own can, because cool or humid rooms lengthen every number.
Is it safe to sand old painted furniture?
Only after you rule out lead. The EPA says about three-quarters of US homes built before 1978 still contain some lead-based paint, so test or assume older painted finishes contain lead. If you must sand a small area, wet it first, sand the minimum and clean up thoroughly; avoid DIY removal.
Sponsored / affiliate links. As an Amazon Associate I earn from qualifying purchases. I may earn additional commission from eligible campaigns.