How To Attach A Socket To A Drill (Step-By-Step)
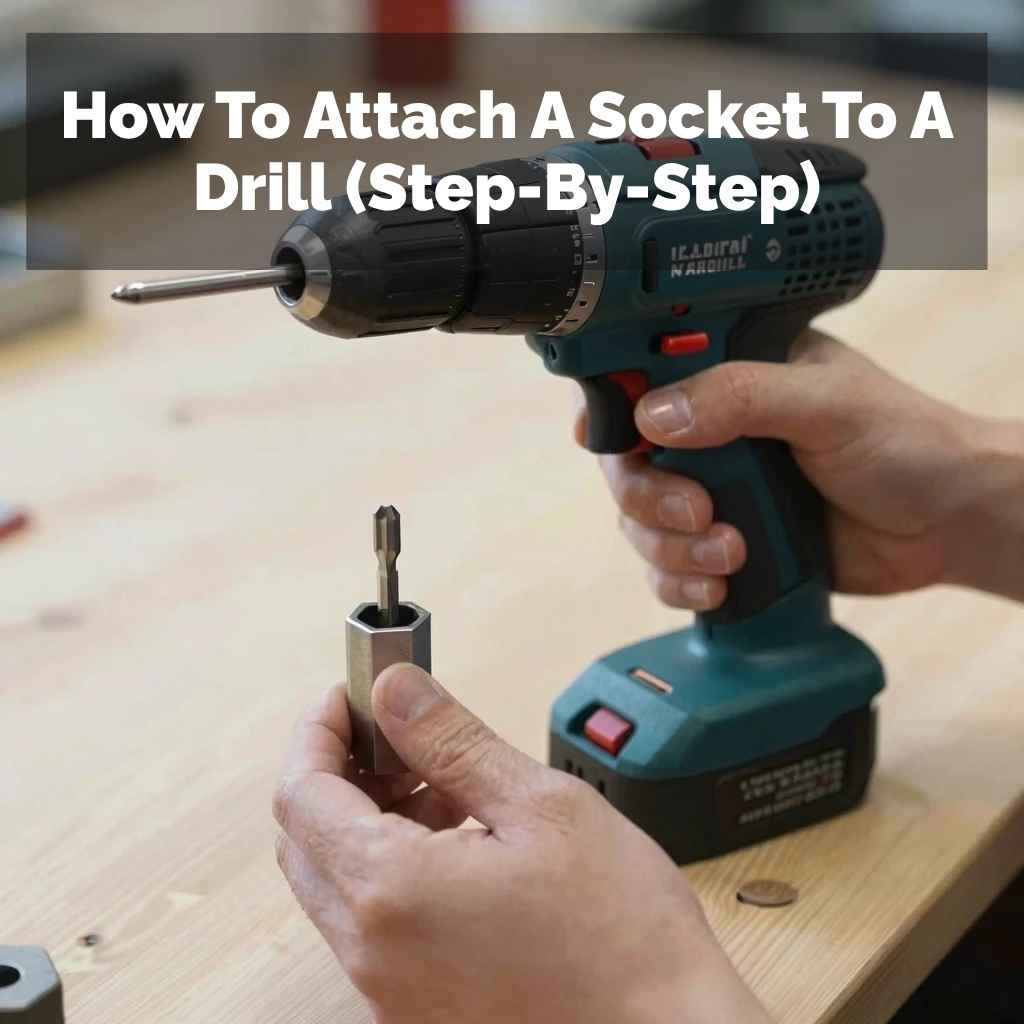
To attach a socket to a drill, you need a socket adapter or a socket wrench with a hexagonal shank that fits into your drill’s chuck. Ensure the adapter or wrench has the correct drive size for your socket. Securely tighten the chuck around the adapter, then attach the socket to the adapter.
Always start with slow speeds.
Understanding Socket Attachments for Drills
So, what exactly are we talking about when we say “attach a socket to a drill”? It’s not like plugging in a light bulb. You can’t just push a socket onto the drill’s chuck and expect it to grip.
Drills have a specific way they hold bits. Sockets are designed to fit onto ratchets or impact wrenches. They have a square opening.
Your drill has a chuck that spins. We need something to bridge that gap.
The main idea is that your drill spins. This spinning action needs to turn the socket. The socket then turns the nut or bolt.
To make this happen, you need a special piece. This piece connects your drill’s chuck to the socket’s square drive. Think of it like an adapter.
It allows two different things to work together smoothly.
Without the right adapter, trying to force a socket onto a drill is impossible. It won’t hold. It could break.
The most common reason people ask how to attach a socket to a drill is because they’ve seen how fast a drill can work. It can save a lot of time and effort compared to doing it by hand. But getting the connection right is the first, crucial step.
My Own Socket Struggle Story
I remember one sweltering summer day. I was trying to assemble a backyard shed. It had dozens of bolts.
My trusty old cordless drill sat on my workbench, buzzing with promise. I’d seen pros use drills with sockets. It looked so fast.
I grabbed a standard socket from my toolbox. Then I looked at my drill’s chuck. It was round.
The socket had a square hole. “Hmm,” I thought. “This isn’t matching up.”
I tried to just wedge the socket into the drill’s chuck. It wouldn’t fit. I wiggled it.
I pushed harder. A little voice in my head said, “This feels wrong.” But the shed was waiting. So, I tried to grip the outer part of the socket with the chuck.
The drill spun, the socket just wobbled uselessly. It made a horrible screeching sound. I felt a pang of panic.
What if I’d broken something? The bolt stayed put, and I was left with sweaty palms and a growing sense of dread. That’s when I realized I needed the right tool for the job, not just brute force.
After a quick trip to the hardware store and a chat with a helpful clerk, I learned about socket adapters. It was a small piece of metal, but it changed everything. It was like discovering a secret handshake between my drill and my sockets.
The frustration melted away. The shed came together much faster.
Types of Drill-to-Socket Connectors
There are a few main ways to connect a socket to your drill.
- Socket Adapters: These are small metal pieces. They have a square drive on one end that matches your socket. The other end is usually a hexagonal shank. This shank fits into your drill’s chuck.
- Socket Wrenches with Hex Shanks: Some wrench sets come with handles. They also have adapters or built-in hex shanks. These are specifically made to go into a drill chuck.
- Impact-Ready Sockets: If you use an impact driver, you need impact-ready sockets and adapters. They are built to handle the strong forces.
Choosing the right one depends on your drill and the sockets you use.
The Essential Tool: Socket Adapters
Let’s talk about the most common and useful item: the socket adapter. This is usually what you need. It’s a simple yet brilliant invention.
Think of it as a translator between your drill and your sockets.
An adapter has two key parts. First, it has a drive size. This matches the square opening on your socket.
Common drive sizes are 1/4 inch, 3/8 inch, and 1/2 inch. You need to match this to your socket. So, if you have 3/8 inch drive sockets, you need a 3/8 inch drive adapter.
Second, the adapter has a shank. This is the part that goes into your drill’s chuck. For most standard drills, this shank is hexagonal.
It’s shaped like a flat-sided cylinder. This shape allows the drill’s chuck jaws to grip it securely. This is super important for safety and effectiveness.
When you buy an adapter, check its rating. Some are made for standard drills. Others are “impact-ready.” If you plan to use them with an impact driver, you absolutely need impact-ready ones.
They are built stronger. They can handle the extra shock and torque. Using the wrong type can lead to the adapter breaking.
These adapters are widely available. You can find them at hardware stores and online. They are usually quite affordable.
Investing in a set with different drive sizes is a good idea. It means you can use all your sockets with your drill.
Step-by-Step: Attaching the Adapter and Socket
Now, let’s get down to how you actually do it. It’s a simple process, but doing it right makes all the difference. Safety first, always.
Step 1: Select the Right Adapter
Look at the sockets you plan to use. What is their drive size? It’s usually stamped on the side of the socket.
You’ll see 1/4″, 3/8″, or 1/2″. Pick an adapter that matches this drive size. Also, consider your drill.
Most cordless drills can use any adapter. If you have a powerful impact driver, ensure your adapter is rated for impact use.
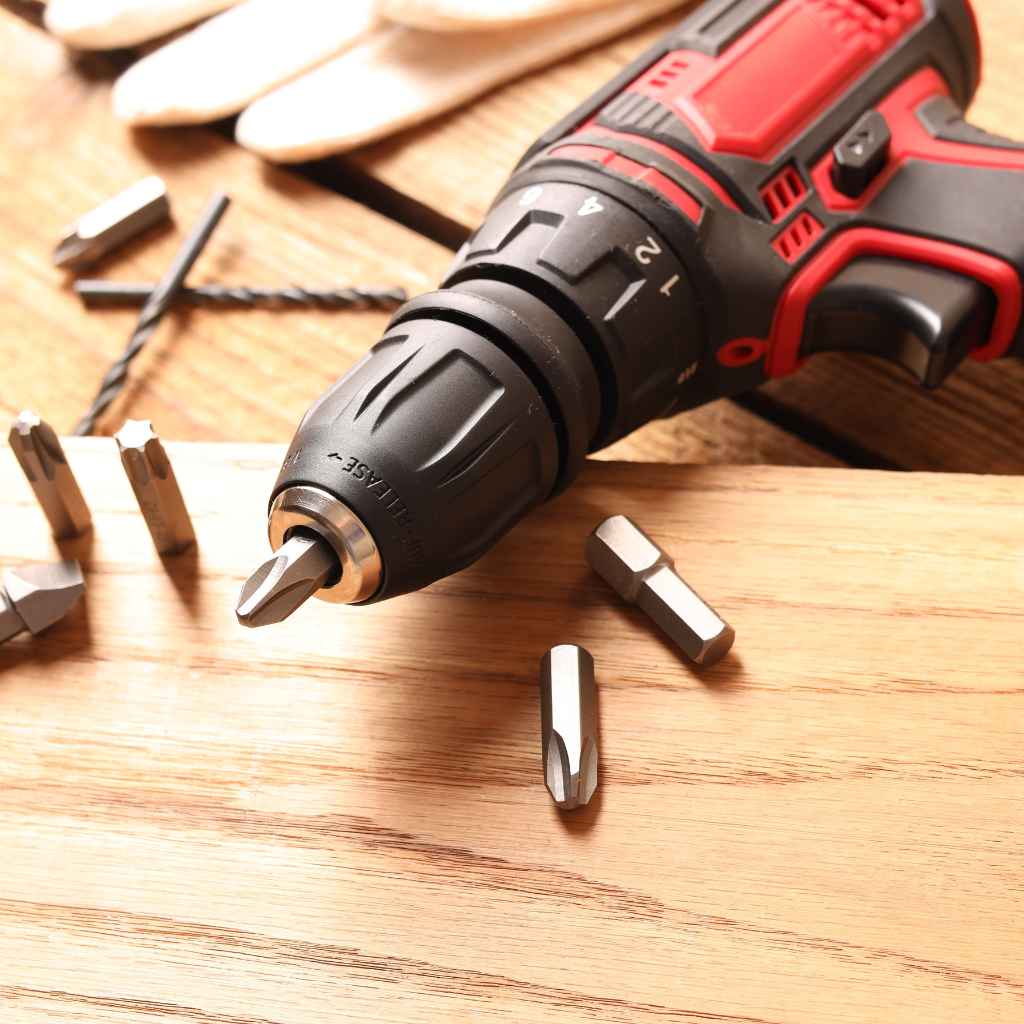
Step 2: Open Your Drill’s Chuck
Most modern drills have a keyless chuck. This means you can open and close it by hand. Look at the front of your drill where the bit goes in.
You’ll see a collar. Twist this collar. It might twist in either direction.
You want to open it up enough. This creates space for the adapter’s shank. You should see the jaws inside retract.
If you have an older drill with a chuck key, you’ll need to use that. Find the small holes on the side of the chuck. Insert the key and turn it.
This loosens the jaws.
Step 3: Insert the Adapter
Take your chosen socket adapter. Place the hexagonal shank end into the opened chuck of your drill. Push it in as far as it will comfortably go.
You want it seated well within the chuck.
Step 4: Tighten the Chuck Securely
This is a very important step. Close the drill’s chuck. Turn the collar firmly.
You want the jaws to grip the hexagonal shank of the adapter tightly. It shouldn’t be able to spin or slip. Give it a good twist.
For keyless chucks, keep turning until it feels snug and secure. If you’re using a chuck key, turn it until the adapter is held very firmly.
A loose grip here is dangerous. It can cause the adapter and socket to fly off. This could hurt you or damage your work.
Always ensure it’s very secure.
Step 5: Attach the Socket to the Adapter
Now, take your socket. You’ll see the square opening on one side. Line this up with the square drive end of the adapter that’s sticking out of the chuck.
Push the socket onto the adapter. You should feel or hear a slight click as it locks into place. It should fit snugly.
It should not wobble.
Step 6: Set Your Drill Settings (If Applicable)
Before you start drilling or turning, check your drill’s settings. For most applications, you’ll want to set your drill to “drill” mode, not “hammer” mode. If your drill has a clutch setting, set it to a low number.
This prevents overtightening. You’ll also want to select a low speed. You can always increase it if needed.
Quick Check Before You Start
Before you pull the trigger:
- Is the adapter tight in the chuck?
- Is the socket firmly on the adapter?
- Are your drill settings correct (speed, mode)?
A quick double-check saves a lot of potential headaches.
Why Using Adapters is Key
You might be thinking, “Why can’t I just use a regular wrench or ratchet?” And you absolutely can. For many tasks, a manual wrench is perfect. But drills offer speed and power.
They can make jobs go much faster.
The primary reason for adapters is to allow the drill’s rotational force to be transferred to the socket. The chuck is designed to hold round or hexagonal shanks. Sockets have a square drive opening.
Without an adapter, there’s no way for the drill to grip and turn the socket effectively. Trying to jam a socket into a chuck is not only ineffective but can also damage both tools.
Adapters are specifically designed for this connection. They are made of strong steel. They can withstand the torque your drill or impact driver puts out.
They ensure a secure and reliable connection. This means the energy from your drill goes directly to turning the fastener, not wasted by slipping or wobbling.
Contrast: Manual Wrench vs. Drill with Socket
| Manual Wrench | Drill with Socket Adapter |
| Slow and steady turning. | Fast turning and high torque. |
| Good for delicate work or precise tightening. | Excellent for driving many fasteners quickly. |
| Requires physical effort to turn. | Reduces physical strain. |
| Limited by arm strength. | Limited by drill power and user control. |
Common Mistakes to Avoid
Even with adapters, people make mistakes. These can lead to broken tools, stripped bolts, or even injuries. Let’s look at a few common pitfalls.
Mistake 1: Not Using the Right Adapter Size
This is a big one. You have a 1/2 inch socket. You try to force it onto a 3/8 inch adapter.
It won’t go on properly. Or worse, it goes on but is loose. This will strip the square drive on the adapter or the socket.
Always match the adapter’s drive size to your socket’s drive size.
Mistake 2: Not Tightening the Chuck Enough
I talked about this earlier, but it bears repeating. If the adapter isn’t gripped tightly by the drill’s chuck, it can slip. When it slips, it can spin violently.
This can cause the adapter or socket to fly off the drill. Always give the chuck a good, firm tightening. You want it to feel solid.
Test it gently before you apply full power.
Mistake 3: Using a Standard Adapter with an Impact Driver
Impact drivers deliver sharp, powerful bursts of torque. They create shockwaves. Standard adapters are not built for this.
They can break under the stress. This can send metal shards flying. Always use “impact-ready” adapters and sockets with impact drivers.
They are made from stronger, more durable materials.
Mistake 4: Using Too Much Speed or Torque Too Soon
A drill has speed and torque settings for a reason. When you’re starting a bolt or nut, especially if it’s not perfectly aligned, start slow. Use a low speed setting and low torque (if your drill has a clutch).
This helps you feel the fastener engage correctly. Ramping up the speed too quickly can cause the socket to slip. It can also strip the threads on the bolt or nut.
Mistake 5: Overtightening
Drills are powerful. It’s easy to overtighten a bolt or nut. This can strip the threads.
It can also put too much stress on the fastener. If it’s a critical component, overtightening can lead to failure. Use your drill’s clutch setting.
Start with a low setting. Once the fastener is snug, finish by hand with a torque wrench if precision is needed.
Safety First: Essential Checks
Here’s a quick checklist before you start turning:
- Is the adapter securely fastened in the drill chuck?
- Is the socket securely attached to the adapter?
- Are you using an impact-rated adapter if using an impact driver?
- Are drill speed and torque settings appropriate for the task?
- Is the fastener properly aligned before starting?
Taking these steps helps prevent accidents and tool damage.
Real-World Scenarios Where This is Useful
So, where might you actually use this skill? It’s not just for mechanics in garages. Plenty of everyday situations call for this technique.
Home Improvement Projects
Building furniture, assembling a new grill, or putting together a swing set often involves many bolts and nuts. Using a drill with sockets can speed up these projects significantly. Tightening all those bolts by hand can be tiring.
A drill makes it much easier.
Car Maintenance and Repairs
While not a substitute for a dedicated impact wrench for heavy-duty jobs, a cordless drill with the right adapter can be great for simpler car tasks. Changing a flat tire (with the spare), tightening lug nuts after a tire rotation (loosened by hand first, then snugged with the drill), or working on less critical components can be made faster.
Outdoor Projects
Assembling a shed, building a deck, or setting up a fence often involves a lot of similar fasteners. A drill makes these repetitive tasks much less strenuous. You can work for longer periods without getting as tired.
Working with Machinery
If you have any small engines, lawnmowers, or other machinery around the house, there will be bolts and nuts to deal with. Attaching a socket to your drill can make routine maintenance or minor repairs much more efficient.
The key is using the right tool for the right job. For very tight or very loose fasteners, or for tasks requiring very high torque, a dedicated tool might be better. But for the vast majority of common tasks, a drill with an adapter is a fantastic helper.
What This Means for You: Normal vs. Concerning Signs
Once you’ve attached your socket and are ready to work, it’s good to know what’s normal and what’s not. Pay attention to how things feel and sound.
When It’s Normal
- Smooth Spinning: The drill spins the adapter and socket smoothly without much wobble.
- Secure Grip: The adapter stays firmly in the chuck. The socket stays firmly on the adapter.
- Satisfying Tightening: You feel the fastener getting snug. The drill’s torque is being applied effectively.
- A Little Noise: Some mechanical noise from the drill motor or the socket engaging is normal.
When to Be Concerned
- Excessive Wobble: If the adapter or socket wobbles significantly, it’s not secure. Stop immediately.
- Slipping or Grinding Noises: This indicates a poor connection. The adapter might be loose in the chuck, or the socket might be loose on the adapter.
- Stripping Sounds: If you hear grinding or scraping that sounds like metal filing away, you are likely stripping the threads of a bolt or nut, or damaging the adapter/socket drive.
- Adapter Shaking Loose: If the adapter feels like it’s coming out of the chuck, stop. It’s not secure.
- Sudden Stops or Jerking: If the drill suddenly stops or jerks unexpectedly, the fastener might be seized, or you might be about to break something.
- Cracking or Breaking Sounds: This is a clear sign something is wrong. Stop immediately to prevent injury or further damage.
If you notice any concerning signs, stop using the drill and the setup. Double-check your connections. Make sure you have the right adapter.
Ensure it’s tightened properly. If the problem persists, it’s best to switch to a manual tool or seek professional advice.
Simple Checks for a Secure Fit
- Adapter Check: After tightening the chuck, try to twist the adapter by hand. It should not budge.
- Socket Check: After attaching the socket, try to wiggle it sideways. It should feel solid.
- Listen Carefully: Pay attention to the sounds your drill makes. Any unusual or loud noises should be investigated.
These simple checks are your first line of defense.
Quick Tips for Using Sockets with Your Drill
Here are a few extra tips that can make your experience smoother and safer.
- Keep it Clean: Make sure the adapter shank and the socket’s square drive are clean. Dirt or debris can affect the fit and grip.
- Use the Right Socket: Always use the correct size socket for the bolt or nut. A socket that’s too big will strip the fastener. A socket that’s too small won’t fit.
- Start Slow: For any new fastener, start with the drill on its lowest speed setting. Gradually increase speed as needed.
- Angle Matters: Try to keep the drill and socket as straight as possible on the fastener. Angled force can cause stripping or damage.
- Don’t Force It: If a fastener is stuck or difficult to turn, don’t just apply more power. Try loosening it a bit and then retightening. Penetrating oil can also help.
- Store Safely: Keep your socket adapters with your sockets. This way, they won’t get lost.

Frequently Asked Questions
Can I use any socket with my drill?
You can use most standard sockets with your drill, but only with the correct adapter. The adapter connects the square drive of the socket to the chuck of your drill. You need to match the drive size of the adapter (e.g., 3/8 inch) to the drive size of your socket.
What is a socket adapter for a drill?
A socket adapter for a drill is a tool that allows you to use standard sockets with your power drill. It typically has a square drive end that fits into your socket and a hexagonal shank that fits into your drill’s chuck.
Do I need a special type of socket for a drill?
No, not usually for standard drills. You can use your regular sockets. However, if you are using an impact driver, you should use “impact-ready” sockets and adapters.
These are made from stronger materials designed to withstand the shock and torque of impact tools.
What happens if the socket adapter is loose in the drill chuck?
If the adapter is loose, it can wobble and slip while spinning. This can lead to inefficient turning, damage to the adapter or socket, or the adapter could fly off the drill. This can be dangerous and cause injury or damage.
Always ensure the chuck is tightened securely around the adapter.
How do I know which size adapter to get?
You need to match the drive size of the adapter to the drive size of your socket. The most common sizes are 1/4 inch, 3/8 inch, and 1/2 inch. Look at your sockets; the drive size is usually stamped on them.
Can I use a drill to tighten lug nuts on my car?
Yes, you can, but with caution. Always loosen lug nuts by hand first. Then, use your drill with the correct socket and adapter on a low speed and low torque setting to snug them up.
After that, use a torque wrench to tighten them to the manufacturer’s specifications. Overtightening with a drill can damage the studs or nuts.
Conclusion
So, there you have it. Attaching a socket to your drill is all about using the right adapter. It’s a simple step that opens up a world of faster, easier DIY and repair tasks.
By choosing the correct adapter size, ensuring a secure fit, and remembering to use the right settings on your drill, you can tackle many jobs with confidence. Don’t let that bolt win; equip yourself with the right knowledge and tools.