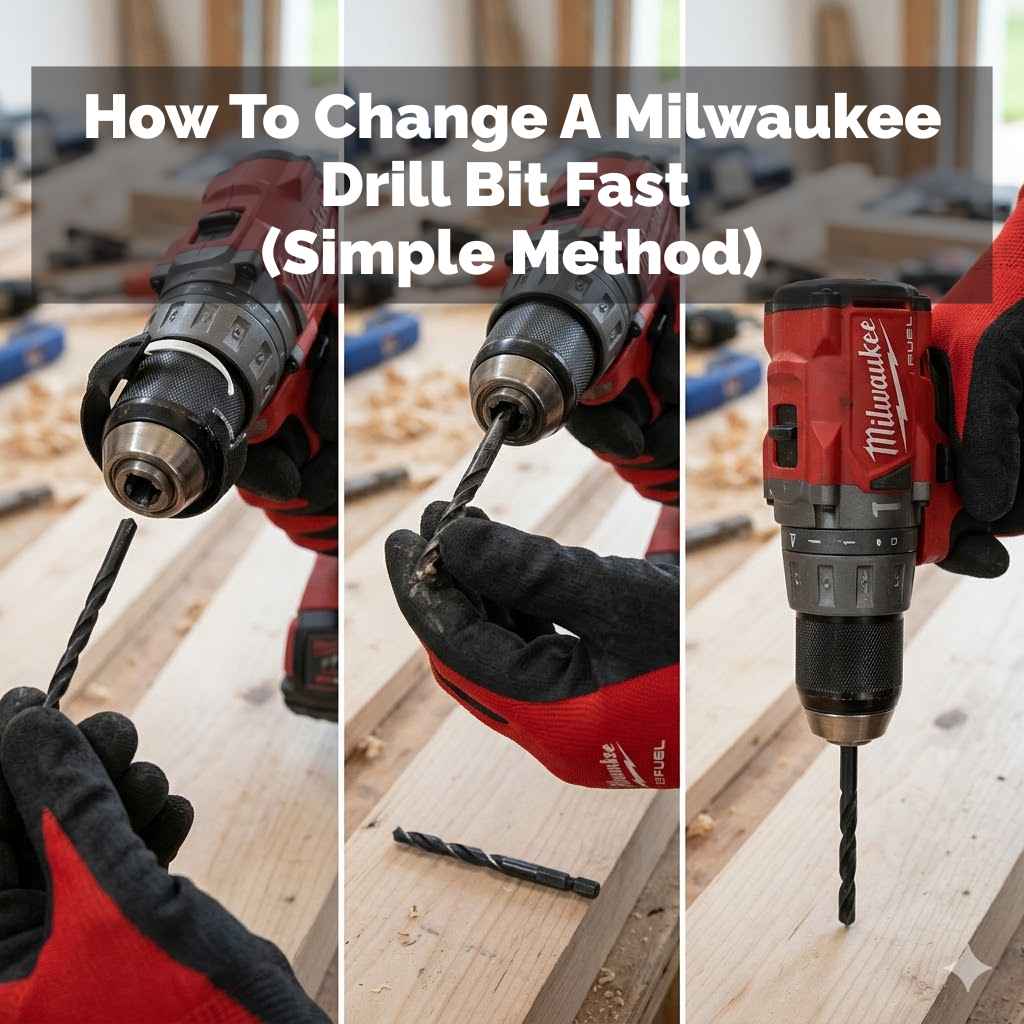
How To Change A Milwaukee Drill Bit Fast (Simple Method)
This guide is here to make that a non-issue. We’ll walk through the whole process, piece by piece. You’ll learn a quick and easy method to change your Milwaukee drill bits. So you can get back to what you were doing without missing a beat. Let’s make this task a breeze.
The quickest way to change a Milwaukee drill bit involves understanding your drill’s chuck type. For keyless chucks, you simply grip the sleeve firmly and twist the chuck. For keyed chucks, you use the key to loosen and tighten. Always ensure the drill is off and unplugged before starting.
Understanding Your Drill Chuck
The part of the drill that holds the bit is called the chuck. It’s like the drill’s hand. It grips the bit tight so it spins true. Most modern drills, like many Milwaukee models, use what’s called a keyless chuck. This means you don’t need a separate tool, like a key, to tighten or loosen it.
Other drills might have a keyed chuck. These use a small, star-shaped key that fits into holes around the chuck. You turn the key to tighten or loosen the jaws that hold the bit. It’s important to know which kind you have. This helps you use the right method.
For our purpose, changing bits fast, the keyless chuck is usually the easiest. We’ll focus on that, but I’ll mention keyed chucks too. Knowing your chuck type is the first step to making changes quick and easy.
How Keyless Chucks Work
Keyless chucks are designed for speed. They have two main parts that grip the drill bit. One part is the sleeve you turn. The other part is the body of the chuck. When you twist the sleeve one way, the chuck tightens. It clamps down on the bit.
When you twist the sleeve the other way, the chuck opens up. The grip loosens. This lets you slide the old bit out. Then you can put a new one in. Most keyless chucks on Milwaukee drills have markings. These often show a locked symbol and an unlocked symbol.
You’ll see arrows. They show which way to turn for locking and unlocking. This makes it super clear. It’s all about turning the sleeve. You grip the main body of the drill or the chuck body itself. Then you twist the sleeve.
Keyed chucks are a bit different. They use a chuck key. This key has a handle and a gear end. The gear end fits into one of the holes on the chuck. There are usually three or four holes.
To loosen the chuck, you put the key in a hole. You turn the key counter-clockwise. This opens the jaws. To tighten, you put the key in a hole. You turn it clockwise. It’s a bit slower. But it can offer a very strong grip.
The key gives you leverage. This lets you tighten the chuck very securely. This is good for tough jobs. But for quick bit changes, it takes an extra step to find and use the key. Always put the key back in its place after use. It’s easy to lose them!
My Own Drill Bit Swap Story
I remember one Saturday morning. I was building a deck. I had drilled about fifty pilot holes. I was using a 3/16-inch bit. Then I needed to switch to a 1/4-inch bit for the screws. I reached for my drill. I instinctively grabbed the sleeve and twisted.
Nothing happened. I tried again, a bit harder. Still, the chuck wouldn’t budge. I started to feel a little heat rise in my cheeks. Was I doing it wrong? I looked at the drill. It was a newer Milwaukee model. I knew it was keyless.
Then I saw it. I was gripping the wrong part. I was trying to turn the sleeve while also twisting the whole drill body in the same direction. The drill was fighting itself! I stopped. Took a deep breath. I gripped the main body of the chuck with one hand. Then, with my other hand, I firmly twisted the sleeve counter-clockwise. Click. The jaws opened. The old bit dropped out. It took maybe five seconds. I felt a bit silly, but also relieved. It was just a simple grip mistake. That taught me to pay attention to the details, even on easy tasks.
Keyless Chuck: Quick Check
Grip Firmly: Hold the main chuck body steady. This is the part closest to the drill body.
Twist Sleeve: Turn the sleeve of the chuck. For most drills, you turn it counter-clockwise to open.
Listen for Click: You might hear a slight click when it’s fully open or closed.
Check Markings: Look for the lock/unlock symbols if unsure.
Safety First: Always Unplug!
This is the MOST important step. Before you even think about touching the drill bit or the chuck, you need to make sure the drill cannot accidentally turn on. This is crucial for your safety. Nobody wants a drill bit spinning unexpectedly.
If you have a corded drill, unplug it from the wall. Seriously, pull the plug. If you have a cordless drill, take the battery out. This completely disconnects the power. It’s a simple habit to build.
I’ve heard stories of people changing bits while the battery was still in. They’d be fiddling with the bit. Their thumb would accidentally brush the trigger. The drill would lurch. It’s not worth the risk. Taking out the battery or unplugging the cord takes two seconds. It keeps your hands and fingers safe.
Safety Checklist Before Swapping Bits
Power Source: Is the drill unplugged (corded)? Is the battery removed (cordless)? YES.
Trigger Lock: Is the trigger lock engaged? (If your drill has one).
Work Area: Is the bit you’re removing away from any surfaces or body parts?
The Simple Method: Step-by-Step
Okay, you’ve got your drill. You’ve made sure it’s safe. Now, let’s get that bit changed quickly. We’re going to focus on the keyless chuck first, as it’s the most common on Milwaukee drills.
Step 1: Power Down and Disconnect
As we just covered, make absolutely sure the drill is off. For cordless, remove the battery. For corded, unplug it. This is non-negotiable.
Step 2: Identify Your Chuck
Look at the front of your drill. See the part that holds the bit? That’s the chuck. Does it have little holes for a key, or does it look like a smooth sleeve around the bit?
If it has holes, you have a keyed chuck. If it’s a smooth sleeve, it’s keyless. Most Milwaukee drills use keyless chucks. They often have rubberized grips on them.
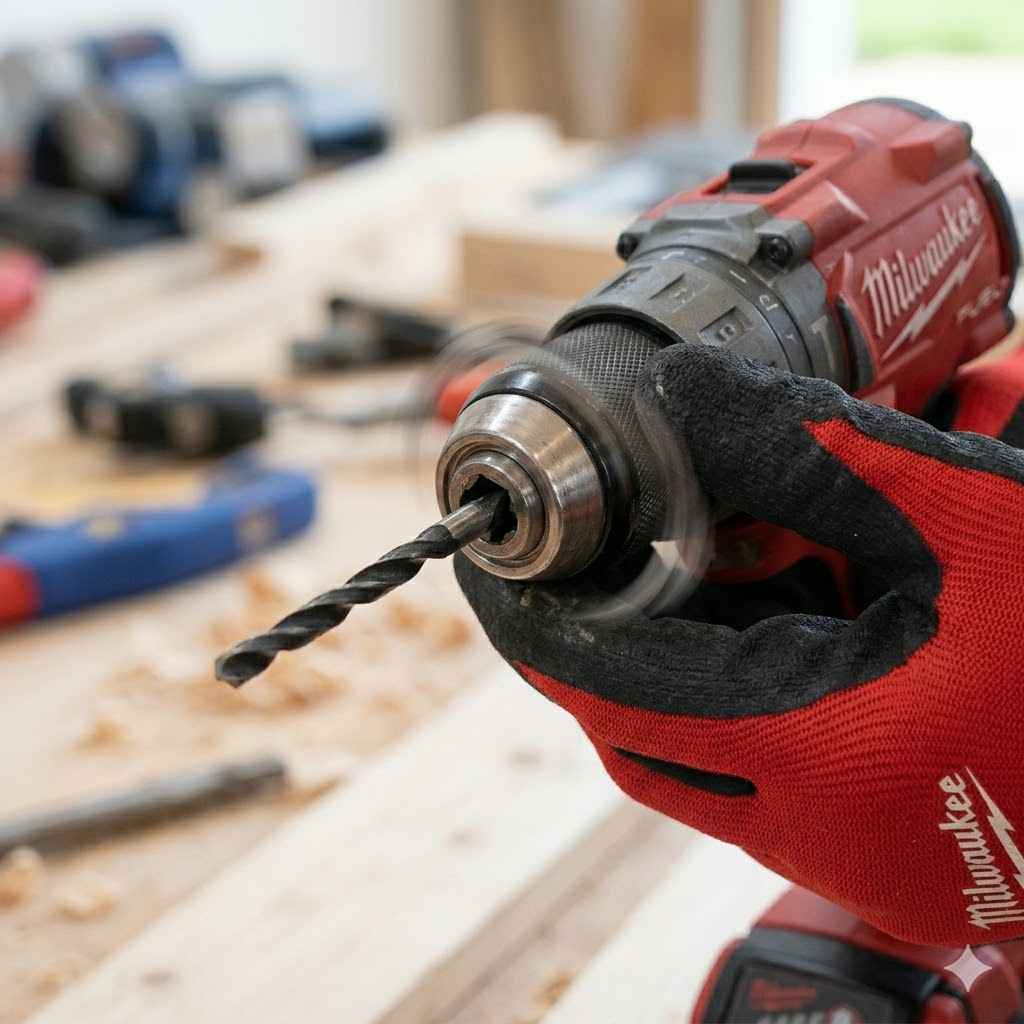
Step 3: Loosen the Keyless Chuck
This is where the magic happens. Grab the main body of the chuck with one hand. This is the part that feels solid and attached to the drill motor housing. Keep that hand steady.
With your other hand, grab the sleeve of the chuck. This is the part that spins. You’ll want to twist this sleeve counter-clockwise. Turn it as if you were unscrewing something. You might need to give it a firm grip, especially if the bit is in there tight.
Keep turning until the chuck jaws open up wide enough. You’ll see them retract. The bit will become loose. You might hear a faint clicking sound. This is normal. It means the chuck is opening.
Keyless Chuck Tightening/Loosening Guide
To Loosen: Grip chuck body. Twist sleeve counter-clockwise (lefty-loosey).
To Tighten: Grip chuck body. Twist sleeve clockwise (righty-tighty).
Note: Some drills might have different gearing. If turning the sleeve one way doesn’t work, try the other. But counter-clockwise to loosen is standard.
Step 4: Remove the Old Bit
Once the chuck jaws have opened enough, the old drill bit will be loose. You can simply pull it straight out. It should slide out easily.
If it feels stuck, you might need to open the chuck a little more. Or, you can gently wiggle the bit side-to-side while pulling. Avoid forcing it too hard. This could damage the chuck.
Step 5: Insert the New Bit
Take your new drill bit. Make sure it’s the right size and type for your job. Slide the shank of the new bit into the open jaws of the chuck. Push it in as far as it will go.
You want the bit to be seated well inside the chuck. This ensures it spins straight. You should feel it go in smoothly. Don’t force it if it resists.
Step 6: Tighten the Keyless Chuck
Now, reverse the process from loosening. Hold the main chuck body steady with one hand. With your other hand, grab the sleeve and twist it clockwise. This is like screwing something in (righty-tighty).
Turn it until the jaws close tightly around the bit. You want a firm grip. The bit should feel secure. It shouldn’t wobble or feel loose. You don’t need to over-tighten it to the point of straining. Just snug and secure.
Many modern drills have a feature where the chuck tightens automatically as you drill. But it’s still good practice to give it a firm tightening by hand first. This ensures it’s seated well.
Step 7: Test the Connection
Before you start drilling, give the bit a gentle tug. Make sure it doesn’t pull out. Then, with the drill still powered off (battery out or unplugged), try to twist the bit by hand inside the chuck. It should resist moving.
Now you can put the battery back in or plug the drill in. Briefly squeeze the trigger. The bit should spin cleanly. It shouldn’t wobble. If it wobbles, turn the drill off again, remove the battery/unplug, and tighten the chuck a bit more.
Quick Scan: Changing a Bit
1. Power Off: Remove battery or unplug.
2. Loosen: Grip chuck body. Twist sleeve counter-clockwise.
3. Remove: Pull old bit out.
4. Insert: Put new bit in.
5. Tighten: Grip chuck body. Twist sleeve clockwise.
6. Check: Tug bit, brief trigger test.
7. Power On: Re-insert battery or plug in.
What If You Have a Keyed Chuck?
If your Milwaukee drill has an older style keyed chuck, the process is similar but uses a tool. First, power down the drill. Remove the battery or unplug it.
Find your chuck key. Look for the holes around the chuck. Insert the key into one of these holes. You’ll want to turn the key counter-clockwise to loosen the chuck. You might need to try different holes until you find the one that allows the jaws to open up.
Once the jaws are open, remove the old bit. Insert the new bit. Then, insert the key into a different hole. Turn the key clockwise to tighten the chuck around the new bit. Make sure it’s good and snug.
The main difference is the use of the key. It gives you more leverage for tightening. But it also means you have an extra item to keep track of. Always put the chuck key back with the drill or in its designated spot.
Keyed Chuck: Using the Key
1. Find Key: Locate the correct chuck key.
2. Loosen: Insert key in hole, turn counter-clockwise.
3. Swap Bit: Remove old, insert new.
4. Tighten: Insert key in hole, turn clockwise.
5. Secure: Ensure bit is tight and doesn’t wobble.
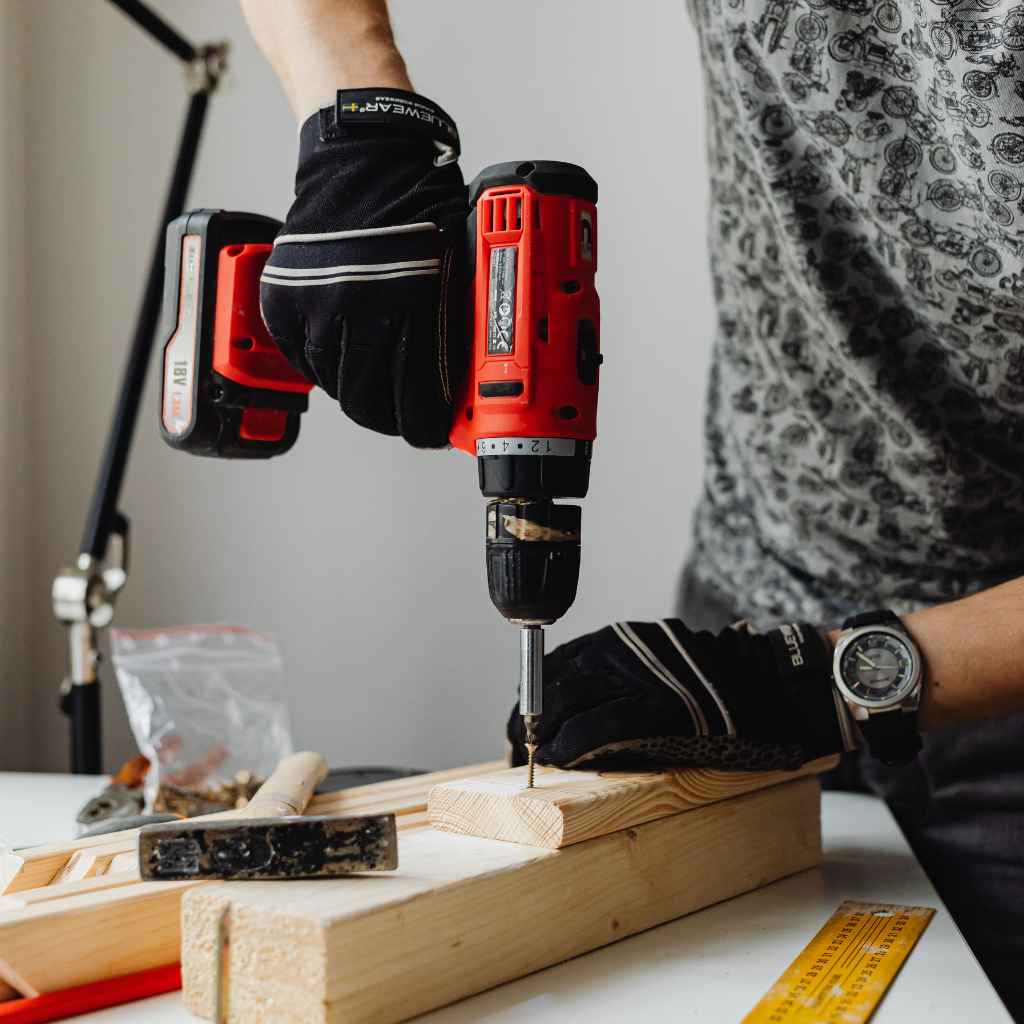
Real-World Scenarios and Tips
In real homes and workshops, you’ll find yourself changing bits often. Maybe you’re hanging shelves, building furniture, or doing DIY repairs. Each task might need a different size or type of drill bit.
For wood, you’ll use wood bits. For metal, metal bits. For concrete, masonry bits. They all have different tips and shapes. You need to swap them correctly to get the job done. Using the wrong bit can damage your material or the bit itself.
One tip: keep your most-used bits handy. Maybe in a small organizer right next to your drill. This saves time searching. Also, make sure the bits you are putting in are clean and free of debris. Sawdust or metal shavings can sometimes make them harder to seat correctly.
Consider the type of material you are drilling into. A small, delicate piece of wood might need a gentler touch than a thick beam. The drill bit needs to be held very securely. This is where a well-tightened chuck comes into play.
Bit Storage & Handling
Organized Bits: Use small bit organizers or magnetic strips. Keep them close to your work area.
Clean Bits: Wipe down bits before inserting. Remove dust or metal filings.
Bit Types: Match the bit to the material (wood, metal, masonry).
Chuck Grip: Ensure the chuck grips the shank (the part without the cutting tip) of the bit, not the flutes.
What This Means For You
Knowing how to change your drill bit quickly is more than just a handy skill. It means less downtime on your projects. You spend less time fiddling with tools and more time actually building or fixing things.
It also means you’re working safer. By following the steps and making sure the drill is powered off, you avoid potential accidents. A secure grip on the bit means the drill works more efficiently and accurately too. You’ll get cleaner holes.
If your bit feels loose even after tightening, or if the chuck seems hard to turn, it might be time for a closer look. Sometimes, debris can get lodged in the chuck jaws. Or, in rare cases, the chuck mechanism might be worn out.
When to Check Your Chuck
Wobbly Bit: If the bit spins noticeably unevenly after tightening.
Stuck Bit: If a bit is very difficult to remove even when the chuck is fully open.
Hard to Turn: If the chuck sleeve is very stiff or difficult to rotate.
Unusual Noises: Grinding or clicking sounds that seem out of the ordinary.
Quick Fixes and Tips for Speed
The best “fix” is really about habit. Make it a routine to disconnect power first. Then, practice the grip. The more you do it, the faster it becomes.
If you’re frequently changing bits, consider a drill with a quick-change chuck system. Many Milwaukee drills have excellent keyless chucks designed for this. They often have a very smooth action.
For very repetitive tasks, like driving lots of screws, you might even consider having two drills. One set up with a driver bit, and another with a common drill bit. This eliminates the need to change bits altogether for those specific jobs.
Another trick is to have a small cloth or rag handy. You can use it to get a better grip on the chuck sleeve if your hands are a bit oily or sweaty. This provides extra traction and makes twisting much easier.
Speed Tips for Bit Changes
Routine: Always disconnect power first. Make it automatic.
Practice: Swap bits a few times when you don’t need to. Get the feel.
Good Grip: Use a rag if hands are slippery for better torque.
Two Drills: For high-volume tasks, use one drill for driving, one for drilling.
Frequent Questions About Changing Drill Bits
What is the best way to hold the drill when changing a bit?
It’s best to hold the main body of the drill with one hand, ideally the one not holding the chuck. This keeps the drill steady. Then, use your other hand to grip and turn the chuck sleeve.
How tight should I make the drill bit?
You want it snug and secure. It shouldn’t wobble at all. You don’t need to apply extreme force. Just enough so the bit is firmly gripped by the chuck jaws. Most bits should not move when you tug on them.
Can I change a drill bit while the drill is still running?
Absolutely not. You should always disconnect the power source first. Remove the battery or unplug the drill. Trying to change a bit while it’s powered can cause serious injury.
My drill bit is stuck. What should I do?
Ensure the drill is powered off. Open the chuck as far as it will go. Sometimes, gently wiggling the bit while pulling can help. If it’s still stuck, check for debris in the chuck jaws. If it persists, the chuck might need cleaning or professional service.
How often should I clean my drill chuck?
For most DIY users, cleaning the chuck a few times a year is usually enough. If you work in dusty environments or with materials that create a lot of debris (like metal shavings), clean it more often. A quick wipe down after use is good practice.
What is the difference between a drill bit and a driver bit?
A drill bit is used to make holes. It has a sharp tip designed for cutting through material. A driver bit has a tip that matches a screw head (like Phillips or flathead). It’s used for driving screws into or out of materials.
Conclusion
Changing a Milwaukee drill bit doesn’t have to be a challenge. By understanding your chuck and following a few simple safety steps, you can swap bits in seconds. This keeps your projects moving and your fingers safe. Now you know how to do it fast!