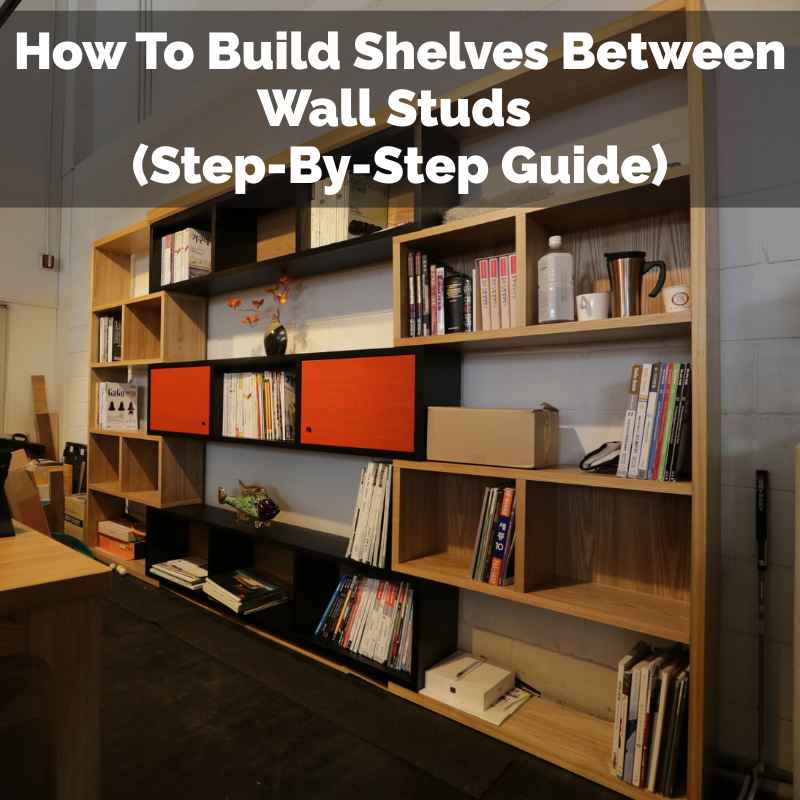
How To Build Shelves Between Wall Studs (Step-By-Step Guide)
You’ve got that perfect spot in your home. It’s just… a wall. An empty space that feels like a missed chance. The same wall-mounting principles apply when displaying a folded flag in a display case — always anchor into studs for heavy shadow boxes. The same basic woodworking skills — measuring, cutting, and assembling — apply to beginner builds like a homemade guitar school project.
You dream of adding storage, making it pretty, but how? The idea of cutting into walls feels scary. You want to add shelves, but not just any shelves.
You want them to look built-in. Like they’ve always been there. This is a common feeling.
Many people see blank walls and wish for more useful space. It’s a puzzle that many DIYers want to solve. We’re here to help you solve it.
You’re about to learn how to make those dream shelves a reality. This guide will break it all down. It’s simpler than you think.
Building shelves between wall studs creates seamless, built-in storage. This guide walks you through finding studs, cutting drywall, framing the space, installing shelves, and finishing the project with clear, easy steps for a beautiful and functional addition to any room.
Understanding Wall Studs and Recessed Shelving
Walls aren’t just solid sheets of material. Inside them, there are wooden or metal beams. These are called studs.
They give your walls their strength. Most homes use studs spaced about 16 inches apart. Sometimes they are 24 inches apart.
These spaces between studs are perfect for adding storage. Think of them as ready-made little rooms inside your wall. Building shelves into these spaces means the shelves sit flush with your wall.
This makes them look like they are part of the house itself. It’s called recessed shelving. It’s a smart way to add shelves without taking up floor space.
It looks very neat and tidy.
Why build shelves this way? Many reasons! First, it’s a big space saver.
Regular shelves stick out. They can make a room feel smaller. Recessed shelves are flush.
They keep your pathways clear. Second, they look amazing. They give a custom, high-end feel.
It’s like having a secret spot for your books or decor. Third, it uses space that’s usually empty. You can add shelves in living rooms, bedrooms, hallways, or even bathrooms.
It’s a project that adds both form and function to your home.
So, how do we actually do this? It starts with knowing where those studs are. Then, you’ll need to carefully open up the wall a bit.
You’ll build a simple frame. Then you’ll put in your shelves. Finally, you’ll make it all look nice with some finishing touches.
We’ll go through each step. You don’t need to be a master carpenter. Just follow along.
We’ll keep it simple. The goal is to feel good about what you’re creating.
My First Attempt at a Recessed Shelf
I remember the first time I thought about building a recessed shelf. It was in my old apartment. The living room had this awkward, narrow wall next to the fireplace.
It was too small for a big piece of furniture. But it was just sitting there, empty. I had so many books.
I felt like the wall was mocking me. I wanted shelves. But I didn’t want plain shelves that jutted out.
I saw pictures online of built-in bookshelves. They looked so classy. I thought, “Can I do that?”
My heart did a little flip-flop. Cutting into a wall? That sounded like a big deal.
I was worried about hitting wires or pipes. Or just making a mess I couldn’t fix. I spent weeks just staring at that wall.
I’d sketch ideas. I’d look at more pictures. I even bought a few shelves.
They sat in my closet for months. Then, one rainy Saturday, I decided enough was enough. I grabbed a stud finder and a drywall saw.
My hands were a little shaky. The first cut felt like a point of no return. But once I saw the space between the studs, a tiny thrill went through me.
This was doable.
I made mistakes, of course. I cut the drywall a bit too big in one spot. I didn’t measure perfectly the first time.
But I learned as I went. Seeing that first shelf sitting perfectly flush, holding my favorite books, felt like a huge win. It wasn’t perfect, but it was mine.
And it looked amazing. That experience taught me that most DIY projects are about courage and learning as you go. It’s okay to make small mistakes.
You can fix them. The satisfaction of creating something useful and beautiful is worth the effort.
Getting Started: Tools and Materials
Before you grab your tools, let’s make sure you have what you need. Having the right items on hand makes the job go much smoother. It’s like packing for a trip.
You don’t want to realize you forgot something important halfway there. For building recessed shelves, you’ll need a few key things. Most of these you might already have.
Or they are easy to find at any hardware store. Don’t get overwhelmed by a long list. We’ll break it down simply.
Essential Tools Checklist
- Stud Finder: This is your best friend. It helps you locate the studs inside your wall without guessing. Magnetic ones find nails, electronic ones find the center of the stud.
- Level: To make sure your shelves are straight. A short one is good for small spaces. A longer one is useful for bigger jobs.
- Tape Measure: Accuracy is key. Measure twice, cut once, as they say!
- Utility Knife or Drywall Saw: For cutting the drywall. A sharp utility knife can score drywall. A drywall saw makes it easy to cut through.
- Pencil: For marking cut lines and measurements.
- Safety Glasses: Always protect your eyes when cutting or drilling.
- Dust Mask: Drywall dust gets everywhere. A simple mask helps you breathe easier.
- Drill/Driver: For drilling pilot holes and driving screws.
- Hammer: For minor adjustments or tapping things into place.
- Putty Knife and Spackle/Joint Compound: For filling holes and smoothing surfaces later.
- Sandpaper: For smoothing spackle and preparing for paint.
Materials You’ll Need
- Wood for Shelves: Pine boards, plywood, or even MDF work well. The thickness depends on how much weight you plan to put on them. 1×8 or 1×10 boards are common choices.
- Wood for Frame: You’ll need 1×3 or 1×4 lumber for the small frame inside the wall.
- Wood Screws: Various lengths. You’ll need them to attach your frame to the studs and to attach the shelves to the frame.
- Drywall Screws: If you need to reattach any drywall pieces.
- Wood Glue (Optional but recommended): Adds extra strength to your shelf joints.
- Primer and Paint: To match your wall color or create a new look.
Choosing the right wood is important. For shelves, you want something strong. Solid wood like pine or poplar is great.
Plywood is also a good choice. Make sure it’s thick enough. If you plan to put heavy items like big books or ceramic pieces, go for thicker wood.
For the frame, you don’t need super strong wood. Basic construction lumber like 1x3s or 1x4s is usually fine. They just need to support the shelf and keep it in place.
Don’t forget the screws! Having a box with a mix of sizes is always handy for DIY projects. They are the backbone of your shelf.
Step 1: Find Your Studs and Plan the Opening
This is where the real work begins. Finding the studs is crucial. They are the skeleton of your wall.
You need to know where they are to know where to cut. Most studs are 16 inches from center to center. This means there’s about 14.5 inches of space between them.
But sometimes they are 24 inches apart. Always check. A stud finder is your best tool here.
Pass it over the wall. It will beep or light up when it finds a stud.
Mark the edges of each stud you find. Use your pencil. You want to find at least two studs.
This creates the space for your shelf. Once you’ve found them, decide on the size of your shelf. Measure the distance between the studs.
This will be the width of your shelf. Then decide how tall and how deep you want it. A good depth for most shelves is 4 to 6 inches.
Any deeper and you might hit electrical wiring or plumbing inside the wall.
Now, you’ll mark the outline of your opening. Use your level and pencil. Draw a rectangle on the wall.
The sides of the rectangle should line up with the edges of the studs. The top and bottom lines define how tall your shelf will be. Make sure the lines are straight.
A crooked opening will make a crooked shelf. It’s like drawing a picture. You need good lines to start.
This marked rectangle is where you will cut. Take your time here. Good planning makes the rest of the project easier.
Tip: If your stud finder isn’t working well, you can also tap the wall with a hammer. A solid thud means you hit a stud. A hollow sound means you are between studs.
Be gentle. You don’t want to damage the drywall before you’re ready.
Quick-Scan: Finding Studs
- Use a Stud Finder: Electronic or magnetic, they are key.
- Mark Edges: Lightly mark the wall where the stud is.
- Measure Spacing: Note the distance between studs (usually 16″ or 24″).
- Tap Test: A solid sound means stud. A hollow sound means no stud.
Step 2: Carefully Cut the Drywall
This step requires a steady hand. You’ve marked your rectangle. Now it’s time to cut.
Take your utility knife or drywall saw. Carefully cut along your pencil lines. If you’re using a utility knife, you might need to score the line several times.
This makes the cut deeper and cleaner. A drywall saw cuts through more easily. Start by poking the tip of the saw into the drywall at one of your marked corners.
Cut along each line of your rectangle. Be careful not to cut too deep. You only need to go through the drywall.
You don’t want to hit the studs behind it yet. As you cut, the piece of drywall should become loose. You might need to wiggle it a bit.
Gently pull it out. It’s best to have a trash bag or a bucket nearby. Drywall dust can be messy.
Once the piece is out, you’ll see the space between the studs. This is the cavity where your shelf will live.
This is also a good time to check for wires or pipes. Look inside the opening. If you see any electrical wires or plumbing pipes, stop.
You’ll need to adjust your shelf placement or depth. Safety first! If you’re unsure about what you’re seeing, it’s best to consult a professional.
You don’t want to accidentally damage anything important. Once you’re sure it’s clear, you can proceed. The opening should be clean and ready for the next step.
Important: Don’t throw away the piece of drywall you cut out. You might be able to use it later for patches if needed. Or, if you’re doing a larger project, save it.
It’s a good piece to have on hand.
Step 3: Build the Shelf Frame
Now we build the support structure. This frame will hold your shelves securely. You need to create a box inside the wall opening.
This box will have a front and back piece, and sides. You’ll attach this frame to the studs. Use your 1×3 or 1×4 lumber for this.
Measure the distance between the studs. Cut two pieces of wood to this length. These will be your front and back frame pieces.
Next, measure the depth of your desired shelf opening. This is usually the depth of the studs plus a little extra to sit flush. Cut two side pieces of wood to this length.
These will go inside the wall, connecting the front and back pieces. You’ll also need to create supports for the shelves themselves. You can add horizontal pieces of wood inside the frame.
These will run from the front frame piece to the back frame piece, at the desired height for each shelf.
Now, assemble the frame. Lay out your pieces. Use wood screws to join them.
Pre-drilling pilot holes will prevent the wood from splitting. Make sure your corners are square. A speed square can help with this.
Once the frame is built, it’s time to put it into the wall opening. Hold it in place. Use your level to make sure it’s straight.
Then, screw it directly into the wall studs. Use 2-3 screws on each side to ensure it’s very secure. This frame is what your shelves will rest on.
Make it strong.
Framing Quick Tips
- Measure Twice: Ensure frame pieces fit the opening precisely.
- Use Screws: Wood screws provide strong connections.
- Pre-Drill: Prevents wood splitting.
- Check for Square: Use a speed square to ensure 90-degree corners.
- Attach Firmly: Screw the frame directly into the studs.
Think of this frame as the internal support system. It’s like the foundation of a building. You need it to be solid.
If the frame is wobbly, your shelves won’t be stable. Take your time with this part. Ensure everything is level and secure.
This is where you gain that built-in look. The front edge of your frame should be flush with the front edge of the drywall. This way, your shelves will also sit flush.
Step 4: Install the Shelves
With the frame in place, installing the shelves is the fun part! Measure the inside dimensions of your frame. You want your shelves to fit snugly.
Cut your shelf boards to size. They should be the exact width needed to fit between the front and back frame pieces, and the correct depth. Make sure they slide in easily but aren’t loose.
You can install shelves in a few ways. If you built horizontal supports within the frame, you can simply slide the shelves onto these supports. Then, screw them in from the top or bottom.
This adds extra strength. Alternatively, if your frame has a front and back piece, you can screw directly through the shelf into the front and back frame pieces. You can also screw up from the bottom of the shelf into the frame supports if you have them.
Use wood screws for this. Again, pre-drilling pilot holes is a good idea. Especially if you are screwing into the ends of the wood.
You want the screws to go in straight and hold firmly. Make sure the shelves are level. Use your level for each shelf as you install it.
If you are installing multiple shelves, they should all line up perfectly. This attention to detail makes a big difference in the final look. A row of perfectly aligned shelves looks very professional.
Experience Tip: When I installed my first multi-shelf unit, I realized one shelf wasn’t perfectly level. It was only slightly off, but I could see it. I had to unscrew it, shim the back slightly with a thin piece of cardboard, and rescrew.
It taught me to check level constantly during installation.
Shelf Installation Ideas
Option 1: Shelf Supports
- Build horizontal supports inside the frame.
- Slide shelves onto supports.
- Screw shelves to supports from top or bottom.
Option 2: Direct Attachment
- Shelf fits snugly between front and back frame pieces.
- Screw through shelf into front/back frame.
- Or screw through frame into the shelf edge.
Step 5: Finishing Touches – Spackling and Painting
This is where your recessed shelves start to look like they were always meant to be there. You’ve got your shelves in. Now you need to blend them with the wall.
Take your putty knife and spackle or joint compound. You’ll want to fill any small gaps. There might be tiny spaces between the shelf edges and the wall.
Or where the frame meets the drywall. Smooth the spackle on. Make it as flush with the wall as possible.
Let the spackle dry completely. This usually takes a few hours. Once dry, it might shrink a little.
You might need to apply a second thin coat. Use your sandpaper to gently sand down the spackled areas. You want the surface to be smooth and even with the wall.
Brush away all the dust. This is important. Dust can ruin a paint job.
Now, it’s time to paint. Start with a coat of primer. This helps the paint stick better.
It also covers up any pencil marks or stains. Let the primer dry according to the can’s instructions. Then, apply your paint.
You can match your wall color. Or choose a contrasting color for a different look. Apply two thin coats of paint.
Let each coat dry fully. Thin coats are better than one thick coat. They look smoother and last longer.
Take your time with the painting. Use a good quality brush. Go slowly around the edges of the shelves.
You want clean lines. It’s the painting that really makes the shelves disappear into the wall. When it’s all done, step back and admire your work.
You’ve just created built-in shelves. That’s a big accomplishment! The result is a clean, custom look that adds real value to your home.
Painting Prep Checklist
- Fill Gaps: Use spackle or joint compound.
- Smooth Surface: Sand spackled areas until flush.
- Clean Dust: Wipe away all sanding dust.
- Prime: Apply one coat of primer.
- Paint: Apply two thin coats of your chosen color.
Real-World Context: Where This Works Best
Building recessed shelves isn’t just a trendy idea. It’s a practical solution for many common home spaces. Think about those awkward nooks.
Or walls that are just too plain. This project can transform them. The most common place to add recessed shelves is the living room.
Imagine a wall filled with books, photos, and plants, all neatly tucked away. It makes a statement without feeling cluttered.
Hallways are another great spot. Hallways often have unused wall space. A few recessed shelves can turn a boring hallway into a functional art display or book nook.
Bedrooms can benefit too. You can create bedside shelves. Or a small shelving unit for toiletries in a bathroom that lacks cabinet space.
Even laundry rooms or garages can use these for organizing cleaning supplies or tools.
The key is understanding your wall structure. Most standard homes in the U.S. have studs spaced 16 inches on center.
This gives you a consistent opening width. However, older homes or custom builds might vary. Always check your specific walls.
Also, be mindful of what’s behind the wall. Electrical wires, plumbing pipes, and HVAC ducts are common. Always do a quick visual check inside the wall cavity before cutting.
The depth of your recessed shelves is also important. Standard wall depth is often around 3.5 inches for the studs. This means you can easily build shelves that are 3 to 3.5 inches deep without going through the other side of the wall.
If you want deeper shelves, you might need to do more framing work. Or choose a wall where the cavity is deeper. But for most typical applications, the standard stud depth is perfect for creating attractive, functional shelves.
Ideal Locations for Recessed Shelves
- Living Rooms: For books, decor, and media.
- Hallways: To display art, photos, or store small items.
- Bedrooms: As built-in nightstands or display shelves.
- Bathrooms: For toiletries and towels in small spaces.
- Home Offices: For organizing books and supplies.
What This Means for You: When It’s Normal and When to Worry
Building recessed shelves is generally a safe and rewarding DIY project. The common signs that things are going well include: your stud finder locating studs consistently, your cuts into the drywall being clean, and the frame fitting snugly into the opening. If your shelves feel solid and level after installation, that’s a great sign.
The finished look, with smooth paint and clean lines, is what you’re aiming for. This is normal and expected.
However, there are a few things to watch out for. If you cut into your wall and immediately see wires or pipes, that’s a red flag. Stop what you’re doing.
Assess the situation carefully. If you’re not comfortable identifying or working around them, it’s best to call a qualified electrician or plumber. Damaging these could be costly and dangerous.
Always prioritize safety over saving a few dollars.
Another sign to be cautious is if your frame feels wobbly after securing it to the studs. This might mean the studs are not as solid as you thought, or your screws aren’t long enough to get a good grip. Double-check your connections.
Make sure you’re using appropriate length screws. If a shelf feels loose or unstable, it’s not safe to put items on it. You’ll need to reinforce the frame or the shelf attachment.
Finally, if you’re unsure about any part of the process, it’s always okay to ask for help. Watch more videos. Read more guides.
Or ask a friend who has DIY experience. There’s no shame in seeking advice. The goal is a safe, functional, and beautiful addition to your home.
Don’t push ahead if you have major doubts. There’s always a way to get it done safely.
When to Be Cautious
Normal Signs:
- Studs found consistently.
- Clean drywall cuts.
- Frame fits snugly.
- Shelves are level and feel sturdy.
- Smooth, painted finish.
Signs to Worry About:
- Visible wires or pipes in wall cavity.
- Wobbly or loose frame.
- Unstable shelves.
- Difficulty cutting drywall cleanly.
Quick Fixes and Tips for Success
Even with the best planning, sometimes little things don’t go exactly as planned. Don’t worry! Most common issues have easy fixes.
For instance, if your drywall cut is a little jagged or too large, don’t panic. You can use a small piece of wood as a shim to fill the gap. Or, if you made a mistake and cut too much, you might need to use a small piece of drywall to patch it.
This usually involves cutting a piece to fit, attaching it with drywall screws to the studs or frame, and then taping and mudding the seams.
If your shelf doesn’t sit perfectly flush with the wall, you can often use caulk. A bead of paintable caulk along the edge where the shelf meets the wall can hide small gaps. Once painted, it will look seamless.
This is a common trick for professional-looking finishes.
For making sure your shelves are strong, consider the type of wood you use for the shelves themselves. Thicker boards are generally stronger. Also, the number and placement of your frame supports matter.
If you anticipate heavy items, add an extra support in the middle of a long shelf. Or use a thicker shelf material like hardwood or high-quality plywood.
Always remember to clean up as you go. Sweeping up drywall dust and wood scraps will make the process more enjoyable. And it prevents tripping hazards.
Keep your work area tidy. It makes it easier to find your tools and see what you’re doing. A well-organized workspace leads to better results.
Don’t forget your safety gear. Glasses and a dust mask are small things that make a big difference.
Pro Tips for a Better Finish
- Caulk Gaps: Use paintable caulk for a seamless look where the shelf meets the wall.
- Reinforce Shelves: Add extra supports for heavy loads.
- Thicker Wood: Opt for thicker boards for shelves that will hold a lot.
- Clean as You Go: Keep your workspace tidy for safety and efficiency.
- Safety First: Always wear safety glasses and a dust mask.
Frequently Asked Questions
Can I build recessed shelves on any wall?
Generally, yes, but you need to be aware of what’s inside the wall. Standard interior walls with wood studs are ideal. Avoid walls with major plumbing or electrical lines where you plan to cut.
Always check with a stud finder and visually inspect the cavity if possible.
How deep can recessed shelves be?
The standard depth of an interior wall stud is about 3.5 inches. This means you can typically create shelves that are 3 to 3.5 inches deep without issue. If you need deeper shelves, you might need to do more advanced framing or consider a different wall location.
What kind of wood should I use for the shelves?
Pine boards, poplar, oak, or high-quality plywood are good choices. For very heavy items, consider thicker boards (like 1×8 or 1×10) or a stronger wood. The frame can be made from simpler lumber like 1×3 or 1×4 pine.
Do I need to be an expert to do this?
No! This is a great project for intermediate DIYers. If you can measure, cut, and use a drill, you can do this.
Patience and careful measurement are key. There are many tutorials online to guide you.
What if I hit a wire or pipe?
Immediately stop cutting. Do not try to move or force anything. If you see electrical wires, call a licensed electrician.
If you see plumbing pipes, call a plumber. It’s not worth the risk of damage or injury. Adjust your shelf location or size.
How do I make the shelves look truly built-in?
The key is to have the shelves sit flush with the wall. Use a well-built frame that is secured to the studs. Finish the project by filling any gaps with spackle or caulk, sanding smooth, and painting to match the wall.
This seamless integration is what makes them look built-in.
How much weight can recessed shelves hold?
This depends on the materials used and the support structure. With a solid frame attached to studs and shelves made of sturdy wood (like 3/4-inch plywood or solid pine), they can often hold 20-50 pounds or more per shelf, distributed evenly. Always err on the side of caution and don’t overload them.
Conclusion
You’ve learned how to take a blank wall and turn it into a beautiful, functional space. Building recessed shelves is more accessible than you might have thought. You now understand how to find studs, cut drywall, build a sturdy frame, install your shelves, and finish them to look like they’ve always been part of your home.
This project adds value and style. It’s a rewarding DIY accomplishment. Enjoy your new custom storage!