How To Anchor A Gazebo Without Drilling Securely
Gazebo anchoring without drilling involves using weight, specialized hardware, or ground stakes that bypass direct fastening to your deck or patio. Options include using heavy pavers, concrete blocks, dedicated gazebo anchoring kits that attach to the frame, or driving stakes into the ground around the base.
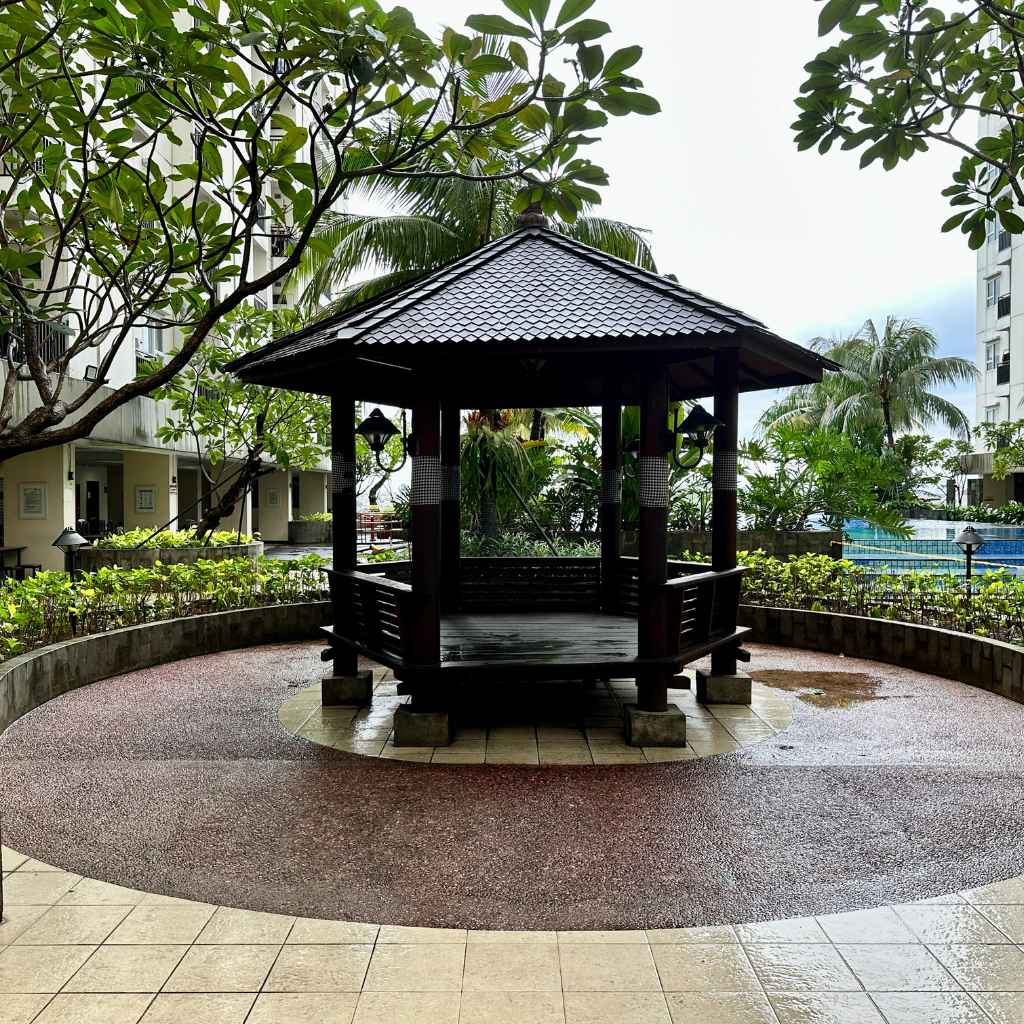
Understanding Gazebo Stability
A gazebo is more than just a roof on poles. It’s an outdoor structure. Wind can exert a lot of force.
Think of a sail. A gazebo acts like a big sail. Even a small gust can lift or move a light gazebo.
Larger ones can tip over. This is dangerous. It can hurt people or damage property.
Stability comes from a strong base. It needs to resist uplift and sideways pushes.
The goal is to transfer the wind’s force. It needs to go from the gazebo into the ground. Or into a very heavy weight.
Traditional methods often use bolts. These go through the gazebo legs. They then go into the deck joists or concrete.
This is very secure. But many people want to avoid this. They might have a new deck.
Or they might rent their home. They don’t want permanent holes.
So, we look for methods that don’t require drilling. This means finding other ways to create that solid connection. It’s about being smart with physics and materials.
We want to keep your gazebo standing tall, no matter the weather. And we want to do it without leaving a mark on your beautiful outdoor space.
The Challenge of Anchoring Without Drilling
When you think about anchoring something heavy, drilling seems like the obvious first step. It’s direct. It’s strong.
But what if you can’t? What if your patio is made of delicate pavers? Or your deck is brand new and you don’t want to void the warranty?
Or maybe you just don’t have the tools. This is where the challenge lies. You need to find alternative ways to fight the wind’s power.
The wind wants to lift your gazebo. It wants to push it. It’s like trying to hold down a kite in a strong breeze.
Without a firm grip, it’ll fly away. Anchoring without drilling means you can’t bolt it down directly. So, you must use other forces.
These can be weight or specialized attachments. These methods need to be strong enough. They need to hold the gazebo in place.
They need to be reliable.
It’s a puzzle. You’re trying to create a secure link. But the link can’t be a permanent hole.
This means we have to get creative. We have to think about how things stay put. Think about how a boat stays in the water.
It’s often tied to a dock. Or it uses a heavy anchor. These are different principles.
But they all aim for the same thing: stability. We’ll explore these creative solutions to keep your gazebo safe and sound. It’s all about working with what you have.
Why Drilling Might Not Be Your First Choice
There are many good reasons why drilling isn’t always the best option for anchoring a gazebo. I’ve seen this come up so many times with clients. They love their new outdoor space.
But they’re hesitant about making permanent changes. One big reason is aesthetics. Nobody wants to see a bunch of drill holes on a beautiful deck.
It can ruin the look. It can make a deck seem less valuable.
Then there’s the material itself. If you have composite decking, drilling can sometimes lead to issues. It might expose the core materials.
This could lead to water damage over time. It can void warranties too. For stone patios or pavers, drilling is even more problematic.
It’s hard to drill into stone cleanly. You risk cracking it. This can be a costly mistake.
Plus, you might need special tools and skills for that kind of job.
Renters are in a similar boat. You can’t make permanent changes to a property you don’t own. Drilling holes would be a big no-no.
You need solutions that are temporary. They need to be removable. They need to leave the property exactly as you found it.
Finally, sometimes people just aren’t comfortable with power tools. They prefer simpler, DIY-friendly methods. All these factors lead us to explore ways to anchor a gazebo securely, without ever picking up a drill.
It’s about finding the smartest, most practical solution for your specific situation.
Method 1: Weight It Down – The Paver and Block Approach
This is one of the most common and easiest ways to anchor a gazebo without drilling. The idea is simple: use heavy objects to hold the gazebo legs down. Think of it like putting weights on a table to stop it from blowing away.
For a gazebo, this usually means using concrete pavers or large concrete blocks.
How it works is you place these heavy items around the base of each gazebo leg. The weight of the pavers presses down. This friction helps keep the leg from sliding or lifting.
You want to stack enough weight. The exact amount depends on your gazebo’s size and weight. It also depends on how windy your area is.
For a smaller, lighter gazebo, maybe two large pavers per leg are enough. For a bigger one, you might need more. You could even use specialized concrete weights designed for outdoor structures.
My friend Sarah did this for her backyard gazebo. She lives in an area with surprisingly strong winds. She bought large, flat concrete blocks from the garden center.
She placed four of these around each of the eight gazebo legs. She then added some decorative stones on top for a nicer look. It looked good and, more importantly, it stayed put through a couple of strong storms.
It’s a very visual way to see the anchor working. You can literally see the weight holding the structure down. It’s a practical, effective, and often budget-friendly method.
Plus, you can rearrange the pavers later if you want to change your patio’s look.
Details of the Paver/Block Method
To make this method work best, pay attention to a few details. First, the pavers or blocks need to be large and heavy. Small garden stones won’t cut it.
Look for blocks that are at least 12 inches square and 4 inches thick. The heavier, the better. You’ll want to position them so they are right up against the gazebo legs.
For maximum effect, you can arrange them in a way that makes it hard for the leg to slide outwards. Imagine forming a square or rectangle with the blocks around the leg. This creates a barrier.
If you’re using pavers, you can stack them. Place one flat, then another on top. This doubles the weight.
Consider the ground underneath. If your gazebo is on grass, the weight might sink in. This can make it look uneven.
It’s better to place these weights on a hard surface like concrete or pavers. This ensures a stable base for the weights themselves. You can even lay down a small piece of plywood or a flat stone under each block.
This protects the surface below.
Also, think about appearance. Many pavers come in nice colors and textures. You can choose ones that match your patio.
You can even plant low-growing flowers around the base of the weights. This helps them blend in. It makes them look like a decorative feature rather than just anchors.
It’s a thoughtful touch that makes a big difference.
Pros and Cons of Weighting Down
Pros:
- No drilling required: This is the main benefit. Your deck or patio stays unmarked.
- Easy to install: You don’t need special tools. Just place the weights.
- Affordable: Pavers and concrete blocks are relatively inexpensive.
- Relocatable: You can move the weights if you need to.
- Adjustable: You can add more weight if needed.
- Aesthetic options: Many pavers look nice and can be decorative.
Cons:
- May not be enough for very high winds: In hurricane-prone areas, this might not be sufficient on its own.
- Can look bulky: If not arranged carefully, the weights can be visually unappealing.
- Requires significant weight: You need substantial weight to be truly effective.
- Can be a trip hazard: If not placed flush or bordered, they could be a tripping risk.
- Surface dependent: Works best on hard, flat surfaces.
Quick Scan: Weight Anchoring Checklist
Item: Concrete Pavers/Blocks
Quantity: At least 2-4 per leg (more for larger gazebos or high winds)
Weight: Heavy (minimum 30-50 lbs each)
Placement: Snug against gazebo legs
Surface: Hard, level surface preferred
Extra: Decorative stones, border for safety
Method 2: The Ground Stake Advantage
Another excellent way to anchor a gazebo without drilling is by using ground stakes. This method works best if your gazebo is placed on grass, soil, or even a gravel area. It’s very effective for providing deep anchoring into the ground.
How it works is you attach specialized stakes to the bottom of your gazebo legs. These stakes are long and sturdy. They are driven deep into the earth.
They create a strong hold against uplift. Many gazebos come with pre-drilled holes on the legs for this purpose. If yours doesn’t, you can often find universal stake mounting plates.
I remember helping a neighbor set up a pop-up canopy for a party. It was a bit windy that day. He used long, heavy-duty metal stakes.
He hammered them deep into the lawn. He then used strong ratchet straps to connect the stakes to the canopy frame. It stayed put all day.
For a more permanent gazebo, you’d use stakes designed to connect directly to the legs.
These stakes often have a spiral design, like a corkscrew. Or they are just long, strong rods. The key is to get them deep enough.
The deeper they go, the more resistance they provide. This stops the gazebo from being pulled out of the ground. It’s a tried-and-true method for keeping things grounded.
Choosing the Right Ground Stakes
Not all ground stakes are created equal. For a gazebo, you need something robust. Look for stakes made of galvanized steel.
This prevents rust. They should be at least 18-24 inches long, sometimes even longer. The longer they are, the more secure the hold will be.
Some stakes have a spiral shape. These are excellent because they offer more surface area to grip the soil.
You’ll also need a way to connect the stakes to your gazebo legs. Some gazebos have built-in mounting points. For others, you might need L-shaped brackets or specialized anchoring plates.
These attach to the bottom of the leg. Then, you can secure the stake to the bracket. Ensure the connection is strong.
Use sturdy bolts and nuts. Don’t rely on flimsy screws.
When installing, you’ll need a hammer or a mallet. A sledgehammer works well for driving in longer stakes. Make sure you drive them in straight.
If they go in at an angle, they won’t be as strong. The stakes should ideally be angled slightly away from the gazebo leg. This provides extra resistance against pulling forces.
It’s also a good idea to check the soil condition. If the ground is very soft or sandy, stakes might not hold as well. In such cases, you might need longer stakes or a different anchoring method altogether.
For firm soil, though, stakes are a fantastic option.
Pros and Cons of Ground Stakes
Pros:
- Very secure: When installed correctly, they offer strong resistance to wind.
- Deep anchoring: They go into the ground, providing a solid hold.
- Minimal visual impact: Once installed, stakes are often hidden by the gazebo legs.
- Good for lawns: Excellent for gazebos placed on grass.
- Relatively affordable: Stakes themselves are not usually very expensive.
Cons:
- Requires ground: Not suitable for gazebos placed directly on concrete or solid decks.
- Installation can be tough: Driving long stakes into hard ground can require effort.
- Can be a hazard: The tops of stakes can be a tripping risk if not covered.
- Soil dependent: Less effective in very soft or sandy soil.
- May require additional hardware: Brackets or plates might be needed.
Stake Installation Tip
Tool: Sledgehammer or heavy mallet.
Technique: Drive stakes at a slight outward angle from the gazebo leg.
Depth: As deep as possible, ensuring firm soil grip.
Connection: Use sturdy hardware for attaching to gazebo legs or brackets.
Safety: Consider covers or markers for stake tops if they are exposed.
Method 3: Specialized Gazebo Anchoring Kits
For those who want a more purpose-built solution, there are specialized gazebo anchoring kits. These are designed specifically to secure gazebos without requiring you to drill into your deck or patio. They often combine a few different principles to achieve a strong hold.
One popular type involves heavy-duty metal brackets. These brackets typically attach to the bottom of your gazebo legs. Then, they have anchor points.
These anchor points can connect to ground stakes, weights, or even other structural elements. Some kits come with everything you need: brackets, stakes, and fasteners. Others might require you to provide your own weights.
I saw a really clever kit at a home and garden show last year. It had sleek, low-profile brackets. You attach these to the gazebo legs.
Then, there were sturdy metal rods that you could either drive into the ground next to the legs. Or, you could attach them to heavy concrete blocks. The design was neat.
It looked less clunky than just stacking pavers.
These kits are often engineered for strength. They distribute the load effectively. They are designed to resist both uplift and lateral movement.
This gives you peace of mind. They are a good middle ground. They offer more security than just stacking pavers.
They are also more versatile than simple ground stakes if your gazebo is on a hard surface.
What to Look for in a Kit
When shopping for a gazebo anchoring kit, look for quality materials. Galvanized steel is usually a good choice. It resists rust and corrosion.
Check the strength of the brackets. They should feel solid and well-made. If the kit includes stakes, make sure they are long and robust.
Consider your gazebo’s leg design. Some kits are universal. Others are made for specific leg shapes (e.g., square, round, or angled).
Measure your gazebo legs to ensure a good fit. The kit should come with clear instructions. If it doesn’t, it might be a sign that it’s not well-engineered.
Think about your specific location. If you have a concrete patio, you’ll need a kit that allows you to attach weights or has an option for concrete anchors (though that might involve drilling, so check carefully). If you have a lawn, a kit that works with ground stakes will be ideal.
Some kits offer flexibility, allowing you to choose your anchoring method.
Read reviews from other customers. See how well the kits held up in different weather conditions. This can give you valuable insights.
A good kit should provide a secure, reliable solution for years to come. It’s an investment in the safety and longevity of your gazebo.
Pros and Cons of Anchoring Kits
Pros:
- Engineered for strength: Designed to provide robust anchoring.
- Purpose-built: Solves the problem of anchoring without drilling directly.
- Often a complete system: Includes brackets, fasteners, and sometimes stakes.
- Can be versatile: Some kits allow for different anchoring methods.
- Neater appearance: Can look more integrated than just stacked weights.
- Good for various surfaces: Can often be adapted for decks, patios, or lawns.
Cons:
- More expensive: Typically cost more than DIY methods with pavers or stakes.
- May require specific tools: Installation might need wrenches or other common tools.
- Can still have visual impact: Brackets might be visible at the base of the legs.
- Compatibility issues: Need to ensure it fits your specific gazebo model.
- Less DIY flexibility: You are using a pre-designed system.
Key Components of Gazebo Anchoring Kits
Brackets: Metal pieces that attach to gazebo legs.
Fasteners: Bolts, nuts, washers for assembly.
Ground Anchors: Metal stakes or screws for embedding in the ground.
Weight Plates: (Optional) For attaching to concrete blocks or pavers.
Straps/Cables: (Optional) For connecting to external anchors.
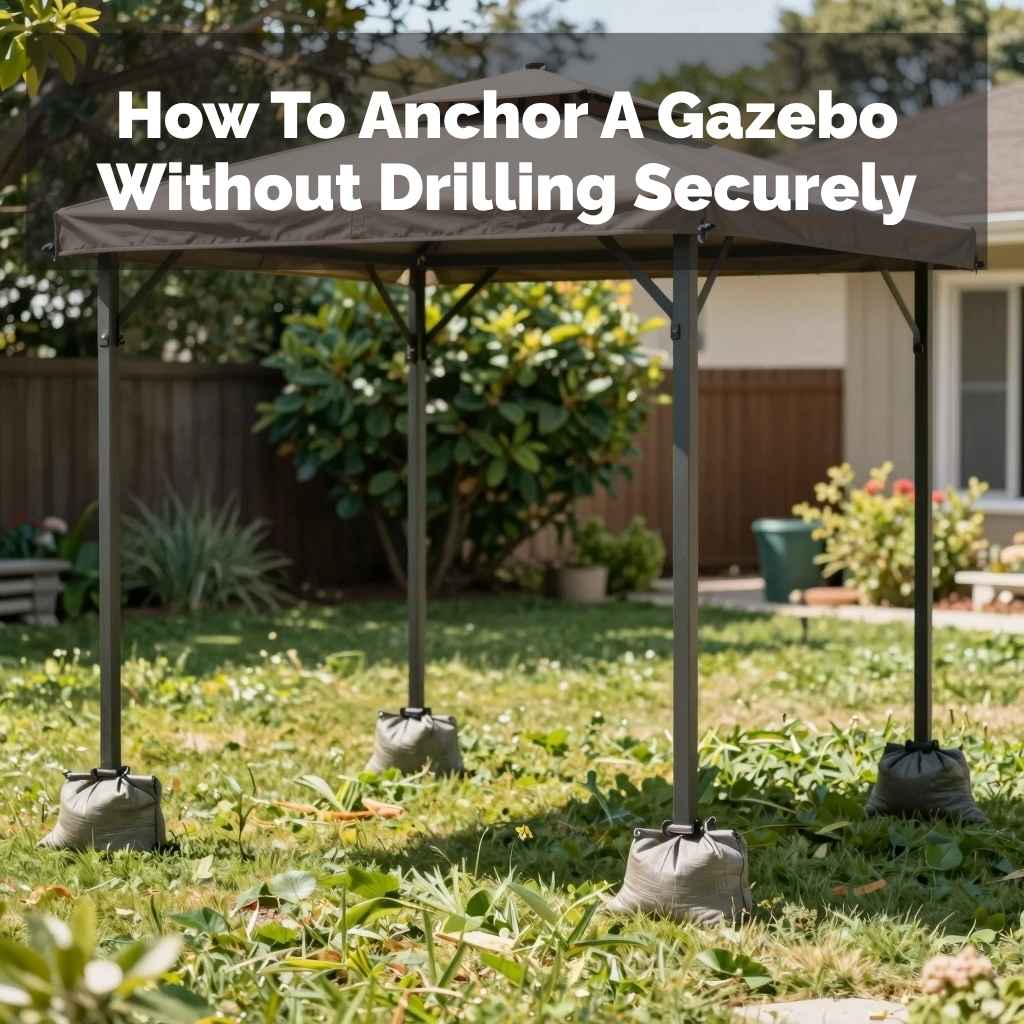
Method 4: Water Bags or Sandbags
This is a creative and often portable solution, especially for lighter gazebos or temporary setups. Water bags or heavy-duty sandbags can be used to add significant weight to the base of your gazebo legs. They are particularly useful if you need a solution that is easy to move or store.
These are typically heavy-duty vinyl bags. You fill them with water or sand. Once full, they are incredibly heavy.
You place them around the base of each gazebo leg. The sheer weight of the water or sand presses down. This friction holds the gazebo in place.
It’s similar to the paver method, but the containers are specifically designed for this purpose.
I saw a friend use these for a large party tent. It was set up on a paved driveway. He filled large, durable canvas bags with sand.
He then placed two bags around each of the tent poles. The bags looked neat and tidy. They served their purpose perfectly.
The tent stayed put even with a bit of a breeze. When the party was over, he just emptied the sand and stored the bags.
The advantage here is that you can fill them with as much or as little as you need. Water is easy to find and drain. Sand provides a more permanent, dense weight.
You can stack them if you need more weight. The flexibility is a big plus for many people.
Choosing and Filling Water/Sand Bags
When selecting water or sandbags, look for durable materials. Heavy-duty canvas or reinforced vinyl are good choices. They need to withstand the weight of water or sand.
They also need to be UV resistant to last outdoors. The size of the bags matters. Larger bags hold more weight.
You’ll need to figure out how many you need per leg based on your gazebo’s size and local wind conditions.
For water bags, ensure they have a secure, leak-proof closure. You don’t want water seeping out and making a mess. For sandbags, they should be tightly woven to prevent sand from escaping.
It’s often easier to fill sandbags using a small shovel or a funnel.
When positioning them, place them snugly around the gazebo legs. You can arrange them in a square or circle. The goal is to create a strong downward force.
If you’re using multiple bags per leg, stack them carefully for stability. Make sure they don’t create a significant tripping hazard. Some bags are designed with lower profiles for this reason.
Remember that water weight can be substantial. A cubic foot of water weighs about 62.4 pounds. A large bag could easily weigh over 100 pounds when full.
Sand is even denser. This makes them very effective anchors. Just ensure the bags are placed on a stable surface.
Pros and Cons of Water/Sand Bags
Pros:
- No drilling: Protects your deck or patio.
- Portable and storable: Easy to move, empty, and store when not in use.
- Adjustable weight: Fill with as much water or sand as needed.
- Relatively inexpensive: Especially if you have access to sand or water.
- Adaptable: Can be used on various surfaces.
Cons:
- Aesthetics: Can look like sandbags or bulky bags, which might not fit all décors.
- Leakage risk: Water bags can potentially leak.
- Filling can be messy: Especially with sand.
- Freezing risk: Water bags can freeze and crack in cold climates.
- May not be sufficient for very large gazebos or extreme winds.
Water Bag vs. Sandbag Weight
Water:
- Density: Approx. 62.4 lbs per cubic foot.
- Pros: Easy to fill and empty, readily available.
- Cons: Freezing risk, potential leaks.
Sand:
- Density: Approx. 100 lbs per cubic foot.
- Pros: Dense, permanent weight, no freezing issues.
- Cons: Messy to fill, heavy to move once filled.
Real-World Context and Scenarios
Let’s picture a few common situations. Imagine you just had a beautiful wooden deck built. You want to place a lovely 10×10 foot gazebo on it.
You don’t want to drill holes through your new composite decking. In this case, the paver or block method is a great choice. You can use attractive concrete pavers that complement your deck’s color.
You stack them around each leg. This adds weight and stops the gazebo from shifting. It looks neat and protects your deck.
Or consider this: you have a garden area with a nice lawn. You’ve purchased a vinyl gazebo for this spot. It’s a bit lighter than a wooden one.
Here, ground stakes are ideal. You can hammer long, strong stakes into the ground around each leg. Then, use sturdy brackets to connect the stakes to the gazebo legs.
This uses the earth’s stability to hold your gazebo firmly. It’s a very secure setup that doesn’t impact your lawn too much.
What about a paved patio? You want to anchor a metal gazebo. Drilling into concrete is possible but can be messy.
You might also need specialized tools. A good option here could be a high-quality anchoring kit. These kits often come with brackets that attach to the gazebo legs.
Then, you can use either heavy weights (like large concrete blocks, possibly with specialized bases) or very robust ground screws that are designed for patios. This provides a strong anchor without extensive damage.
Even for gazebos that are already assembled, you can often adapt these methods. If the gazebo legs have a flat bottom, you can place weights directly on them, provided the weight is distributed. For most situations, however, attaching something to the side of the leg is more effective.
Always check your gazebo’s manual. It might offer specific recommendations or even come with its own anchoring hardware.
What This Means for You: When is it Normal? When to Worry?
It’s normal for a gazebo to feel stable. When you lean on it, it shouldn’t wobble. When a gentle breeze blows, it should stay put.
You shouldn’t see any significant movement. If your gazebo has some give in it, even when there’s no wind, that’s usually a sign it needs better anchoring. It’s not normal for a structure to feel loose.
You should worry if your gazebo shakes or rattles during mild winds. If you notice any lifting at the corners, that’s a big red flag. This indicates uplift force is stronger than your anchoring.
It’s a dangerous situation. If the gazebo leans noticeably in any direction, it’s also a cause for concern. This means it’s not properly secured against lateral forces.
Always consider the weather in your area. If you live somewhere with frequent strong winds or occasional storms, you need to be extra diligent. A gazebo that might be fine in a calm area could be a hazard in a windy region.
It’s better to over-anchor than under-anchor. Peace of mind is worth the effort.
A simple check is to give the gazebo legs a good push sideways and then try to lift them. If there’s any significant give or movement, you need to add more anchoring. It’s important to periodically inspect your anchoring system.
Weights can shift. Stakes can loosen over time. A quick check every spring is a good habit.
Simple Checks for Gazebo Stability
Here are a few quick checks you can do:
- The Push Test: Stand on one side of the gazebo. Gently push on a leg. Does the whole structure move easily? If so, it needs more stability.
- The Lift Test: Try to lift one of the gazebo legs. Even a little bit. If it lifts easily, your anchors aren’t strong enough.
- Visual Inspection: Look at the base of each leg. Are the anchors (weights, stakes, etc.) securely in place? Are they snug against the legs?
- Weather Check: After a windy day or a storm, do a visual check. Did anything shift? Did any weights fall over?
- Sound Check: Listen for any creaking or groaning sounds in the wind. This can sometimes indicate stress on the structure due to poor anchoring.
Quick Fixes and Tips for Better Anchoring
Sometimes, you might already have a gazebo anchored, but it feels a little wobbly. Or perhaps you’ve chosen a method and want to make it even more robust. Here are a few quick tips:
- Add More Weight: If you’re using pavers or blocks, simply add more. Stack them higher or use larger ones.
- Reinforce Connections: If you’re using stakes and brackets, ensure all bolts are tight. Use lock washers to prevent them from loosening over time.
- Angle Your Stakes: When driving ground stakes, a slight outward angle from the leg provides more resistance against uplift.
- Secure Loose Parts: Make sure any decorative panels or roof elements are securely fastened. Loose parts can catch the wind.
- Consider the Surface: If your anchoring method is on a soft surface, try to create a more stable base first. Lay down a piece of thick plywood or a concrete paver for weights to sit on.
- Combine Methods: For maximum security, you can sometimes combine methods. For example, use weights on a deck and ground stakes on the surrounding lawn if the gazebo straddles both.
- Regular Maintenance: Periodically check your anchoring. Wind and weather can loosen things over time. A few minutes of checking can save you a lot of trouble.
Frequent Questions About Gazebo Anchoring
Do I really need to anchor my gazebo if it’s heavy?
Yes, absolutely. Even heavy gazebos can be lifted or toppled by strong winds. The wind exerts uplift pressure on the roof.
It can act like a sail. Weight alone might not be enough in very high winds. Proper anchoring is crucial for safety and to prevent damage.
Can I just tie my gazebo to something nearby?
Tying a gazebo to a fence or tree is generally not recommended as a primary anchoring method. The forces involved can damage the tree or fence. Also, the connection points might not be strong enough.
It’s a temporary fix at best and doesn’t offer reliable, long-term security.
How much weight do I need to anchor a gazebo?
This varies greatly. For a small, lightweight gazebo in a low-wind area, a few hundred pounds total might suffice. For a larger, sturdier gazebo in a windy region, you might need over a thousand pounds of anchoring weight distributed among the legs.
It’s better to overdo it slightly than underestimate the wind.
Will anchoring affect my deck’s warranty?
Drilling directly into your deck joists will likely void the warranty. Methods that add weight around the legs, like using pavers or specialized kits that don’t require drilling, should not affect your warranty. Always check your deck’s warranty documentation for specifics.
What’s the best anchoring method for a gazebo on a concrete patio?
For concrete patios, specialized anchoring kits that use heavy-duty brackets and either concrete anchors (which might require drilling) or significant weight are best. You can also use very heavy concrete blocks or pavers placed strategically around the legs. Water or sand bags can also work if they are heavy enough.
How do I know if my gazebo is safe in high winds?
If your gazebo is properly anchored using one of the robust methods described, it should withstand winds up to its design limit. Always follow the manufacturer’s recommendations. If you experience extreme weather, it’s often safest to temporarily remove any fabric elements like canopies or screens to reduce wind resistance.
Can I use my gazebo during a thunderstorm?
No, you should never use a gazebo during a thunderstorm. Gazebos, especially those with metal frames, can attract lightning. It is dangerous to be inside or near a gazebo during a storm.
Seek proper shelter indoors.
Conclusion
Securing your gazebo without drilling is totally achievable. You have several smart options. From using heavy pavers and blocks to employing ground stakes or specialized kits, there’s a method to fit your needs.
The key is understanding the forces at play. You need to ensure your gazebo has a solid connection to the ground or is weighed down sufficiently. Always prioritize safety.
A well-anchored gazebo means worry-free enjoyment of your outdoor space. Take a moment, assess your situation, and choose the best method to keep your gazebo standing strong.