How To Charge A Black And Decker Drill Battery The Right Way
Charging your Black and Decker drill battery the right way involves using the correct charger, ensuring a good connection, and understanding your battery type. Avoid overcharging and store batteries properly to extend their lifespan and performance.
Understanding Your Black and Decker Drill Battery
Black and Decker offers a few types of batteries for their drills. The most common ones you’ll see today are Lithium-ion (Li-ion) and older Nickel-Cadmium (NiCd) or Nickel-Metal Hydride (NiMH) types. Each type has its own needs when it comes to charging.
Knowing which one you have is the first step to charging it right.
Lithium-ion batteries are very popular now. They hold a charge for a long time, even when not in use. They also don’t have that “memory effect” that older batteries did.
This means you can charge them at any time without hurting their capacity. They also tend to be lighter.
Older NiCd and NiMH batteries are still around. NiCd batteries could suffer from the memory effect. This meant if you charged them before they were fully drained, they might not hold as much power later.
NiMH batteries were an improvement, with less memory effect. However, Li-ion batteries have largely taken over due to their superior performance and fewer charging quirks.
Your drill will come with a specific charger. This charger is designed for the battery type that came with your tool. Using the wrong charger can damage the battery.
It can also be a safety risk. So, always check that the charger and battery are a matching set.
The Basic Charging Process
Charging a Black and Decker drill battery is usually quite simple. It’s designed to be user-friendly. The goal is to get power into the battery safely and efficiently.
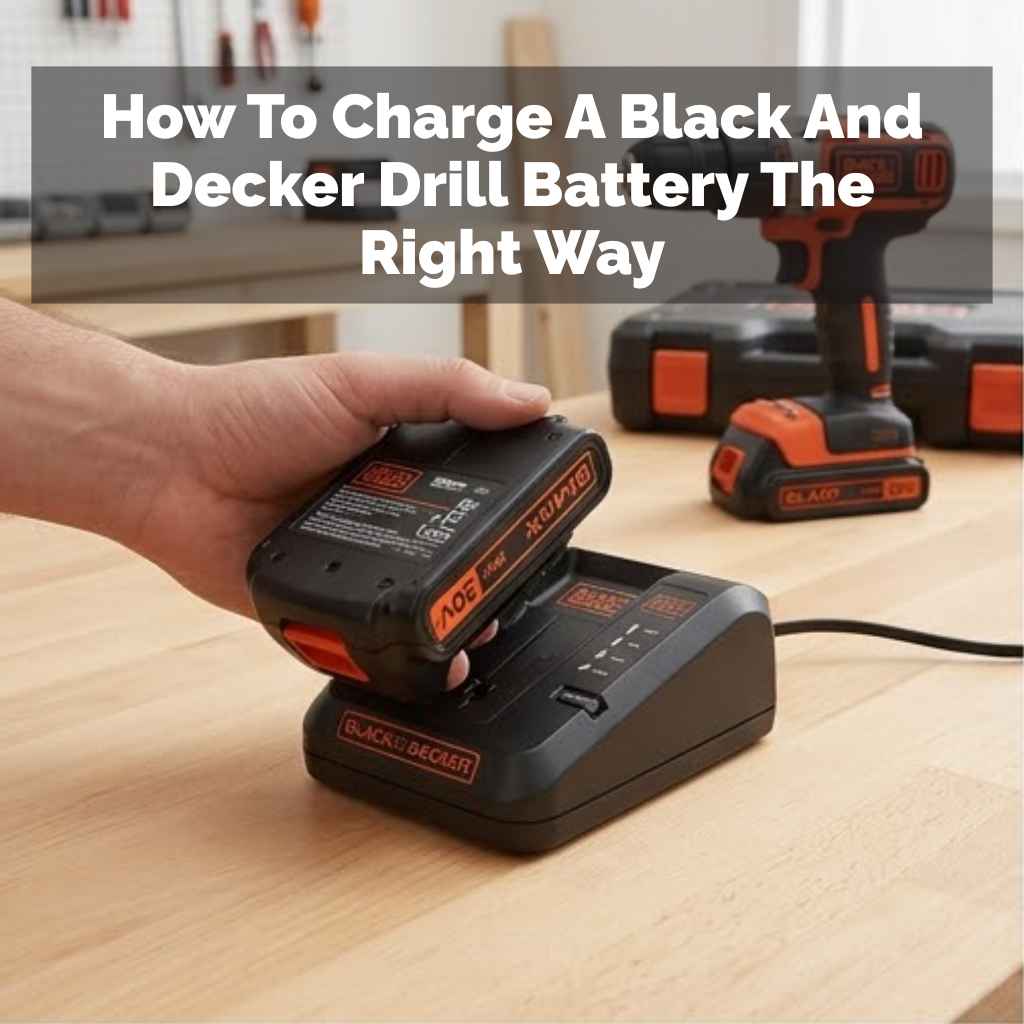
First, find your charger. It will have a plug for the wall and a slot or connector for the battery. Make sure the charger is unplugged from the wall outlet before you start.
This is a basic safety step.
Next, take your drill battery. Look at the connection points on the battery. Now, look at the charger.
You’ll see matching connection points. Line them up carefully.
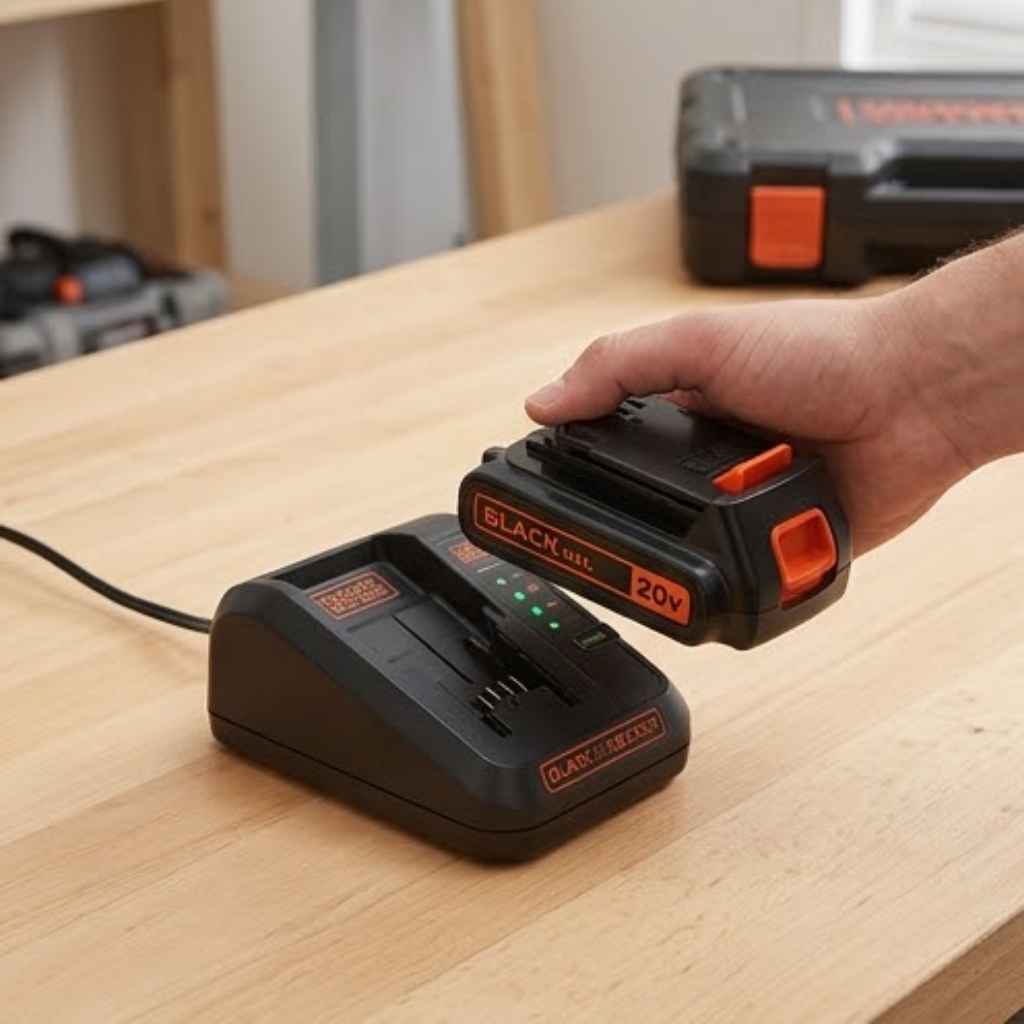
Slide or click the battery into the charger. It should fit snugly. You should hear or feel a click if it’s seated correctly.
This ensures a good electrical connection. A poor connection is a common reason why a battery might not charge.
Once the battery is secure in the charger, you can plug the charger into a wall outlet. Most Black and Decker chargers will have an indicator light. This light tells you what the charger is doing.
It might be red when charging. It could turn green or off when the battery is full.
The charging time can vary. It depends on the battery’s size and how drained it was. It also depends on the charger itself.
Some chargers are fast chargers. Others take longer. Your drill’s manual will give you an idea of expected charging times.
When the indicator light shows the battery is fully charged, unplug the charger from the wall. Then, remove the battery from the charger. It’s now ready to use in your drill.
It’s that simple for most modern batteries.
Experiencing the “Dead Battery” Panic
I remember one Saturday morning. Sunlight streamed into my garage. I was ready to finally tackle that fence repair.
I grabbed my trusty Black and Decker drill. I’d used it just last week, so I figured it was good to go. I lined up the drill bit, pressed the trigger, and… nothing.
Just a sad little click, and the LED light flickered weakly. My heart sank. The fence post was half-uncovered.
I looked at the battery pack. It was barely showing a sliver of charge. Panic started to bubble.
I hadn’t even thought about charging it beforehand. Was I going to have to stop everything? I rushed to find the charger.
It looked so simple, but suddenly, I felt unsure. Was I putting it in right? Was it even working?
That moment of helplessness is something many DIYers know well. It’s a reminder that our tools need care too.
Understanding Charger Indicator Lights
Black and Decker chargers use lights to talk to you. These lights are important. They tell you what’s happening with your battery.
Knowing what these lights mean helps you charge correctly. It also helps you spot problems early.
A common light is the charging indicator. This light often shows red or amber. It means the battery is taking on a charge.
You’ll see this light while the battery is actively charging. It’s your signal that power is flowing.
When the battery is full, the light often changes. It might turn green. Sometimes, it goes off completely.
This means the charger has finished its job. For Li-ion batteries, this is generally fine. You can leave them on the charger for a bit longer, but it’s best to remove them once charged.
Some chargers have a fault indicator. This might be a blinking red light or a different color. If you see this, something is wrong.
The battery might be too hot. Or it could be too cold. It might be damaged.
Or it might not be a Black and Decker battery at all. Check your manual for what this specific light means.
A ready or charged indicator is often the most desired light. It’s usually green. It tells you, “Hey, your battery is good to go!” Once this light is on, you can safely disconnect the battery.
Some chargers also have a maintenance mode. For older NiCd batteries, leaving them on for too long could cause issues. Modern Li-ion chargers are smarter.
They often stop charging when full. Some may then enter a low-level maintenance charge. This keeps the battery topped up without overdoing it.
But it’s still a good habit to remove the battery when done.
Charging Light Meanings at a Glance
Solid Red/Amber: Charging in progress.
Solid Green: Battery is fully charged.
Flashing Red/Amber: Potential issue (e.g., battery too hot, cold, or faulty).
No Light: Charger not plugged in, or battery not seated correctly.
Note: Always refer to your specific charger’s manual for exact light code meanings.
What Type of Battery Do You Have?
Knowing your battery type is key to proper charging. Black and Decker uses a few common types. Their model numbers can sometimes hint at the battery type.
But looking at the battery itself is the easiest way.
Lithium-ion (Li-ion): These are the most modern. They are usually black or black and orange. They often have a smooth, solid look.
They don’t have vents like older battery types might. They are lighter than older batteries of the same size. You’ll often see “Li-ion” printed on the battery itself.
Nickel-Cadmium (NiCd): These are older. They might look a bit clunkier. They can sometimes have small vents on them.
They are heavier than Li-ion batteries. NiCd batteries were common in drills from the 90s and early 2000s. They are prone to the memory effect if not charged carefully.
Nickel-Metal Hydride (NiMH): These were an improvement over NiCd. They are also heavier than Li-ion. They might look similar to NiCd batteries.
They have less of a memory effect. You’ll usually see “NiMH” printed on them.
How to check: The easiest way is to look at the label on the battery pack. It will clearly state “Li-ion,” “NiCd,” or “NiMH.” If you can’t find it there, check your drill’s manual or the original packaging. Sometimes, the color can be a clue, but the label is definitive.
The charger that came with your drill is designed for the battery type it shipped with. If you bought a
Charging Lithium-ion (Li-ion) Batteries
Li-ion batteries are the most forgiving. They don’t suffer from the memory effect. You can charge them at any point.
It’s best to charge them when you finish a job or when the power indicator on your drill shows it’s low.
The process is straightforward: seat the battery firmly in the Black and Decker charger. Plug in the charger. The indicator light will show it’s charging.
When the light turns green (or your charger’s indicator for “full”), the battery is ready.
It’s okay to leave a Li-ion battery on the charger for a little while after it’s full. The chargers are smart enough to stop putting in a heavy charge. However, it’s not recommended to leave them on for days.
Prolonged connection can still stress the battery over time.
Extreme temperatures are bad for Li-ion batteries. Don’t charge them if they are very hot or very cold. If you’ve been using the drill hard, let the battery cool down for 15-20 minutes before charging.
If your garage is freezing in winter, bring the battery inside to warm up before charging.
Key takeaway for Li-ion: Charge when needed, don’t overthink it, and keep them at moderate temperatures.
Charging Older NiCd and NiMH Batteries
These older battery types need a bit more care. The main concern is the memory effect, especially with NiCd. This means if you repeatedly charge a NiCd battery before it’s fully depleted, it can “forget” its full capacity.
It will then only discharge to the point where you last charged it.
To avoid the memory effect with NiCd batteries, try to let them drain as much as possible before recharging. This isn’t always practical. If you can’t fully drain it, try to charge it only when it’s significantly depleted.
NiMH batteries have much less of this effect. You can treat them more like Li-ion batteries. Still, draining them when possible is good practice for overall battery health.
For both NiCd and NiMH, avoid leaving them on the charger for extended periods after they are full. This can lead to overheating and reduce their lifespan. Once the “charged” light comes on, remove the battery.
Deep cycling is sometimes recommended for older NiCd batteries. This means draining the battery completely, then charging it fully. You can do this by running the battery in a low-drain device until it stops.
Then charge it fully. Do this only once every few months, not every charge. Overdoing it can actually harm the battery.
Quick Battery Type Check
Li-ion: Lightweight, no memory effect. Charge anytime.
NiCd: Heavier, prone to memory effect. Try to drain before charging.
NiMH: Heavier, less memory effect than NiCd. Similar to Li-ion but heavier.
Always check the label on the battery itself.
Common Charging Problems and Solutions
Sometimes, things don’t go as planned. Your battery might not seem to be charging. Or it might charge very slowly.
Don’t panic. Most of these issues have simple fixes.
Problem: Battery not charging at all.
Solution: First, check that the charger is plugged in. Is the outlet working? Try another device in the same outlet.
Next, ensure the battery is seated correctly. Remove it and reinsert it firmly. Check the charger and battery contacts.
Are they clean? Use a dry cloth or a pencil eraser to gently clean any dirt or corrosion.
Problem: Charger light is flashing or shows an error.
Solution: This usually means a temperature issue or a battery fault. If the battery is very hot (from recent use) or very cold (from a cold garage), let it reach room temperature first. If the battery is old or has been damaged, it might be the cause.
Try a different battery if you have one. If the problem persists, the charger or battery may need to be replaced.
Problem: Battery charges, but doesn’t last long.
Solution: This often means the battery is old and its capacity has degraded. Like any rechargeable battery, they have a limited lifespan. For Li-ion batteries, this usually means it’s time for a new one.
For NiCd or NiMH, a deep cycle might help briefly, but it’s likely nearing the end of its life.
Problem: Charging takes much longer than usual.
Solution: If the battery was deeply discharged, it will naturally take longer. However, if it’s consistently slow, it could indicate the battery is losing its ability to hold a charge. Check the battery contacts and charger contacts for cleanliness.
If they are clean and it’s still slow, the battery might be aging.
Remember: Always refer to your specific Black and Decker drill and charger manual. It has detailed troubleshooting steps for your exact model.
Real-World Charging Scenarios
Let’s look at how charging plays out in different situations. These scenarios reflect common experiences.
Scenario 1: The Weekend Warrior
Mark uses his drill for DIY projects on weekends. He charges his Li-ion battery after each big project. He stores the batteries indoors.
This way, they are always ready and at a good temperature for charging. He rarely runs them completely dead.
Scenario 2: The Pro User (Light Duty)
Sarah uses her Black and Decker drill a few times a week for small repairs at her rental properties. She has two batteries. When one starts to run low, she swaps it out for the charged one.
She charges the depleted battery overnight. She doesn’t worry about memory effect with her Li-ion batteries.
Scenario 3: The Garage Find
David found an old Black and Decker drill in his dad’s garage. It came with NiCd batteries. He wants to use it.
He notices one battery doesn’t hold a charge well. He decides to try a deep cycle on the other battery. He runs it until it stops, then charges it fully.
It works a bit better, but he knows it won’t last forever.
Scenario 4: The Cold Climate User
Jessica lives in Minnesota. Her garage gets very cold in winter. She knows charging a cold Li-ion battery is bad.
So, she brings her drill batteries inside to warm up for an hour before plugging them into the charger. This protects the battery.
These scenarios show that good charging habits depend on battery type, usage, and environment.
Best Practices for Battery Longevity
To make your Black and Decker drill batteries last as long as possible, follow these tips. They are simple steps that make a big difference over time.
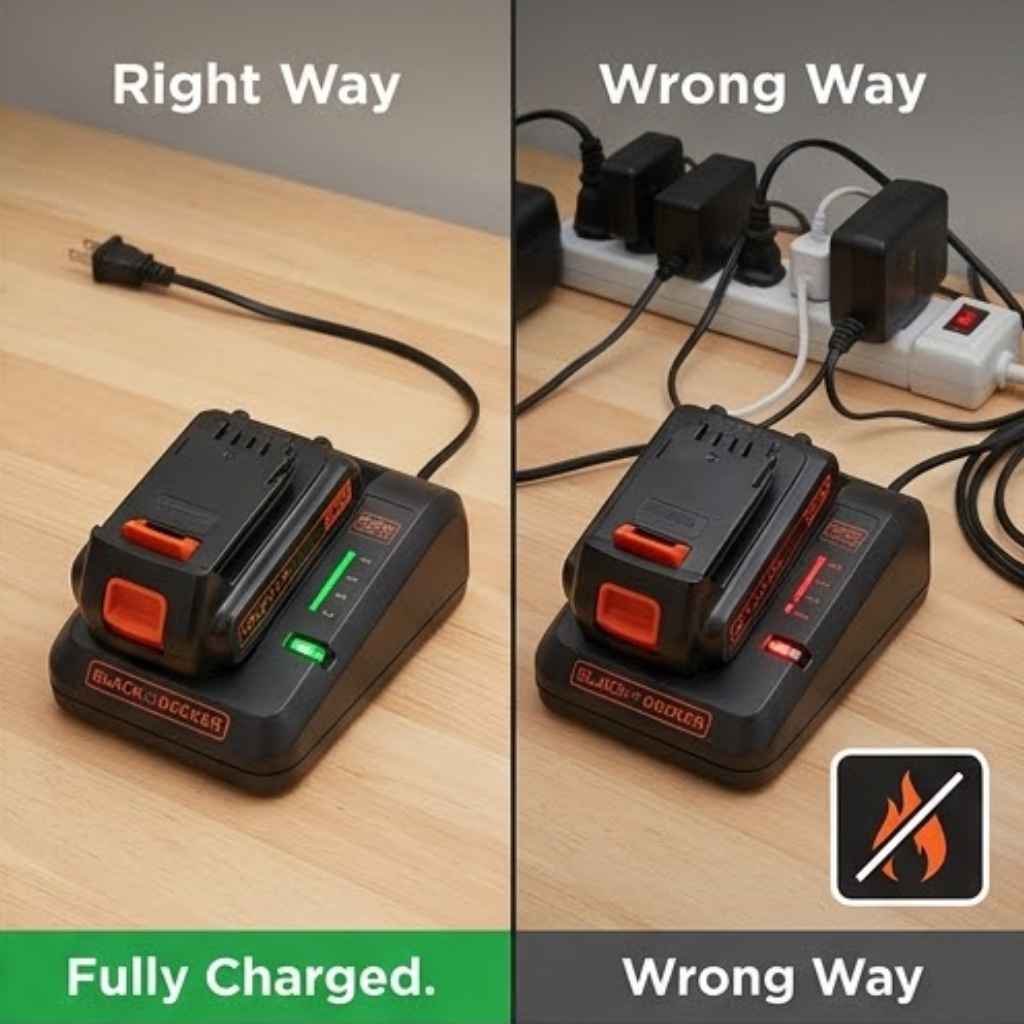
1. Use the Correct Charger: Always use the charger that came with your drill or a genuine Black and Decker replacement charger. Using a generic or incorrect charger can damage the battery or charger, or even be a safety hazard.
2. Keep Contacts Clean: Dirty contacts cause poor charging. Periodically wipe the metal contacts on both the battery and the charger with a clean, dry cloth.
For stubborn grime, use a pencil eraser or a cotton swab lightly dampened with isopropyl alcohol (let it dry completely before charging).
3. Avoid Extreme Temperatures: Do not charge batteries when they are very hot or very cold. Let them return to room temperature first.
Store batteries in a cool, dry place, away from direct sunlight and heat sources.
4. Don’t Overcharge (Especially Older Batteries): While modern Li-ion chargers are smart, it’s still a good practice to remove the battery once it’s fully charged. For NiCd batteries, avoid leaving them on the charger for days.
5. Store Batteries Properly: If you won’t be using the drill for a while, store the batteries at about a 50% charge. For Li-ion batteries, this helps maintain their health.
Store them in a cool, dry place. Avoid storing them fully charged or fully depleted for long periods.
6. Rotate Batteries: If you have multiple batteries, use them in rotation. This prevents one battery from sitting idle for too long while others get heavily used.
7. Handle with Care: Avoid dropping batteries or exposing them to water or excessive moisture. Physical damage can shorten their lifespan or make them unsafe.
8. Understand Battery Lifespan: All rechargeable batteries have a limited number of charge cycles. Eventually, they will wear out.
You can’t stop this entirely, but good care will help you get the most out of them.
Battery Care Checklist
- Use the correct charger.
- Keep contacts clean.
- Avoid extreme heat/cold for charging and storage.
- Remove from charger when full (especially older types).
- Store at ~50% charge for long periods.
- Rotate batteries if you have more than one.
- Handle batteries carefully.
When to Replace a Battery
Batteries don’t last forever. There comes a time when you need to replace them. Here are signs that your Black and Decker drill battery might be at the end of its life.
1. Drastically Reduced Runtime: If your drill used to last for an hour of work on a full charge and now it only lasts 10-15 minutes, the battery capacity is significantly degraded. This is the most common sign.
2. Not Holding a Charge: The battery indicator might show full, but the drill dies very quickly after you start using it. Or it might not power the drill at all.
3. Swelling or Physical Damage: If you notice the battery casing is bulging, cracked, or leaking any fluid, stop using it immediately. This is a serious safety concern.
Such batteries should be disposed of properly.
4. Inconsistent Performance: The drill suddenly loses power, even when the battery indicator shows charge remaining. Or it might not even turn on sometimes.
5. Slow Charging or Not Charging at All: If you’ve tried cleaning contacts, using the correct charger, and ensuring proper temperature, but the battery still won’t charge or takes excessively long, it’s likely dead.
Disposal: Old batteries should not be thrown in regular trash. They can be hazardous. Check with your local waste disposal or recycling center.
Many electronics stores also offer battery recycling drop-off points. Black and Decker often provides information on their website for battery recycling.
My Own Charger Fumble
A few years back, I was gifted a newer Black and Decker drill. It came with a Li-ion battery. I was used to my old NiCd tools.
So, for the first few weeks, I treated the new battery like my old ones. I’d always wait until it was completely dead before charging. Then, one day, I noticed it wasn’t holding a charge like it used to.
It was only a few months old! I felt so frustrated. I thought I had a faulty battery.
I was about to call customer service. Then, I remembered reading about Li-ion batteries. They don’t have that memory effect.
I was actually hurting it by always draining it completely! The next time, I just popped it on the charger when I finished a small task. It made all the difference.
The battery bounced back and performed well for years. It was a simple mistake, but a valuable lesson in how different battery technologies need different care.
Tips for Extending Battery Life
Beyond basic care, a few extra tips can help squeeze more life out of your batteries. These are about smart usage and storage.
1. Match Battery to Task: If you have different capacity batteries (e.g., 1.5Ah vs. 2.0Ah), use the smaller ones for light tasks and the larger ones for heavier work.
This helps avoid unnecessary strain on smaller batteries.
2. Avoid Overworking the Drill: Don’t force the drill if it’s struggling. If you’re drilling into hard material, use the right bit and let the drill do the work.
Forcing it puts extra strain on both the motor and the battery.
3. Use a “Work Battery” and a “Storage Battery”: If you have two batteries, use one for active work and keep the other charged and ready. This ensures you always have a backup and prevents one battery from being constantly depleted.
4. Clean the Drill Too: Sometimes, debris can get into the drill’s chuck or ventilation. This can make the drill work harder, draining the battery faster.
Keep your tools clean.
5. Consider a Battery Caddy/Organizer: For multiple batteries, a caddy can help keep them organized and protected. Some even have slots for chargers.
6. Read the Manual: Black and Decker provides specific advice for their tools and batteries. While this guide is comprehensive, your tool’s manual is the ultimate source for its care.
Battery Life Boosters
- Use the right battery size for the job.
- Don’t force the drill.
- Rotate between multiple batteries.
- Keep your drill clean.
- Organize your batteries.
- Always check your tool manual.
Real-World Context: Battery Degradation
Think of your drill battery like a phone battery. Over time, its ability to hold a full charge naturally decreases. This is called degradation.
For Li-ion batteries, this happens through normal use. Each time you charge and discharge it, tiny chemical changes occur. After hundreds of cycles, you notice the battery doesn’t last as long.
Factors that speed up degradation include: frequent deep discharges, charging at extreme temperatures, and leaving batteries at 100% charge for very long periods. Conversely, charging more frequently, keeping them at moderate temperatures, and not always draining them fully can slow down this process.
For NiCd and NiMH, degradation can also be linked to the memory effect and internal chemical changes. Keeping them charged correctly helps mitigate some of these issues, but they too will eventually wear out.
It’s important to accept that batteries are consumable parts of your tools. But with the right charging and care, you can maximize their usable life.
Understanding Battery Capacity (Ah)
You’ll often see numbers like 1.5Ah, 2.0Ah, or even 4.0Ah on Black and Decker drill batteries. This “Ah” stands for Amp-hours. It’s a measure of the battery’s capacity.
A higher Amp-hour rating means the battery can supply power for a longer time.
For example, a 2.0Ah battery can theoretically supply 2 amps of current for 1 hour. Or it could supply 1 amp for 2 hours. Or 0.5 amps for 4 hours.
A higher Ah battery will generally power your drill for longer between charges. However, it might also be physically larger and heavier. And it may take slightly longer to charge than a lower Ah battery, depending on the charger.
When choosing a
Frequently Asked Questions
Can I use a charger from another brand with my Black and Decker battery?
It’s generally not recommended to use chargers from other brands. Black and Decker chargers are specifically designed for their battery systems. Using an incompatible charger could damage the battery, the charger, or pose a safety risk.
Always use the charger that came with your tool or a genuine Black and Decker replacement.
How often should I deep cycle my Black and Decker drill battery?
For modern Lithium-ion (Li-ion) batteries, deep cycling is not necessary and can even be detrimental. They do not suffer from the memory effect. For older Nickel-Cadmium (NiCd) batteries, a deep cycle every few months (once every 1-3 months) can help recalibrate them.
Avoid doing it too often. Nickel-Metal Hydride (NiMH) batteries are in between; deep cycling isn’t usually needed.
My Black and Decker battery is old. Can I still get replacements?
For many popular Black and Decker drill models,
Is it okay to leave my Li-ion battery on the charger overnight?
Modern Li-ion chargers are designed to stop charging when the battery is full and won’t overcharge it. So, it’s generally safe to leave them connected overnight. However, for optimal battery health and to prevent potential long-term stress, it’s best practice to remove the battery once it indicates it’s fully charged.
What does it mean if my Black and Decker charger light is blinking?
A blinking light on a Black and Decker charger usually indicates an issue. Common causes include the battery being too hot or too cold for charging, a faulty battery, or a problem with the charger itself. Allow the battery to reach room temperature, ensure it’s properly seated, and if the problem persists, consult your charger’s manual or contact Black and Decker support.
How do I know if my battery is completely dead and needs replacing?
If your battery holds very little charge, dies very quickly after charging, or fails to charge at all after trying troubleshooting steps like cleaning contacts and ensuring proper temperature, it’s likely at the end of its lifespan. Look for significantly reduced runtime compared to when it was new. Physical signs like swelling or leaking also mean it needs immediate replacement and proper disposal.
Can extreme cold damage my Black and Decker drill battery?
Yes, extreme cold can affect battery performance and health. Charging a very cold battery (especially Li-ion) can cause permanent damage. It’s best to bring cold batteries inside to warm up to room temperature before charging.
While storage in moderate cold might be okay for some types, extreme cold can slow down chemical reactions and reduce efficiency.
Conclusion
Keeping your Black and Decker drill battery charged the right way is about more than just plugging it in. It’s about understanding your battery type, using the correct charger, and following simple care steps. By doing so, you’ll ensure your batteries last longer and perform reliably.
This means fewer interruptions to your projects and more power when you need it most. Happy drilling!