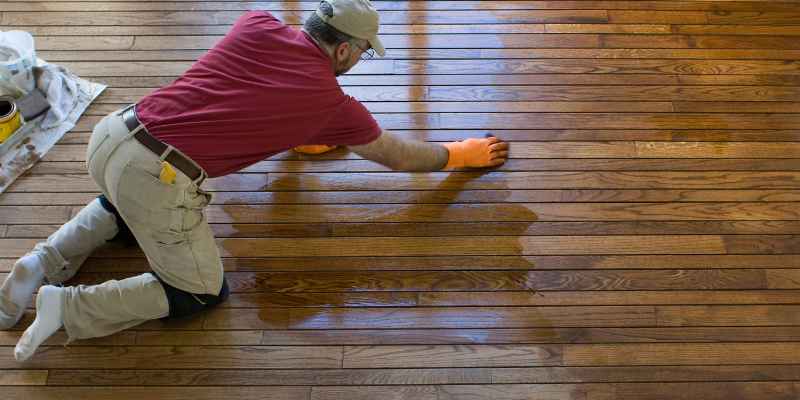
How to Refinish Wood Floors Yourself (Steps + Lead Dust Safety)
Refinishing a wooden floor yourself is a realistic project, but sanding old varnish is a dust job first. A NIOSH study of a refinishing job found wood dust above the recommended limit during every sanding and buffing task it measured, plus lead in the settled dust. This guide covers the lead and dust checks, the 36-60-80 grit sequence, and the three-coat finish schedule.
Before You Sand: Lead, Old Finish and Dust Safety
Best Respirator Pick for Floor Sanding
 |
3M P100 Performance Mold & Lead Paint Removal Respirator, Medium ($24.71) A reusable half-mask with NIOSH-approved P100 (2097) filters, the filter class EPA’s do-it-yourself lead guidance points to for sanding dust. It covers the fine wood and old-finish dust this guide’s safety section is about.
|
As an Amazon Associate we earn from qualifying purchases.
Most refinishing guides stop at “wear a mask.” The more useful question is what is in the dust. The EPA renovation rule covers homes built before 1978, but it does not impose requirements on homeowners working on their own homes, so nothing forces you to take precautions. That makes the decision yours.
The common myth is that lead is a wall-paint problem only. The data on floors says otherwise:
| What was measured | Result | Benchmark |
|---|---|---|
| Wood dust during rough sanding, edging, final sanding and buffing | Above the benchmark in every task when extrapolated to a full shift | NIOSH recommended limit: 1 mg per cubic meter |
| Airborne lead at the worker’s breathing zone | 1.5 to 25 micrograms per cubic meter in short tasks; buffing approached the action level | OSHA action level 30, limit 50 micrograms per cubic meter |
| Lead in settled floor dust before the final coat | Above the benchmark in every room sampled | HUD clearance guideline: 0.43 mg per square meter |
| Floor finishes the contractor had tested for lead (41 finishes) | 15% were above 0.5% lead by weight | Federal action level for lead-based paint: 0.5% |
Source: the NIOSH health hazard evaluation of a floor refinishing job (Madison, Wisconsin, 2000). It was a single house and one contractor’s finish tests, so treat the numbers as a warning, not a forecast for your floor. The takeaway is that old varnish, not just paint, can put lead into the air and onto the floor.
Before the sander comes in, work through this list:
- Assume lead in a pre-1978 home, or have the finish tested. The National Lead Information Center (1-800-424-LEAD) can point you to a certified inspector or lab.
- Use a sander with HEPA dust collection. EPA advises sanders or grinders with HEPA vacuum attachments to cut dust. Ask the rental counter what the machine collects dust with, because an ordinary cloth bag is not HEPA filtration.
- Seal the work area. EPA’s advice is heavy-duty plastic and tape over floors and furniture you cannot move, doors, and heating and cooling vents. Keep children, pregnant women and pets out of the area at all times.
- Wear a P100 respirator for sanding and for cleanup, not a paper dust mask.
- Clean up with a HEPA vacuum, wet-wipe surfaces, and wet-mop with plenty of rinse water. A regular household vacuum can blow fine dust back into the room.
Two machine rules apply no matter what is in the finish. Keep the drum sander moving whenever the drum touches the floor, and tilt it up before you stop, because a spinning drum held in one place gouges the boards. And lay oil-based finish and stain rags flat outdoors to dry or soak them in water in a sealed metal can, since they can heat up and ignite on their own.
Can You Refinish Hardwood Floors Yourself?
Yes. Refinishing hardwood floors yourself is doable for someone comfortable renting heavy equipment and following a sequence without shortcuts. The finishing steps are forgiving. The sanding is where mistakes become permanent, and it is also where the dust is.
First confirm there is enough wood left to sand. The National Wood Flooring Association (NWFA) says a floor with less than 3/32 inch of wear layer should not be sanded, which is why thin engineered floors are the usual no-go. For the limits on solid floors and how to tell how many sandings are left, see how many times you can refinish wood floors.
| Factor | DIY | Hire a pro |
|---|---|---|
| Dust control | Depends on the rented machine; you must seal and clean up yourself | Usually brings dust-containment sanders and a cleanup routine |
| Learning curve | Drum sander takes practice; finishing is easy | Experienced operator; fewer sanding marks |
| Equipment | Drum sander, edger, buffer, P100 respirator, applicators | Included in the quote |
| Best for | Flat, solid floors in one or two rooms | Deep gouges, uneven boards, parquet, or a possible lead finish |
For what a job costs, see our average cost to refinish wood floors breakdown. If you only need to know what the process involves before committing, our explainer on what refinishing hardwood floors actually means covers it, and if the floor may not need a full sand at all, start with how to restore wood floors.
DIY Hardwood Floor Refinishing for Beginners: Full Step-by-Step
Follow these steps in order. Skipping a grit or rushing a coat is the usual reason a finish looks patchy or peels within a year.
1. Prep the Room and Check the Floor
Empty the room, remove shoe molding and number each piece, and cover vents and doorways with plastic. Hammer or countersink any nail heads below the surface so they do not tear the paper, and fill gaps and holes with wood filler. Measure the board thickness at a floor vent opening to confirm there is wood left to sand.
2. Rent the Right Equipment
You need a drum sander for the main field, an edger for the perimeter, and a buffer or orbital sander for the last pass. Buy abrasives in 36, 60 and 80 grit, plus extra belts. If you are weighing renting against buying a smaller machine, our floor belt sander comparison works through the break-even.
3. Sand in Three Passes
Start with 36 grit to remove the old finish and flatten the boards. Move to 60 grit, then finish with 80 grit, edging with the matching grit each time before you run the drum. Do not skip a grit: coarse scratches left by a skipped step show up as stain streaks. Sand with the grain, overlap each pass slightly, and keep the machine moving.
4. Clean Meticulously
Vacuum the floor, baseboards and window sills with a HEPA vacuum, then wipe with a barely damp microfiber mop and let it dry. Any dust left behind is trapped under the finish and shows up as bumps. This is also the cleanup step EPA singles out for lead dust: HEPA vacuum, wet wipe, wet mop.
5. Apply Stain (Optional)
Stain only changes the color if the wood is sanded to bare wood. Test the color on a closet floor or a scrap first, brush it on with the grain in small sections, and wipe off the excess within the can’s stated time. Going darker is easy and going lighter means sanding the stain back out, so the same logic answers the common question of whether you can restain hardwood floors a different color. For picking a shade, see our guide to staining wood.
6. Apply Polyurethane in Three Coats
Use a lambswool or microfiber applicator and work with the grain in thin coats. Lightly screen the surface between coats and vacuum before the next one. Follow the can for recoat and cure times, and keep furniture off until the label allows it.
| Finish type | What you get | Trade-off |
|---|---|---|
| Water-based polyurethane | Clear look that keeps light woods like maple pale; lower odor; quicker recoats | Often needs more coats for the same build |
| Oil-based polyurethane | Warmer amber tone; durable | Stronger fumes; slower recoats; rags are a fire risk |
Comparing a floor finish with an oil finish? Our Danish oil vs polyurethane guide explains why polyurethane is the usual pick for floors.
Mistakes That Ruin a DIY Floor Refinish
- Skipping a grit between 36, 60 and 80, which leaves scratches the stain will highlight.
- Stopping the drum sander while the drum is down, which leaves a permanent gouge.
- Cleaning with a household vacuum, which sends fine dust back into the air and onto the wet finish.
- Applying thick coats to finish faster, which causes bubbles, slow drying and peeling.
- Staining without a test patch on the same species.
If the floor is brand new rather than old, the work is different: see how to install wood flooring. And for stains that survive sanding, like deep dark marks or pet urine, read how to remove dark stains from hardwood floors or how to remove pet urine stains from hardwood floors before you sand.
Frequently Asked Questions
What Is The Easiest Way To Refinish Wood Floors?
The easiest way is a screen and recoat: lightly abrade the existing finish with a buffer and apply a fresh topcoat. It works on floors with a sound finish and no deep scratches or bare wood. If the finish is worn through or you want a new color, you need a full sand to bare wood with a drum sander.
Is It Worth It To Refinish Hardwood Floors Yourself?
It can be, mainly on flat solid floors in one or two rooms where the labor is the biggest part of the cost. It is less worthwhile for deep gouges, parquet, or a possible lead finish, where a professional with dust-containment equipment is the safer choice.
Can Wood Floors Be Refinished Without Sanding?
Yes, if the finish is intact. A screen and recoat scuffs the old finish so a new coat bonds, but it will not remove deep scratches, stains in the wood, or a color you dislike. A floor with worn-through finish needs sanding.
Is It Safe To Sand Old Hardwood Floors In A Pre-1978 Home?
Treat it as lead-risky until proven otherwise. EPA’s renovation rule does not cover homeowners in their own homes, but EPA advises sealing the work area, using sanders with HEPA vacuum attachments, keeping children, pregnant women and pets out, and cleaning with a HEPA vacuum and wet wiping. A P100 respirator is the minimum for the person sanding.
Can You Restain Hardwood Floors A Different Color?
Yes, but only after sanding to bare wood so the new stain can penetrate. Going darker is easier than going lighter. Test the color on a hidden area or scrap of the same species before staining the full floor.
Conclusion
A DIY refinish comes down to two things: safe dust handling and a disciplined sanding and coating sequence. Check the wear layer, assume the old finish might contain lead, seal the room, sand 36-60-80 without skipping, clean until no dust is left, and apply thin coats. Do those and the result will match a professional job on a flat floor.
Sponsored / affiliate links. As an Amazon Associate I earn from qualifying purchases. I may earn additional commission from eligible campaigns.