How to Repair a Rotting Wood Post Without Replacing It
You can repair a rotting wood post without replacing it using wood hardener and epoxy filler — as long as the post retains at least 50% of its structural integrity. Skipping this repair costs $200–$600 per post in professional replacement fees. This guide covers how to identify repairable rot, which products to use (Minwax, PC-Petrifier, Abatron WoodEpox), and the exact 5-step process for deck posts, fence posts, and porch posts.
See our full guide to wood cleaning, repair & protection.
Quick Answer
To repair a rotting wood post without replacing it: (1) chisel out all soft rot, (2) apply liquid wood hardener and let dry 2–4 hours, (3) fill cavities with two-part epoxy wood filler, (4) shape and sand once cured, (5) seal with primer and exterior paint or stain. Works for surface rot and moderate internal rot — not for posts rotted through more than 50%.
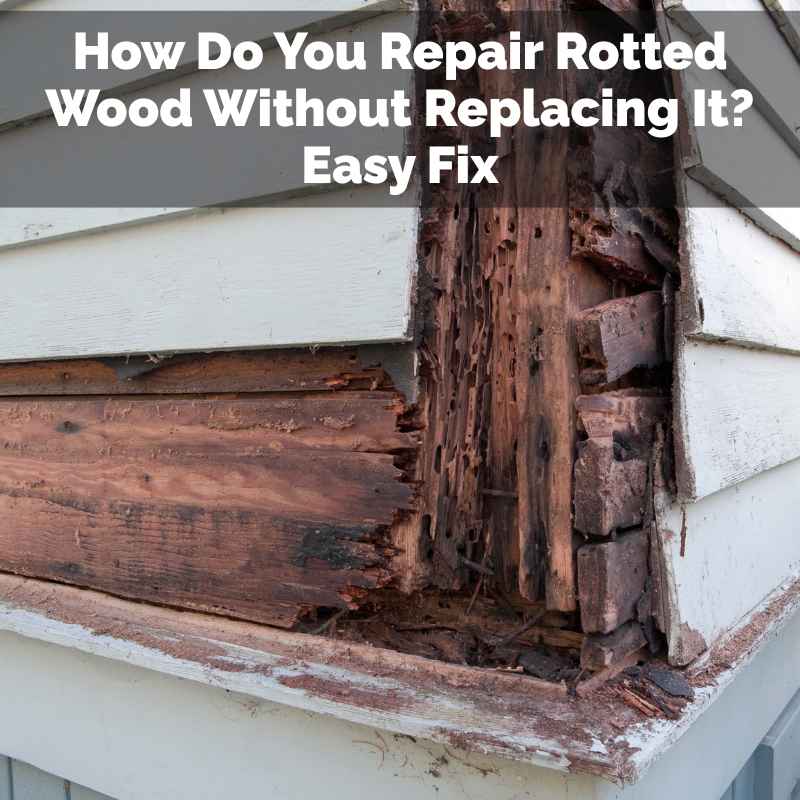
Identifying Rot In Wood Posts
Wood rot repair is the process of removing decayed wood fiber, stabilizing remaining wood with a penetrating hardener, and restoring lost volume with epoxy filler. The repair is viable when the post retains its core structural integrity — typically when less than 50% of the cross-section is affected.
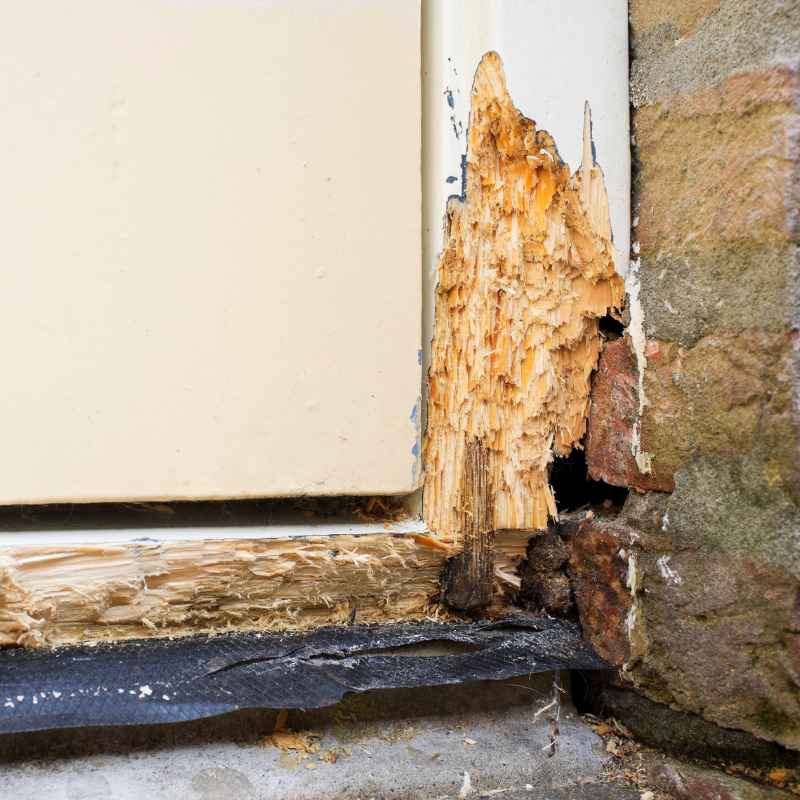
Wood rot is not hard to identify once you know what to look for. Check for soft spots by pressing a screwdriver firmly into the wood — it should not penetrate more than ¼ inch without significant force. Look for discoloration (gray, black, or orange tones), visible fungal growth, or a musty odor. Tap the post with a hammer and listen for hollow sounds, which indicate internal decay. Moisture meters check for wet wood — readings above 20% indicate active rot conditions.
Repair vs. Replace decision: If the screwdriver sinks more than 1 inch, if the post is structurally load-bearing and more than half is affected, or if the rot has reached the base where the post meets concrete — replacement is safer than repair.
Safety Precautions
Wood hardeners and epoxy fillers contain solvents and resins that require basic protective equipment. Wear safety goggles, chemical-resistant gloves, and a dust mask rated N95 or better. Work in a ventilated area — epoxy fumes concentrate quickly in enclosed spaces. Keep wood hardener away from open flames; most formulas are flammable until fully cured.
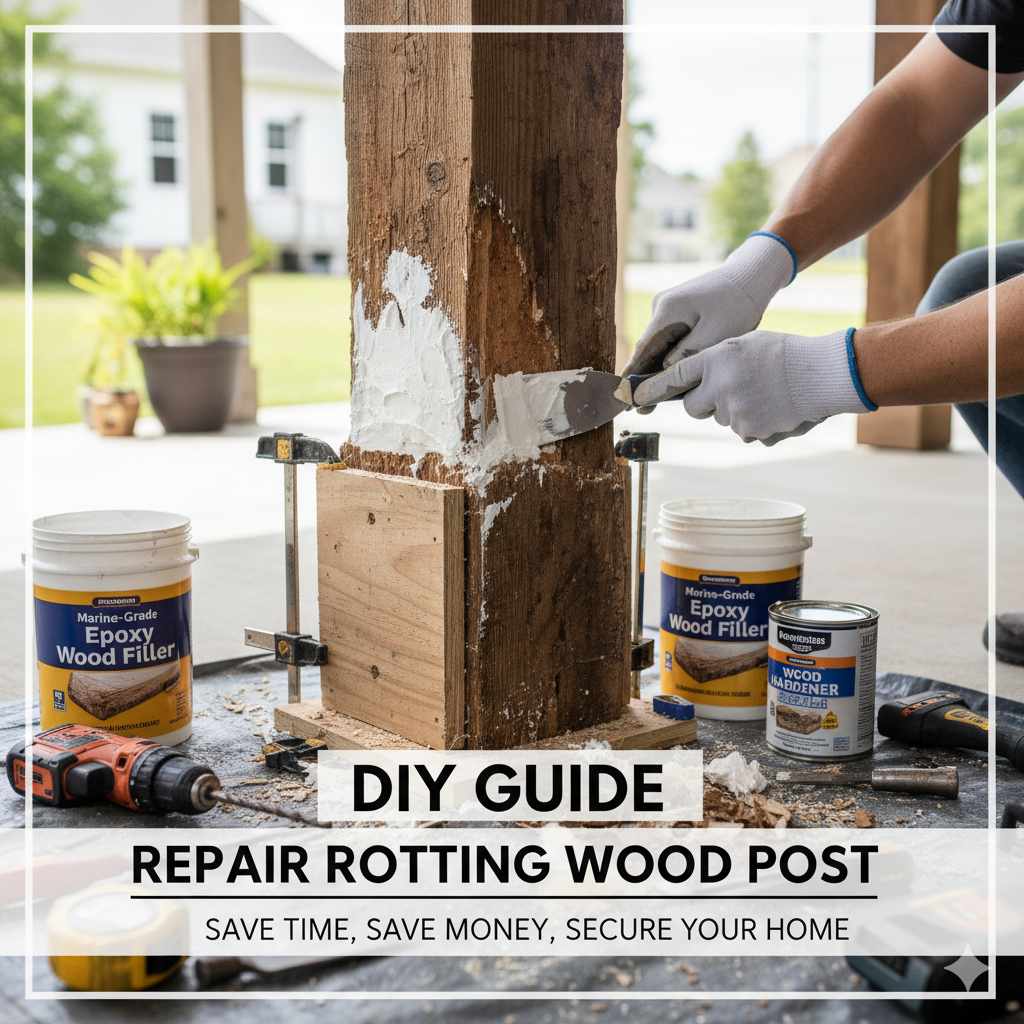
Gathering Necessary Materials
Two products do the heavy lifting in any rotting post repair: a penetrating liquid wood hardener and a two-part epoxy filler. The hardener soaks into remaining soft fibers and converts them into a hard base. The filler restores the original shape and provides a paintable surface.
- Wood hardener: Minwax High Performance Wood Hardener, PC-Petrifier, or LiquidWood by Abatron
- Epoxy wood filler: Abatron WoodEpox, Bondo Wood Filler, or Minwax Wood Filler
- Tools: chisel, wire brush, putty knife, caulking gun (for tube epoxy), sandpaper (80, 120, 220 grit)
- Finishing materials: exterior primer, exterior paint or stain rated for ground contact
★ Recommended product
Minwax Wood Hardener + Filler Kit
The most widely available wood rot repair system. Hardener penetrates and consolidates soft wood; the filler restores shape and accepts paint or stain.
- Workable for ~20 minutes — enough for shaping
- Paintable in 4–6 hours, sandable in 2
- Available at Home Depot, Lowe’s, and Amazon
As an Amazon Associate we earn from qualifying purchases.
Preparing The Post For Repair
Clear away any dirt, bark, or debris around the base of the post. If the post is painted, remove all peeling paint in the repair area with a chisel or putty knife. Use a wire brush to clean exposed wood fibers. Allow the post to dry completely — wet wood prevents hardener penetration. This drying step may take 24–48 hours in humid climates.
Chisel out all visibly soft and punky wood. Do not try to save soft wood — the hardener cannot fully penetrate severely degraded fiber. Remove material until you reach firm wood on all sides. The cavity does not need to be pretty; the epoxy filler will rebuild it.
Repair Notes for Cedar Posts
Cedar is naturally rot-resistant due to its oils, but rot still occurs at cut ends, ground contact points, and anywhere the protective finish has failed. When repairing a rotting 6×6 cedar post, remove the damaged area completely before applying hardener — cedar’s oils can interfere with epoxy adhesion if the surface is not properly prepared. Sand the repair area with 80-grit before applying hardener for best bonding. Use an exterior-grade primer specifically formulated for resinous woods before the final coat.
Applying Wood Filler
Apply liquid wood hardener generously to all exposed wood surfaces using a paintbrush, working in the direction of the grain. The hardener will soak in quickly — apply a second coat immediately after the first disappears. Allow to cure for 2–4 hours minimum (check the manufacturer’s label; PC-Petrifier requires full 24-hour cure before filling).
Once the hardener is fully dry, mix the two-part epoxy filler according to package directions. Using a caulking gun for tube epoxies, dispense a small amount onto scrap first until the color is uniform — this ensures proper mixing. Apply the filler to the cavity with a putty knife, pressing firmly to eliminate air pockets. Shape the wood filler to match the original post profile while it is still workable (typically 15–20 minutes). Epoxy expands slightly as it cures, so underfill slightly.
Reinforcing The Repaired Post
After the epoxy filler has cured (typically 4–6 hours), inspect the repair for voids or shrinkage. Apply a second thin skim coat if needed. For posts subject to lateral load (deck railings, fence posts), add a Simpson Strong-Tie post base or galvanized metal brace at the repair zone for structural reinforcement. Metal braces hold the wood tight and prevent future movement that could crack the epoxy repair.
Repairing a Post With a Rotten Core
A post with a rotten core — where the outside looks intact but the interior is hollow — requires a different approach than surface rot. Drill 3/8-inch holes into the soft core from multiple angles, then inject liquid epoxy consolidant (LiquidWood or PC-Petrifier) using a syringe until the cavity fills. Allow 24 hours for the consolidant to harden before filling the drill holes with epoxy wood filler. This technique rebuilds the internal structure without removing sound outer wood. Test the post by pressing firmly — a properly consolidated core should feel solid with no flex.
Finishing Touches
Sanding And Smoothing
Start with 80-grit sandpaper to level any high spots in the cured epoxy. Progress to 120-grit, then 220-grit for a smooth finish. Sand along the grain to avoid visible scratches. Wipe away all dust with a tack cloth before priming. Epoxy filler sands easily once fully cured — do not sand before the manufacturer’s minimum cure time or the filler will gum up the sandpaper. Smoothing also prepares the wood for paint or stain.
Painting Or Staining
Apply one coat of exterior oil-based primer over the entire repaired area. Epoxy filler is not UV-stable — it will degrade and crack if left uncoated. Allow primer to dry fully, then apply two coats of exterior paint or stain. For painting or staining the wood, choose a product rated for exterior use and, if the post base contacts soil, one rated for ground contact. Recoat every 2–3 years to maintain protection.
Maintenance Tips
A repaired post requires the same ongoing maintenance as any exterior wood. Apply a wood hardener to strengthen any new soft spots you find during annual inspections — catching rot early means smaller repairs and less material cost.
Regular Inspections
Inspect all outdoor wood posts annually, ideally in spring before the wet season. Use a screwdriver to probe at the base and any area where two pieces of wood meet — these joints trap moisture. Catching soft spots at less than ¼-inch depth allows a simple hardener-only repair without full epoxy filling. Early detection saves significant repair time and cost.
Preventive Measures
Keep post bases dry: use gravel or crushed stone around base instead of soil contact; add metal post base hardware to lift wood off concrete by ½ inch; trim vegetation to 6 inches from post bases. Seal all cut ends of posts with end-grain sealer before installation — end grain absorbs moisture 250 times faster than face grain and is the most common entry point for rot fungi.
Frequently Asked Questions
How Do You Fix A Rotting Wood Post Without Replacing It?
Remove all soft rot with a chisel until you reach solid wood. Apply liquid wood hardener (Minwax or PC-Petrifier) to the cleaned cavity and let cure 2–4 hours. Fill the void with two-part epoxy wood filler, shape to match the original profile, and allow to cure. Sand smooth, then prime and paint with exterior paint rated for outdoor use.
What Is The Best Wood Filler For Rotted Wood?
Two-part epoxy fillers are the best choice for rotted wood because they are waterproof, do not shrink, and accept paint and stain. Top options are Abatron WoodEpox (professional-grade, longest working time), PC-Woody (easier to mix, good for small repairs), and Bondo Wood Filler (most widely available, fast cure). Avoid water-based wood fillers for exterior rot — they absorb moisture and fail quickly outdoors.
How To Repair A Rotted Post Bottom?
Post base rot is the most common failure point. Expose the base by digging around it if buried. Chisel out all soft wood, then soak the area with liquid wood hardener. Once cured, pack epoxy filler into the cavity. For severe base rot where more than 50% of the cross-section is gone, sister a new treated post alongside the existing one with galvanized carriage bolts — this is stronger than a full epoxy repair alone.
Can You Put New Wood Over Rotted Wood?
No. Covering rotted wood with new wood traps moisture and accelerates decay in both pieces. Always remove the rotted material completely before installing new wood. The only exception is sistering — attaching a new structural member alongside the old one — and even then the rot must be stabilized with hardener first to stop its spread.
How Long Does a Wood Rot Repair Last?
A properly done epoxy repair — with all rot removed, full hardener penetration, and a painted finish — can last 10–15 years or more. The epoxy itself does not rot. The repair fails when: paint or primer is not applied (UV degrades epoxy), the root moisture cause is not fixed, or the repair is structural and the post flexes repeatedly. Annual inspection and touch-up painting extend repair life significantly.
Can a Structurally Load-Bearing Post Be Repaired?
Yes, with conditions. If the post supports a roof, deck, or floor load and the rot affects less than 30% of its cross-section, epoxy repair can restore full structural integrity. For rot affecting 30–50%, pair the epoxy repair with metal reinforcement (post base hardware or steel strap). If more than 50% is affected, or the post is a primary beam support, replace it — the material cost of a new post is far less than the liability of a structural failure.
Conclusion
Repairing a rotting wood post without replacing it is straightforward when you catch rot before it exceeds 50% of the post cross-section. Remove all soft material, apply wood hardener, fill with two-part epoxy, and protect with exterior primer and paint. The repair costs $30–$60 in materials versus $200–$600 for professional replacement — and a well-done repair can outlast the surrounding wood if maintained properly.