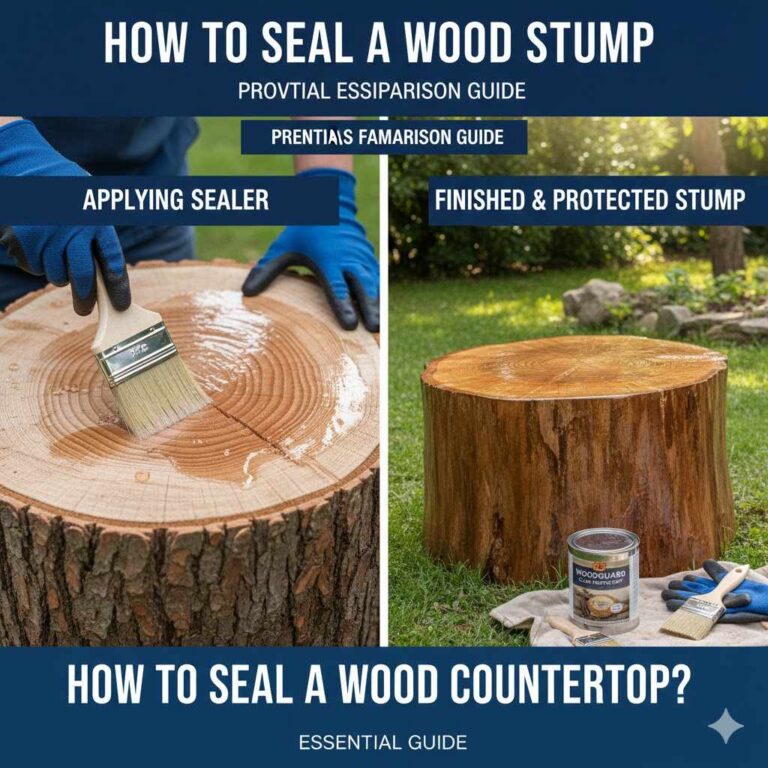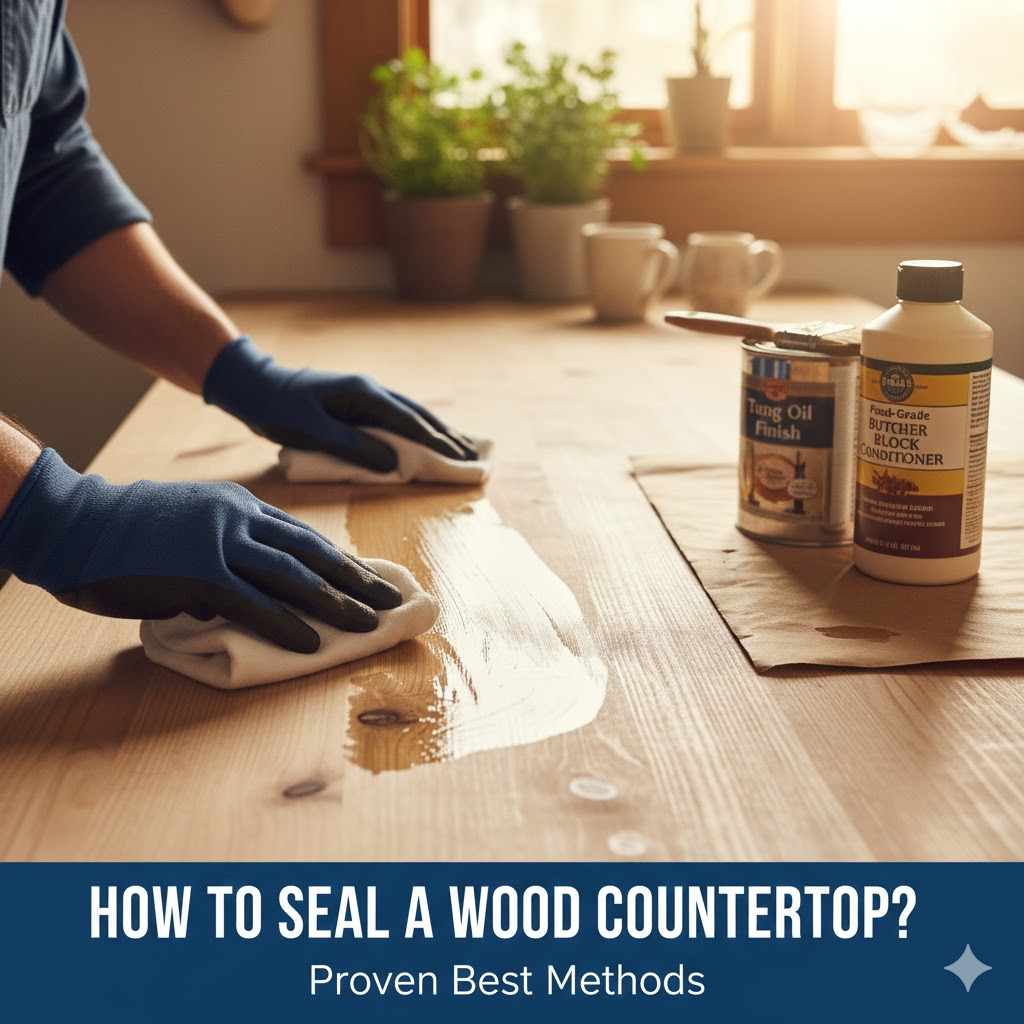
How To Seal A Wood Countertop: Proven Best
To successfully seal a wood countertop, you must thoroughly clean, sand to at least 220-grit, and then apply several thin coats of a high-quality, food-safe finish like mineral oil, tung oil, or a polyurethane/epoxy blend. Proper preparation and multiple layers are the keys to lasting water resistance and durability.
Hello there! I’m Md Meraj, and I know that putting in a beautiful wood countertop is exciting. But seeing water spots or worrying about stains can really take the joy out of it. Wood looks amazing, but it needs protection from everyday kitchen messes. If you’re unsure about how to properly protect your investment, you’ve come to the right place.
Don’t worry; sealing wood isn’t rocket science! We will walk through the easiest, most durable steps to get a finish you can be proud of. Stick with me, and we will make your wood countertop last for years to come.
Sealing a wood countertop is the most important step after installation. It turns a lovely piece of lumber into a durable work surface. A good seal keeps out moisture, which prevents warping and mold growth. It also makes cleanup a breeze! Choosing the “best” method really depends on how you plan to use your counter—is it a high-traffic prep area or a decorative coffee bar? We’ll explore the top techniques used by professionals, starting with preparation, which is half the battle!
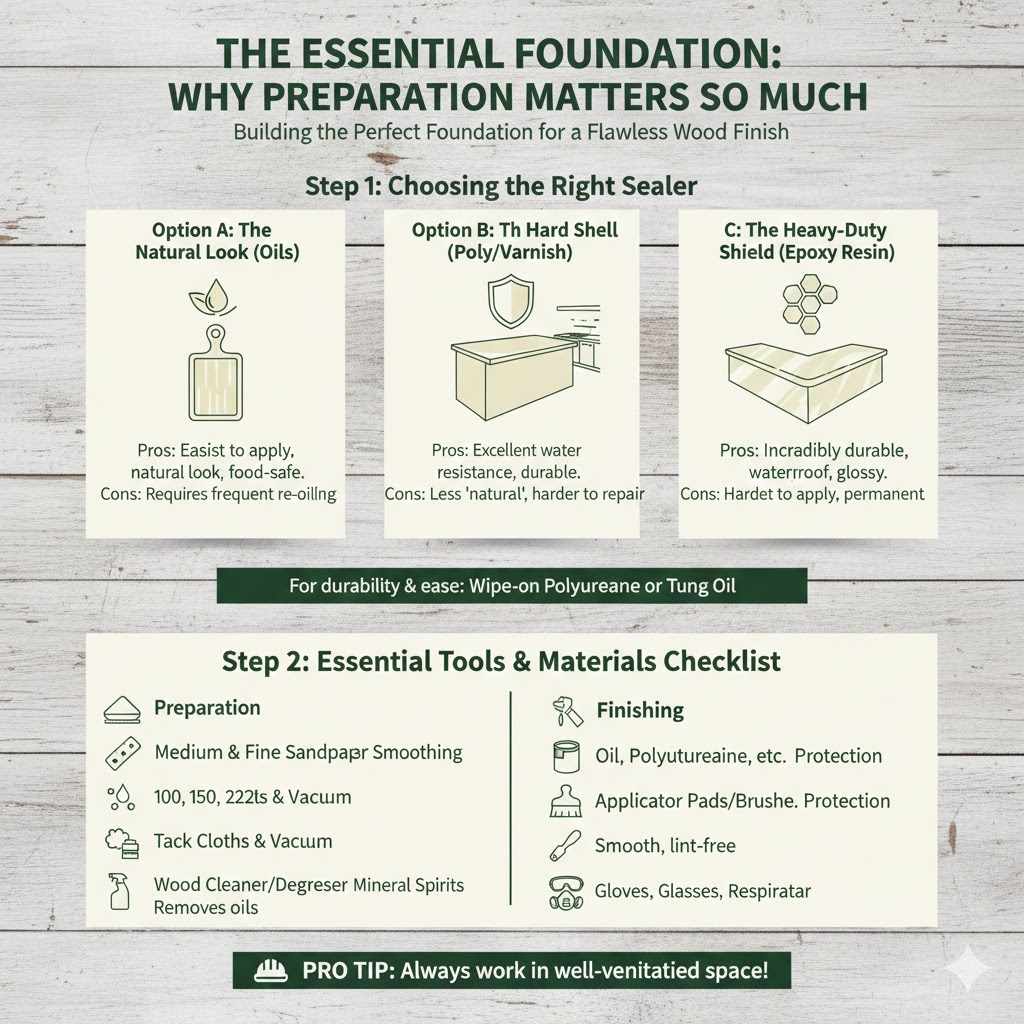
The Essential Foundation: Why Preparation Matters So Much
If you skip preparation, even the best finish will fail. Think of sanding and cleaning as building a perfect foundation for a house. A smooth, clean surface lets the sealer sink in properly and create a strong bond. Don’t rush this part; a few extra hours here saves you weeks of frustration later!
Step 1: Choosing the Right Sealer for Your Needs
This is where most beginners get confused. There are three main paths, each offering different looks and levels of protection. Your choice depends on use, desired maintenance, and aesthetic goals. Here’s a simple breakdown to help you decide.
Option A: The Natural Look (Oils: Mineral or Tung Oil)
These finishes penetrate the wood, offering a natural, warm look that is very easy to repair. They are perfect for cutting boards and countertops where you want the true feel of wood. These are almost always food-safe once cured.
- Pros: Easiest to apply, totally natural look, very food-safe.
- Cons: Requires frequent re-oiling (sometimes monthly), offers less protection against harsh chemicals or standing water.
Option B: The Hard Shell (Polyurethane or Varnish)
Polyurethane creates a hard plastic-like layer on top of the wood. This is your strongest defense against water and stains, ideal for busy kitchens.
- Pros: Excellent water resistance, low maintenance once cured, very durable against spills.
- Cons: Looks less “natural,” repairs require sanding down the entire affected area, can look slightly plastic.
Option C: The Heavy-Duty Shield (Epoxy Resin)
For the absolute toughest surface, epoxy is the answer. It results in a thick, glass-like coating, often used for bar tops or specialty kitchen islands.
- Pros: Incredibly durable, waterproof, creates a very deep, glossy look.
- Cons: Hardest to apply correctly (must be mixed perfectly), high learning curve, permanent finish.
For the average homeowner looking for the best balance of durability and ease, many experts recommend a quality wipe-on oil-based polyurethane or a heavy application of pure Tung Oil. We will focus on the general steps that apply to all of them, while highlighting oil application differences.
Step 2: Essential Tools and Materials Checklist
Before you grab sandpaper, gather everything listed below. Being prepared keeps the project flowing smoothly and reduces unnecessary trips to the hardware store. Safety first, always!
| Category | Tool/Material | Purpose |
|---|---|---|
| Preparation | Medium and Fine Sandpaper (100, 150, 220 grit) | Smoothing the surface |
| Preparation | Tack Cloths or Vacuum with Brush Attachment | Removing all sanding dust |
| Preparation | Wood Cleaner/Degreaser (Mineral Spirits) | Removing natural oils and contaminants |
| Finishing | Chosen Sealer (Oil, Polyurethane, etc.) | The protective coating |
| Finishing | Applicator Pads or High-Quality Brushes | For smooth, lint-free application |
| Safety | Nitrile Gloves, Safety Glasses, Respirator/Ventilation | Crucial protection when sanding and applying fumes |
Pro Tip on Safety: Always work in a well-ventilated space, especially when sanding wood dust or applying solvent-based finishes. Check out the OSHA guidelines regarding workplace safety, even in your home workshop, to ensure proper protection against fine dust particles.
Step 3: Sanding – Achieving the Perfect Smoothness
Proper sanding is the difference between a counter that lasts a year and one that lasts a decade. We are aiming for smoothness but not too smooth that the sealer can’t grip the grain. Start rough and finish fine.
- Initial Sanding (100 or 120 Grit): If your wood is rough, new, or has old finishes, start with a 100 or 120-grit sandpaper. This levels the surface and removes any deep imperfections. Use an orbital sander for large areas. Always sand with the grain direction.
- Mid-Stage Smoothing (150 Grit): Switch to 150 grit. This step refines the scratches left by the coarser paper. Keep your passes light and consistent.
- The Final Sand (220 Grit): This is critical for a smooth feel. Use 220 grit. This final sanding opens the pores just enough for the sealer to adhere nicely. Going finer than 220 can sometimes seal the wood surface too much, causing your finish to look blotchy.
- Dealing with Water Rings: If you are refinishing an old top with water rings, you might need to use a detail sander or block of wood wrapped in 150-grit paper to focus on those dark areas. Remove the damage completely before moving on.
Step 4: Dust Removal – Cleanliness is Next to Durability
Even a single speck of dust under your final coat will feel like a pebble. You need to eliminate every trace of sanding residue.
- First, use a shop vacuum with a brush attachment to get up the bulk of the loose dust from the countertop and surrounding cabinets.
- Next, wipe the entire surface thoroughly with a dry tack cloth. A tack cloth is a cheesecloth material treated with a light resin that grabs fine particles. Fold it frequently so you always wipe with a clean surface.
- For the absolute best cleaning, especially if using oil finishes, wipe the entire surface down lightly with mineral spirits using a clean rag. This dissolves residual sanding oils and surface contamination. Allow the mineral spirits to fully evaporate (usually 15–30 minutes) before sealing.
Applying the Finish: The “How-To” for Longevity
Once the wood is clean and perfectly smooth, it is ready for its protective armor. The application technique varies depending on whether you chose an oil or a film-building finish like polyurethane.
Method 1: Sealing with Penetrating Oils (The Food-Safe Choice)
If you chose Tung Oil or Mineral Oil, this process is about saturation, not just coating.
- First Coat – Saturate Deeply: Pour a generous amount of your oil directly onto the countertop. Using a lint-free cloth, work the oil vigorously into the wood surface, making sure to rub it into all end grains (the sides of the boards—they suck up oil fastest!).
- Let It Dwell: Allow the oil to soak in for at least 15 to 30 minutes. This gives the wood time to absorb what it needs.
- Wipe Off Excess Immediately: This step is crucial. If you leave thick excess oil sitting on top, it will cure into a gummy, uneven mess. Wipe aggressively with a clean, dry cloth until the surface feels dry to the touch.
- Curing Time: Allow the first coat to cure according to the product directions (Tung oil can take 24 hours; mineral oil dries quickly but isn’t “cured” in the same way).
- Subsequent Coats (Build Coats): Apply two to five more coats. For subsequent coats, use significantly less oil. You are now building density, not penetrating deeply. Wipe off the excess thoroughly after each coat.
Crucial Safety Note on Rags: Rags soaked with curing oils like Linseed Oil or Tung Oil can spontaneously combust (ignite) due to oxidation. Always lay oil-soaked rags flat outside to dry completely, or soak them completely in water and store them in an airtight, water-filled metal container before disposal.
Method 2: Sealing with Polyurethane (The Tough Barrier)
Polyurethane creates a durable film. It’s all about thin, even layers. We recommend wiping-on poly (like Waterlox or other clear sealers) over brush-on for beginner countertops, as wiping minimizes streaks and bubbles.
- The Seal Coat (First Layer): Following the manufacturer’s direction, apply a very thin, even coat across the entire surface, moving with the grain. Thin coats dry harder and smoother than thick ones.
- Don’t Overwork It: Apply the sealer quickly and evenly. Stop applying once the surface is coated. Do not go back over wet spots, as this leads to divots.
- Drying Time: Allow this first coat to dry fully. This usually takes 2 to 6 hours, depending on humidity. It will look dull or slightly patchy when dry—this is normal.
- Scuff Sanding (The Secret to Adhesion): Once fully dry, lightly sand the entire surface using 320 or 400-grit sandpaper or fine steel wool. You are not sanding off the finish; you are just scratching the surface microscopically so the next layer sticks better.
- Cleaning Dust: Use a tack cloth to meticulously remove all sanding dust created in Step 4.
- Subsequent Coats: Apply the second coat, thin and evenly. Repeat the dry-sand-and-tack process between every coat. Most applications require 3 to 4 total coats for sufficient kitchen durability.
To help you gauge what type of protection you’ve achieved, here is a comparison table based on typical finish performance:
| Finish Type | Water Resistance (Durability) | Required Maintenance | Repair Difficulty |
|---|---|---|---|
| Mineral/Pure Tung Oil | Fair | High (Re-oil every 1-3 months) | Very Easy (Spot re-oiling) |
| Wiping Polyurethane (3 Coats) | Good | Low (Wipe down only) | Moderate (Lightly sand and recoat spot) |
| Pour-On Epoxy | Excellent (Commercial Grade) | Very Low | Hard (Requires grinding/patching) |
Special Considerations: Sealing the Edges and End Grain
If there is one place moisture sneaks in, it is the end grain. This is where the wood fibers are exposed like straws sucking up water. You must treat the end grain aggressively.
End Grain Sealing Technique
The end grain (the short sides of your boards) requires significantly more product than the flat surfaces. Think of it as priming drywall—it absorbs the first coat like crazy.
- Apply your chosen sealer liberally to the edges first.
- For oils, ensure the edges are fully saturated and weeping oil. You may need 50% more oil on the ends than the tops.
- For polyurethanes, apply several very thin coats just to the ends before finishing the top surface. Let each coat fully cure before moving on.
- If you are concerned about durability around the sink area, consider applying an extra layer of sealant only to the front and back edges exposed to the most humidity.
Curing and Final Cure Time: Patience is Protection
Applying the finish is the easy part; waiting for it to cure is the hardest! Curing is not the same as drying. Drying means the solvents have evaporated. Curing means the finish has chemically hardened to its maximum strength.
Never treat your counter as fully protected until the full cure time has passed, even if it feels dry to the touch after a few hours.
- Oil Finishes (Mineral/Tung): While dry in 24 hours, the protection builds over several days or weeks. Avoid acidic spills (lemon juice, vinegar) for at least 7 days.
- Polyurethane Finishes: Most standard oil-based polyurethanes are hard enough for light use in 24–48 hours. However, they take 14 to 30 days to reach 100% hardness and full resistance to scratching or harsh cleaners. Wait at least a week before using abrasive sponges or strong chemicals on the surface.
If you use a Waterlox product, for example, they specifically state that the sealer gains significant chemical resistance over the first two weeks of cure time. For more details on finish curing times related to chemical exposure, reputable sources like the Forest Products Laboratory (FPL) offer technical insights into wood coating behaviors.
Troubleshooting Common Beginner Sealing Mistakes
Don’t sweat a little mistake! Woodworking is forgiving. Here are the usual culprits and how to fix them, which builds confidence for your next project.
Issue 1: Sticky or Gummy Surface
Cause: Usually happens with oil finishes when excess oil was left standing on the surface and cured partially into a soft film instead of being fully wiped off.
Fix: Wipe the area aggressively with mineral spirits to soften the residue. If it remains sticky after 48 hours, you might need to lightly abrade the surface with 220-grit sandpaper to remove the gummy layer, then clean thoroughly and apply a fresh, very thin coat.
Issue 2: Brush Marks or Streaks (Polyurethane)
Cause: Applying the finish too thickly, not waiting long enough between coats, or using a brush that leaves too many lines.
Fix: For oil-based wipe-on polys, streaks mean you applied too much product. For subsequent coats, use less finish and try to lay it off smoothly without reapplying. If the streaks are visible after curing, you must sand down the whole area to 220-grit and recoat, focusing on ultra-thin application.
Issue 3: Bubbles or Fish Eyes
Cause: Contamination! Tiny amounts of oil, wax, or silicone on the wood prevent the sealer from bonding smoothly. This is why cleaning with mineral spirits (Step 4) is vital.
Fix: If the bubbles are small, they might pop as the finish dries. If large bubbles remain after curing, you must sand out the entire affected section until the bubbles are gone, clean the area, and reapply only to that spot.
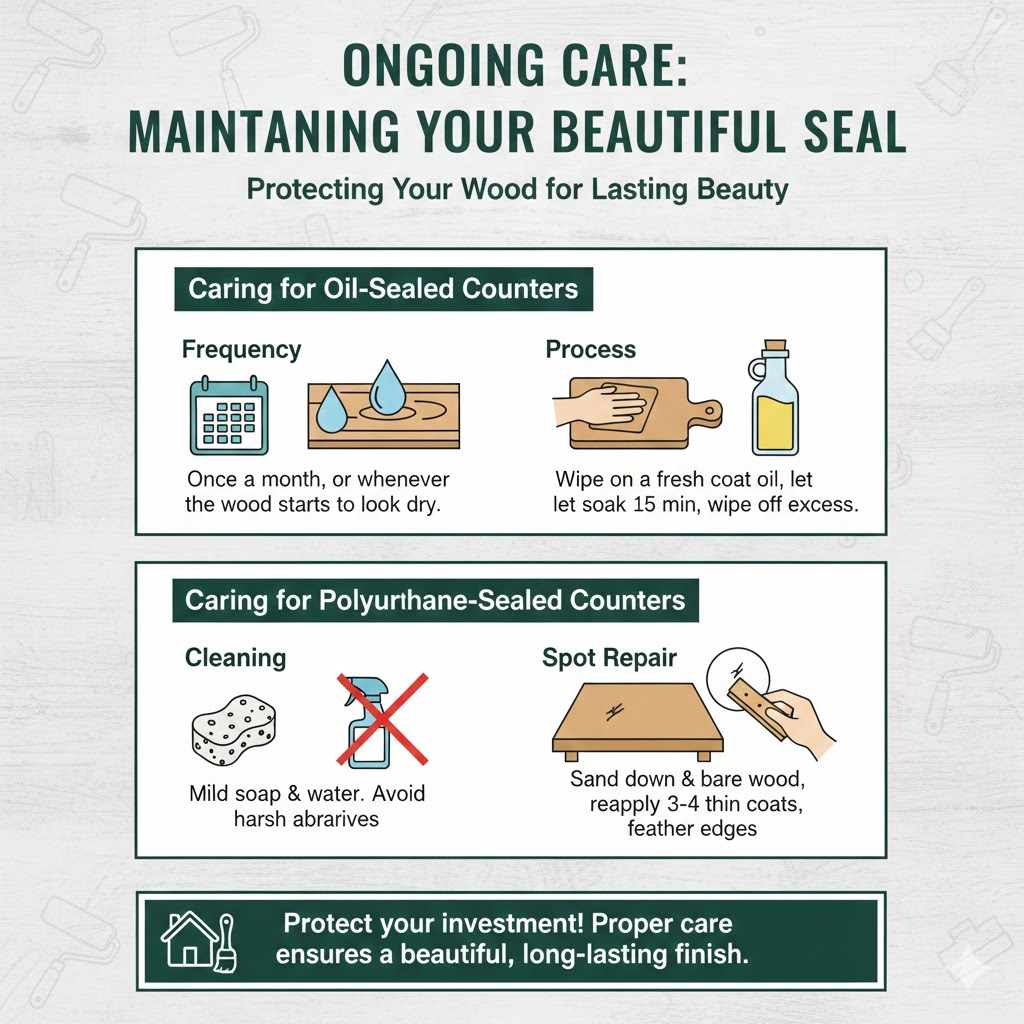
Ongoing Care: Maintaining Your Beautiful Seal
The “best” seal job will fail if not maintained properly. Maintenance depends heavily on what you used.
Caring for Oil-Sealed Counters
Oil sinks in and wears away over time, especially around the sink and chopping zones. You must “feed” the wood regularly.
- Frequency: Once a month, or whenever the wood starts to look dry or water no longer beads up.
- Process: Lightly wipe the entire surface down with a fresh coat of oil. Let it soak for 15 minutes, then wipe off all excess aggressively. No sanding needed unless you have major scratches.
Caring for Polyurethane-Sealed Counters
Polyurethane stays on the surface, so routine care is much easier.
- Cleaning: Use mild soap and water, or a 50/50 mix of white vinegar and water for general cleaning. Avoid harsh abrasives like scouring pads, which will scratch the topcoat.
- Spot Repair: If a large chip or scratch occurs, you must sand down to the bare wood in that specific area, clean it well, and then apply 3-4 new, thin coats of your polyurethane, allowing full cure between applications. Feather the edges so the new coats blend with the old ones.
FAQ Section: Answering Your Beginner Questions
Q1: Can I seal a wood countertop I’m going to use as a direct cutting surface?
A: It is generally not recommended to use standard polyurethane as a direct cutting surface. For cutting, use pure food-grade mineral oil, beeswax blends, or dedicated board finishes. Polyurethane seals well, but cutting into it contaminates the plastic layer. If you love the look of sealed wood, dedicate one area for prep and avoid heavy chopping directly on the sealer.
Q2: How long do I absolutely have to wait before I can put dishes or hot pans on the sealed counter?
A: For an oil finish, you can typically use it lightly after 48 hours, but avoid hot pans or high acidity for at least one week. For Polyurethane, it feels dry in 24 hours, but the manufacturer’s full cure time is usually 2-4 weeks for maximum resistance to heat and scratching. Wait at least 7 days before putting hot pots directly down.
Q3: Do I need to sand the counter if it came pre-oiled from the supplier?
A: Yes, usually. Even factory-applied finishes are often only for protection during shipping. They are usually thin oil coats that aren’t suitable for heavy kitchen use. Always sand down to 180 or 220 grit and apply at least three of your own durable coats for guaranteed longevity.
Q4: Is water-based or oil-based polyurethane better for a kitchen counter?
A: Oil-based polyurethane generally provides a harder, more durable, and more water-resistant shell, making it the preferred choice for high-moisture areas like kitchens, despite taking longer to cure and often having more VOCs (fumes). Water-based finishes cure faster but may require more coats to achieve the same water resistance.
Q5: What is the very best finish if I want a matte (not shiny) look?
A: If you use polyurethane, choose a ‘Matte’ or ‘Satin’ topcoat instead of ‘Semi-Gloss’ or ‘Gloss.’ For an oil finish (like Tung Oil), the resulting look is naturally more matte, offering a softer appearance that looks great under kitchen lighting.
Q6: My sink cutout looks rough. How do I seal the inside edge cleanly?
A: Seal the inside edge just as you would the end grain—liberally and generously. Use a small, high-quality artist’s brush to reach the corners neatly. Ensure you apply at least one full coat into the basin hole to prevent water wicking up from the underside. This is just as important as sealing the top surface.
Conclusion: You Have the Power to Protect Your Wood
Sealing your wood countertop correctly is a simple but vital project. By committing to excellent surface preparation—thorough sanding and meticulous cleaning—you set yourself up for a flawless, long-lasting finish. Remember the two main paths: oils provide easy maintenance and natural looks, while polyurethane builds a strong, durable barrier. Choose the protection that matches your lifestyle.
Take your time during those curing stages. That patience will repay you tenfold in a kitchen surface that looks beautiful, resists daily wear, and makes you proud of the craftsmanship you achieved right in your own home. Happy sealing, and enjoy your new, protected wooden countertop!