How To Varnish Hardwood Floors: Proven Essential Guide
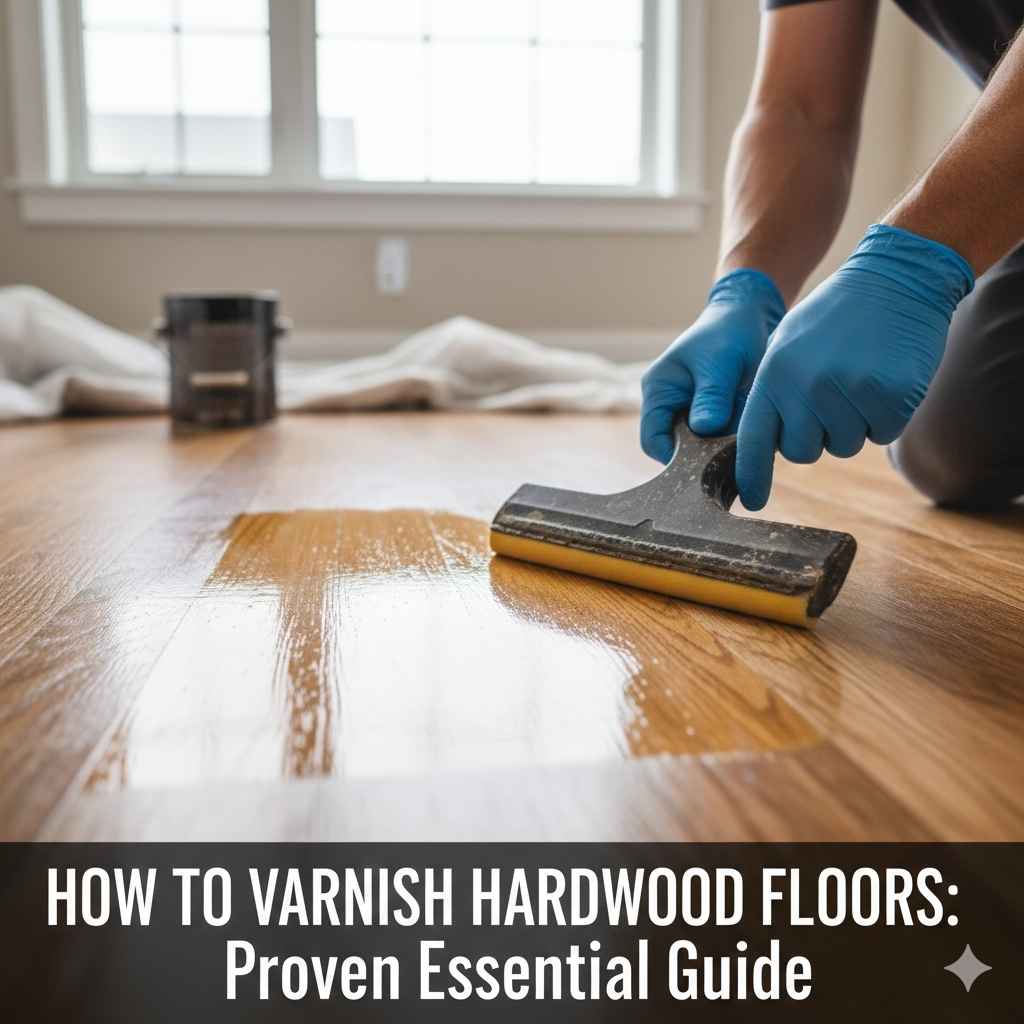
Learn how to varnish hardwood floors successfully by following these pre-sanding prep steps, applying the varnish thin, coat-after-coat, and ensuring you permit proper drying time. Applying floor varnish properly seals and protects the wood for decades while achieving a beautiful, custom finish, even for first-time DIYers.
Thinking about preserving the look of your lovely wooden floors can feel big and tricky. Many homeowners worry that varnishing hardwood floors means using complicated equipment and spending days learning, only to end up with streaks or sloppy edges. That’s not true! With the right steps, even a beginner can achieve a professional-looking, durable coat. We will work through this job together, method by method, ensuring your floors stay protected beautifully for years. Get ready—we’re about to transform that wood finish together!
Varnishing old hardwood floors provides unbeatable protection and dramatically enhances the wood’s natural beauty. If raw wood looks a little dull or worn, the right varnish coat gives it a tough shield against spills, scratches, and high foot traffic. Knowing exactly how to start, what supplies to gather, and the right way to apply the coats is the secret to success. This guide breaks down the entire varnish process so safely so you can breathe new life into your home’s centerpiece floors.
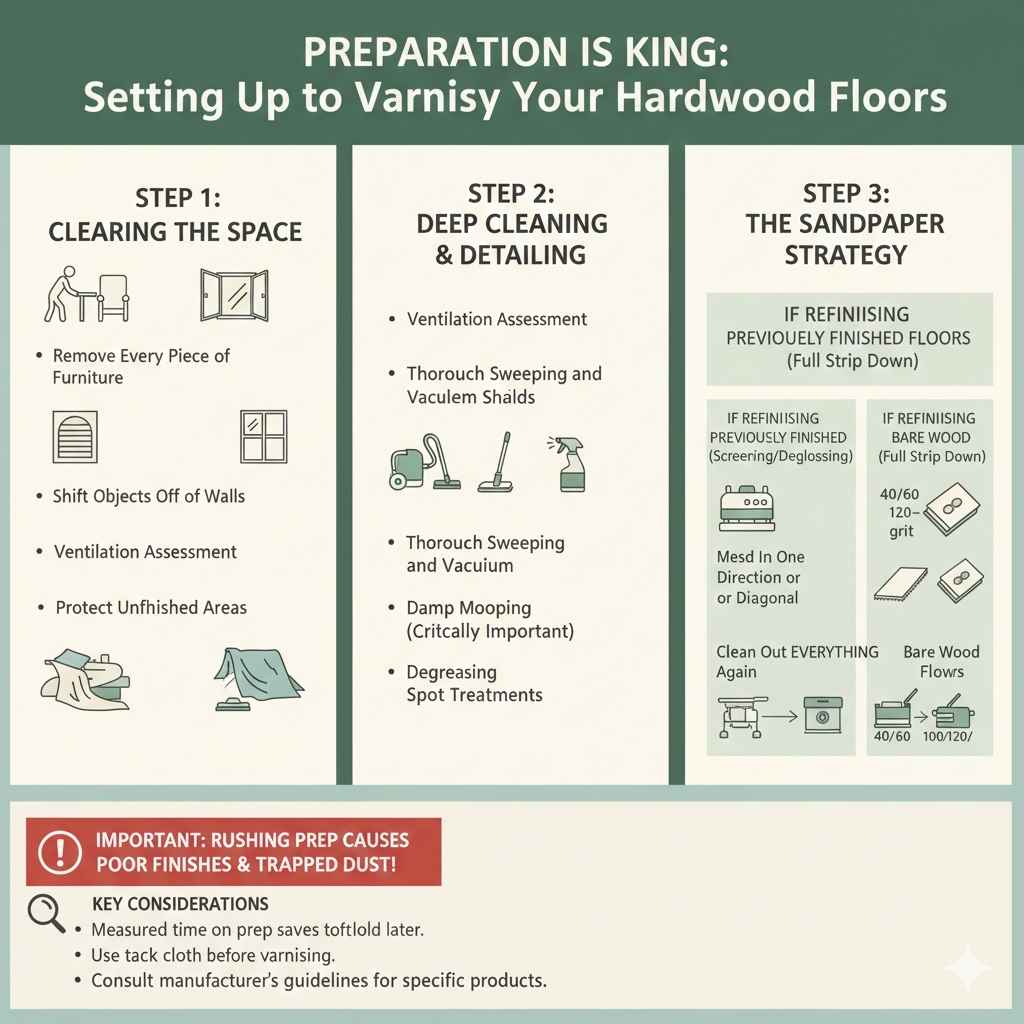
Preparation is King: Setting Up to Varnish Your Hardwood Floors
Success in floor finishing depends almost entirely on what happens before the varnish tin is even opened. Rushing the prep makes poor finishes, sticky sections, and dust trapped forever under the shine. Take measured time here; it pays off tenfold.
Step 1: Clearing the Space (The Big Move)
You physically cannot finish your floors properly while they are covered with things. This seems obvious, but planning this step needs to be systematic.
- Remove Every Piece of Furniture: Ensure there is absolutely nothing sitting on the floor to be coated. Pay special attention often over-looked spots like under radiators or tucked-in corners where rugs sat longer and caused color changes.
- Shift Objects Off of Walls: Remove switch plates, vent covers, and any decorative baseboard molding that might catch errant varnish drips. You need clean lines later.
- Ventilation Assessment: Open windows—a necessity for drying. Look up the recommendations for your chosen sealant—for extreme vapors from oil-based varnishes, you might consult EPA guidelines on minimizing volatile organic compounds (VOCs) during renovations. Airflow is vital for rapid drying and reducing fumes.
- Protect Unfinished Areas: Plastic sheeting and good painter’s masking tape are your friends. Completely cover cabinets that sit next to your floors, permanent fixtures like stair risers, and adjacent rooms you don’t want dust or finish drifting towards.
Step 2: Deep Cleaning and Detailing
The grit you think swept away is often still holding on right where you are trying to glue your new finish. Deep cleaning pulls substances away from the wood’s actual pores.
- Thorough Sweeping and Vacuuming: Go over every inch twice. Use a good shop vacuum (one with powerful suction) and then sweep the area again toward the center, capturing dust you missed.
- Damp Mopping (Critically Important): If you are working over old, sealed surfaces, skip powerful detergents. Generally, a very lightly dampened mop with plain water lifts fine dirt without wetting the wood too deeply. The key? Dry it instantly. Use clean, dry towels to “buff dry” sections immediately after mops touch them. Excess water damages wood.
- Degreasing Spot Treatments: Focus on greasy spots like entryways or kitchen zones. Use a specialty wood floor cleaner labeled as effective for mild degreasing, but always test in an inconspicuous area first. Soap residue will totally block Varnish from sticking. Rinse twice.
Step 3: The Sandpaper Strategy (Crucial Refinishing step)
If you are recoating already varnished (or seemingly finished) floors, you aren’t trying for ‘stripped to bare plywood.’ You are scuffing the surface. This creates what we call an ‘intercoat abrade ability”—tiny grooves that give the new varnish something sticky to grip.
If Refinishing Previously Finished Floors (Screening/Deglossing):
For these floors, you need minimal sanding just through and edge that dulls the sheen. This is typically called fine smoothing/screening rather than deep sanding.
- Use Mesh Screens or High Grit Sandpaper: Common grits for just making the old finish dull are specifically screens used with a rotary floor buffer—usually 120–150 grit. If sanding by hand, 150 to 180 grit is usually safe.
- Sand In One Direction or Diagonal: Do NOT sand with the grain pattern if using discs with swirly sanding paths (like the type used in large orbital rentals); move either diagonally (in an X pattern) or parallel when using dedicated screening methods or screens. This step smooths light scratches but still preps intake across the whole floor.
- Clean Out EVERYTHING Again: Wear a good respirator! Cabinet sand should just go everywhere when you are scrubbing on the floor or moving it too roughly toward woodwork. Vacuum dust aggressively, and then use a tack cloth (a sticky cheesecloth) immediately before applying any finish coat.
If Refinishing Bare Wood Floors (Full Strip Down):
If older lacquer or stain has penetrated deep and needs total removal to reach raw wood, you must conduct a deep sanding. This is very involved and requires heavy machinery best covered in a deeper hardware resource, but if starting bare…
Progress through successive grits, usually:
- Coarse Grit (40/60 Digger): Removes old protective layers and flattens uneven boards, using a standard edge sander (for mains) and a pole sander or specific edger tool.
- Medium Grit (80 Smoother): Removes all evidence of the previous coarse action, smoothing tool marks.
- Final Grit (100 or 120 Finest): Perfectly polishes the wood, preparing it for perfect stain absorption (if staining will happen before the final varnish).
Understanding Floor Varnishes & Tools of the Trade
For a DIY project, picking the right product for the right scenario greatly affects difficulty and longevity. Don’t grab the first tin you see—read the label. I often advise beginners to look into water-based polyurethanes (or hybrids) as they clean up easily and dry fastest.
Choosing The Right Varnish Type
Varnish comes in main families. These options perform differently regarding curing time, aroma, toughness beneath the heel of a boot, and cleanup required.
| Varnish Type | Pros (For beginners) | Cons / Work Environment Needed | Sheen (Appearance) |
|---|---|---|---|
| Water-Based Polyurethane | Low odor, fast drying, soap/water cleanup, very light amber/clear look. | Slightly less durable long-term than Oil-Based; might notice brush marks if coating too slowly. | Gloss, Semi-Gloss, Satin |
| Oil-Based Polyurethane | Extremely tough wear layer, natural deepens wood tone beautifully (‘ambering’). | Strong vapors (must adhere exactly to PPE, excellent airflow), very long cure time (slow!). | Gloss, Semi-Gloss, Satin |
| Moisture-Cured Urethane | Highest durability, great for surfaces that see absolute abuse (e.g., commercial spaces). | Difficult to work with chemically (reactive), very strong odors, expensive. Seldom needed for residential areas. | Varies highly based on specific product |
Necessary Tools Checklist
Applying Tools:
- High-Quality Brushes (natural or nylon/china bristle): A high build for cut-ins; good quality sheds fewer cheap bristles.
- Applicator Pad/Mop: Often T-bar shaped, using specialty pads great for even, wide application over large spaces without streaks.
- Trays & Liners: Use non-absorbent flat liners for rollers or quality polyurethane waste trays. You buy liners to keep solvent vapors contained to the tray not your ambient air.
Prep & Safety Tools:
- Respirator Mask (Must be rated for Organic Vapors): Critical for solvent protection regardless of claims on odor. A cheap dust mask is NOT ENOUGH. Trust an industry professional and review OSHA standards where powerful solvents are involved in your covering choice.
- Nitrile Gloves: To protect your skin! Varnish is tough to wash clean later.
- Eye Protection/Goggles.
- Tack Cloths/Cheesecloth: To pick up residual super-fine dust. Absolutely non-negotiable just before step three coats start flying down.
- Painter’s Tape (Good Quality Blue or Green): Creates professional lines around the non-varnished areas.
The Varnishing Process: Perfect Application, Coat by Coat
We need extreme care during application, the technique matters more than force. Varnish should level itself out effortlessly on good surface prep materials. Move deliberately.
Phase A: The Prep Stage Repeat Test
Before you ever open the can labelled ‘VARNISETURN-1,’ verify that preparation went perfectly. Gently run a clean piece of lint-free cloth over a main section of floor. If it picks up nothing beyond minute, dust the size of flour? You are cleared hot. Do this multiple times toward the entrance door just before you commence laying down product.
Phase B: Cutting In (Edges First)
This is where you paint edges around the whole room before doing the fast central area. Cutting in goes where rollers struggle—corners by walls, door jambs, fireplace framing, and stairs!
Use a high-quality standard paint bush designed for 1–2 inch strokes on varnish quality.
- Dip your brush about ¼ deep into the varnish (no more! We want multiple SEVERAL THIN layers, not ONE THICK lisp).
- Start 2–3 inches away from the edge you are cutting, applying a smooth, thin lather outward toward the baseboard or fixture, utilizing a technique known as ‘tip feathering,’ where barely any finish comes off after the last ten inches of your brush stroke.
- Be diligent covering a foot or two perimeter around ALL walls—the roller can reach very near, but often misses that tiny patch along skirting.
- Do not stop brushing or pause with the weight of a full brush loaded resting somewhere in the middle—continue running to the next section overlap quickly. Allow this edge area to fully flash/tack off (usually 20-60 minutes, watch label drying times!) before the remainder of the area begins to slow down due to cold sections.
Phase C: Rolling the Wide Application Zone With Consistent Style
Now for the bulk of the room. Use your T-bar or lamb’s wool pad attached to a proper handle setup. Always maintain an actively wet edge (an area partially covered but not yet setting) to merge cleanly between overlapping passes.
- Start In the Corners Farthest Away. You want to finish right beside the section you cut in earlier, so you slowly work your way backward toward the exit door.
- Load the Pad: Dip your pad or saturate it slightly—then remove surplus via laying a good clean, flat edge (a ramp of dry cardstock is a good visual here). You aim for sheer wetness needed to lay down smoothly—not sludge dumping.
- Roll in Squares or Sections NOT Just Back and Forth. Map out a section (e.g. 4 ft by 6ft). Lay down finish parallel strokes first covering Width of 6 or more inches. Then go over within the same time frame using the perpendicular pass over that same wet layer slightly overlaying wet section upon wet section again, just to knock down any standing lines or ridges formed by the nap/pad edge itself after setting. For true finish mastery, brush LIGHTELY at the end along major traffic patterns BEFORE FULL LEVELING SET (Water poly often cures too fast for traditional back brushing).
- Overlap Strategy: Always maintain minimum 50% overlap from the finished dry stroke area toward the wet coating area. It merges seamlessly.
- Leave No Puddles: If, where you backed up, excess seems slow coating and gathering thick around corners/Edges, stop rolling immediately. Use a damp sash-brush (ONLY a DAMP one, light wiping is okay) to gently wick this puddle away immediately to thinner areas. Puddles never successfully dry.
- Keep it Moving: This is the hardest part. Water-based topicals dry scary fast indoors! You aim to complete an area coat entirely before humidity differential makes sections truly unblendable otherwise your lines will be visible.
The Importance of Thin Coats – The Craftsmanship Secret
Homeowners mistakenly apply thick varnish thinking covering coats means thickness = durability or covering missed spots.
Thickness = Cracking Hazard.
Slow drying spots underneath quickly thicken sealant skins create bubbles and will crack prematurely. The goal is maximum smoothness through many incredibly THIN layers. Think of applying fine layers instead of laying down one heavy, muddy layer.
We aim for bare minimum three coats minimum for a durable finish. Four is often needed.
| Coat Number | Primary Goal | Drying Method Recommendation |
|---|---|---|
| Coat 1 (Sealant/Primer Pass) | Ensure uniform absorption into prepared wood fibers (if bare). Acts porous boundary seal. | Can I scuff already? ONLY the main shell of the finish feels dry. Can take longer near ventilation. |
| Coat 2 | Building the critical bulk layer for traffic wear resistance; addressing minor textural imperfections. | Lightly tack cloth; possibly check flatness and resolve major ridges via wiping ONLY. Gentle sanding highly often recommended. |
| Coat 3 onwards | Deep finishing, optimizing sheen control, final protective film. This should be extremely smooth. | Apply very carefully. Minimal to NO sanding between final varnish passes, depending on specific materials chosen. |
Between Coats 2 and 3: The Essential Light Sanding
This step is overlooked by beginners but cherished by pros. Those first seal coats (especially water-based) often lift or trap tiny airborne motes like pet hair or floor debris, creating little orange-peel texture when dry.
Performing Intercoat Abrasion
The goal is to flatten the surface and prepare it for the next cohesive seal coat to “melt” together by creating scuffs on the previously cured varnish layers.
- Check Full CURE/Bake Time: Read packaging. If it suggests touching after 4 hours, wait 6 hours to sand just in case. You must not feel anything gummy or sticky left behind.
- Choose Your Grit Wisely: Sanding a varnish needs very fine contact. Use specialty super-fine screening pads, often brown or maroon colored, which act much lighter than sandpaper you might use raw timber. A true Grit designation would be 220++ very light paper for manual hand usage or 320 screen.
- Go Gently, By Hand Across the Grain with Direction/Screen. Since you are smoothing dry existing chemical structure not opening depth of wood surface, applying aggressive scrubbing by machine will scratch heavily below any subsequent coating. Use linear (or gently checked angular/diagonal) application with mild weight via soft foam sanding blocks. Very lightly sweep covering all cured varnish.
- Detail Cleaning: Vacuum thoroughly via hose setting once it’s clear you have de-glossed every section perfectly even (look for an evenly white-grey dust appearance across your whole floor’s surfaces). Follow up immediately with damp tacking cloths along every inch. Dust is the enemy of the final coat!
Post-Application Curing and Maintenance Timeline Recap
Rushing use after any floor finish ensures early disaster. Drying (when it’s non-tacky) is NOT the same as Curing (‘When it develops max physical hardware’). Different finishes demand specific strictness guidelines given by material developers at VOC emission sites.
Floor Use Schedule Guideline (General Polyurethane Advice)
- Light Foot Traffic Allowability: After the final coat dries through tackiness (typically 12–48 hours depending on poly type and ventilation). Light traffic applies only to clean, sock-footed movers who avoid tracking grit in.
- Furniture Move-Back: Wait a minimum good three to potentially seven Full Days before heavy furniture should attempt placement onto floor section beneath where the thing now sits back on this polished surface! Rug-pads are forbidden the first full week, regardless of how plush they seem—the varnish is still hardening the final chemical structure over fourteen days!
- Full Cure (Traffic Hardness Achieved): Give most high durability floor varnishes 14 to 30 full days until maximum hardness appears AND you want rugs or heavy movable items placed down or full activities like aggressive sweeping can occur securely. Consult the Safety Data Sheet (SDS) available on producer sites for best chemical response specific timing, rather than generic advice which fails in your environment particulars.
This patience proves the real cornerstone of professional results during DIY flooring endeavors. You did the hard building work. Resist the temptation early on after you coat.
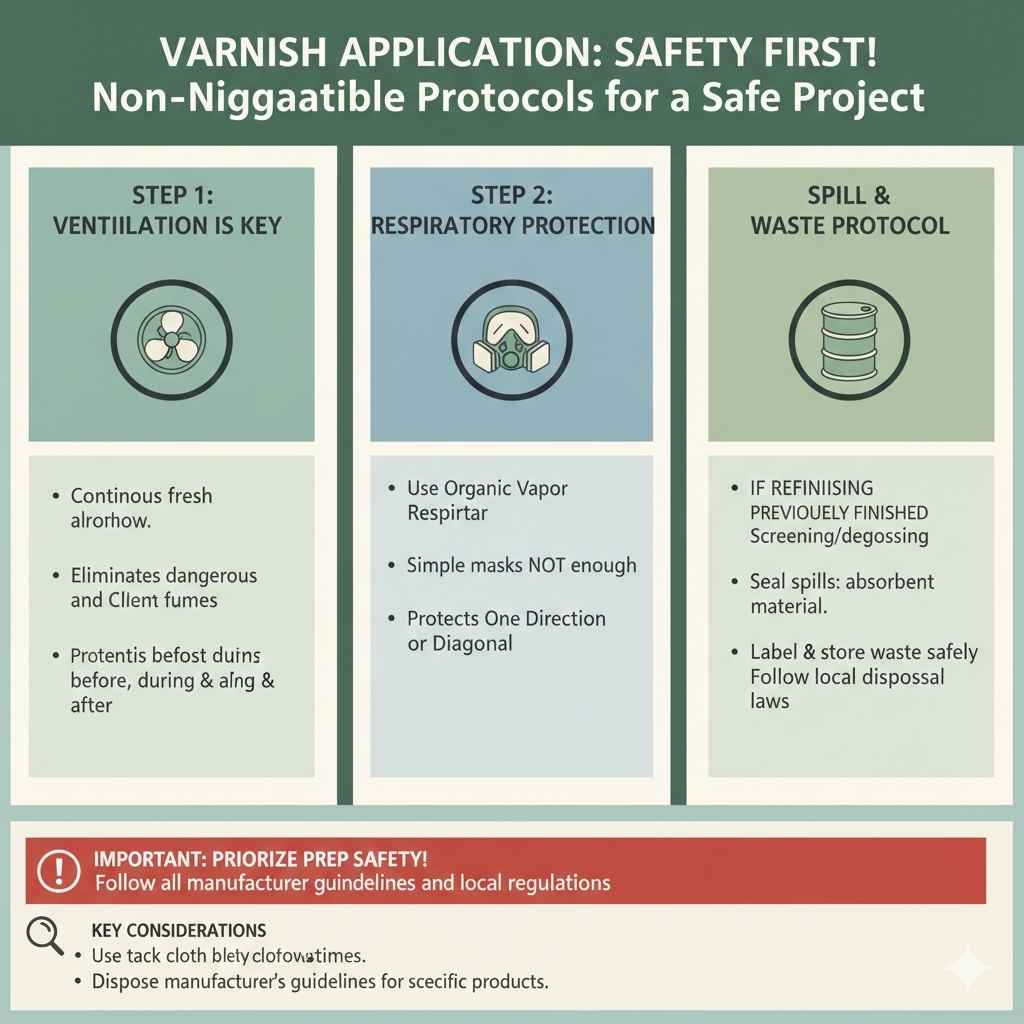
Safety During Varnish Application – Non-Negotiable Protocols
We must respect finishes and thinners chemically. They provide hard surface shells for durability, but they demand caution during creation (application).
- Ventilation First and Always: Continuous source movement of FRESH replacement air through the space eliminates dangerous vapor concentration and helps coating offload chemical content toward removal sources swiftly. Do air exchange for an hour before application, through coating downtime gaps allowed curing needs, and strongly after cleanup ends.
- Respirators > Simple Dust Masks: If the can says Oil-Based Urethane used in a room enclosed, utilize a well-fitting organic vaporizer specific respirator cartridge. Failure on this vital piece of gear is the most severe threat to breathing health when coating floors.
- Spill and Waste Protocol: Never wash these products down any sink (especially oil residues). Keep lids tight! If varnish or solvent spills, cover immediately with newspaper/absorbent material, seal this safely in a labelled metal can/tin outside when appropriate and follow specialized local environmental removal guidelines required for dangerous household chemical waste handling disposal specific zones.
Frequently Asked Questions (FAQ’s for Finishers)
Q1: Why does my varnish look streaky even though I used that T-bar roller?
A: Streaking usually comes down to two main issues requiring correction next timeframe: Uneven application height—making sure that when working overlapping sections, your roller has sufficient varnish to lay off the edge onto the previously laid section only enough coverage. Also often, stopping to address edges ruins the ‘hot/flowing’ stage necessary for flatness—commit edges perfectly and keep a good wide space margin. You need a fresh pot application every single area tile! Work fast on drying polies.
Q2: How much varnish should I buy?
A: Estimation relies on square footage, coverage area usually listed like ‘cover 400 sf per Gallon; apply three coats.’ You MUST increase your gallon need estimate by 10%-15% to allow for edge cutting detail work, waste tray losses, and absorption spikes needed on bare wood seal coats. Always budget for slightly more for multi-coat work rather than dealing with a matching color shade mid-build.
Q3: Can I just put another coat over thick, peeling older varnish runs?
A: Absolutely stop! That means previous coating failed intake adhesion across itself and the newer shiny skin is likely peeling off there very fast at traffic points soon also—it traps Air, dust grit or bad moisture vapor. Peeling areas must be fully scraped or delicately stripped away/sanded entirely down before laying next coat attempt to patch/fill a small scar where a bad edge was if possible.
Q4: Is polyurethane the same thing as varnish? For woodworking protection needs?
A: Most modern finishes sold today which claim ‘durable wood protection with water clean-up’ fall under the name polyurethane finish, although sometimes chemically they differ from old, true oil-based gums listed formerly as ‘Varnish’ meaning, it offers superior water proofing capabilities suitable. Generally speaking in context of homeowner flooring jobs: Yes, expect them to perform similarly to a modern interior spar or ‘Varnish’ finish, but polyurethanes deliver that ease of maintenance.
Q5: After applying water-thin Varnish, the grains seem more distinct or darker—What happened?
A: This is usually expected, especially on woods like Oak or Pine. Even water-based finishes slightly add amber content (‘ambering’) by leveling themselves over the wood pores. If you don’t like this natural shading slightly increased visual sharpness, this shade change happens immediately layer administration. Make extra sure that Coat 1/Base Coat is of lowest pigment value if deep retention natural matte gray/blonde desired tone change during the stages later.
Conclusion: Achieving That Forever Floor Shine
Finishing your hardwood floors introduces inherent unknowns, yet by adhering strictly to process hierarchy—cleaning superbly, sanding/scuffing correctly for surface gripping, applying thin multiple subsequent applications allowing cures adequate time, this expert guide demystifies “how to varnish hardwood floors.
Remember to treat ventilation seriously, utilize quality prep pads on previous coatings needing just light scuff repair, and never stop seeking that consistently ‘wet but not drippy’ look when distributing coats wide across big sections. If done purposefully, maintaining focus during application while respecting all drying stages needed between coats guarantees you own a floor shine that won’t just improve appearances—it protects decades worth of wood foundation you invested in cleaning up well. Go on, now; your durable, professional-looking wood floors await!