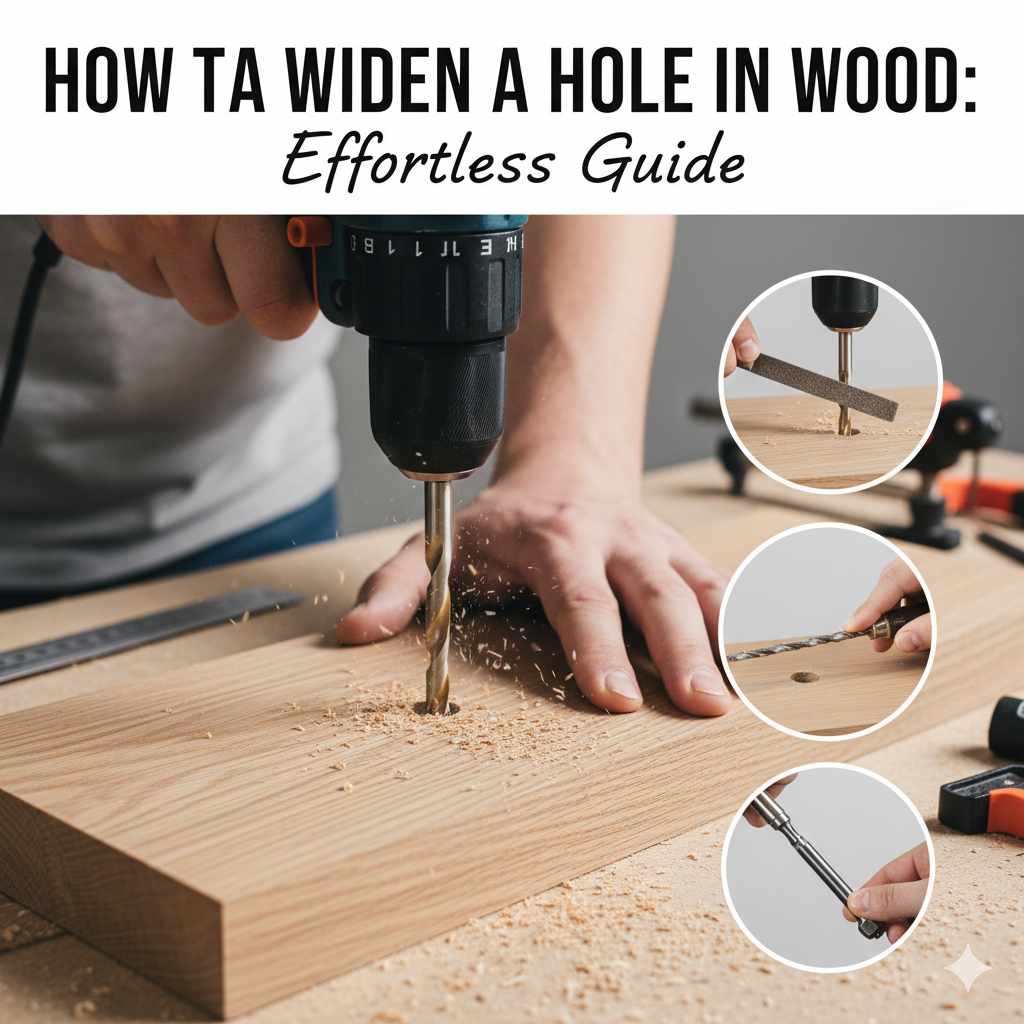
How to Widen a Hole in Wood: Effortless Guide
To widen a hole in wood, start by marking your desired diameter. Use a drill bit slightly larger than the current hole for a rough enlargement, or a Forstner bit or hole saw for a clean, precise cut to the exact size. Finish by carefully removing excess material with a chisel or sandpaper for a smooth edge.
Ever found yourself working on a woodworking project, only to realize the hole you drilled is just a little too small? It’s a common hiccup for many DIYers and homeowners. Whether you need a slightly larger opening for a bolt, to adjust for a different fitting, or simply to correct a measurement, widening a hole in wood doesn’t have to be a frustrating ordeal. With the right approach and a few simple tools, you can achieve a perfectly sized hole quickly and easily. This guide will walk you through the most effective methods, making this common woodworking challenge a breeze. Let’s get your project back on track!
Why You Might Need to Widen a Hole in Wood
There are several reasons why a woodworker might need to enlarge an existing hole. Sometimes, it’s an honest mistake during the initial drilling phase. Other times, project requirements change mid-build. You might be fitting a new component that’s a different size than originally planned, or perhaps you need to accommodate a thicker material or a larger fastener. Understanding why you need to widen a hole helps in choosing the best method and tools for the job. For instance, if you’re mounting a shelf bracket, a clean, precise widening is crucial for a secure fit. If you’re simply enlarging a pilot hole for a larger screw, a quicker method might suffice.
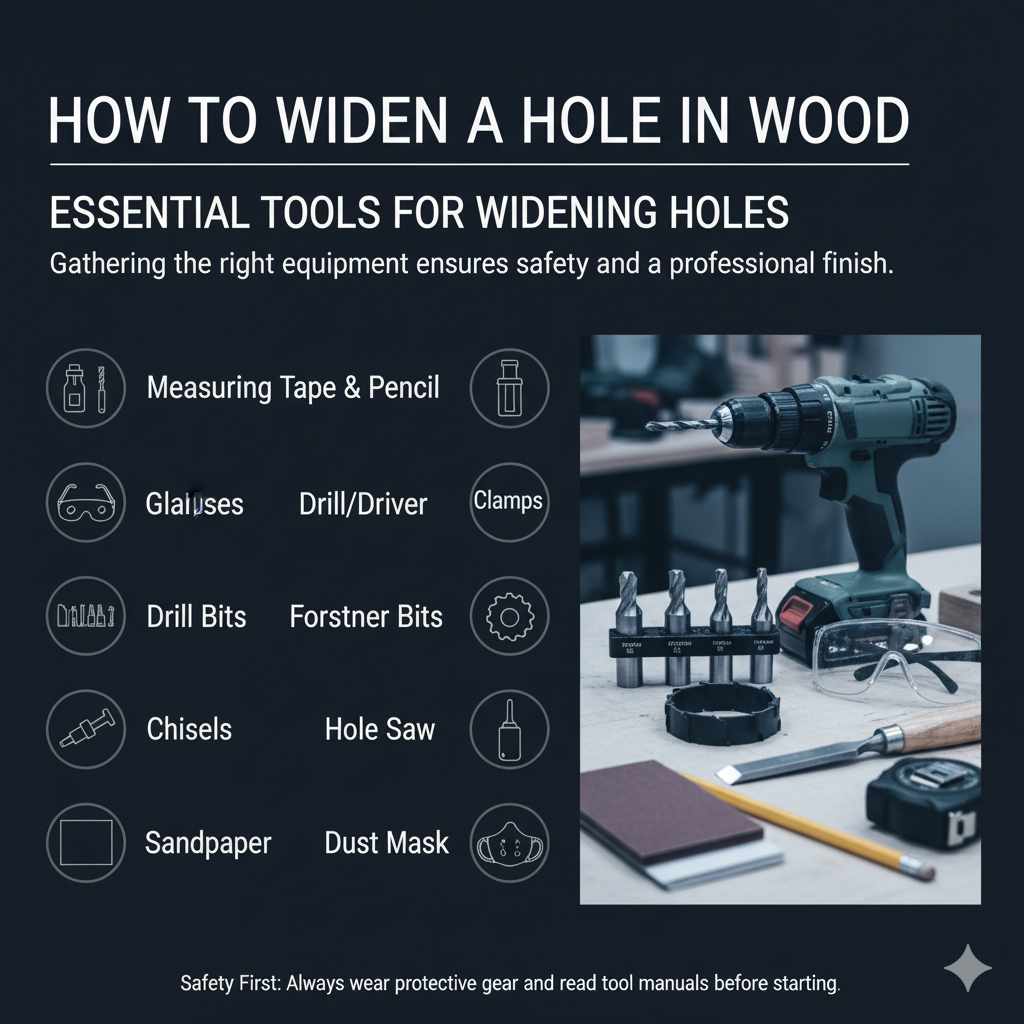
Essential Tools for Widening Holes
Before we dive into the methods, let’s gather the necessary tools. Having the right equipment not only makes the job easier but also ensures safety and a professional finish. Here’s a list of common tools you’ll likely need:
- Measuring Tape and Pencil: For accurate marking of your desired hole size.
- Safety Glasses: Always protect your eyes from wood dust and debris.
- Drill/Driver: Your primary power tool for most widening tasks.
- Clamps: To secure your workpiece firmly.
- Drill Bits: Various sizes, including spade bits or brad-point bits if starting fresh, and possibly bits slightly larger than the existing hole.
- Forstner Bits: Ideal for creating clean, flat-bottomed holes.
- Hole Saw: For cutting larger, precise diameter holes.
- Chisels: For carefully removing excess wood, especially around edges.
- Sandpaper: Various grits for smoothing the enlarged hole.
- Dust Mask: To protect your respiratory system from fine wood dust.
Safety First!
Woodworking, even for simple tasks like widening a hole, requires attention to safety. Always wear safety glasses to protect your eyes from flying debris. If you’re working with power tools, ensure your workpiece is securely clamped down to prevent it from moving unexpectedly. If working with saws or routers, tie back long hair and remove any loose clothing or jewelry that could get caught. Always read and understand the operating instructions for any power tool you use. For fine dust considerations, a dust mask is a smart addition to your safety gear.
Method 1: Enlarging with a Larger Drill Bit
This is often the simplest and quickest method, especially if you only need to slightly increase the diameter of an existing hole. It’s perfect for when a screw needs a bit more clearance or a dowel needs to fit more snugly.
Step-by-Step: Enlarging with a Drill Bit
- Mark the Desired Diameter: Using your measuring tape and pencil, lightly mark the maximum diameter you need the hole to be. This gives you a visual guide.
- Select the Right Bit: Choose a drill bit that is the exact size or just slightly larger than your target diameter. For instance, if your hole is 1/4 inch and you need it to be 3/8 inch, select a 3/8 inch drill bit.
- Position the Drill: Place the tip of the drill bit directly in the center of the existing hole. Ensure the drill is perpendicular (straight up and down) to the wood surface.
- Drill Slowly: Begin drilling at a slow, steady speed initially. This helps the bit to center itself and prevents it from ‘walking’ or drifting.
- Increase Speed (Carefully): Once the bit has started to cut, you can gradually increase the drill speed. Apply consistent, light pressure. Let the drill bit do the work.
- Drill Through: Continue drilling until you’ve gone completely through the wood.
- Smooth the Edges: After drilling, you may find some rough edges. Use sandpaper (starting with a coarser grit like 80 or 120 and moving to finer grits like 220) to smooth the inside of the hole. A dowel with sandpaper wrapped around it can be useful for this.
This method is excellent for general-purpose holes. However, it might leave a slightly uneven edge, especially if your existing hole isn’t perfectly round or if the drill bit isn’t razor-sharp.
Method 2: Using a Forstner Bit for Precision
Forstner bits are a craftsman’s best friend when it comes to creating clean, precise, flat-bottomed holes. They are ideal for widening existing holes when a perfectly smooth, clean edge is required. They drill a hole with a perfectly flat bottom, unlike twist bits or spade bits.
When to Use a Forstner Bit:
- When the hole needs to be very precise and perfectly round.
- When you need a flat bottom, such as for a mortise or a hinge.
- When working with hardwoods where clean cuts are essential for aesthetic and structural integrity.
- When widening existing holes for a cleaner finish than a standard drill bit can provide.
Step-by-Step: Widening with a Forstner Bit
- Measure and Mark: Determine the exact diameter of the hole you need. Forstner bits come in specific sizes, so select the one matching your requirement. Mark this diameter onto the wood if necessary, though you’ll be using the existing hole as your starting point.
- Secure the Workpiece: Ensure the wood is firmly clamped down. This prevents any wobbling and ensures a safe, accurate cut.
- Center the Forstner Bit: Place the pilot point of the Forstner bit precisely in the center of your existing hole. This is crucial for an accurate enlargement.
- Set the Drill: Mount the Forstner bit into your drill. Set your drill to a medium speed. Lower speeds often provide more control and a cleaner cut with Forstner bits, especially in harder woods.
- Start Drilling: Gently lower the bit to the wood. Let the pilot point engage and begin cutting. Apply steady, even pressure. You should see the spurs of the bit start to cut into the wood.
- Drill Through the Material: Continue drilling through the wood. It’s important to keep the drill straight and avoid tilting it to ensure a perfectly round enlargement.
- Clear Debris: Periodically lift the bit out of the hole to clear wood chips and dust. This helps prevent the bit from overheating and ensures a cleaner cut.
- Finish and Smooth: Once through, carefully remove the bit. You should have a clean, enlarged hole with a flat bottom. If there are any minor rough spots, carefully clean them up with a sharp chisel or sandpaper.
Forstner bits are an excellent choice for a professional finish. Their design allows for a cleaner cut than spade bits, minimizing tear-out and providing a precise, smooth edge. You can find a great overview of drill bit types and their uses on the Popular Mechanics Drill Bit Guide.
Method 3: Using a Hole Saw for Large Diameter Holes
When you need to create a significantly larger hole, or precisely enlarge an existing one to a specific large diameter, a hole saw is the tool of choice. Hole saws are essentially a cylindrical saw blade that attaches to your drill, designed for cutting large-diameter holes through various materials, including wood.
When to Use a Hole Saw:
- For creating large perfectly round holes.
- When you need to cut through thicker material precisely.
- For installations like doorknobs, plumbing fixtures, or speaker cutouts.
- To enlarge an existing hole to a much greater diameter cleanly.
Step-by-Step: Widening with a Hole Saw
- Choose the Right Hole Saw: Select a hole saw with the exact diameter you need. Hole saws come in many sizes, so ensure you have the correct one for your project.
- Attach to Arbor: Hole saws typically attach to an arbor, which is a shank that fits into your drill chuck. Make sure the hole saw is securely fastened to the arbor.
- Mark Your Target: If you’re enlarging an existing hole, you’ll use that as your starting point. If you’re creating a new large hole or significantly enlarging an existing one, use a compass to draw a circle of your desired diameter centered on the existing hole.
- Position the Drill: Place the pilot bit of the hole saw precisely in the center of the existing hole or your marked circle. Ensure the hole saw is sitting flat against the wood.
- Clamp the Wood: Securely clamp the wood to prevent it from spinning. This is critical for safety and for achieving an accurate cut.
- Set Drill Speed: Set your drill to a low to medium speed. High speeds can cause excessive heat and binding.
- Begin Cutting: Apply steady, firm pressure. Let the teeth of the hole saw do the cutting. Don’t force it.
- Clear Debris: Periodically pull the hole saw back slightly to allow sawdust to clear. This prevents clogging and overheating.
- Complete the Cut: Continue drilling until the hole saw has cut completely through the wood.
- Remove and Clean: Carefully remove the hole saw. You’ll often find a ‘plug’ of wood in the center of the hole saw. Eject this by unscrewing the arbor or using a screwdriver. Clean up any rough edges with sandpaper.
Hole saws provide very clean, precise holes. For best practices on using hole saws safely and effectively, especially for larger diameters, you can consult resources like This Old House’s guide to using a hole saw.
Method 4: Using a Chisel for Fine Adjustments
Sometimes, after using a drill bit or hole saw, the hole might be very close to the right size, but still a bit tight, or the edge might be slightly rough. In these cases, a sharp chisel can be your best friend for making those final, delicate adjustments.
When to Use a Chisel:
- For shaving off small amounts of wood to perfect the fit.
- To clean up rough edges left by drilling.
- To make minor enlargements to an irregular shape that a drill can’t access.
- When very precise, manual control is needed.
Step-by-Step: Refining with a Chisel
- Sharpen Your Chisel: A sharp chisel is crucial for safety and effectiveness. A dull chisel requires more force and is more likely to slip.
- Secure the Wood: Just like with any cutting operation, the wood must be securely clamped.
- Position the Chisel: Place the sharp edge of the chisel against the wood you want to remove. For widening, you’ll likely be working the edge of the existing hole.
- Pare Away Small Amounts: Instead of trying to take large chunks, use a paring action. Push the chisel forward with steady, controlled pressure to shave off very thin layers of wood.
- Work Incrementally: Gradually work your way around the hole, removing small amounts of material at a time. Regularly test your fit with the object that needs to go into the hole.
- Angle the Chisel: You may need to angle the chisel slightly to create a smooth, beveled edge inside the hole.
- Smooth with Sandpaper: Once you’ve achieved the desired size and shape, use sandpaper to smooth out any tool marks left by the chisel.
Using a chisel requires patience and practice. It’s a skill that adds a level of craftsmanship to your work. Remember that safety eyewear should always be worn when using a chisel.
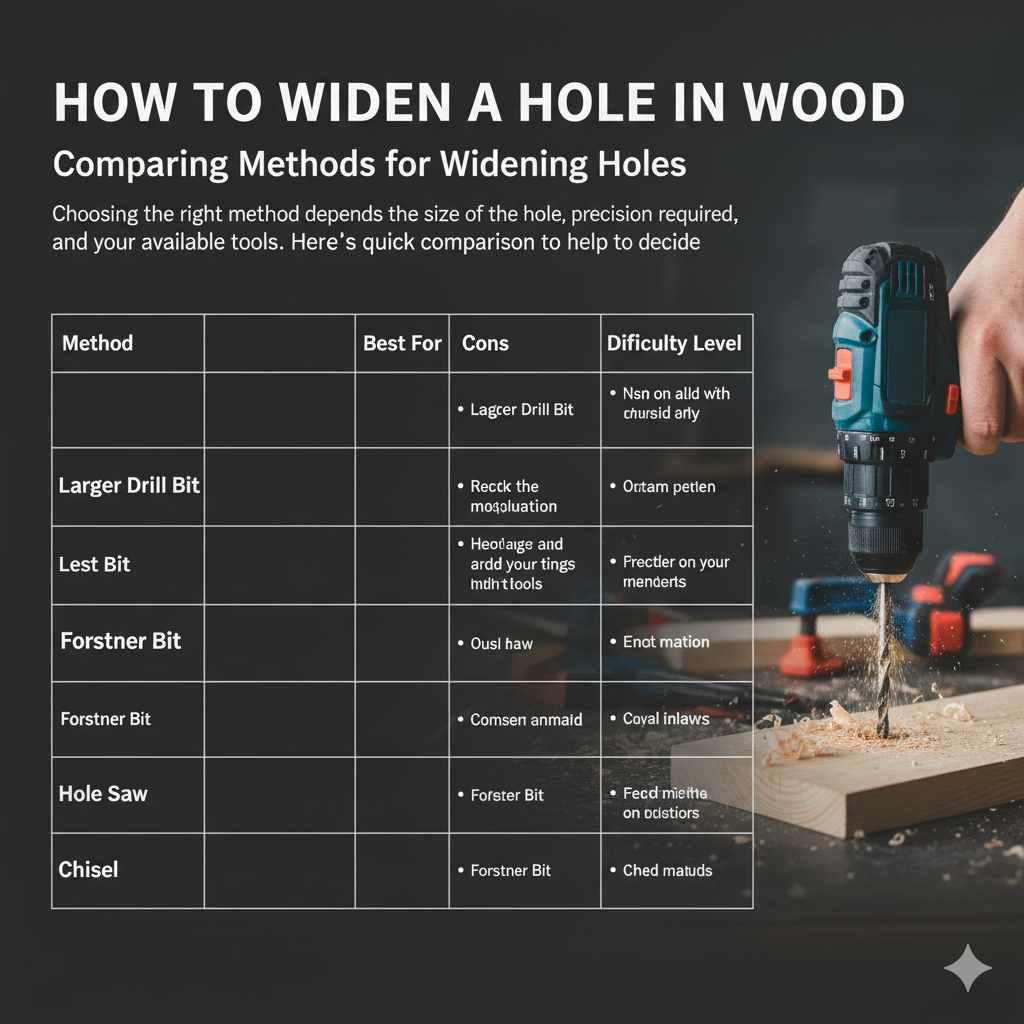
Comparing Methods for Widening Holes
Choosing the right method depends on the size of the hole, the precision required, and your available tools. Here’s a quick comparison to help you decide:
| Method | Best For | Pros | Cons | Difficulty Level |
|---|---|---|---|---|
| Larger Drill Bit | Slight enlargements, common screw/dowel holes | Fast, simple, readily available tools | Can leave a rough edge, prone to bit ‘walking’ | Beginner |
| Forstner Bit | Precise, clean, flat-bottomed holes | Very clean cuts, flat bottom, accurate sizing | Requires specific bit, can be slower than spade bits | Beginner to Intermediate |
| Hole Saw | Large diameter holes, precise cutouts | Clean, large diameter holes, fast for big sizes | Requires specific hole saw and arbor, can be powerful to control | Intermediate |
| Chisel | Fine adjustments, smoothing edges, small material removal | High precision for small adjustments, good for cleanup | Slow for significant enlargement, requires practice and sharp tool | Intermediate to Advanced |
Tips for a Professional Finish
Beyond the basic steps, a few extra tips can elevate your work from good to great:
- Use Sharp Tools: This is the golden rule of woodworking. Sharp bits and chisels cut cleanly, reduce effort, and improve safety.
- Go Slow: Especially when starting a cut or working with delicate wood, a slower speed gives you better control and a cleaner result.
- Clean as You Go: Regularly clear sawdust from the hole and your work area. This prevents dust buildup, which can affect the cut quality and tool performance.
- Support Your Workpiece Properly: A securely clamped workpiece is fundamental for both safety and accuracy.
- Practice on Scrap Wood: If you’re unsure about a method or a new tool, practice on a scrap piece of wood first. This helps you get a feel for the tool and the material.
- Sandpaper on a Dowel: For smoothing the inside of a hole, wrap sandpaper around a wooden dowel that fits snugly into your drill. High-speed sanding will help smooth the interior of the hole.
- Pilot Holes for Larger Bits: If you’re using a large Forstner bit or hole saw to enlarge an existing hole, it can be helpful to drill a small pilot hole in the center of your existing hole with a smaller bit. This helps guide the larger bit and keeps it centered.
Frequently Asked Questions (FAQ)
Q1: What is the easiest way to make a hole in wood slightly bigger?
The easiest way is usually to use a drill bit that is the next size up from your original hole. Simply center the larger bit in the existing hole and drill carefully through your material. Always wear safety glasses!
Q2: Can I widen a hole in wood without a drill?
Yes, you can, but it’s much more difficult and time-consuming. You could use a hand drill, a reamer tool, or carefully and patiently chip away at the wood with a sharp chisel. For significant widening, a drill is highly recommended.
Q3: How do I make a perfectly round hole larger?
For perfectly round holes, especially larger ones, a hole saw or a Forstner bit is your best bet. These tools are designed to cut precise circles. Ensure you select the correct diameter saw or bit for your desired size.
Q4: What if I accidentally drill a hole that’s too big?
If you drill a hole that’s too big, you can often repair it. For smaller holes, you can glue in a dowel or a wood plug, let it dry, and then sand it flush. You can then drill a new pilot hole in the repaired section. For larger issues, you might need to use wood filler or even a larger patch piece.