Raised panel door calculator: cut sizes and fit guide
Use a raised panel door calculator that starts with the cabinet opening, subtracts your reveal and hinge allowance, then sizes the panel about 1/8 in. smaller than the frame’s groove-to-groove opening so it can move with the seasons. Get it wrong and the door binds, gaps look uneven, or the panel splits. This guide shows the math for doors, drawer fronts, and wider openings, plus the fit tolerances and joinery choices that make the numbers work.
How is this calculated?
Press Calculate to see the math with your numbers.
What a raised panel door calculator must do


Door parts: rails, stiles, and panel
A raised-panel cabinet door is a 5-piece door: 2 rails, 2 stiles, and a panel. The calculator does not begin with those parts; it begins with the opening, then pushes that opening through your door style, reveal, and joinery settings. That order matters.
Enter the rail and stile width once as fixed inputs and reuse them across multiple door sizes on the same sheet. The same is true for interlock, if your spreadsheet uses it. Those values change the door math, but they do not change from one door to the next unless the design changes.
Which inputs stay fixed across a sheet
A practical sheet usually keeps stile width, rail width, overlay, clearance, gap-between-doors, interlock, groove depth, and expansion gap in dedicated cells. That keeps the door size calculation separate from the part-size calculation. It also makes it easier to batch several doors without retyping the same settings.
Where opening size enters the math
The opening size drives the final door size. Inset doors, lipped doors, partial overlay doors, and full overlay doors all begin with the cabinet opening, then add or subtract reveal and overlay allowances before the calculator computes rail length, stile length, and panel size. The panel is sized from the frame opening, not from the cabinet opening.
According to Raised Panel Cabinet Door Calculator – Inch Calculator — Raised-panel and flat-panel cabinet doors typically consist of 5 parts.
How do you calculate raised panel door dimensions?

Start with the cabinet opening, then apply the door style. Inset doors sit flush to the cabinet with a 1/16 inch gap around the edges. Lipped doors usually overlay the frame by 3/8 inch. Partial overlay doors often overlap the frame by 1/2 inch. Full overlay doors use the largest overlay in the design, with the exact amount set by the hardware and face-frame or frameless layout.
Start from the cabinet opening
- Measure the opening width and height at the cabinet, not at the door.
- Choose inset, lipped, partial overlay, or full overlay.
- Enter reveal or clearance and any gap-between-doors value.
- Calculate the final door size first.
- Split that size into stiles, rails, and panel.
That sequence avoids the common mistake of sizing parts first and hoping the door fits later. It also leaves room for install-day adjustment when the cabinet opening is out of square by a little bit.
Adjust for inset, lipped, partial overlay, or full overlay
Inset doors are the strictest fit because the door sits inside the opening. Overlay doors tolerate more cabinet variation, but the sheet still needs the opening size first. For a pair of doors, the calculator also needs the gap-between-doors input so the center reveal does not disappear.
Set the final door size before part sizes
Once the final door size is known, the rail and stile math becomes predictable. The frame size sets the visible boundary. The panel size follows the groove-to-groove opening and the movement allowance. That order keeps the cut list honest.

How do you size rails and stiles?
Use rail and stile width as a fixed input, entered once for the sheet. Then subtract the joinery allowance and any interlock or coping allowance from the final door width to get rail length, while stile length usually tracks the full door height with the rail deductions applied. Face-frame and frameless cabinets can use the same method, but the overlay and hinge reveal settings differ.
Rail and stile width as a fixed input
Many calculators treat stile width as a sheet-wide input because it is a design choice, not a per-door measurement. Rail width works the same way. If a kitchen uses 2-1/4 in. stiles and 2-1/4 in. rails, every door can share those dimensions unless the layout calls for arched pieces or special end panels.
Rail length from stile deductions and joinery
For a rectangular door, the rail length is driven by the final door width minus the two stile widths and any joinery allowance built into the joint. Stile length is driven by the final door height, then reduced by the rail interlock and the cope-and-stick geometry used in the shop.
Face-frame doors usually ride a reveal around the frame opening. Frameless doors often depend more heavily on hinge hardware and consistent overlay settings. The math is the same, but the input values are different.
How do you account for interlock in a raised panel door calculator?
Interlock is a fixed parameter entered once, and it changes how the calculator subtracts joint material from the finished door size. In spreadsheet calculators, interlock usually sits beside stile width and rail width because it affects the cope-and-stick fit on every door on the sheet. Set it wrong and the rails or stiles come out short.
What interlock changes in the formula
Interlock is part of the joinery geometry, not the cabinet opening. It affects how much of the rail end overlaps the stile shoulder and how much visible frame remains after assembly. The calculator has to account for that overlap so the finished door lands on size after glue-up and cleanup.
How spreadsheet calculators usually store it
A spreadsheet usually stores interlock in a single cell and references it in every door row. That keeps a batch of mixed sizes consistent. The same sheet can also hold one-panel and vertical split panel options, plus groove depth and expansion gap inputs for the panel.
When to test a sample door before cutting a batch
If the design uses a new profile, a different cutter head, or a different hinge reveal, test one sample door. A sample reveals whether the calculator’s interlock, groove depth, and reveal settings actually fit the hardware and cabinet. Batch cutting before that test is how a sheet becomes scrap fast.
Worked example: one door and one two-door opening
Below is a sample cut list using real dimensions for one shop setup. The numbers are not a universal standard; they are a concrete example of how the calculator can be used to size, cut, and check fit before any glue is applied.
Sample cut-list table for one door
| Item | Opening / setting | Final door size | Rail length | Stile length | Panel oversize | Clearance check | Groove depth check |
|---|---|---|---|---|---|---|---|
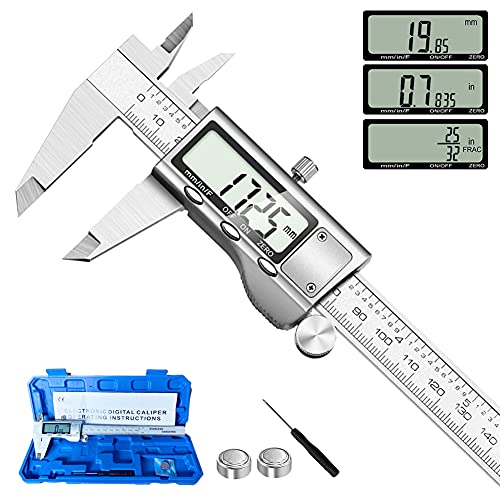
| Single inset door | Opening 18 in. W x 30 in. H; 1/16 in. edge gap; stile width 2-1/4 in.; rail width 2-1/4 in.; groove depth 3/8 in.; expansion gap 1/8 in. | 17-7/8 in. W x 29-7/8 in. H | 13-3/8 in. | 25-7/8 in. | 16-3/4 in. x 28-3/4 in. | Pass | Pass |
In this example, the panel is cut smaller than the frame opening by the movement allowance, then checked against the groove depth so the panel tongue can float without bottoming out. If the panel were sized to fit tight in the groove-to-groove opening, seasonal swelling could split the frame or bow the door.
Sample cut-list table for one two-door opening
| Item | Opening / setting | Final door size | Rail length | Stile length | Panel oversize | Clearance check | Groove depth check |
|---|---|---|---|---|---|---|---|
| Two partial-overlay doors | Opening 30 in. W x 24 in. H; 1/2 in. overlay; 1/8 in. gap-between-doors; stile width 2-1/4 in.; rail width 2-1/4 in.; groove depth 1/4 in.; expansion gap 1/8 in. | 30-7/8 in. W total x 24-1/2 in. H total | 10-3/4 in. each | 20-1/4 in. each | Per door: 12-1/2 in. x 21-1/4 in. | Pass | Pass |
Two doors are usually the cleaner answer for wider openings, and the calculator should let that choice be entered directly. The center gap is part of the math, not a guess at the bench.
Pass/fail checks for clearance and groove depth
If panel clearance is too tight, the panel cannot move when humidity changes. If groove depth is too shallow, the panel tongue can rattle, lose bearing, or leave less glue surface than intended at the edges. If groove depth is too deep, the rail and stile shoulders may look fine while the panel sits loose inside the frame.
How should the panel be sized for movement?
Solid wood panels need movement room on both width and height. Plywood is more stable and can be sized closer, while MDF is stable still but heavier and less tolerant of abuse. The calculator should treat panel oversize as a starting point, then subtract for the groove and the seasonal movement gap so the panel does not bind.
Solid wood versus plywood versus MDF
Solid wood panels move with humidity. That means the panel should not be trapped hard against the groove walls. Plywood panels move less, so the movement allowance can be smaller, but the edge treatment still needs enough room for assembly. MDF stays flatter, but it can chip and is less forgiving around the profile.
Panel oversize and final trim allowance
For a solid wood panel, cut it oversize, then sneak up on the final size by fitting the tongue into the groove after the frame is dry-assembled. The target is a light slip fit, not a press fit. If the panel is too large, the frame can bow during clamp-up.
What fails when the panel is too tight
A too-tight panel often shows up as a door that sounds solid on the bench but moves badly in the cabinet. In hot weather the panel can swell, push the frame apart, and telegraph stress at the joints. In a dry season the same panel may rattle because the fit was forced instead of planned.
What about drawer fronts, drawer boxes, and arched parts?
The same sheet can handle drawer fronts too, but drawer boxes need separate size inputs because their dimensions follow slide hardware and clearance, not door reveals. Arched doors or end panels may need different top and bottom piece widths, so the calculator should treat them as a separate layout, not a straight door with a curved top.
Using the same sheet for drawer fronts
Drawer fronts often follow the same opening-driven logic as doors. The difference is that the front may have its own reveal, overlay, and pull location. A calculator that already handles door width and height can usually calculate drawer fronts on the same sheet with separate rows.
Why drawer boxes need separate inputs
Drawer boxes are not door frames. Their width, height, and depth depend on the slide system, internal cabinet space, and the front thickness. Put those values in separate inputs so the door math does not contaminate the box math.
When arched doors or end panels need different top and bottom widths
Arched doors and arched end panels often change the top rail or top panel condition, so the calculator may need separate top and bottom piece widths. A straight-door sheet can get close, but the top curve usually changes the actual cut list. Treat those parts as a special case.
Frequently asked questions
What is a raised panel door
A raised panel door is a 5-piece cabinet door made from 2 rails, 2 stiles, and a panel. The frame holds the shape, while the panel fills the center and is allowed to move within the grooves. That structure is why the panel size cannot be treated like a fixed sheet part.
How do I size raised panel door rails and stiles
Start with a fixed rail and stile width, then calculate rail length from the final door width and stile deductions, while stile length follows the final door height with the rail joinery subtracted. The exact numbers depend on your interlock, overlay, and reveal settings.
Can one calculator handle multiple door sizes on one sheet
Yes. That is one of the better uses for a spreadsheet calculator. Keep stile width, rail width, interlock, overlay, clearance, and gap-between-doors in fixed cells, then enter each opening size in its own row. That makes mixed-size door runs much easier to batch.
What does the raised panel door calculator over the dishwasher box mean
It usually means the door opening above the dishwasher is being entered into the calculator as a separate cabinet opening. That area often has its own reveal and hardware constraints, so the door size should be calculated from that specific opening rather than copied from adjacent cabinets.
Sponsored / affiliate links. As an Amazon Associate I earn from qualifying purchases. I may earn additional commission from eligible campaigns.