Refinishing Prefinished Hardwood Floors: A Simple Guide
Thinking about updating your floors? Many people wonder, “Can You Refinish Prefinished Hardwood?” It’s a popular question, and you’re not alone if you feel a little unsure. The good news is, you can often refresh these floors, even though they come with a factory finish. This process can seem tricky at first, but with a few simple steps, you can bring new life to your space. We’ll explore the whole process step-by-step so you can make an informed decision and potentially DIY your floor refresh. Get ready to explore the options and get the details!
What Is Prefinished Hardwood?
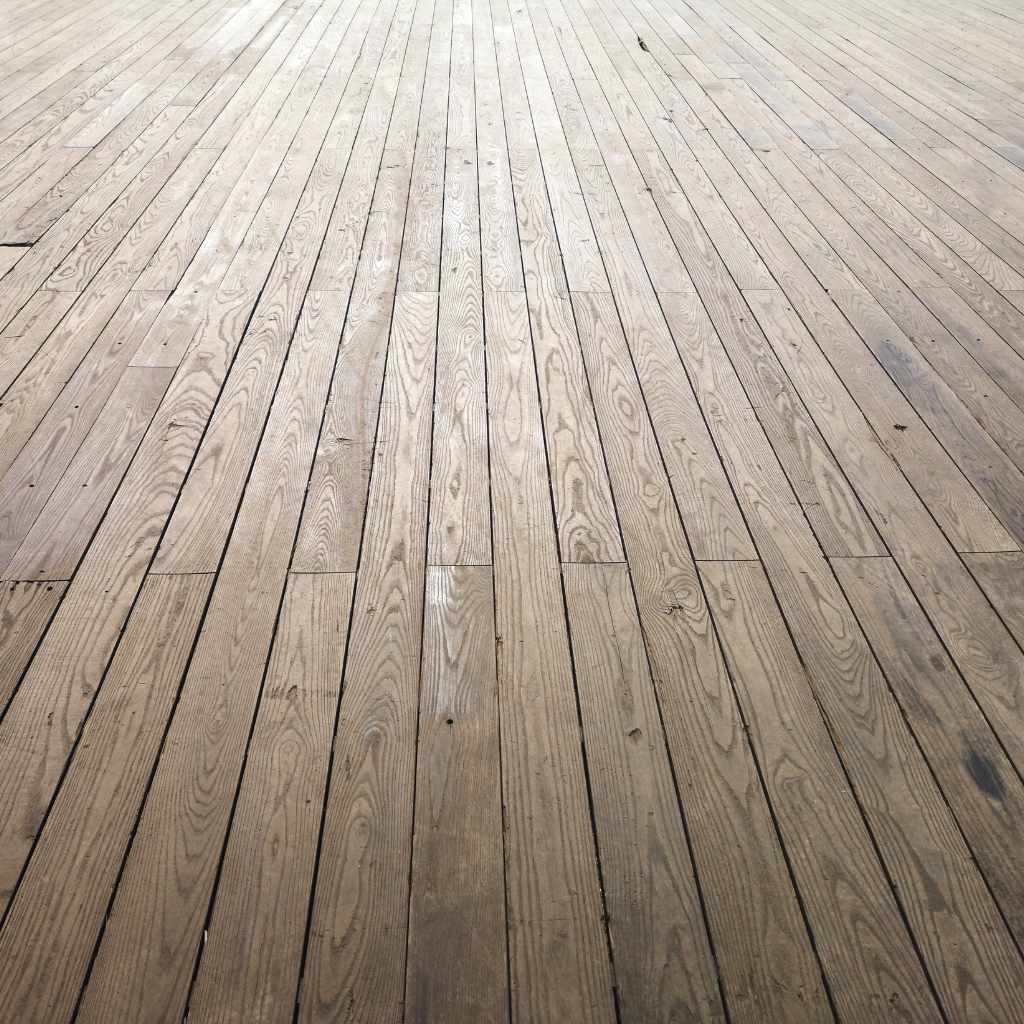
Prefinished hardwood floors are a popular option for many homes because they are ready to install straight out of the box. Unlike traditional unfinished floors, which require sanding and finishing on-site, prefinished floors have already had this process done at the factory. This can save time and effort during installation, as well as reduce mess. The finish is applied in a controlled environment, resulting in a durable and consistent surface. Prefinished hardwood is known for its durability and resistance to wear and tear. This is because the factory finish is usually cured with UV light or another method that creates a hard, protective layer. Because the finish is cured at the factory, it offers better scratch resistance than what’s often achieved with on-site finishing.
The manufacturing process of prefinished hardwood usually involves several layers of coating. These layers often include a stain, a base coat, and multiple topcoats. The topcoats are usually a polyurethane or other protective finish. This ensures the floor is ready to withstand foot traffic and other common household activities. The result is a floor that can handle daily wear and tear. One of the main benefits is the wide variety of styles and finishes available. Homeowners can choose from different wood species, colors, and textures. The choices range from traditional to modern looks. Prefinished hardwood is also generally easier to maintain than unfinished wood, often only requiring regular sweeping and occasional mopping.
Advantages of Prefinished Hardwood Floors
Prefinished hardwood has become a go-to choice for homeowners seeking a beautiful, durable, and relatively easy-to-install flooring solution. The process is a favorite, thanks to a few important upsides.
Speed of Installation: Prefinished floors skip the sanding and finishing on-site. This significantly shortens the time it takes to install the flooring, allowing you to enjoy your new floors sooner. This is a game changer for DIY projects and renovation schedules.
Because the finishing process is completed at the factory, there is no need to wait for the finish to dry. The flooring can be walked on almost immediately after installation. This is a big win compared to unfinished floors, which can take several days to dry and cure.
Consistent Finish Quality: The factory setting offers precise control over the finishing process. This ensures the finish is even, smooth, and consistent across all planks. This means no streaks, drips, or inconsistencies that can sometimes occur with on-site finishes.
The controlled environment prevents dust, debris, and other issues that could affect the finish quality. This gives you a more professional and durable look. The controlled environment also allows for more consistent application of the stain and topcoats, ensuring a uniform appearance across your floor.
Durability and Scratch Resistance: Factory-applied finishes are often more durable and scratch-resistant. This is because the finish is usually cured with UV light or a similar method. This creates a harder, more resilient surface. This increased durability is vital in high-traffic areas.
Prefinished floors are often better at withstanding scratches, dents, and other damage. This makes them a great choice for families with kids or pets. The tough finish also helps protect the wood from moisture and spills, extending the floor’s life.
Variety of Styles and Finishes: Prefinished floors come in a wide range of wood species, colors, textures, and finishes. Whether you are looking for a classic look or a modern design, you can find a prefinished option that fits your taste. The variety makes it easier to find the perfect match for your home décor.
This allows homeowners to select from different types of wood, such as oak, maple, or hickory, each with its unique grain patterns and characteristics. There are also many colors and finishes available, ranging from natural stains to deep, rich hues. You can explore many styles without worrying about the on-site work.
Checking Your Prefinished Hardwood for Refinishing
Before jumping into a refinishing project, it’s key to figure out if your prefinished hardwood is a good candidate. The ability to refresh your floors depends on a few factors, mainly the type of finish and the overall condition of the wood. A simple inspection can tell you a lot about whether it is possible. You will also learn whether a full refinish is required or if a light buffing and recoating will work.
Carefully look at the surface of your floors. Look for signs of wear and tear, such as scratches, dents, and dull spots. Take notes of where the damage is heaviest. A floor that shows surface scratches and light wear may be ideal for a simple recoating. Deep scratches and areas where the finish has worn through might mean that sanding and refinishing are necessary. Consider the thickness of your hardwood. A thick wear layer is key for multiple refinishes. If the wood has a thin top layer, you might only get one shot at refinishing. A professional can help you assess the remaining wear layer.
Identifying the Finish Type
Understanding the type of finish on your prefinished hardwood is the first step in deciding the refinishing strategy. Knowing the finish helps you know what materials and techniques to use. This can impact the results and ensure the long life of your floor.
Polyurethane Finishes: Polyurethane is a very common finish for prefinished floors. These finishes provide excellent protection against wear, scratches, and water damage. There are two main types: oil-based and water-based polyurethane. Oil-based finishes are known for their rich, amber tones and great durability. They take longer to dry and have a strong odor. Water-based finishes dry faster and have a clearer appearance. They are also less smelly. Many prefinished floors use aluminum oxide or other additives in the topcoat to make them even more resistant to scratches.
If you see a shiny surface with good protection, it may be polyurethane. You can often recoat these floors without sanding, depending on their condition. Make sure to choose a recoat product that is compatible with the existing finish.
Aluminum Oxide Finishes: Many prefinished hardwood floors include aluminum oxide in their topcoats. This additive makes the finish much harder and more scratch-resistant. These floors are often very durable. It is more challenging to refinish floors with aluminum oxide because the finish is so hard. Specialized sanding techniques and equipment may be needed to prepare the floor for refinishing.
If your floor looks very tough and has a high degree of scratch resistance, aluminum oxide is likely a part of the finish. Assess the condition carefully because sanding might be the only option for heavy wear. Even when it is time to sand, it is important to choose the right products and techniques to ensure the best results.
Acrylic Finishes: Acrylic finishes are another type, known for their clarity and resistance to yellowing. They are often water-based and can provide a durable and attractive surface. Acrylic finishes are generally less common than polyurethane, but they can still be found.
Look for floors that have a clear, non-yellowing appearance. If your floors have this type of finish, recoating may be an option, but it’s important to use compatible products. Consult a flooring expert for the best recommendations.
Testing Your Floor
Before you start any refinishing process, doing a few tests will help you determine the right approach. These tests help figure out the existing finish’s properties and the degree of wear. The testing provides key information, helping you choose the best methods and products to refresh your floors.
- The Water Drop Test: This is a very simple test to see if the finish is still intact and can repel water. Place a few drops of water on your floor, and let them sit for a few minutes. If the water beads up and doesn’t soak into the wood, the finish is still effective. If the water starts to absorb into the wood, the finish has worn through, and the floor may need sanding and refinishing.This test reveals the integrity of the finish. If the water does not penetrate the surface, the finish is likely still protecting the wood. If it does penetrate, it means the topcoat is compromised. This test can tell you a lot about what you should do next.
- The Scratch Test: Look for scratches and damage. Use a coin or a similar object and lightly scratch a small, inconspicuous area. Pay attention to how easily the finish scratches and if the wood underneath is exposed. This test helps assess the floor’s overall condition and whether spot repairs or more extensive work is needed.The scratch test helps reveal how well your finish resists wear. If it scratches easily, it can indicate that the topcoat is worn and that sanding and refinishing might be needed. If the finish resists scratching, the floor may be a good candidate for a simple buff and recoat.
- Adhesion Test: The adhesion test is useful to determine how well the existing finish adheres to the wood. You can use a small piece of painter’s tape and press it firmly onto the floor. Quickly pull it off. If the tape comes away clean, the finish is adhered well. If the tape pulls up pieces of the finish, the floor may have adhesion issues, which can affect the refinishing process.Adhesion issues can be caused by contamination on the floor or the age of the finish. Resolving these issues is important for any refinishing project. You may need to clean the floor thoroughly or use a primer to help the new finish stick.
Refinishing Options: Buff and Recoat vs. Full Sanding
Once you’ve checked your prefinished hardwood, you’ll need to decide which refinishing option suits your floors. You can choose from buffing and recoating, which is for lighter wear, or full sanding and refinishing, which is for more serious damage. Each option has its own steps, benefits, and costs. Knowing the difference between them will help you make the right choice to keep your floors looking their best.
The decision depends heavily on the condition of your floor and the type of finish it has. A simple buff and recoat can refresh a floor with minor scratches and surface wear. Full sanding and refinishing is needed when the damage is more extensive. This involves removing the old finish and applying a new one. The best choice depends on what your floors look like and how much effort you want to put in.
Buff and Recoat Process
A buff and recoat is a less intensive approach to refinishing prefinished hardwood. This method is best when the floors have light surface scratches or have lost their shine. It can refresh the floor’s appearance and protect it. The process is much quicker and less messy than a complete sand and refinish.
- Prepare the Area: Start by removing all furniture and items from the room. Clean the floors thoroughly. You can use a vacuum cleaner with a soft brush attachment and a damp mop to remove any dust and debris. If you have any stubborn stains or sticky spots, you can use a floor cleaner. The goal is a clean and clear surface to work with.Before you begin, make sure to ventilate the space to help with air quality, since you will be working with chemicals. Cover any adjacent areas to keep them safe from dust or chemical spills.
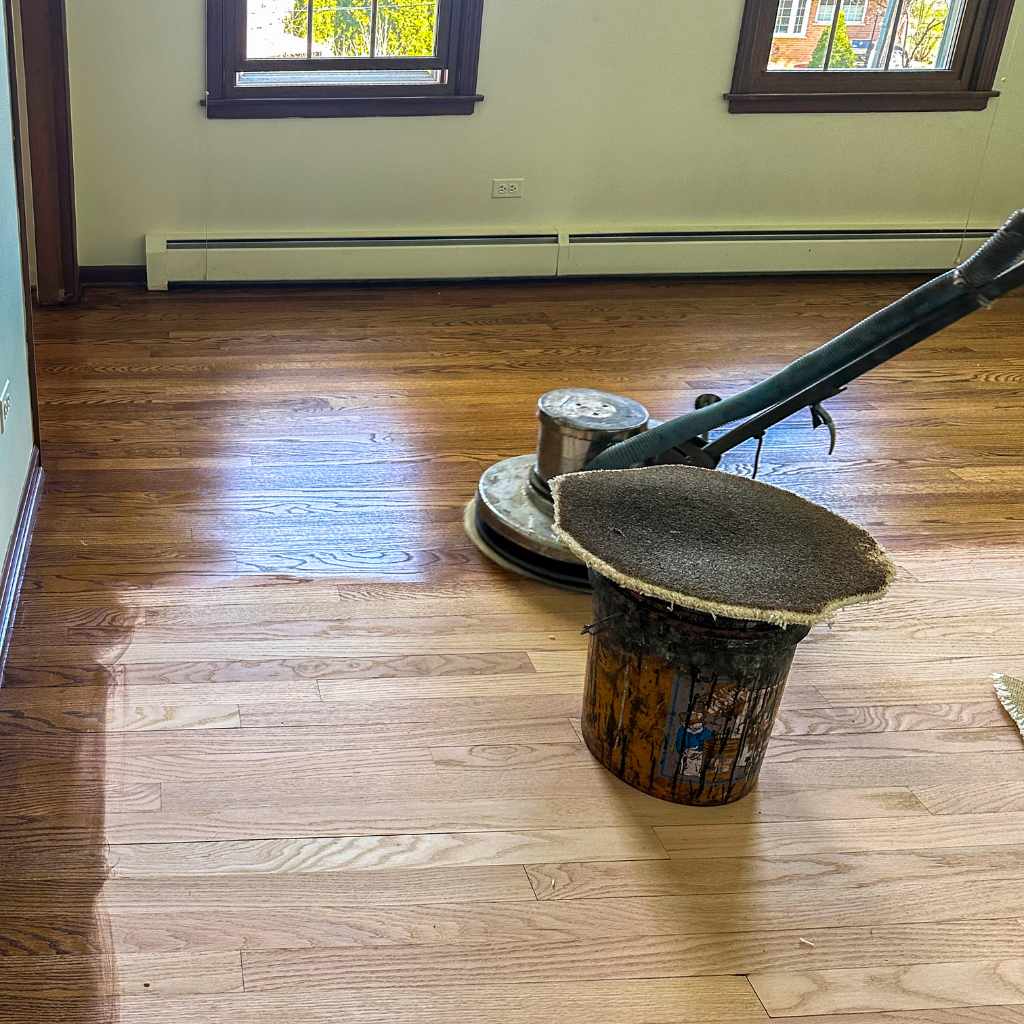
- Buff the Floor: Use a floor buffer with a fine abrasive pad to lightly scuff the surface of the existing finish. This step helps to roughen up the surface, improving adhesion for the new coat of finish. Make sure to work in the same direction, using overlapping passes to ensure uniform results.A floor buffer is a rotating machine with a pad that gently abrades the finish. The right abrasive pad is key to avoiding deep scratches and damaging the existing finish. Always follow the manufacturer’s instructions and wear appropriate safety gear.
- Clean Up: After buffing, thoroughly vacuum the entire floor to remove all dust and particles. Any dust left behind will affect the finish. Wipe down the floor with a tack cloth to capture any remaining dust. This step is critical for ensuring a smooth, clean surface for the new finish.Dust can settle into the finish and create imperfections. A tack cloth is a sticky cloth designed to trap and remove any remaining particles. Be sure to use a clean tack cloth and replace it as soon as it becomes dirty.
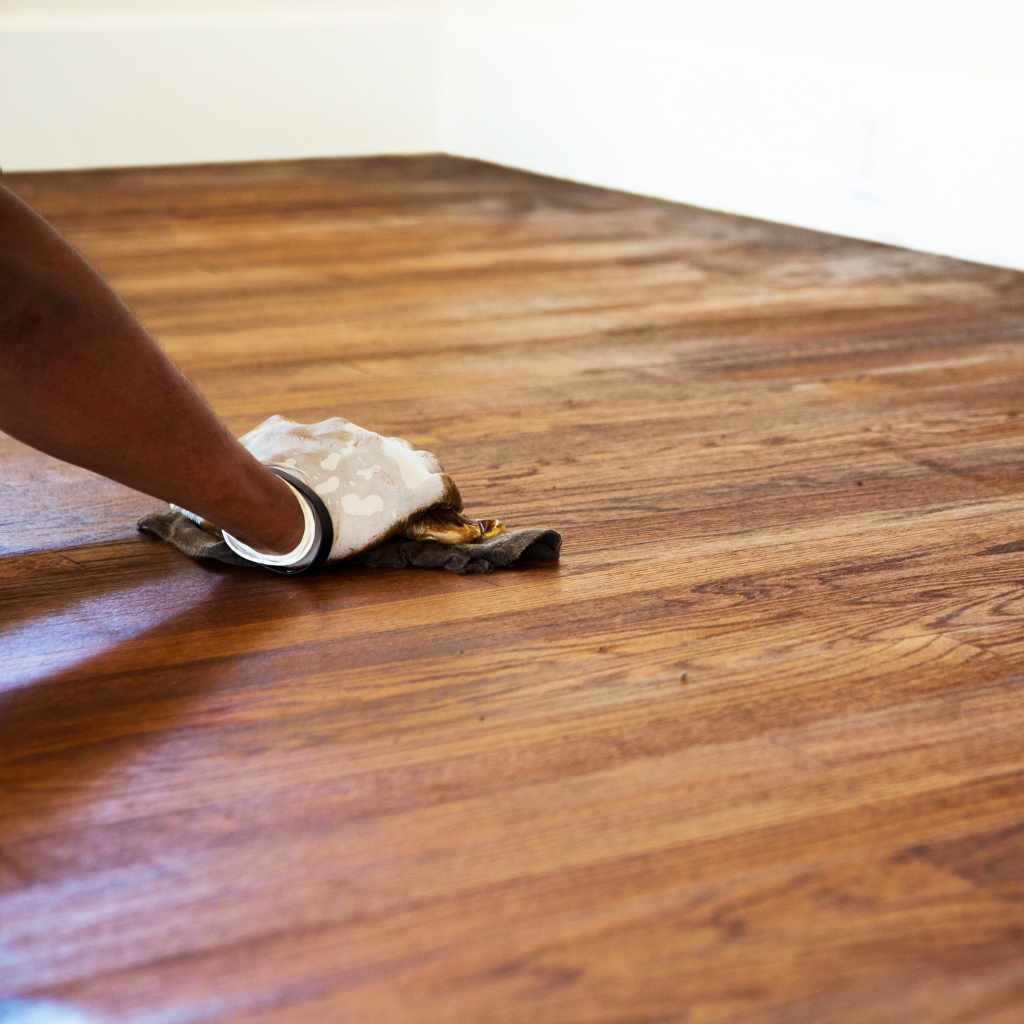
- Apply the New Finish: Choose a finish that is compatible with your existing finish. Apply the new coat using a brush or a pad applicator. Work in the direction of the wood grain, applying thin, even coats to avoid drips or puddles.Always follow the manufacturer’s instructions for the finish you are using. Apply the finish in a well-ventilated area and avoid walking on the floor until it’s completely dry. Allow ample drying time between coats for the best results. Generally, two coats of finish are required.
Full Sanding and Refinishing Procedure
Full sanding and refinishing is a more involved process. This is the best approach when the floors have deep scratches, significant wear, or have been damaged. This process involves removing the old finish, sanding the wood, and applying a new finish. This can give your floors a complete makeover, restoring their beauty and durability.
- Area Preparation: Clear the room completely. Remove all furniture, curtains, and anything else. Protect surrounding areas with plastic sheeting and tape. This helps stop dust and debris from getting into other areas of your home. Proper preparation is very important in this more extensive process.Clean the area thoroughly, paying attention to the edges and corners where dust might collect. Adequate ventilation is also key because sanding can create a lot of dust, and the finishes can have strong odors.
- Sanding the Floor: Use a drum sander or orbital sander with progressively finer grits of sandpaper to remove the old finish and any imperfections. Start with a coarse grit to remove the old finish, then work your way up to a finer grit to smooth the wood. Make sure to sand with the wood grain. This step will remove the old finish.Sanding is the most important part of this process. It removes the old finish and gets the wood ready for the new finish. Be sure to overlap each pass slightly to ensure an even surface. If you are not familiar with this, consider hiring a pro.
- Cleaning the Surface: After each sanding pass, thoroughly vacuum the floor. Use a tack cloth to remove any remaining dust particles. Dust and debris left behind can cause imperfections in the finish. Cleaning the surface is a crucial step to preparing for the new finish.This cleaning step is critical. Even small particles of dust can ruin the look of your newly refinished floor. Pay close attention to corners and edges, where dust tends to accumulate.
- Applying the Finish: Once the floor is sanded and cleaned, it is time to apply the new finish. Choose a finish that suits your needs. Apply thin, even coats, following the manufacturer’s directions. Give the finish enough time to dry between coats. Two or three coats are often needed for durability.Use a brush or pad applicator, working in the direction of the wood grain. Make sure the room is well-ventilated and that you are wearing the necessary safety gear. Waiting for the recommended drying time between coats is very important to make sure the finish hardens properly.
| Feature | Buff and Recoat | Sand and Refinish |
|---|---|---|
| Damage Type | Light surface scratches, loss of shine | Deep scratches, significant wear, damage |
| Process | Buffing the surface, cleaning, recoating | Sanding to remove old finish, cleaning, applying new finish |
| Effort | Less intensive, quicker | More labor-intensive, takes more time |
| Cost | Lower | Higher |
| Results | Refreshes and protects the floor’s appearance | Restores the floor’s beauty and durability |
What Kind of Finish Should You Use?
Choosing the right finish is key to the beauty and durability of your refinished prefinished hardwood floor. The market offers a few options, each with unique features that make them suited for different applications. Knowing these options and the benefits of each can help you choose the best product for your project.
The type of finish you choose affects the look, feel, and protection of your floors. There are many options, from traditional oil-based polyurethane to modern water-based finishes. Each finish type offers its own set of advantages, from durability and scratch resistance to ease of application and environmental impact. Choose wisely based on your needs and preferences.
Water-Based Polyurethane
Water-based polyurethane is a very popular choice for refinishing hardwood floors. These finishes have improved a lot and offer a great balance of performance, ease of use, and environmental friendliness. They are known for their low odor and quick drying times. The finish is clear, which means it enhances the natural beauty of the wood without adding any yellowing. This makes water-based polyurethane great for lighter wood species and stained floors, where you want to keep the original color.
Low Odor: Water-based polyurethanes produce very few fumes, making the refinishing process more comfortable. This is a plus for homeowners who want to reduce the smell and avoid strong chemical odors in their homes. This is also safer for people who have health issues.
This greatly improves the work environment, allowing for better air quality and a more pleasant experience. Low-odor finishes are also more suitable for homes where people with allergies or asthma live.
Fast Drying Times: Water-based finishes dry quickly, often within a few hours, which cuts down on the overall project time. This is a big advantage over traditional oil-based finishes, which can take days to dry. This makes the project quicker.
Because the finish dries quickly, you can apply multiple coats in a single day, speeding up the entire refinishing process. You can use your floors more quickly as well.
Clear Appearance: Water-based finishes stay clear and do not yellow over time. This helps to show off the natural color of your wood. They do not add the amber tone seen with oil-based finishes. This is a great choice if you want to keep the floor’s original color.
This clear finish is especially good for lighter-colored wood species. You can apply water-based polyurethane to protect and enhance the beauty of your floors. It is a good choice for people looking for a modern aesthetic.
Durability: Modern water-based polyurethanes offer good durability and resistance to scratches and wear. They are tough enough to handle everyday foot traffic. The technology has advanced a lot.
While water-based finishes are not as tough as some oil-based options, the advancements mean they can be a great choice for areas with high use. They provide excellent protection for your floors and can last for many years. Many water-based polyurethanes include additives that improve durability.
Oil-Based Polyurethane
Oil-based polyurethane is a traditional finish that has been used for years to protect and beautify hardwood floors. Oil-based finishes are known for their durability and warm, amber appearance. They provide a strong, protective coating that resists scratches, dents, and wear. They are a good choice for areas with heavy foot traffic.
Warm, Amber Tone: Oil-based polyurethane gives wood a warm, amber color that enhances the beauty of the grain. This can give a classic, rich look. This adds depth and character to the wood.
The amber color comes from the natural oils in the finish, which interact with the wood over time. This can add a traditional look. This is a good choice if you like a classic style.
High Durability: Oil-based finishes are very durable and resistant to scratches and wear. They provide a strong layer of protection against daily use and the damage of foot traffic. This finish is suitable for high-traffic areas.
The durability of oil-based polyurethane makes it suitable for areas of your home that see heavy use, such as entryways, living rooms, and hallways. The finish is also good for keeping the floors in good shape for a long time.
Longer Drying Time: Oil-based finishes take longer to dry. This can be seen as an advantage because it allows for more time for the finish to level. You must have time to wait for the finish to cure completely.
The longer drying time means that you must plan extra time to complete the project, allowing the finish to cure completely before allowing traffic on the floor. However, the wait can be worth it for the long-term benefits of a durable finish. Oil-based products can take up to several days before it is fully cured.
Strong Odor: Oil-based polyurethane has a strong odor during application and drying. This is because of the solvents in the finish. It is very important to use a well-ventilated space when applying this product.
Ventilation is key, and it is a good idea to consider wearing a respirator to protect yourself from fumes. The odor will disappear as the finish dries, but it can be very strong. It may be necessary to leave the room for a couple of days while the finish dries.
Hybrid Finishes
Hybrid finishes blend the best properties of both water-based and oil-based polyurethane finishes. Hybrid options try to offer the durability and amber tone of oil-based products with the low odor and quick drying times of water-based products. These hybrid finishes are a nice choice if you want both types of finishes. Hybrid finishes give you a good compromise.
Combines Properties: Hybrid finishes combine the benefits of both oil-based and water-based formulas. They offer a balance of hardness, durability, and a warm tone. This makes them a strong option for homeowners wanting the benefits of both types of finishes.
This combination gives a balance of durability and beauty, as well as easier application and reduced odors. It’s a good choice if you’re not sure which type of finish is right for you. They help you get the best of both worlds.
Varied Durability Levels: The durability of hybrid finishes can vary. Some products lean more towards the oil-based side, offering greater scratch resistance, while others emphasize the low odor and fast drying times of water-based products. You can find options.
This allows you to select a product that best suits your needs and the specific conditions of your project. If high-traffic areas are important, you may want to focus on durability. If faster drying times and better air quality are vital, you should explore those features.
Moderate Odor: Hybrid finishes generally have a lower odor than traditional oil-based polyurethane, but they may still have a stronger smell than water-based products. Proper ventilation is still important when using these finishes.
The reduced odor makes these finishes more user-friendly. Always work in a ventilated area, even if the odor is lower. This will ensure air quality.
Easy Application: Hybrid finishes are often easy to apply. They usually dry quickly and spread well, reducing the risk of streaks or unevenness. This makes them suitable for DIY projects.
This eases the refinishing process. If you want to do the project yourself, a hybrid product can be a good choice. Always follow the manufacturer’s directions.
DIY vs. Professional Refinishing
Deciding if you should tackle the refinishing yourself or call a pro is an important step. DIY can be a good way to save money and take control. Hiring a professional offers experience and guarantees a great result. Think about your skills, budget, and how much time you have. Both options have their upsides and downsides.
Your choice depends on a few factors. If you are good at DIY projects and have time, you might like doing it yourself. Hiring a pro is a good idea if you are not experienced, if you are looking for a flawless result, or if you want to avoid the potential issues. Choosing the right option is key to having a successful project.
DIY Refinishing
DIY refinishing can be a good way to refresh your floors and save money. It allows you to control the project and learn new skills. This option does require effort, time, and attention to detail. This also means you are responsible for any issues that may arise.
- Cost Savings: One of the main benefits of DIY is the cost savings. You avoid paying for labor costs, which can be a huge part of the overall cost. You will save money. You only need to buy the materials and any equipment you need to rent.This can make the whole project more affordable, especially if your budget is tight. The savings can be significant. This will make your project a good idea.
- Control: Doing it yourself gives you full control over every step of the project. You choose the materials, methods, and schedule. You can make decisions. You can change your approach if you want to.You can adjust the work to fit your pace and preferences. You can also focus on parts of the project that you care about. If you like to have control over details, DIY can be a great choice.
- Learning Experience: DIY projects can be a great learning opportunity. You can discover how your floors work and learn valuable skills. You may also get to enjoy the satisfaction of completing the project yourself.Refinishing floors is a rewarding project. The knowledge and skills you get can be useful for any future home improvements. If you want to expand your skills, doing it yourself is a good choice.
- Time Commitment: Refinishing floors is a time-consuming process. It includes area preparation, sanding, cleaning, and applying multiple coats of finish. Doing it yourself means that the project will take up a lot of your time.Schedules can be hard to predict. This can be more difficult if you are working around a busy lifestyle. Make sure you plan your schedule to account for the time it will take and the drying periods needed.
Hiring a Professional
Hiring a professional flooring contractor is a good option. They have the experience, tools, and expertise to ensure your floors are finished to a high standard. They can provide quality work and avoid potential problems. Professional services often cost more, but the benefits can be worth it.
- Expertise and Skill: Professionals have lots of experience refinishing floors. They know the correct methods, materials, and techniques. They can deal with issues that may come up. They ensure a beautiful result.Experienced contractors have refinished many floors. They know how to address problems that might arise, and they can make sure the results are amazing. If you want to make sure the work is done properly, this is a great choice.
- Access to Equipment: Professionals have access to all the tools and equipment needed, including drum sanders, orbital sanders, and dust containment systems. You do not need to purchase or rent this equipment yourself. This saves time and expense.High-quality tools ensure a better result and quicker work. If you have the right tools, you will be able to do your project well.
- Time Savings: Professionals can complete the job much faster than you can. They are experienced and efficient. This will save you a lot of time and effort.This means your project will be done quicker, and you will have fewer interruptions to your daily routine. Professionals will finish the work much faster. This will prevent any delays.
- Higher Costs: Hiring a professional costs more than doing it yourself. You are paying for their expertise, experience, and labor. This can affect your budget.The cost is higher, but you get quality and peace of mind. Consider the quality and speed you get when evaluating the costs. Make sure your budget can handle the professional cost.
Can You Refinish Prefinished Hardwood? Final Considerations
Refinishing prefinished hardwood can be a good way to give your floors a makeover. You need to know what to expect and make smart decisions. The success of the project hinges on your preparation and understanding.
Taking the time to plan and think about the details will help you know if refinishing is a good idea. Doing this will let you evaluate the condition of your floor and choose the right methods and products. Doing so can help you make a decision that can make your floors look amazing.
Frequently Asked Questions
Question: What is the best way to clean prefinished hardwood floors before refinishing?
Answer: Before refinishing, clean your prefinished hardwood floors thoroughly. Remove any furniture, vacuum with a soft brush, and mop with a wood floor cleaner. Ensure the floors are free of dust, debris, and any sticky residues. Cleaning allows for better adhesion of the new finish.
Question: Can I sand and refinish prefinished hardwood myself?
Answer: Yes, you can sand and refinish prefinished hardwood yourself, but it is a complex project. It requires skill, proper equipment, and careful attention to detail. If you are not familiar with sanding, it is best to hire a professional.
Question: How many coats of finish do I need to apply when refinishing prefinished hardwood?
Answer: Usually, two to three coats of finish are needed when refinishing prefinished hardwood. The specific number of coats will depend on the product you choose. Be sure to follow the product manufacturer’s directions for the best outcome.
Question: What safety precautions should I take when refinishing hardwood floors?
Answer: Make sure to wear personal protective equipment, including a dust mask or respirator, eye protection, and gloves, when refinishing hardwood floors. Ensure the area is well-ventilated to reduce fumes. Following safety precautions is vital for safety.
Question: How often should I refinish my prefinished hardwood floors?
Answer: The frequency of refinishing depends on wear and tear. A simple buff and recoat can be done every 3-5 years. If the floors are heavily used, or if you have deep scratches, it might be necessary to sand and refinish them every 10-15 years, or more often depending on use.
Final Thoughts
Refinishing prefinished hardwood can be an excellent way to renew the look of your floors. You have explored the steps, from checking your floor’s condition to choosing the right products, such as water-based polyurethane, oil-based options, and even hybrid finishes. You have learned how to evaluate your floor to see if a simple buff and recoat or a full sanding and refinishing is the best route. The key to a great outcome is careful planning, preparation, and knowing the pros and cons of doing it yourself versus hiring a pro. Always remember to prioritize safety and pick products that fit your needs and preferences. Start now, gather your supplies, and make your flooring project a success!