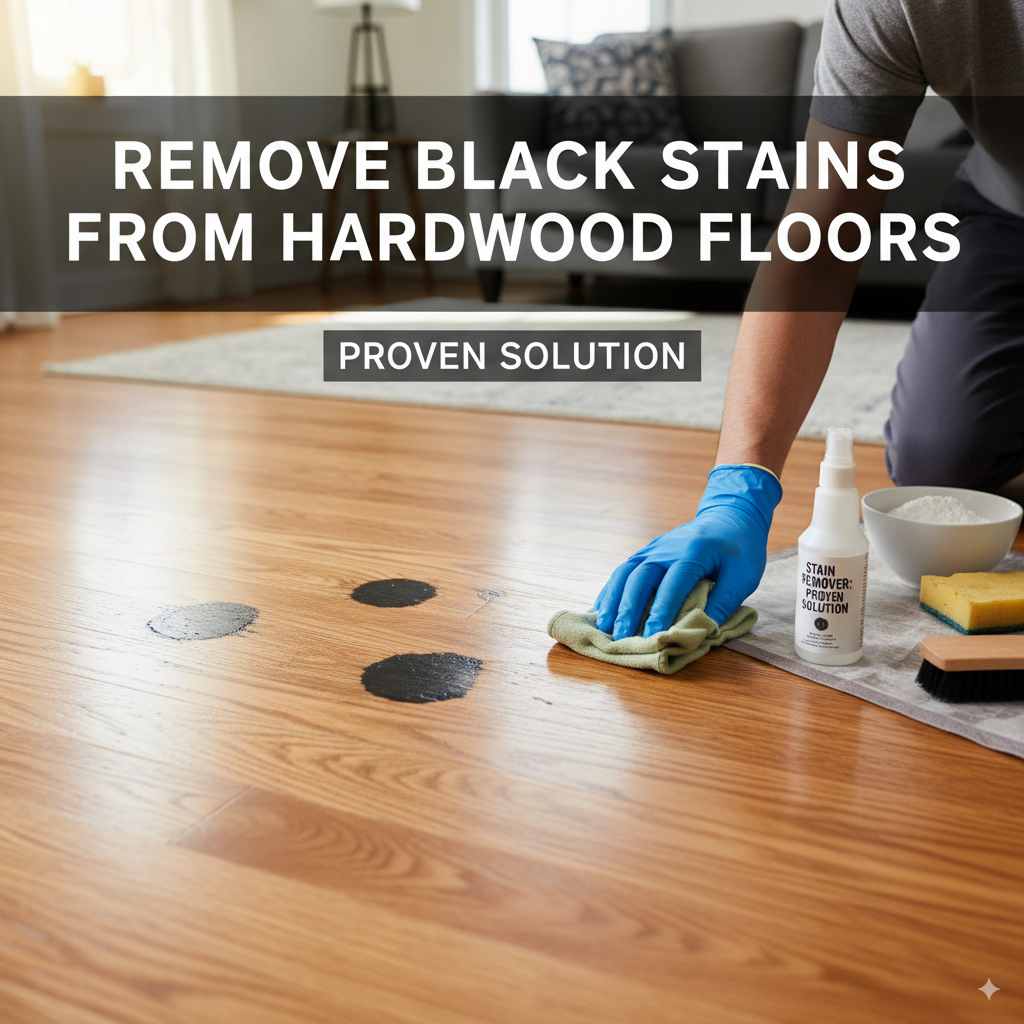
Remove Black Stains From Hardwood Floors: Proven Solution
To remove black stains from hardwood floors, gently scrub with a solution of baking soda and water, or use a specialized hardwood floor cleaner, ensuring you rinse and dry thoroughly to restore your floor’s beauty.
Black stains on hardwood floors can really catch you off guard, turning a beautiful space into something that looks dingy and neglected. Don’t worry, though! Many homeowners face this issue, and thankfully, there are simple, effective ways to tackle these stubborn marks. You don’t need to be a professional restorer to bring back the shine to your wood. This guide will walk you through easy steps and proven methods to say goodbye to those unsightly black spots for good. We’ll cover everything from common household remedies to specialized cleaners, so you can confidently restore your hardwood’s charm.
Understanding Black Stains on Hardwood Floors
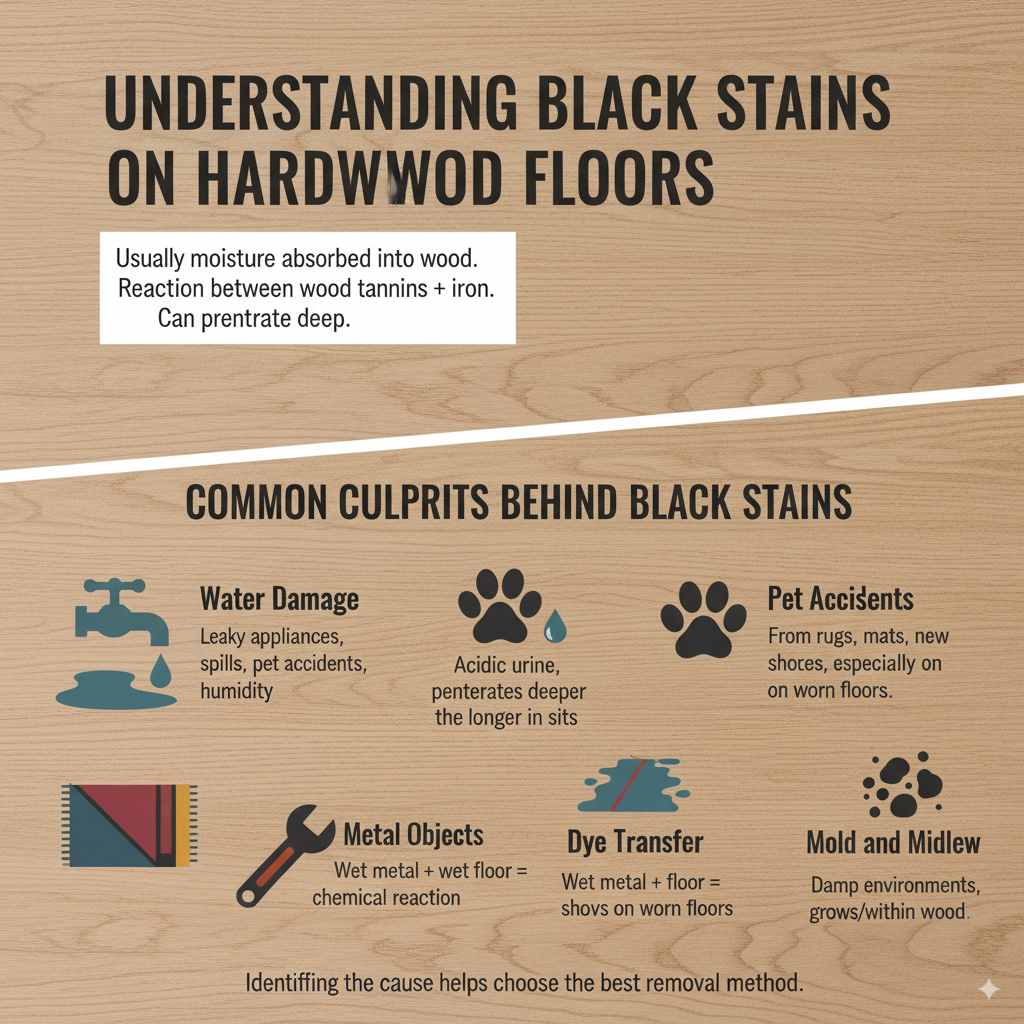
Black stains on hardwood are usually a sign of something absorbed into the wood, often moisture. These can happen for various reasons, from a leaky pot or pet accident to standing water from plants or even condensation. What makes them “black” is often a reaction between the wood’s tannins and the iron present in the water or other staining agents. Sometimes, it’s just dirt and grime built up in the wood’s grain, but the deep black ones are typically moisture-related and can penetrate deeper. The good news is, identifying the cause helps in choosing the best removal method.
Common Culprits Behind Black Stains
Before we grab our cleaning supplies, let’s pinpoint what might be causing these dark marks. Knowing the source can make the cleaning process much smoother.
- Water Damage: This is the most frequent cause. Leaky appliances, spills that weren’t wiped up quickly, pet accidents, or even high humidity can lead to water seeping into the wood.
- Pet Accidents: Urine is acidic and can quickly discolor wood, especially if left untreated. The longer it sits, the deeper it penetrates and the darker the stain becomes.
- Metal Objects: If a wet metal object (like a metal planter base, or even a dropped screwdriver) sits on a wet floor, it can cause a chemical reaction that leaves a dark stain.
- Dye Transfer: Sometimes, dyes from rugs, mats, or even new shoes can transfer onto the floor, especially if the floor surface is slightly worn or if there’s moisture.
- Mold and Mildew: In very damp environments, mold or mildew can grow on the surface or within the wood, creating dark patches.
DIY Solutions: Gentle and Effective Stain Removal
You don’t always need fancy cleaners. Often, you can find effective solutions right in your pantry! These DIY methods are great for beginners because they use common items and are generally safe for most hardwood finishes when used carefully.
The Baking Soda Paste Method
Baking soda is a mild abrasive and a natural deodorizer, making it a fantastic choice for tackling many common stains. It’s gentle enough not to damage your floor’s finish if used correctly.
What You’ll Need:
- Baking soda
- Water
- A soft cloth or sponge
- A clean, dry cloth
- Optional: A mild dish soap
Steps to Follow:
- Mix the Paste: In a small bowl, mix baking soda with enough water to create a thick paste. Think of toothpaste consistency.
- Apply the Paste: Gently apply the paste directly onto the black stain. Don’t rub it in aggressively; just cover the stained area.
- Let it Sit: Allow the paste to sit on the stain for about 10-15 minutes. This gives the baking soda time to work.
- Gently Scrub: Using a damp (not wet) soft cloth or sponge, gently scrub the stain in the direction of the wood grain. Avoid harsh scrubbing, as this can damage the finish.
- Wipe Clean: Dampen a clean cloth with water and wipe away the baking soda paste residue.
- Dry Thoroughly: Immediately dry the area with a clean, dry cloth. It’s crucial to ensure no moisture is left behind, as this could cause further issues.
- Assess and Repeat: Check the area. If the stain is still visible, you can repeat the process. For stubborn stains, you might mix a tiny amount of mild dish soap into the baking soda paste, but use this sparingly and be sure to rinse very well afterward.
The Vinegar Solution (Use with Caution)
White vinegar is another household staple that can work wonders. Its acidity helps break down stains. However, it MUST be diluted, as undiluted vinegar can damage the wood finish. This is best for lighter stains and small areas.
What You’ll Need:
- White vinegar
- Water
- A spray bottle (optional, for easier application)
- Soft cloths
Steps to Follow:
- Dilute the Vinegar: Mix equal parts white vinegar and water in a bowl or spray bottle.
- Test in an Inconspicuous Area: VERY IMPORTANT! Before applying to the stain, spray a small amount on a hidden part of your floor to ensure it doesn’t harm the finish.
- Apply Sparingly: Lightly dampen a soft cloth with the diluted vinegar solution. Again, do not soak the cloth.
- Gently Blot/Wipe: Gently blot or wipe the stain. Avoid excessive rubbing. Work in the direction of the wood grain.
- Rinse Immediately: Dampen another clean cloth with plain water and wipe the area to remove any vinegar residue.
- Dry Thoroughly: Use a clean, dry cloth to completely dry the spot.
Commercial Hardwood Floor Cleaners: When to Use Them
Sometimes, DIY isn’t quite enough, or you prefer a product specifically designed for hardwood. Commercial cleaners are formulated to be effective while typically being safe for your floors’ finishes when used as directed.
Choosing the Right Cleaner
When selecting a cleaner, look for products specifically labeled “for hardwood floors.” Avoid all-purpose cleaners, as they can strip the finish or leave a dull residue. Many specialized cleaners are pH-neutral, which is best for wood. Some also contain mild solvents that can help lift tougher stains.
Using a Specialized Cleaner
Always read and follow the manufacturer’s instructions carefully. The general process usually involves:
- Vacuum or Sweep: Remove any loose dirt or debris from the floor.
- Apply Cleaner: Lightly spray the cleaner onto a soft cloth or directly onto the stain, depending on the product’s instructions. Avoid oversaturating the wood.
- Gentle Scrubbing: Use a soft cloth or a very gentle scrub brush to work the cleaner into the stain, moving with the wood grain.
- Wipe Away Residue: Use a clean, damp cloth to remove the cleaner.
- Dry the Area: Buff the area dry with a clean, dry cloth.
For very stubborn stains, some brands offer “spot removers” or “deep cleaners” for hardwood. It’s wise to test these in a hidden area first.
Tackling Deep-Set and Stubborn Black Stains
If the stain is very dark, has penetrated deeply, or the methods above didn’t fully work, you might be dealing with a stain that requires a bit more effort. These often come from pet urine or significant water exposure that has caused a chemical reaction within the wood itself.
Oxalic Acid for Dark Stains
Oxalic acid is a chemical often found in wood cleaners specifically designed for removing dark water stains or iron stains from wood. It’s a more potent solution and requires careful handling. This is generally for use on unfinished or re-finishable wood, as it can affect some finishes. Always wear gloves and eye protection.
Where to find more information on safely handling chemicals for home use: The U.S. Environmental Protection Agency (EPA) provides information on safer chemical choices for household use, which can be a good starting point for understanding safer practices.
General Procedure for Oxalic Acid (on suitable wood types):
- Prepare the Area: Ensure the wood is clean and dry. You might need to slightly sand the immediate area of the stain to expose the wood fibers, depending on the finish.
- Mix Oxalic Acid: Follow the product’s instructions precisely. It usually comes in crystal form and is mixed with warm water. Work in a well-ventilated area.
- Apply Carefully: Using a cloth or sponge, apply the oxalic acid solution directly to the stained wood.
- Let it Work: Allow it to react with the stain, usually for a short period. You might see the stain lighten.
- Neutralize: It’s crucial to neutralize the acid. This is often done with a baking soda and water solution or a specific neutralizer recommended by the product.
- Rinse and Dry: Rinse thoroughly with plain water and dry COMPLETELY.
- Sanding and Refinishing: After using oxalic acid, you will likely need to lightly sand the area smooth and then reapply a finish (like polyurethane or wax) to match the rest of the floor. This is why it’s often considered a more advanced step.
When to Consider Professional Help
If the stain is very deep, covers a large area, or you’re hesitant to use stronger chemicals, calling in a professional hardwood floor refinisher is a wise decision. They have specialized tools and knowledge to tackle severe damage and can often restore the floor to its original beauty without you needing to worry about making mistakes.
Prevention is Key: Avoiding Future Black Stains
Once you’ve successfully removed those black stains, you’ll want to keep them from coming back! A little bit of prevention goes a long way in maintaining the beauty of your hardwood floors.
Daily Habits for a Stain-Free Floor
- Wipe Spills Immediately: Keep a cloth handy and tackle any moisture or spills as soon as they happen.
- Use Doormats: Place mats inside and outside entry doors to catch dirt and moisture before it tracks onto your floors.
- Protect from Furniture: Use pads under furniture legs to prevent scratches and dents. For metal-based furniture, ensure there’s no direct contact with the floor if it might get wet.
- Care for Pets: Clean up pet accidents promptly. Consider using waterproof mats or rugs in areas where pets frequent.
- Water Plants Carefully: Place potted plants on saucers or trays to catch any overflow. Avoid placing them directly on the wood.
- Manage Humidity: Maintain a consistent humidity level in your home. Too much humidity can contribute to moisture issues.
Regular Cleaning and Maintenance
Regular, proper cleaning is your best defense. Vacuum or sweep your hardwood floors frequently to remove grit that can scratch the finish or get ground into the wood. Use a hardwood floor cleaner periodically, following product instructions.
For a general idea of how to care for your floors, flooring manufacturers often provide care guides. For example, the National Hardwood Lumber Association (NHLA) is a great resource for understanding different types of wood and their properties, which can influence how they react to cleaning.
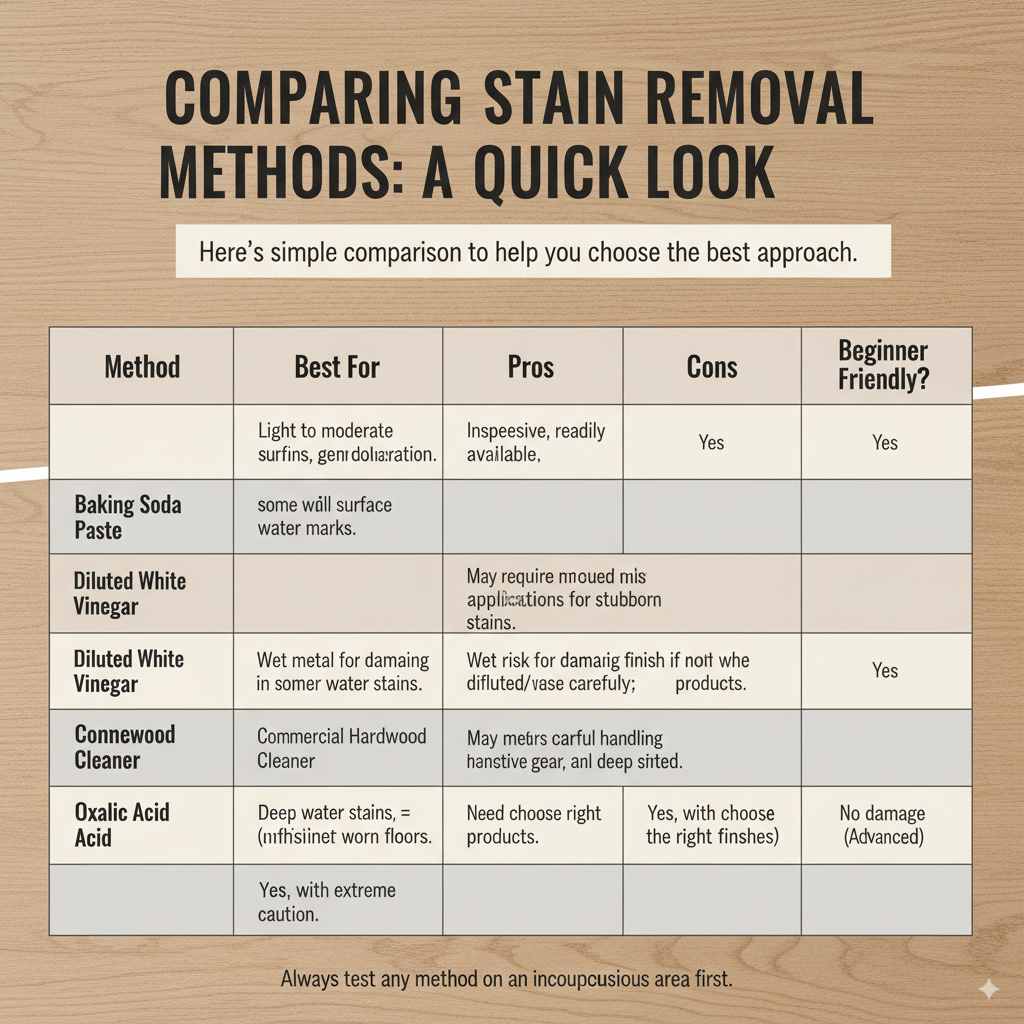
Comparing Stain Removal Methods: A Quick Look
Here’s a simple comparison to help you choose the best approach.
| Method | Best For | Pros | Cons | Beginner Friendly? |
|---|---|---|---|---|
| Baking Soda Paste | Light to moderate surface stains, general discoloration. | Inexpensive, readily available, gentle. | May require multiple applications for stubborn stains. | Yes |
| Diluted White Vinegar | Light surface stains, some water marks. | Inexpensive, good for mild cleaning. | Risk of damaging finish if not diluted/used carefully; limited effectiveness on deep stains. | Yes, with extreme caution. |
| Commercial Hardwood Cleaner | General cleaning, mild to moderate stains. | Specially formulated for hardwood, usually safe when used as directed. | Cost involved, need to choose the right product. | Yes |
| Oxalic Acid | Deep water stains, iron stains (on unfinished/refinishable wood). | Very effective on deep, specific stains. | Requires careful handling, protective gear, and likely refinishing. Can damage finishes. | No (Advanced) |
Frequently Asked Questions (FAQs)
Q1: Can I use bleach to remove black stains from my hardwood floors?
A1: It is strongly advised NOT to use bleach on hardwood floors. Bleach is a harsh chemical that can strip the wood’s natural color, damage the finish, and even alter the wood itself, potentially causing more permanent problems than the original stain.
Q2: How can I tell if the black stain is just on the surface or has gone deeper?
A2: Light surface stains might disappear with gentle cleaning. If the stain remains after a few attempts with mild solutions, or if the wood appears discolored or damaged even after cleaning, it’s likely penetrated deeper into the wood grain.
Q3: My puppy had an accident on the floor. What’s the best way to remove the black stain?
A3: Clean up the area immediately. Blot up as much urine as possible. Then, use the baking soda paste method or a specialized pet-stain remover for hardwood. Ensure you rinse and dry thoroughly to prevent lingering odors and further staining or damage.
Q4: How often should I clean my hardwood floors?
A4: Sweep or vacuum your hardwood floors daily or every few days to remove dust and grit. A light damp mopping with a pH-neutral hardwood cleaner can be done weekly or bi-weekly, depending on foot traffic and how dirty they get.
Q5: Can I sand out black stains from my hardwood floors?
A5: Yes, if the stain has deeply penetrated the wood and cannot be removed by cleaning, sanding is an option. However, sanding removes a layer of wood and the finish. After sanding, you will need to reapply a finish (like polyurethane) to protect the wood and match the sheen of the surrounding area. This is a more involved process.
Q6: What’s the difference between a black stain and just dirt in the grain?
A6: Dirt in the grain is usually gray or dark gray and can often be lifted with regular sweeping and cleaning. Black stains are typically a deeper, more uniform black and often result from moisture, chemical reactions, or absorption of dark materials that have bonded with the wood fibers.
Conclusion
Dealing with black stains on your hardwood floors can be a worry, but as you’ve seen, there are many effective and beginner-friendly solutions available. From simple, cost-effective DIY pastes like baking soda and water to carefully chosen commercial cleaners, you have the tools to tackle these marks and restore the beauty of your floors. Remember that prompt attention to spills and moisture is your best defense against future stains, so establish those good habits to keep your hardwood looking its best for years to come. With a little patience and the right approach, you can confidently remove those black stains and enjoy your beautiful hardwood floors again.