Trex Decking Tools You Actually Need (Blade, Fasteners, Gear)
Trex decking tools are the equipment you need to cut, fasten, and finish Trex composite decking without voiding the warranty or wrecking the boards: a carbide blade rated for composite (not a standard wood blade), a Trex-approved hidden fastener system, and basic safety gear.
Composite decking cuts and fastens differently than real wood. A standard wood-cutting blade tears and melts Trex’s PVC shell instead of slicing it cleanly, and the wrong fastener can void Trex’s own warranty outright. The good news is the actual tool list is short and most of it is stuff you can rent or buy once and reuse.
Below is what you actually need, in the order you’ll use it: cutting, fastening, and finishing, plus the safety gear and the spacing numbers Trex’s own installation guides call for.
Introduction To Trex Decking
Best Blade For Cutting Trex Composite
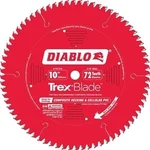 |
Diablo TrexBlade Circular Saw Blade, 10″, 72-Tooth – $74.97 This is the blade Trex’s own installation guides point to for cutting Trex boards, and it’s the tool most first-time installers skip until their first cut chips or melts.
|
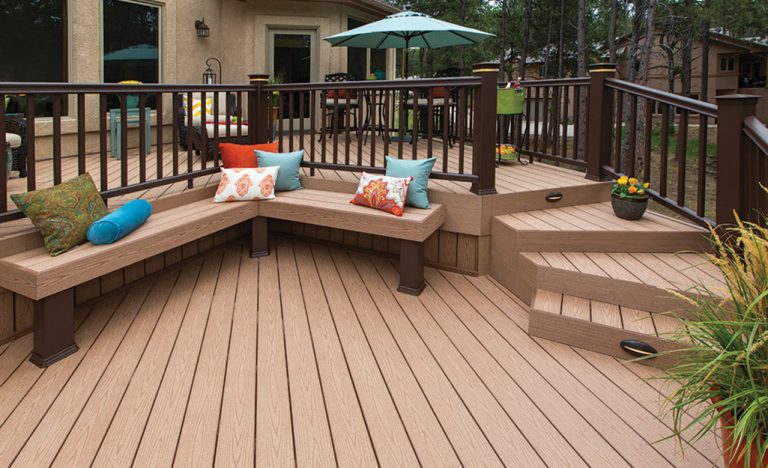
Trex Decking is a wood-alternative made from recycled wood fibers and reclaimed plastic film, pressed into boards that won’t rot, splinter, or need annual staining. That’s the whole appeal: it looks like a stained wood deck without the yearly sanding-and-sealing cycle. This composite decking transforms patios and balconies into low-upkeep outdoor rooms.
Benefits Of Choosing Trex
- Durability: the outer shell resists fading, staining, and scratching far better than an unsealed wood board left in direct sun.
- Low Maintenance: no sanding, staining, or sealing – an annual soap-and-water scrub with a soft-bristle brush is the standard recommendation.
- Recycled Content: Trex boards are made primarily from reclaimed wood fiber and recycled plastic film (like shopping bags), diverting that material from landfills.
- Color And Grain Options: multiple product lines (Enhance, Select, Transcend, Signature) each offer several color/grain combinations, so matching a house’s trim isn’t limited to one or two shades.
- Slip Resistance: the textured cap-stock surface holds up better underfoot when wet than smooth, worn wood.
Comparing Materials
| Material | Durability | Maintenance | Recycled Content | Relative Cost |
|---|---|---|---|---|
| Pressure-Treated Wood | Moderate – needs periodic sealing | High – annual staining/sealing | Low | $ |
| Composite (Trex) | High – capped shell resists rot and fading | Low – occasional wash | High – ~95% recycled material | $$$ |
| PVC/Vinyl | High – fully synthetic, won’t absorb moisture | Low | Low | $$$ |
Upfront cost is the real trade-off. Trex runs more than pressure-treated lumber per square foot, but skipping the annual staining labor over a 25-year board warranty usually closes that gap within the first several years.
Getting Started: Planning Your Deck
Before any tool touches a board, nail down the layout on paper. A little planning here avoids the expensive kind of mistake – cutting boards short, discovering a joist is in the wrong spot, or realizing after the fact that the local code requires guardrails you didn’t budget for.
Design Considerations
Work through these before you buy a single board:
- Purpose: a dining deck needs a flatter, more open layout than a lounging deck built around a fire pit or hot tub.
- Size and footprint: most residential building departments require a permit above a certain height or square footage – check before you design around a size that triggers extra inspections.
- Style and color line: Trex’s product lines (Enhance, Select, Transcend, Signature) differ in price and finish, so pick the line before finalizing a budget.
- Structural framing: composite decking is heavier than most wood alternatives per board foot – confirm your joist spacing and beam sizing can handle it.
Sketch the footprint, mark where railings, stairs, and any built-in seating will go, and note where the house’s electrical or gas lines run before digging for footings.
Measuring And Layout Basics
Get the footprint locked down first:
- Measure the full area where the deck will sit, including any stair or landing footprint.
- Use stakes and mason’s string to outline the perimeter and check it’s square (measure both diagonals – they should match).
- Check the ground for level across the whole footprint, not just one corner, and note how much grading or footing depth variance you’ll need.
The core measuring tools:
| Measurement | Tool Required |
|---|---|
| Length and width | 25′ tape measure |
| Squareness | Framing square or the 3-4-5 triangle method with a tape measure |
| Level across the footprint | 4′ level or a laser level for larger decks |
Write measurements down as you go rather than trusting memory – a single transposed number here compounds into a crooked deck later.
Must-have Tools For Trex Decking
These are the tools that actually touch a Trex board, split into what you cut with, what you fasten with, and what you finish with.
Cutting Tools
A standard wood blade tears and melts the composite shell instead of slicing it. Use a carbide blade rated for composite:
- Circular Saw with a 7-1/4″ composite-rated blade: for straight field cuts on decking boards.
- Miter Saw with a composite-rated blade: for angled cuts at stair stringers and picture-frame corners.
- Table Saw with a 10″ composite-rated blade (like the Diablo TrexBlade above): for ripping boards down to width.
Blades built for composite – look for a non-stick coating and a triple-chip tooth grind – run cooler and clear chips instead of gumming up with melted plastic shavings, which is what causes chipped or scorched cut edges.
Fastening Tools
How you fasten Trex boards affects both looks and warranty coverage:
| Tool | Purpose |
|---|---|
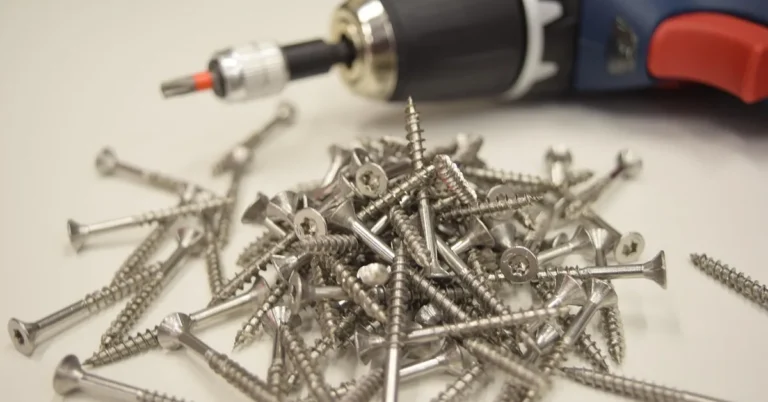
| Trex-Approved Composite Deck Screws | Color-matched, coated for corrosion resistance, and required at board ends and picture-frame cuts. |
| Hidden Fastener System | Clips into a groove on the board edge and screws to the joist, leaving no visible fastener heads on the field of the deck. |
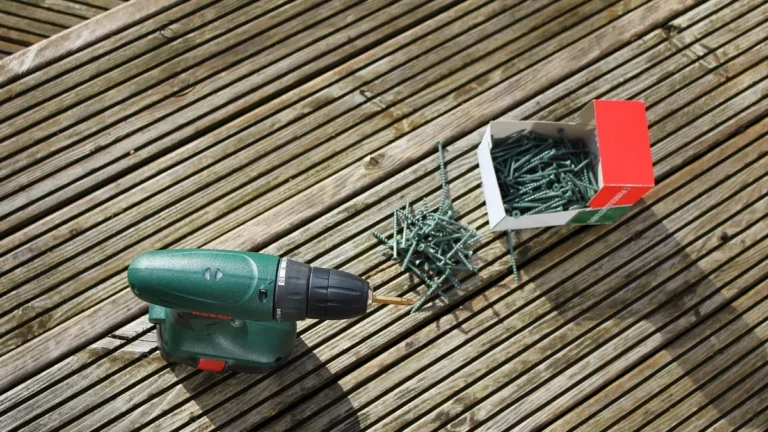
| Impact Driver | Drives both screw types faster and with less wrist fatigue than a standard drill over a full deck. |
This is the part most DIY guides skip: Trex’s own installation guidance calls for hidden fasteners at every joist, spaced at standard 16-inch on-center framing, and using fasteners or screws that aren’t on Trex’s approved list can void the manufacturer’s warranty outright – not just look worse, actually void coverage. See our full comparison of Trex-rated composite deck screws for corrosion ratings and current prices before you buy generic deck screws to save a few dollars.
Finishing Tools
Trex doesn’t need paint or stain, but a few tools still matter for the trim and edge work:
- Router with a composite-rated bit: for routing clean, chip-free edges where boards get notched around posts.
- Caulk Gun: for sealing gaps where the deck meets the house band board or around post bases.
- Soft-Bristle Brush: the only “finishing” tool Trex’s own cleaning guidance actually calls for – not sandpaper, not a pressure washer on high pressure.
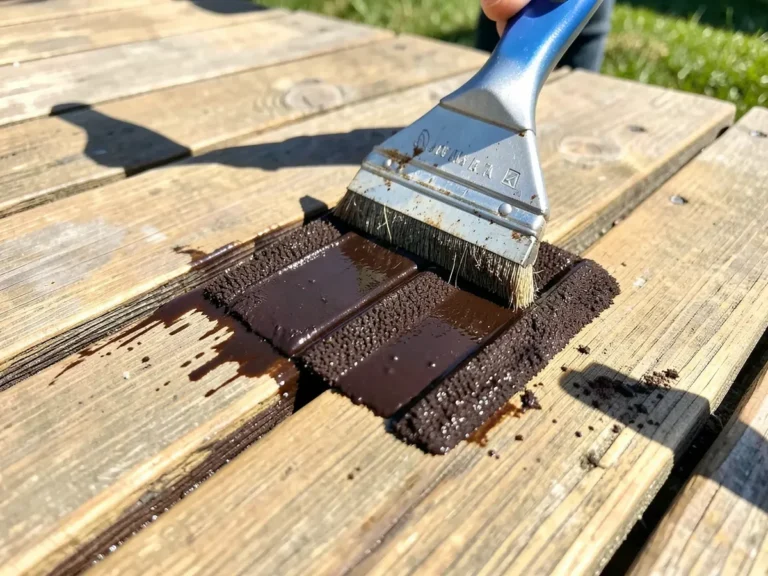
Skip the paint roller and stain brushes from a traditional wood-deck checklist – putting stain or paint on capped composite decking doesn’t bond properly and isn’t part of Trex’s maintenance recommendations.
Specialized Tools For Enhanced Efficiency
Once the basics are covered, these two tools are what separate a fast, straight install from a slow, crooked one.
Hidden Fastener Systems
Hidden fasteners clip into a groove milled into the long edge of grooved-profile Trex boards, then screw down into the joist below – so the fastener head never shows on the walking surface.
- Advantages of Hidden Fastener Systems:
- No visible screw heads on the field of the deck
- Less water pooling around fastener points than exposed screw heads
- Faster per-board installation once you’re in a rhythm
How they go in:
- Seat the clip into the groove on the installed board’s edge.
- Drive the screw through the clip into the joist below.
- Set the next board’s groove onto the same clip and repeat down the run.
They only work with grooved-edge board profiles, though – a square-edge board (common at deck perimeters and picture-frame borders) still needs a face-screwed, color-matched screw instead.
Board Straighteners
A board straightener (sometimes called a deck jack or pry bar clamp) pulls a slightly bowed board tight against the last fastened board before you drive the next screw, so the gap stays consistent down the whole run.
- Benefits of Board Straighteners:
- Keeps gap width consistent even when a board has a slight bow
- Prevents the “gap creep” that shows up 10+ boards into a run without one
- Reduces the need to re-cut or shim a board that’s fighting you
Using one:
- Hook or clamp the straightener against the already-fastened board.
- Lever the new board into position against your spacers.
- Fasten while the tool holds tension, then move it down to the next section.
On a long, hot day a board straightener earns its cost fast – composite boards do flex more than most people expect straight out of the packaging.
Safety Gear And Best Practices
Cutting composite generates a different kind of dust and debris than wood – finer plastic particulate mixed with wood fiber – so the safety list below matters even if you’ve built a wood deck before without much gear.
Protective Equipment
What to actually wear:
- Safety Glasses: composite chips fly further and are harder than wood shavings.
- Work Gloves: protect against both splinters on exposed wood framing and the sharp cut edges of composite boards.
- Hard Hat: standard if you’re working under an elevated deck frame or near overhead framing.
- Ear Protection: composite-rated blades still run at full saw RPM – hearing protection matters over a full day of cutting.
- Dust Mask (N95 or better): for the fine composite dust generated when cutting or routing.
On-site Safety Tips
Habits that prevent the most common jobsite injuries:
- Keep the cutting station and walking paths clear of offcuts and cords.
- Cut in a ventilated area – composite dust is finer and lingers longer than wood sawdust.
- Stack materials so nothing can tip or roll into a walkway.
- Set up ladders and scaffolding on level ground and check their rated capacity.
- Never work alone on framing or elevated sections – have someone nearby who can call for help.
| Safety Gear | Purpose |
|---|---|
| Safety Glasses | Protect eyes from composite chips and debris |
| Work Gloves | Protect hands from cuts on sharp cut edges and exposed fasteners |
| Hard Hat | Protect against falling tools or framing overhead |
| Ear Protection | Reduce cumulative noise exposure from saws |
| N95 Dust Mask | Prevent inhalation of fine composite dust |
Preparing The Site And Foundation
The foundation is the one part of a deck you can’t easily fix after the boards go down, so it’s worth getting right before any Trex ever gets cut.
Clearing And Leveling
Clear the footprint down to bare, stable ground. Grass, roots, and organic debris left under a deck hold moisture and invite rot in the framing above them, even though the decking itself won’t rot.
- Use a shovel or spade to strip sod and topsoil from the footprint.
- Remove roots and large rocks that could interfere with footing placement.
- Call 811 (or your local utility locate service) before digging – underground lines are a real risk, not a formality.
Grade the cleared area for drainage away from the house, then check it with a level or a long, straight board before setting any footings.
- Stake out the footing locations based on your layout.
- Fill and compact any low spots so footings sit on stable, undisturbed soil.
- Re-check level across the whole footprint, not just at the footing points.
Foundation Options
The framing under a Trex deck is standard pressure-treated lumber or steel – the composite material is only the decking and railing, not the structural frame.
| Foundation Type | Description |
|---|---|
| Concrete Footings | Poured below the frost line; the standard for permitted, ground-level and elevated decks. |
| Deck Blocks | Precast concrete blocks set on grade; only suitable for low, detached, non-permitted decks in most jurisdictions. |
| Post and Beam | Posts anchored to footings support beams and joists; the standard approach for elevated decks. |
Check with your local building department before choosing – frost depth and permit requirements vary by location and determine which of these is actually legal for your deck’s height and size.
Installation Tips For A Flawless Deck
The framing and foundation are done. Here’s what actually changes the outcome once you’re laying boards.
Board Spacing
Composite expands and contracts with temperature more than wood does, so spacing isn’t optional:
- Use dedicated composite decking spacers between boards, not a scrap of wood.
- Follow the gap width listed for your specific Trex product line – it varies by board profile, so check the installation guide that ships with your boards rather than assuming one number fits every line.
- Re-check spacing after every few boards, since small errors compound over a long run.
Too tight and the boards can buckle on a hot day; too wide and gaps look sloppy and can catch heels or furniture legs. Cut on a mild day if you can, since the boards are close to their resting size then.
Securing The First Board
Every board after the first one follows its line, so get this one right:
- Snap a chalk line at your planned offset from the house or edge joist.
- Fasten the board to that line at every joist, checking square as you go.
- Sight down the board’s length before moving to the second row to confirm it’s straight, not just fastened.
Use Trex-approved, corrosion-resistant screws at face-screwed locations – not standard deck nails, which loosen as composite expands and contracts through the seasons. A straight, secure first board makes the rest of the run dramatically easier.
Dealing With Overhang
How far a board overhangs the outer joist affects both looks and water drainage:
| Overhang Length | Recommendation |
|---|---|
| Under 1 inch | Minimal drip edge; water can wick back toward the joist. |
| 1 to 1.5 inches | Typical range used on most installations for a clean drip edge. |
| Over 2 inches (unsupported) | Can flex underfoot and stress the board’s fastening points – avoid unless the board is otherwise supported. |
Trim overhangs after the field is fastened, using the same composite-rated blade, and check the fascia line for straightness before calling the run finished.
Maintenance And Care For Longevity
Trex’s low-maintenance reputation is earned, but “low” isn’t “zero.” A few minutes of seasonal attention prevents the debris buildup and hardware issues that cause most of the complaints about composite decks.
Cleaning Your Trex Deck
The routine Trex’s own care guidance recommends:
- Sweep debris off regularly – leaves and pollen trapped against the surface can cause surface staining over time.
- Mix mild soap with warm water for routine cleaning.
- Scrub with a soft-bristle brush – never a wire brush or an abrasive pad, which can scuff the cap-stock finish.
- Rinse thoroughly with a garden hose.
For tougher stains (grease, tannin from wet leaves), use a cleaner formulated for composite decking rather than a generic wood deck cleaner, and avoid bleach-based products, which can affect the surface finish.
Seasonal Maintenance Tips
A simple seasonal rhythm keeps small issues from becoming repairs:
| Season | Maintenance Task |
|---|---|
| Spring | Inspect fasteners and railings after winter freeze-thaw cycles; clean. |
| Summer | Clear debris regularly; check gaps haven’t closed up in the heat. |
| Fall | Remove fallen leaves promptly to limit surface mold growth from trapped moisture. |
| Winter | Shovel with a plastic-edged shovel, not metal; avoid ice-melt products not rated for composite. |
Walk the deck each season and check for movement at fasteners. Composite doesn’t rot, but the screws and clips holding it are still hardware that can loosen over years of thermal cycling.
Advanced Techniques And Customizations
Decks built with Trex composite take the same lighting, railing, and layout customizations as a wood deck – the tool list below covers the finishing touches beyond the structural build.
Incorporating Lighting
A few placement principles matter more than the fixture brand:
- Low-voltage LED systems draw little power and run cool against composite decking.
- Recessed deck lights set flush into the board surface avoid creating a trip hazard.
- Post cap lights mark railing corners and stair edges without extra wiring runs.
- Solar fixtures skip wiring entirely, at the cost of dimmer, less consistent output.
Light stairs and transitions first – those are the safety-critical spots – then add ambient lighting around gathering areas once the functional lighting is placed.
Adding Railing And Steps
Railings are a code item, not just an aesthetic choice, above a certain deck height:
- Composite railings resist fading and splintering the same way the decking does.
- Match the railing color line to the decking rather than mixing manufacturers, since color-matching across brands is inconsistent.
- Check your local code’s required baluster spacing and railing height before finalizing a design – requirements vary by jurisdiction.
Common customizations:
- Decorative post caps at railing corners.
- Glass panel inserts in place of balusters for an unobstructed view.
- Built-in bench seating along the perimeter to save floor space.
Whatever you add, confirm it doesn’t compromise the guardrail’s structural attachment – a beautiful railing that fails a code inspection has to come back apart.
Common Challenges And Solutions
Most Trex complaints trace back to one of two things: a board that wasn’t given room to move, or a fastener that wasn’t tight or wasn’t approved. Here’s how to catch both.
Addressing Warping And Bowing
Composite responds to heat and moisture more than people expect coming from a wood-deck background:
- Follow The Manufacturer’s Install Guide: joist spacing and fastener spacing aren’t suggestions – undersized framing is a common cause of long-term sag.
- Leave The Specified Expansion Gap: skipping spacers to make boards look tighter is the single most common cause of buckling later.
- Use Approved Fasteners: non-approved screws can work loose as the board expands and contracts, allowing movement that generic hardware wasn’t designed to handle.
Walk the deck once a season and sight down board runs in low-angle light – early bowing shows up as a faint wave before it’s obvious underfoot.
Fixing Loose Boards
A loose board is a trip-and-fall risk, not just a squeak. Here’s the fix:
- Find It: walk the full deck and note any board that flexes or shifts underfoot.
- Re-tighten First: back the fastener out slightly and re-drive it; a stripped screw hole needs a slightly larger or relocated fastener, not just more torque.
- Replace If Damaged: a cracked or chipped board at the fastener point should be swapped, not just re-fastened, since the crack will spread.
Catching a loose board in one season prevents it from becoming a cracked board and a bigger repair the next.
Conclusion: Enjoying Your Trex Deck
The tool list for a Trex deck is shorter than most first-time installers expect – a composite-rated blade, an approved fastener system, basic measuring and safety gear, and a board straightener if you want the install to go faster. Skipping the composite-rated blade or the approved fasteners is where most of the avoidable problems start.
Final Thoughts
Buy the composite-rated blade and the approved fasteners before you start cutting, not after the first melted cut edge. Everything else on this list is either a standard carpentry tool you likely already own or a convenience upgrade.
- Durability: Trex’s capped shell resists fading and scratching far longer than sealed wood.
- Low Maintenance: soap, water, and a soft brush replace annual staining.
- Warranty Protection: approved fasteners and correct spacing keep the manufacturer’s warranty intact.
Once the deck is built, the maintenance list is short enough that most owners spend more time enjoying it than caring for it.
Inspiring Ideas For Your Space
A few ways owners commonly finish out a new Trex deck:
- Outdoor Furniture: weather-resistant pieces that can stay out through the season.
- Lighting: low-voltage post cap or string lighting for evening use.
- Planters: composite or resin planters that won’t rot from irrigation runoff.
- Fire Pit: check clearance requirements against combustible decking before placing one.
- Outdoor Rugs: define seating zones without any permanent modification to the deck.
The tools above get the structure right; the rest is just making the space your own.

Frequently Asked Questions
What Are Essential Tools For Trex Decking?
The essentials are a composite-rated carbide blade (not a standard wood blade), a Trex-approved hidden fastener system or color-matched screws, a drill/impact driver, a tape measure, a level, and basic safety gear. The blade and fastener choice matter most – the wrong ones can chip the boards or void the warranty.
How Do I Install Trex Decking Boards?
Prepare and level the frame first, then lay boards with the manufacturer-specified expansion gap using dedicated spacers. Secure grooved-edge boards with hidden fasteners at every joist, and face-screw square-edge boards with Trex-approved, corrosion-resistant screws. Follow the installation guide that ships with your specific Trex product line, since gap and fastener spacing vary slightly by board profile.
Can I Use Regular Tools For Trex Decking?
Most of your existing tools work fine – drills, tape measures, and levels don’t care what material they’re used on. The exception is the saw blade: a standard wood blade tears and melts composite instead of cutting it cleanly. For jigsaw work specifically, see our comparison of the best jigsaw blades for cutting Trex. Swapping in a composite-rated blade is the one upgrade that actually matters.
What Safety Gear Is Needed For Trex Decking?
Wear safety glasses, work gloves, hearing protection, and an N95 dust mask when cutting or routing composite. The fine plastic-and-wood-fiber dust generated by composite is different from ordinary wood sawdust and worth taking seriously, especially indoors or in an unventilated garage.
Conclusion
The right Trex decking tools come down to a short list: a composite-rated blade, approved fasteners installed at the correct spacing, and basic safety gear. Get those three right and the rest of the build – measuring, framing, finishing – is standard carpentry most DIYers already know how to do.
Sponsored / affiliate links. As an Amazon Associate I earn from qualifying purchases. I may earn additional commission from eligible campaigns.