Woodworking Saws: Essential Power Cuts
Mastering essential woodworking saws unlocks smooth, accurate cuts for any DIY project. From basic crosscuts to intricate curves, understanding each saw’s specialty empowers you to build with confidence and precision. This guide breaks down the most vital saws for beginners, ensuring you choose the right tool for the job.
Welcome to the workshop! If you’re just starting with woodworking, you might feel a bit overwhelmed by all the different saws out there. Which one do you need for that bookshelf? What’s best for cutting those decorative curves on a birdhouse? Don’t worry, many beginners feel the same way. I remember feeling that initial confusion myself! The good news is, you don’t need every saw ever invented to get started. You just need to know the essentials.
This guide is designed to make choosing and using your first woodworking saws simple and safe. We’ll walk through the most important power saws every beginner should consider, explaining what they do best and how to use them effectively. By the end, you’ll have a clear understanding of your essential cutting toolkit and be ready to tackle your first projects with confidence!
The Foundation: Understanding Woodworking Saws
At its heart, a woodworking saw is a tool designed to cut material, usually wood. The magic happens with the blade – a strong metal strip with sharp teeth that slice through the wood fibers as it moves. The type of saw you choose largely depends on the type of cut you need to make. Are you cutting a board to length? Making an intricate shape? Or creating a slot? Each task calls for a specific saw and blade combination.
For beginners, investing in a few key saws that offer versatility will get you the furthest. It’s not about having the most tools, but the RIGHT tools. We’ll focus on the power saws that provide the most bang for your buck in terms of capability and ease of use for common DIY and homeowner projects. Safety is our top priority, so we’ll sprinkle in important tips along the way.
Choosing Your First Saws: Key Considerations
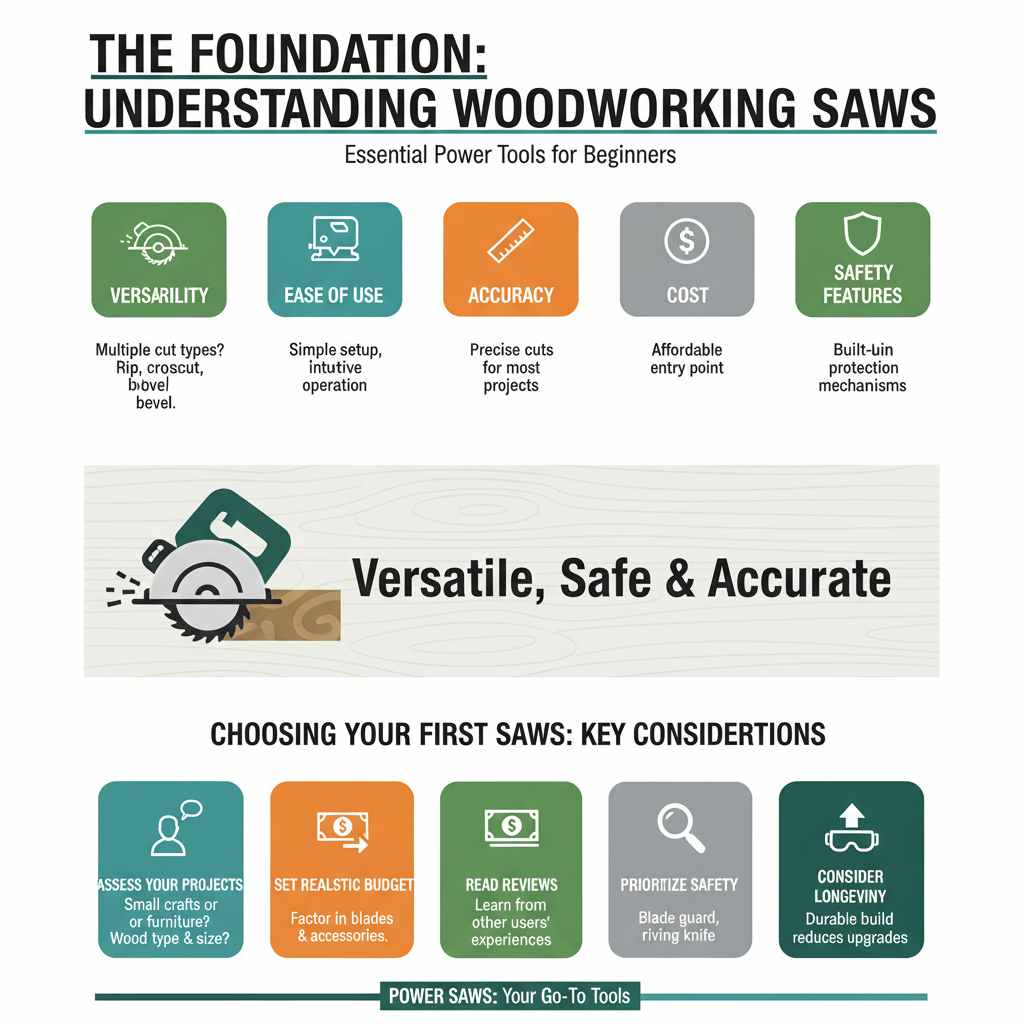
Before diving into specific saws, let’s think about what makes a saw “essential” for a beginner. It boils down to a few things:
- Versatility: Can it handle a few different types of cuts?
- Ease of Use: Is it relatively simple to set up and operate safely?
- Accuracy: Can it make reasonably precise cuts for most projects?
- Cost: Is it an affordable entry point into power woodworking?
- Safety Features: Does it have built-in mechanisms to protect you?
We’ll explore saws that hit the sweet spot on these points. Think of these as your go-to tools for a very long time, even as you expand your workshop.
Essential Power Saws for Beginners
Let’s get down to the tools themselves. These are the workhorses that will help you make the most common cuts in woodworking. We’ll cover why each is important and what it’s best used for.
1. The Circular Saw: The All-Rounder
If there’s one power saw that screams “DIY essential,” it’s the circular saw. It’s incredibly versatile, relatively affordable, and can handle a wide range of tasks, from cutting lumber to size for framing a deck to crosscutting plywood sheets for furniture.
What is a Circular Saw?
A circular saw uses a spinning, toothed blade to make straight cuts. It’s a handheld power tool, meaning you guide it along your workpiece. They come in various sizes, but a 7-1/4 inch blade is a very common and versatile size for DIYers.
What Can You Do With It?
- Rip Cuts: Cutting along the length of a board (e.g., making a wide plank narrower).
- Crosscuts: Cutting across the width of a board (e.g., cutting a 2×4 to length).
- Sheet Goods: Cutting plywood, MDF, or particleboard.
- Angled Cuts (Bevels): Most circular saws allow you to tilt the base plate to make angled cuts, which are useful for trim work or specific joinery.
Pros for Beginners:
- Highly versatile for straight cuts.
- Relatively inexpensive to purchase.
- Portable, allowing you to cut materials in place.
- Easy to learn the basic operation.
Cons for Beginners:
- Requires practice for perfectly straight and smooth cuts.
- Dust can be significant (look for models with dust collection).
- Safety is paramount – always use a blade guard and follow safety procedures.
Safety Tip:
Always ensure the blade guard is functioning correctly and retracts smoothly. Never force the saw; let the blade do the work. Make sure your workpiece is stable and supported, and keep your hands well away from the blade path. For sheet goods, using a guide like a clamp-on straight edge or a track saw system can dramatically improve cut accuracy and safety.
For more on safe circular saw operation, check out resources from organizations like OSHA, which offers guidance on woodworking tool safety.
2. The Jigsaw: For Curves and Details
When you need to cut more than just straight lines, the jigsaw is your best friend. This is the tool for creating curves, intricate shapes, and cutouts. It’s a staple for decorative woodworking, making circular holes, or cutting irregularly shaped pieces.
What is a Jigsaw?
A jigsaw uses a thin, reciprocating blade that moves up and down. This up-and-down motion allows it to make curved cuts. They are also handheld and are excellent for detailed work.
What Can You Do With It?
- Curved Cuts: Creating arcs, circles, or any flowing shape.
- Cutouts: Making holes in the middle of a board (you typically drill a starter hole to insert the blade).
- Detail Work: Cutting intricate patterns or shapes.
- Bevel Cuts: Many jigsaws also have tilting bases for angled curves.
Pros for Beginners:
- Excellent for making curved and irregular shapes.
- Relatively easy to control for detailed work.
- Compact and maneuverable.
- Affordable and widely available.
Cons for Beginners:
- Can be prone to blade wander on thicker materials, leading to less precise lines if not careful.
- Not ideal for long, perfectly straight cuts (a circular saw or miter saw is better).
- Blade selection is crucial for the type of wood and cut desired.
Blade Tips:
Jigsaws use a variety of blades. For fast, rough cuts, use a coarser blade. For smoother finish cuts on curves, use a finer-toothed blade. Blades designed for wood, metal, or specialized cuts are available.
A great resource for understanding blade types and their applications can be found on sites like Rockwell Tools or Hitachi Power Tools, which often provide detailed guides for their equipment.
3. The Miter Saw (Chop Saw): For Precise Crosscuts and Angles
If you need to make many accurate straight cuts or precise angled cuts (miters and bevels) on lumber, a miter saw is a fantastic investment. It’s especially useful for projects involving trim, framing, or anything where consistent, repeatable cuts are essential.
What is a Miter Saw?
A miter saw features a motor and blade mounted on a pivoting arm. You pull the arm down over the workpiece, which is held against a fence. It’s designed for making crosscuts and angled cuts with high accuracy.
What Can You Do With It?
- Precise Crosscuts: Cutting boards to exact lengths repeatedly.
- Miter Cuts: Making angled cuts across the face of the board (e.g., for picture frames or corners of a room).
- Bevel Cuts: Tilting the blade itself to make angled cuts through the thickness of the board (often combined with miter cuts on sliding miter saws).
- Compound Cuts: Both a miter and a bevel cut simultaneously (possible with most miter saws, and standard on sliding miter saws).
Pros for Beginners:
- Extremely accurate for crosscuts and angled cuts.
- Fast and efficient for repetitive cuts.
- Safer for many operations than a handheld circular saw, as your hands are further from the blade.
- Built-in angle adjustments make setting up common angles very quick.
Cons for Beginners:
- Less portable than a circular saw.
- Primarily for crosscuts and angles; not used for rip cuts.
- Can be more expensive than a circular saw.
- Requires a stable workbench or stand.
Types of Miter Saws:
There are a few types, and for a beginner wanting versatility, a compound miter saw is often a great choice.
Here’s a quick rundown:
| Saw Type | Primary Uses | Beginner Suitability | Key Advantage |
|---|---|---|---|
| Miter Saw | Crosscuts, Miter cuts | Good | Simple, accurate straight and angled cuts. |
| Compound Miter Saw | Crosscuts, Miter cuts, Bevel cuts | Excellent | Adds the ability to tilt the blade for angled cuts through the thickness. |
| Sliding Compound Miter Saw | Crosscuts, Miter cuts, Bevel cuts, Wider stock | Very Good (for larger projects) | Rail system allows the blade to slide, accommodating wider boards than non-sliding versions. |
Safety Tip:
Always ensure the saw is unplugged before changing the blade or making any adjustments. Keep both hands on the saw handles during operation. Never reach under the blade guard while the saw is running. Make sure the workpiece is held firmly against the fence and the table.
The Saw Industry offers a lot of good comparisons on different miter saw types. For instance, a guide from a reputable tool manufacturer like DeWalt can help you understand the nuances.
4. The Jigsaw vs. The Scroll Saw: Which is Right for Detail?
This is a common point of confusion for beginners wanting to do intricate work. Both can cut curves, but they serve slightly different purposes and offer different levels of control.
Jigsaw Recap:
Handheld, versatile, good for curves in a variety of materials and thicknesses. Less precise for very fine, detailed work compared to a scroll saw. Great for general-purpose curve cutting.
The Scroll Saw:
A scroll saw is a stationary tool that uses a very fine, thin blade that moves up and down. It’s designed specifically for highly intricate, detailed curved cuts in thinner materials. You feed the wood under the blade, moving it precisely with your hands.
What Can You Do With a Scroll Saw?
- Intricate Inlays: Cutting extremely detailed shapes for decorative work.
- Small Models: Perfect for model building or craft projects.
- Fine Detail: Cutting complex patterns where extreme precision is needed.
- Internal Cutouts: Similar to a jigsaw, you can drill a hole and insert the blade for cutouts.
Pros for Beginners (who need fine detail):
- Unmatched precision for delicate curves and patterns.
- Very safe as your hands are far from the blade.
- Excellent for small, detailed craft projects.
Cons for Beginners:
- Limited to thinner materials (typically 1-2 inches thick).
- Not suitable for general lumber cutting or large projects.
- Takes practice to master feeding the wood smoothly for consistent results.
- A niche tool – you likely won’t need it for your very first projects unless they are specifically detailed crafts.
Which One Should You Get First?
For most beginners tackling general home improvement and furniture projects, a circular saw and a jigsaw will cover 90% of your cutting needs. If your projects involve a lot of trim or precise angles, add a miter saw. A scroll saw is a fantastic secondary tool if you get into detailed decorative work or model making.
5. The Random Orbital Sander (Wait, that’s not a saw!)
Okay, I know this isn’t a saw, but it’s so important for making your cuts look good that I have to mention it briefly. Even the best saw cuts leave a rough edge. A random orbital sander is crucial for smoothing those edges, preparing surfaces for finishing, and making your projects look professionally done. It’s the perfect companion to your new saws!
Using Your Essential Saws Safely
Safety is not just a guideline; it’s paramount in woodworking. Power saws are incredibly useful, but they demand respect. Always remember these core principles:
- Read the Manual: Every saw is different. Understand your specific tool’s operation, safety features, and maintenance requirements by reading its manual thoroughly.
- Wear Safety Gear:
- Eye Protection: Safety glasses or a face shield are non-negotiable. Wood chips and dust fly!
- Hearing Protection: Power saws are loud. Earplugs or earmuffs will protect your hearing over the long term.
- Dust Mask/Respirator: Sawdust can be harmful to inhale. A good quality mask or respirator is essential, especially when working indoors.
- Sharp Blades: A dull blade works harder, produces a rougher cut, and is more likely to bind or cause kickback (when the saw suddenly jumps back). Keep your blades sharp or replace them when they become dull.
- Secure Your Workpiece: Always clamp your wood firmly to a workbench or sawhorses. Never try to hold a piece of wood with your foot or knee while cutting.
- Keep Hands Clear: Maintain a safe distance between your hands and the blade’s cutting path at all times.
- Unplug When Not in Use: Disconnect the power before changing blades, making adjustments, or cleaning your saw.
- Know Your Saw’s Limits: Don’t try to force a saw to do something it’s not designed for. For example, don’t try to rip a thick board with a jigsaw.
- Clear Your Workspace: Keep your work area clean and free of clutter. Tripping hazards or sawdust buildup can lead to accidents.
For more in-depth safety information, the Wood Magazine is an excellent resource with practical, easy-to-understand advice.

Basic Saw Maintenance for Longevity
Taking care of your tools ensures they perform well and last a long time. Here’s how to keep your essential saws in top shape:
- Blade Cleaning and Care: After use, especially if cutting resinous woods, clean your blades with a brush and a mild solvent to remove sap and pitch. Store blades properly to prevent damage.
- Keep Saws Clean: Regularly blow or brush away sawdust and debris from the motor housing, vents, and moving parts. Clogged vents can cause overheating.
- Check Guards and Adjustments: Periodically ensure that blade guards operate freely and that all adjustment mechanisms (like miter or bevel angles) move smoothly and lock securely.
- Lubrication: Some saws may require occasional lubrication of moving parts, as specified in the owner’s manual.
- Storage: Store your saws in a dry place, protected from dust and moisture. If possible, use their original cases or invest in tool bags/boxes.
FAQ: Your Woodworking Saw Questions Answered
Q1: What is the most important saw for a beginner to buy first?
A1: For general-purpose projects, a handheld circular saw is usually the best first purchase. It’s versatile for making straight cuts on lumber and sheet goods, which are common tasks for most beginner projects.
Q2: Can I make curved cuts with a circular saw?
A2: While you can make very shallow curves with a circular saw, it’s not designed for it and can be dangerous. A jigsaw is the dedicated tool for making smooth, controlled curved cuts.
Q3: How do I get perfectly straight cuts with a jigsaw?
A3: Jigsaws can be tricky for perfectly straight cuts. Using a clamped-on straight edge or a guide rail, similar to how you’d guide a circular saw, can significantly improve the straightness of your cut. Always go slow and steady.