2×4 Christmas Craft Ideas for Easy Wood Projects
2×4 Christmas craft ideas work best as scrap-lumber projects sorted by cut complexity, stability, and finish durability: start with no-rip, low-cut builds for fast decor, then move to balanced pieces, then planters or large yard displays. Bad layout wastes stock, tips over outdoors, and fails after one wet season. This guide sorts practical 2×4 holiday projects so you can choose one, cut it, finish it, and keep it stable.
Choosing cuts and shapes from a single 2×4 board
A 2×4 can become trees, block characters, signs, candle holders, and small porch décor. The best choice depends on where the piece sits, how many cuts you want to make, and whether it needs to stand on its own. Indoor shelf pieces can be lighter; porch pieces need wider bases, better sealing, and proportions that resist tipping.
What you can make from one 2×4
Standard softwood construction lumber works well as the base material for blocks, trees, signs, and décor. You can cut it into rounds, blocks, angles, and stacked layers. That is why it fits holiday builds so well: one board can become several small pieces, or one larger tree with only a few angled cuts.
A common first-timer mistake is assuming a long board automatically yields many finished pieces. In practice, the cut pattern matters more than the raw length. A 4-foot board used for a stacked tree may leave very little waste, while the same board cut into block characters can leave offcuts that are too small for another stable project.
How to choose by space, skill, and display location
If you need a quick tabletop piece, choose block characters or a simple sign. If you want a freestanding accent, choose a wide-base tree or a short porch marker. If the piece will sit near a door or on a covered porch, keep the footprint broad and the finish sealed. Outdoor moisture attacks raw wood edges and unsealed paint.
| Rank | Project | Skill level | Build time | Material waste | Stability risk | Best use case | Cut strategy | Finish recommendation |
|---|---|---|---|---|---|---|---|---|
| 1 | Painted holiday blocks | Beginner | 30-45 min | Low | Low | Shelf or mantel décor | Crosscut 2×4 into 3-1/2-inch or 4-inch cubes, sand all faces, paint characters | Acrylic paint over sanded wood; seal with clear water-based topcoat for indoor use |
| 2 | Tabletop holiday sign | Beginner | 45-60 min | Low | Low | Entry table or mantel | Rip or crosscut a short board, add a simple base block, paint the face panel | Primer plus acrylic paint; tape off lettering, then seal if handled often |
| 3 | Mini stacked tree | Beginner to intermediate | 1-2 hr | Moderate | Medium | Shelf, table, or windowsill | Cut several angled blocks from one board and stack them largest to smallest | Sand edges, paint green or white, then dry-brush details after the base coat cures |
| 4 | A-frame tree | Intermediate | 1.5-2 hr | Moderate | Medium | Covered porch or corner display | Cut two mirrored side rails and crosspieces; keep angles consistent for symmetry | Exterior-rated paint or stain-plus-sealant for sheltered outdoor display |
| 5 | Snowman block stack | Beginner | 45-75 min | Low | Low to medium | Indoor floor or hearth decor | Cut three or four blocks in graduated lengths and stack vertically on a base | Acrylic paint with taped bands, then a clear topcoat after full drying |
| 6 | Porch marker sign | Intermediate | 1-2 hr | Moderate | Medium | Front steps or porch corner | Use one long vertical board with a wide foot block or back brace | Exterior paint and a moisture-resistant clear finish on all faces and end grain |
| 7 | LED candle holder block | Intermediate | 1 hr | Low | Medium | Dinner table or mantel centerpiece | Drill centered holes sized to LED candle inserts or metal cups, then sand smooth | Natural stain or paint, then clear coat; use only LED candles or metal inserts |
| 8 | Short porch tree | Intermediate | 2-3 hr | Higher | Medium to high | Sheltered porch or entry display | Cut layered branches from repeating triangles or offset blocks and mount to a broad base | Exterior paint plus sealed base edges; add weight at the bottom if needed |
What tools do you need?
The tool list stays short for most 2×4 Christmas craft ideas. A miter saw helps with angled cuts, especially for A-frame tree shapes and sized blocks. A circular saw can do the same job for crosscutting 2x4s into blocks or rough tree parts, but it should be paired with clamping and measurement so the cuts stay square and repeatable.
Cutting and layout tools
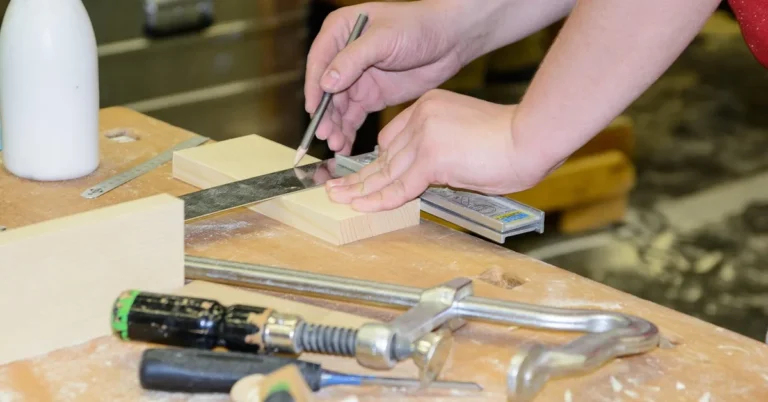
At minimum, use a tape measure, pencil, speed square, clamps, and one saw. Add sandpaper, wood glue, and a brush or foam applicator for finish work. Wood glue is common for stacking and assembling layered projects, especially tree sculptures and block builds, but it needs drying time before you paint or seal.
- Measure every cut from one reference end.
- Mark each cut line on all visible faces.
- Clamp the board before sawing it.
- Cut slightly proud only if you plan to sand to the line.
- Dry-fit stacked parts before adding glue.
- Sand sharp edges before any paint or stain.
Hand-tool-friendly versus saw-dependent projects
Simple blocks, signs, and candle holders can be built with a circular saw or even pre-cut lumber from a home center cut list. A miter saw helps when the project depends on repeated angles, such as a layered tree or a symmetrical A-frame. If you want crisp geometry, the saw choice matters more than the holiday theme.
Suppose a 2×4 sign is meant for a covered porch. A square-cut board with a wide base and sealed end grain will hold up better than a decorative sign with thin feet and no finish. The difference is not the wording on the sign. It is the base width, the cut accuracy, and the seal on the bottom edge.
How do you turn a 2×4 into a Christmas tree?
You can turn a 2×4 into a Christmas tree by cutting a series of graduated pieces and stacking them into a tapered form, or by building an A-frame with angled sides and short crosspieces. For tabletop use, a tree about 12 to 24 inches tall is a practical range. For a porch accent, a height of about 24 to 36 inches is easier to keep stable than a tall, narrow build.
Stacked tree cut pattern
A stacked tree often works well with 5 to 7 layers. Start with the widest bottom layer, then reduce each layer by roughly 1/2 inch to 1 inch per side so the silhouette tapers. One common plan for a 24-inch tree uses seven blocks, descending from about 5-1/2 inches wide to about 2 inches wide, with each block sanded and slightly offset when stacked.
Use wood glue between layers and keep the glue line thin. Clamp the stack lightly until it sets. If the layers twist even a little, the whole tree reads as crooked. That is why flat cuts and a square bottom matter more than decoration at this stage.
A-frame tree shape and base control
An A-frame tree uses two side members joined by crosspieces or a center spine. It is a good option when you want a clear tree outline without many stacked blocks. Keep the base wider than the top by about 2 to 3 inches on each side for a tabletop piece, and more if the tree will sit near a doorway where it may get brushed.
For stability, add a flat base board or hidden foot block. If the tree leans, check whether one leg is shorter or whether the floor contact is uneven. A wide base and a clean miter are the easiest ways to reduce wobble without adding visible hardware.
How do you cut a stacked 2×4 Christmas tree?
Cut a stacked 2×4 Christmas tree by laying out all layer sizes before you make a single cut, then cutting the largest blocks first and checking the taper as you go. A typical stack uses 5 to 7 layers, and the base should be wide enough to keep the tree from rocking. The goal is a clean taper, not a random pile of blocks.
Simple cut plan
Start with one 2×4 and mark consecutive lengths for each layer, leaving enough material for a stable base and a smaller top piece. A practical arrangement is to make the bottom block the full width of the 2×4, then shape the upper layers by trimming side angles or shortening each layer by a small amount. The exact look can vary, but the layers must step down evenly.
Keep the bottom face square to help prevent tipping. If it is not square, the entire tree will tip when placed on a shelf or porch rail. After cutting, sand all edges with 120-grit paper, then move to 180-grit for the visible faces. This removes splinters and helps paint stick without fuzzing the grain.
How to stop wobble
Wobble usually comes from an uneven base, uneven glue lines, or a top-heavy profile. Add weight to the bottom layer, widen the base block, or shorten the tallest section. If the tree still rocks, trim the feet rather than forcing it into place. A tree that sits flat before paint will usually sit flat after paint.
A common first-timer mistake is painting before checking the dry stack. Once paint hides the joint lines, it becomes harder to see the small misalignment that causes wobble. Dry-fit first. Then glue, clamp, and paint only after the structure stands on its own.
What can you make from a 2×4 for Christmas?
You can make a short list of useful pieces from 2×4 lumber: block characters, tabletop trees, porch markers, sign boards, and candle holders with safe inserts. Those projects cover most holiday display needs without forcing you into complex joinery. They also keep waste predictable, because each build starts from clear cut lengths rather than guesswork.
Block, sign, and holder builds
Holiday block characters are the easiest way to use a 2×4 efficiently. Cut cubes or short rectangles, sand the corners, and paint simple faces or lettering. For signs, use one long board and a wider base block. For candle holders, drill holes only for LED candles or metal inserts, never for an open flame directly in raw wood.
Pillar or taper candle openings must match the candle diameter closely, and the holder must stay non-flammable where heat is involved. If you want the look of candlelight, choose LED candles first. If a real flame is required for a separate display piece, use a rated metal insert and keep it away from dry greenery, paper décor, and unstable surfaces.
Holiday characters and porch décor
Santa and snowman blocks work because the shape is simple and the cut list is short. Paint on acrylic color after sanding, then use painter’s tape for clean stripes, hats, scarves, or plaid details. Painter’s tape works best when removed before the paint fully cures in some designs, which helps keep the edge crisp.
Twine or jute ribbon adds a quick rustic note. Wrap it around a block, tie a small bow, or use it as a hanger for a sign. It pairs well with berries, pinecones, or bells, but keep the trim light so it does not pull the piece out of square or cover the paint detail you just made.
How do you keep rough lumber looking finished?

Rough lumber looks finished when you sand it well, seal it properly, and keep the paint lines clean. Start with 80- or 100-grit only if the board is especially rough, then move to 120-grit and finish with 180-grit on exposed faces. Rounded corners, smooth edges, and a consistent top coat matter more than costly decoration.
Sanding, paint, and tape
Acrylic paint works well on sealed or sanded wood and is a common finish for rustic décor. For crisp plaid or geometric patterns, tape the lines before painting and press the edges firmly. Remove the tape before the paint fully cures if the design starts to bridge the edge. That reduces peeling and keeps corners sharp.
If the piece will go outdoors, add a moisture-resistant clear coat or exterior-rated paint system after the color coats cure. Porch pieces need extra attention on the end grain, which drinks finish faster than the flat face. The underside of a base deserves finish too, because water often sits there first.
Failure cases to avoid
Splitting happens when screws are too close to an edge or when a board is drilled without a pilot hole. Rough edges come from skipping the final sanding pass. Paint bleed usually means the tape was placed over dust, not bare wood. Wobble usually means the base is too narrow, not that the design is “off.”
Keep the fixes simple. Pre-drill near ends, sand every cut face, clean dust before tape goes down, and test the stand before finishing. Those steps are boring, and they prevent most of the ugly outcomes people blame on the lumber itself.
Say your 18-inch tabletop tree looks good from the front but rocks when you touch it. The likely issue is a narrow bottom block, not the stacked layers. A wider base or one extra flat block under the stack will usually solve the problem without changing the look.
Frequently asked questions
What tools do I need for 2×4 Christmas crafts?
Use a tape measure, pencil, square, clamps, sandpaper, and one saw. A miter saw helps with repeated angles, while a circular saw can handle straight crosscuts when clamping and measurement are solid. Add wood glue for layered projects and acrylic paint for the finish.
How tall should a 2×4 Christmas tree be?
A tabletop tree usually works best at 12 to 24 inches tall. A porch or entry piece can go to 24 to 36 inches if the base is wide enough. Taller trees need more footprint and weight at the bottom, or they will feel top-heavy and easier to tip.
What finishes work best on 2×4 Christmas crafts?
Acrylic paint works well on sanded wood for indoor pieces. For porch décor, use exterior-rated paint or a clear moisture-resistant topcoat. If the project gets handled often, seal it after the color dries. For striped or plaid designs, painter’s tape gives the cleanest lines when removed at the right time.
Sponsored / affiliate links. As an Amazon Associate I earn from qualifying purchases. I may earn additional commission from eligible campaigns.