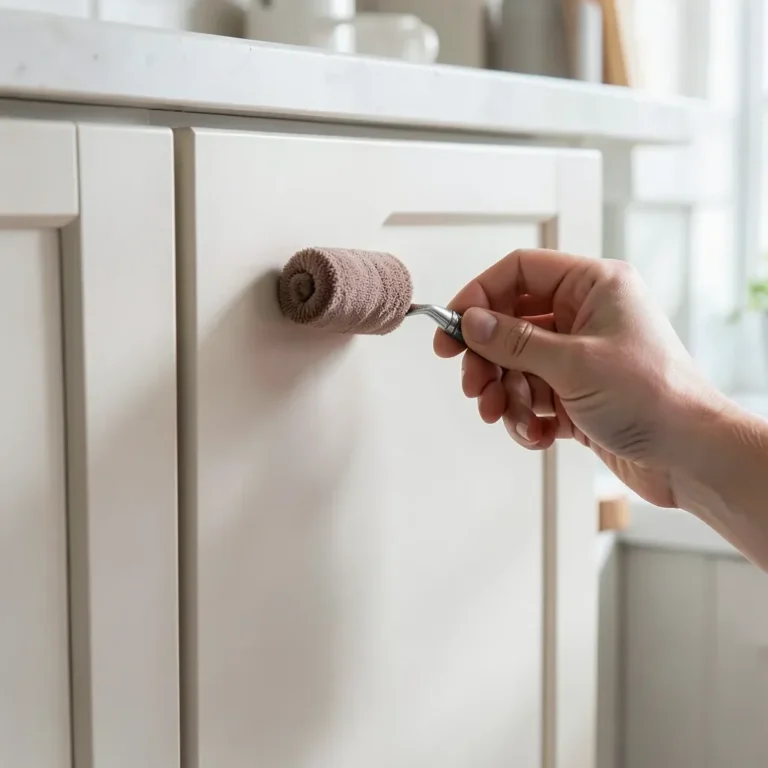
Best Foam Rollers for Wood Furniture: Based on Specs and Reviews
Use a foam roller for smooth furniture surfaces. Load it lightly, apply about two thin coats of self-leveling furniture enamel, keep a wet edge, and sand lightly between coats. If you skip that process, you will get stipple, lap lines, roller drag, and an uneven finish. For smooth furniture surfaces, a high-density foam mini roller is the safest default because it leaves the least visible texture on flat wood.
What you’ll need
- High-density foam mini roller, 4-inch or 6-inch
- Standard mini roller frame that fits the cover
- Bonding primer or shellac-based primer for bare or problem wood
- Self-leveling furniture paint, or latex/acrylic paint with the right additive
- Floetrol for water-based paint
- Penetrol for oil-based paint
- 220-grit sandpaper
- Vacuum or tack cloth for dust removal
- Paint tray with ridges
- Small brush for corners, edges, and profiles
- Clean rag and mineral spirits or water, matched to the paint type
- Sand the wood with 220-grit sandpaper to dull the surface and remove machining marks.
- Vacuum or tack off every bit of dust before primer or paint goes on.
- Prime bare wood, stained wood, or old finish that is glossy or patchy.
- Sand the primer lightly with 220-grit sandpaper after it dries.
- Stir in Floetrol for water-based paint, or Penetrol for oil-based paint.
- Pour paint into the tray and roll off the tray ridges to remove excess.
- Cut in corners and edges with a brush, then roll the flat areas right away.
- Use thin, even passes and keep a wet edge across each panel.
- Add only enough paint to keep the cover moving; check the finish after each pass.
- Let the coat dry, then sand lightly with 220-grit sandpaper before the next coat.
Why the order matters
Paint film defects show up fastest on tabletops, drawer fronts, and cabinet doors because those surfaces reflect light evenly. A smooth roller can still leave ridges if the base is rough, the coat is heavy, or the paint flashes too fast.
Say your dresser top is 30 inches wide and you are working in a warm room. The first half of the panel dries before you reach the far edge, so the overlap line prints through. The fix is a wetter working edge, thinner coats, and a paint choice that levels before it skins.
Quick comparison
| Product | Badge | Best for | Price | ||
|---|---|---|---|---|---|
 |
VOOMEY Mini Paint Roller CoversVoomey | Our pick | 4 in · foam · 24-pack | $17.99
Price as of 2 Nov 2026
|
View |
 |
Pro Grade Mini Paint Roller CoversPro Grade | Also great | 4 in · 1/2 in nap · 25-pack | $12.99
Price as of 2 Nov 2026
|
View |
 |
INSL-X Cabinet Coat – Urethane Acrylic Satin Sheen EnamelINSL-X | Upgrade pick | 1 qt · satin sheen · cabinet paint | $26.99
Price as of 2 Nov 2026
|
View |
 |
Premium Quality Paint and Primer Compatible with BEHR 1 Qt.Behr | Pair with it | 1 qt · semi-gloss · interior paint | $47.99
Price as of 2 Nov 2026
|
View |
 |
Wooster Brush RR308-4-1/2 Pro FoamWooster | Budget pick | 4.5 in · foam · 2-pack | $7.19
Price as of 2 Nov 2026
|
View |
Foam is the safest default for smooth furniture, while microfiber and mohair give more film control on some paints. The wrong cover usually shows up as stippling, drag, or orange peel before it shows up as a color problem.
How we chose
Selection starts with defect control, not speed. The best match depends on four things: surface smoothness, paint chemistry, furniture profile, and how much texture the finish can tolerate.
High-density foam gets priority for flat, smooth furniture. Flocked foam matters when a mini roller must reach tighter profiles, but it can stipple if overloaded. Microfiber and mohair matter when the paint needs more body control than foam can give.
Roller size also matters. A 4-inch cover is easier on narrow drawers and trim. A 6-inch cover helps on broader panels, but only if you can keep the coat thin and even.
Way paint wood furniture decision table
| Surface type | Paint type | Expected defect risk | Best roller material | Ideal nap/size | What to do if stippling, drag, or orange peel appears |
|---|---|---|---|---|---|
| Flat tabletops and cabinet doors | Self-leveling furniture enamel or acrylic-alkyd blend | Low if coats stay thin; ridging if overloaded | High-density foam | 4-inch or 6-inch mini roller | Roll off more paint on the tray ridges, then recoat thinner |
| Drawer fronts and flat panels with sharp edges | Latex or acrylic with Floetrol | Medium; lap lines and drag can show at edges | High-density foam | 4-inch mini roller | Shorten each pass, keep a wet edge, and slow the room with more open time |
| Cabinet doors with light contour detail | Water-based cabinet paint | Medium; stippling if the cover is overloaded | Flocked foam | Mini roller, light nap feel | Use less paint per load and do not press the cover into grooves |
| Previously coated wood with light sheen | Oil-based paint with Penetrol | Medium; drag if the coat flashes too fast | Microfiber or foam | 4-inch mini roller | Add the oil additive within the label range and roll immediately after brushing |
| Raw wood with open grain or sanding marks | Primer first, then topcoat | High if primer is skipped; grain telegraphing | High-density foam | 4-inch mini roller | Prime, sand with 220-grit, then recoat instead of trying to bury defects in one pass |
What to do if stippling shows up
Stippling usually means the roller held too much paint or the surface started to skin before the film could level. Load less paint, roll more of it off on the tray ridges, and switch to thinner passes. If the room is warm or dry, add a conditioner made for the paint type.
What to do if drag or orange peel appears
Drag means the roller is pulling through paint that is setting too fast. Orange peel usually means the coat is too thick or the paint is not leveling enough. Use a thinner coat, work in shorter sections, and keep the overlap moving before the first pass loses its wet edge.
Top pick for furniture: high-density foam mini roller
The Voomey 4-inch high-density foam covers are the safest default for flat furniture surfaces. They are made for smooth surfaces, including cabinets, doors, and tables, and the foam construction is meant to leave a lint-free finish. Replacement covers are available, which matters if you want the same result on more than one piece.
The main drawback is capacity. Foam does not hold as much paint as thicker covers, so you need to reload more often on larger panels. That is a fair trade when the goal is fewer visible marks.
Why 4-inch and 6-inch sizes matter
A 4-inch cover is easier to control on drawer fronts, narrow tabletops, and framed panels. A 6-inch cover covers more area, but only if the furniture face is broad enough to keep the roller moving in long, even passes. On small furniture parts, oversize coverage can leave ridges at the ends of each stroke.
When replacement covers matter
Foam covers flatten out with use. A fresh cover keeps the edge of the film more even, which matters on final coats. If the cover starts leaving lines at the ends of passes, replace it instead of forcing one more coat through a tired sleeve.
Best for cabinets and trim details: flocked foam mini roller
The Wooster 4-1/2-inch foam covers suit smooth furniture when you want a little more coverage than a small mini roller gives. Based on the published product details and buyer feedback, the closed ends help near corners, and the lint-free finish is useful on cabinet faces and trim. That makes it a practical choice for furniture with edges and cutouts.
The drawback is simple: foam still depends on careful loading. If you overload it, the cover can leave more texture than you wanted. That risk is higher on profiles and raised edges than on flat panels.
Where it helps
Use this format on cabinet doors, picture-frame style drawer fronts, and trim that has a few tight corners. It gives you more usable paint than a very small foam sleeve without moving into a wall-roller feel.
Why overload causes stippling
Flocked foam and similar mini covers can trap too much paint in the face of the roller. When that happens, the surface leaves peaks as the paint starts to set. The fix is to charge the cover lightly and roll off the excess before it touches the furniture.
Best for paint and prep system: self-leveling paint and thin coats
Self-leveling furniture paint helps brush strokes and roller marks disappear as it dries. It works best in thin coats, and the strongest results usually come from enamel or an acrylic-alkyd blend. Heavy coats do the opposite: they hold ridges, sag at edges, and make texture easier to see.
Floetrol is the right additive for water-based paints. Penetrol is the right additive for oil-based paints. Do not swap them, because each is intended for a different paint chemistry and flow behavior.
Primer and 220-grit sanding before topcoating
Use a bonding primer on slick, previously finished furniture, and use a shellac-based primer when stains or tannins may bleed through. Primer gives the topcoat a smoother base and helps prevent discoloration from raw wood or problem wood. Sand the primer between coats with 220-grit sandpaper so bumps and fuzz do not telegraph into the finish.
When primer is not optional
Skip primer at your own risk on pine, oak, mahogany, or any piece with stain bleed, patchy old finish, or glossy factory coating. Those surfaces tend to show defects through the topcoat, even when the roller choice is correct.
Which one should you buy?
If you want the best first purchase for most furniture, buy a high-density foam mini roller in 4-inch size. It is the safest default for tabletops, drawer fronts, and cabinet doors because it gives the least visible texture on smooth surfaces.
If your furniture has more edges and cutouts, choose a flocked foam mini roller or a 4-1/2-inch foam sleeve. If you are painting with water-based enamel or acrylic, pair the roller with Floetrol. If the paint is oil-based, use Penetrol instead.
For the lowest cost, a foam cover is still the cleanest starting point. For the most forgiving paint system, use a self-leveling furniture paint over sanded primer. For the fastest job, use a 6-inch mini roller only on broad flat faces where you can keep the wet edge intact.
Picture a 6-drawer dresser with flat fronts and square edges. A 4-inch foam cover gives you more control on the drawer faces, while a larger cover can be useful on the top panel if the room is cool enough to keep the paint open. One roller will not solve every zone.
Common mistakes
Loading the roller too heavily. That is the fastest way to get stipple and ridges. Roll off excess on the tray ridges before the cover reaches the wood.
Skipping the wet edge. Once a section starts to skin, the overlap prints through. Work in short sections and overlap while the film is still open.
Using the wrong additive. Floetrol is for water-based paint. Penetrol is for oil-based paint. Do not use either as a universal fix.
Skipping sanding between coats. 220-grit sanding knocks down bumps and fuzz that would otherwise show after the next layer dries.
If that didn’t work, try this next
Say the finish still shows tiny peaks after a careful first coat. The next step is not a thicker roller; it is a thinner coat and a smoother base. Sand lightly with 220-grit, wipe the dust away, and switch to a fresh cover if the sleeve face looks packed or uneven.
Prevention
Keep one paint system per job. Use the same chemistry, the same roller type, and the same loading method from the first coat to the last.
Frequently asked questions
What is the best way to paint wood furniture with a roller without brush marks?
Use a high-density foam mini roller, prime first, and roll thin coats over a smooth base. Cut in corners with a brush, then roll the flat face immediately and keep a wet edge. Sand lightly with 220-grit between coats so the next layer does not trap bumps.
What roller should I use for a smooth finish on furniture?
A high-density foam mini roller is the safest default for smooth furniture. A 4-inch size is easier to control on drawer fronts and narrow panels, while a 6-inch size fits broader faces. For light profiles, flocked foam can work, but keep the load low.
Do I need to sand furniture before rolling on paint?
Yes. Use 220-grit sandpaper on raw wood and on existing finishes that are glossy or uneven. Sand again between coats to remove dust nibs, raised grain, and small ridges that would otherwise show through the next layer.
Should I use primer before painting wood furniture with a roller?
Use primer on bare wood, stained surfaces, tannin-heavy species, and problem finishes. Bonding primer helps the topcoat grip slick surfaces, while shellac-based primer helps block stains and tannins. Sand the primer lightly before the finish coat goes on.
What paint works best for furniture when rolled on?
Self-leveling furniture paint is the easiest route to a smoother rolled finish. Look for enamel or an acrylic-alkyd blend, then keep the coats thin. If you are using water-based paint, Floetrol can help; if the paint is oil-based, use Penetrol.
How do I avoid stipple and roller texture on painted furniture?
Load the cover lightly, roll off excess on the tray ridges, and avoid pressing hard into the surface. Keep the room from getting too hot and dry if you can. If texture still appears, thin the coat and work in smaller sections with a wet edge.
Sponsored / affiliate links. As an Amazon Associate I earn from qualifying purchases. I may earn additional commission from eligible campaigns.