Best Way to Clean Oak Cabinets (Test Your Finish First)
The best way to clean oak cabinets is a damp microfiber cloth with a mild soap solution, wiped along the grain and dried at once, but only after you confirm what finish is on the wood. Most oak cabinets carry a sealed film of polyurethane or varnish, yet older or custom ones can be shellac, and each reacts differently to cleaners. This guide covers a 30-second finish test, an exact dilution table, and how to lift grime out of oak’s open grain.
Best Way to Clean Oak Cabinets: Test the Finish Before You Wipe
Best Oak Cabinet Cleaner Pick
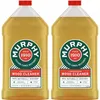 |
Murphy Oil Soap Concentrated Original Wood Cleaner, 32 oz (Pack of 2), $16.04 A concentrate made for sealed wood, so you control the dilution in the bucket. That matters here, because too much soap is the usual reason cabinets look streaky after cleaning.
|
Cleaning advice for oak cabinets usually assumes a hard polyurethane coat. That is the common case, but it is a guess, and a wrong guess is how a cleaner turns a finish tacky or cloudy. A cotton swab and a little denatured alcohol settle it in under a minute.
Work on a hidden spot, such as the inside edge of a door or the underside of a face frame. Rub a swab dampened with denatured alcohol on the finish for about ten seconds, then look at the swab and the wood. Alcohol is flammable and its fumes build up in a closed kitchen, so open a window and keep it away from the stove and any open flame.
| What the swab test shows | Likely finish | What it means for cleaning |
|---|---|---|
| Finish dissolves or turns sticky fast | Shellac | Keep water minimal and skip soaps with strong solvents. Wipe damp, never wet, and dry at once |
| Finish softens slightly | Lacquer (confirm with lacquer thinner on a hidden spot) | Mild soap only, no degreasers, light pressure |
| Nothing happens to the finish | Polyurethane or varnish | Handles the routine soap or oil-soap method below |
| Swab pulls color or the wood looks raw | Worn through or unfinished | Do not use oil soap or water-heavy cleaning here. Treat with a finish touch-up instead |
Our guide to identifying wood furniture finishes covers the same solvent test in more detail, including what each reaction looks like. A second check takes ten seconds: put one drop of water on a hidden area. If it beads, the finish is still sealing the oak. If it soaks in and darkens the wood, the coating is worn there and that spot needs a refinish, not a better cleaner.
What You Need
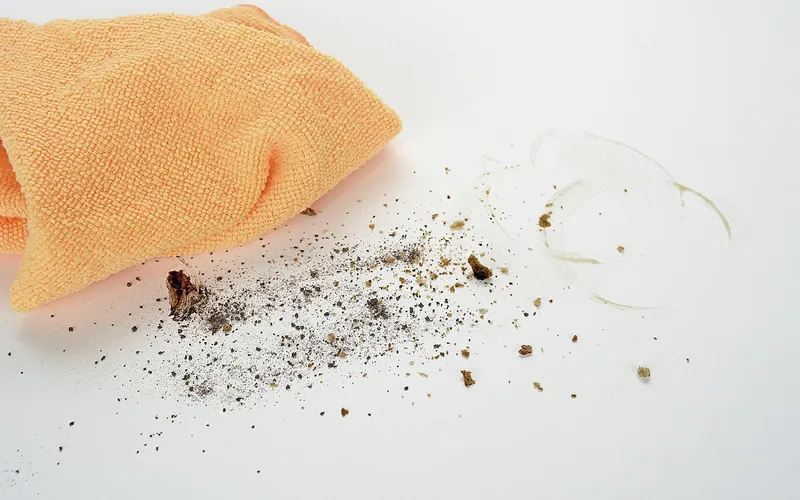
- Two or three clean microfiber cloths: one to wash, one to rinse, one to dry
- A bucket and a gallon of warm water
- Mild dish soap, or the oil soap concentrate from the box above
- A soft toothbrush for carved edges, raised panels and grooves
- A vacuum with a brush attachment, or a dry duster, for the first pass
Leave out steel wool, scouring powder, ammonia, bleach, acetone and steam cleaners. Abrasives scratch the coating, and the others either dissolve it or force moisture into the seams.
How to Clean Oak Cabinets, Step by Step
- Dry-dust first: Run a dry microfiber cloth or a vacuum brush over the doors and face frames so you are not pushing grit around with a wet cloth.
- Mix the solution: Use a few drops of dish soap in a quart of warm water, or the oil soap mix from the dilution table below.
- Work one door at a time, top to bottom: Wring the cloth until it is barely damp and wipe with the grain. Starting at the top keeps drips from landing on a section you already cleaned.
- Lift grime out of the grain: On textured spots and around handles, use a soft toothbrush along the grain lines, not across them.
- Rinse right away: Wipe the same door with a cloth dampened in plain water to remove soap before it dries into a film.
- Dry and buff: Finish with a dry cloth, including the edges and the seams where doors meet the frame.
Why Oak Holds Grime: The Open-Grain Problem
Oak is a ring-porous hardwood, which means its grain has visible, open pores running the length of each board. A film finish sits over those pores but does not fill them completely, so cooking grease, hand oils and dust settle into the grain lines and look like a dirty shadow even after a wipe. That is why a smooth cloth passed across oak often moves the dirt around, while a soft toothbrush worked along the grain actually reaches it.
This is also why the heavy grime band tends to sit around handles and the stove side of the kitchen, where hand oils and airborne grease meet the same open grain. Treat those zones with a second, patient pass rather than a stronger chemical.
How Much Cleaner to Use: A Dilution Table
More soap does not clean better. Extra oil soap or dish soap dries as a thin sticky film that attracts dust and makes the finish look dull, which people often mistake for dirty cabinets and respond to by cleaning harder. Murphy’s Oil Soap is commonly mixed at 1/4 cup per gallon of warm water for regular cleaning. Always check your own bottle’s label first.
| Job | Mix per gallon of warm water | Rinse? |
|---|---|---|
| Weekly wipe-down | 1/4 cup oil soap, or about 1/2 teaspoon dish soap per quart | Yes, plain damp cloth |
| Heavy grease or grime | Up to 1/2 cup oil soap | Yes, then dry buff |
| Dust and fingerprints only | Dry microfiber, no liquid | Not needed |
| Sticky label or tape residue | A dab of mineral oil or cooking oil on a cloth, then wash with the weekly mix | Yes, to remove the oily film |
Fix the Problem You Actually Have
| Problem | What works | What to avoid |
|---|---|---|
| Greasy film near the stove | Warm water and dish soap, a minute of dwell time, then rinse. Repeat once more if needed | Kitchen degreasers made for stovetops and range hoods |
| Dark fingerprints around handles | Toothbrush along the grain with the weekly mix | Scrubbing across the grain |
| Cloudy or streaky look after cleaning | Rinse with a damp cloth of plain water and buff dry | Adding more cleaner |
| Water ring or white haze | Dry buff first, then call it a finish issue if it stays | Abrasive pastes that wear the coating |
| Scuffs and light scratches | Dry soft cloth, then a touch-up marker matched to the stain | Magic erasers, which are mildly abrasive |
A scuff that has turned into an actual split is a repair job, not a cleaning one, and our guide to fixing cracks in wood cabinets covers that.
The Moisture Habit That Quietly Ruins Cabinets
A single spill wiped up quickly will not hurt a sealed cabinet. Damage builds from repeated moisture at the joints, where doors and drawer fronts are assembled and the finish is thinnest. A dripping cloth, a splash left by the sink or steam from a dishwasher vent can work past the finish over the years and show up as swelling, a door that no longer sits flush, or a seam that starts to open. Wring the cloth until it is barely damp, dry each door right after rinsing, and keep steam from boiling pots away from the cabinet fronts.
The same finish-first thinking applies on the floor. If you also maintain hardwood, see how to clean hardwood floors, and if you are prepping bare wood for a new finish, our guide to cleaning wood after sanding covers a different job with different rules.
A Realistic Maintenance Schedule
- As needed: a dry microfiber wipe on handle zones removes fresh fingerprints before they set.
- Weekly: a full damp wipe with the weekly mix, rinsed and dried, for a busy kitchen.
- Every one to three months: a deeper wash with the stronger mix, plus the toothbrush pass on grain-heavy areas.
If cleaning cannot bring a tired set back, the real choice is a refresh. Related reading: whether oak cabinets are outdated, how to stain oak cabinets over the existing finish, and how to paint oak cabinets white. For broader oak cupboard care, see our guides on cleaning oak cupboards and cleaning oak kitchen cabinets without stripping the finish.
Frequently Asked Questions
Is Murphy’s Oil Soap safe for oak cabinets?
Yes, if the cabinets have an intact sealed finish such as polyurethane or varnish and you dilute it, commonly 1/4 cup per gallon of warm water. Rinse with a damp cloth and dry right away. Do not use it on unfinished, waxed or worn-through oak, where it can soak in.
Can I use vinegar and water on oak cabinets?
It is better to skip it for routine cleaning. Vinegar is acidic, and repeated use on a softer or aging finish can dull it. Mild dish soap in warm water does the same job on fingerprints and grease with less risk to the coating.
How do I get sticky grease off oak cabinets near the stove?
Wipe with warm water and a few drops of dish soap on a damp microfiber cloth, let it sit for a minute, then wipe again and rinse. Repeat rather than switching to a stronger degreaser, which can soften the finish. Use a soft toothbrush along the grain in carved or grooved areas.
Why do my oak cabinets look streaky or cloudy after cleaning?
Usually leftover cleaner. Too much soap or oil soap dries to a thin film that holds dust. Rinse with a cloth dampened in plain water and buff dry with a clean cloth. If the haze remains, you may be seeing a worn finish instead of residue.
How often should I clean oak cabinets?
Wipe fingerprint zones around handles with a dry microfiber cloth as needed, do a full damp wipe-down weekly in a busy kitchen, and do a deeper wash every one to three months. Cabinets next to the stove may need the deeper wash more often.
Sponsored / affiliate links. As an Amazon Associate I earn from qualifying purchases. I may earn additional commission from eligible campaigns.