Can You Grow Cherries From Cherry Pits? Step-By-Step Guide
Yes, it is possible to grow cherry trees from cherry pits, but it’s not as straightforward as planting many other fruit seeds. While germination can occur, the resulting trees may not produce fruit true to the parent variety, and they often take many years to mature and bear fruit. It’s a project that requires significant patience.
Understanding Cherry Pit Germination
Cherry pits, also called stones, hold the seeds for new cherry trees. However, these seeds have a natural defense. They need a period of cold and moisture to break dormancy.
This process is called stratification. Without it, the seed won’t know it’s time to sprout. Most cherry varieties also need cross-pollination.
This means you often need two different cherry trees for them to make fruit.
The pit itself is hard. It protects the delicate seed inside. Think of it like a tiny armor.
Breaking through this armor is the first step. Then, the seed needs the right signals from nature. Cold, wet conditions tell the seed that winter has passed.
This prompts it to start growing when spring arrives.
This natural process is why simply planting a pit in a pot in spring often fails. The seed is just not ready to wake up. It’s waiting for those specific environmental cues.
Understanding this helps you prepare the pit correctly. It sets you up for a much better chance of success.
The Genetics of Growing from Seed
This is a really important point. When you grow a cherry tree from a pit, you’re not growing an exact clone. You’re creating a new, unique plant.
This is like how children inherit traits from both parents. The new tree will have characteristics from the parent tree and the pollen that fertilized its flower. This means the fruit might be different.
Sometimes, the fruit is better! Other times, it’s not as tasty. It could be smaller, more sour, or have a different texture.
This is a gamble, but it can also be an exciting discovery. You might end up with a new, wonderful cherry variety!
For commercial cherry production, growers use grafting. They take a cutting from a known, good variety and attach it to the roots of another tree. This guarantees the fruit quality.
Growing from seed is more of an adventure. It’s for the gardener who loves the process and is happy with whatever outcome they get. It’s about the journey of growing something new.
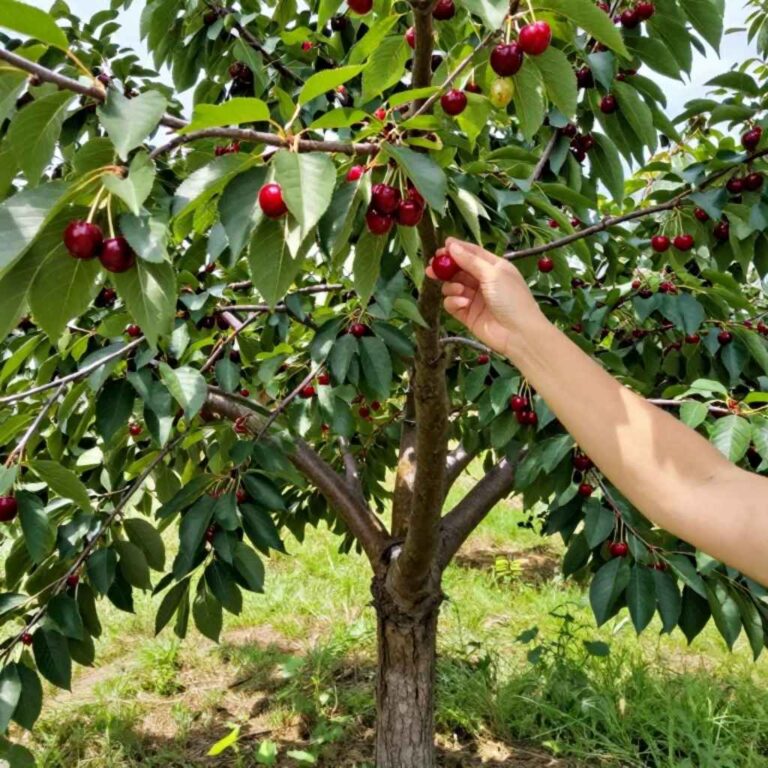
Personal Experience: My First Cherry Tree Attempt
I remember this one time, years ago, after a delicious bowl of Rainier cherries. I loved those sweet, yellow cherries. I thought, “Why not try growing a tree?” So, I took a few pits, washed them off, and popped them right into a small pot on my sunny windowsill.
I watered them, I gave them light. Nothing happened for months. I figured cherry pits were just not meant to sprout.
I almost gave up.
Then, I read about the cold treatment needed. I felt a bit silly, but I decided to try again. This time, I carefully cleaned several pits.
I put them in a damp paper towel inside a plastic bag. I tucked that bag into the back of my refrigerator. It felt strange, putting a potential tree in the fridge.
It sat there for what felt like an eternity. I had to keep checking to make sure the towel stayed moist. It was a real test of my patience.
I wondered if I was doing it all wrong. This felt like a secret mission for my future garden.
Step 1: Selecting and Preparing Your Cherry Pits
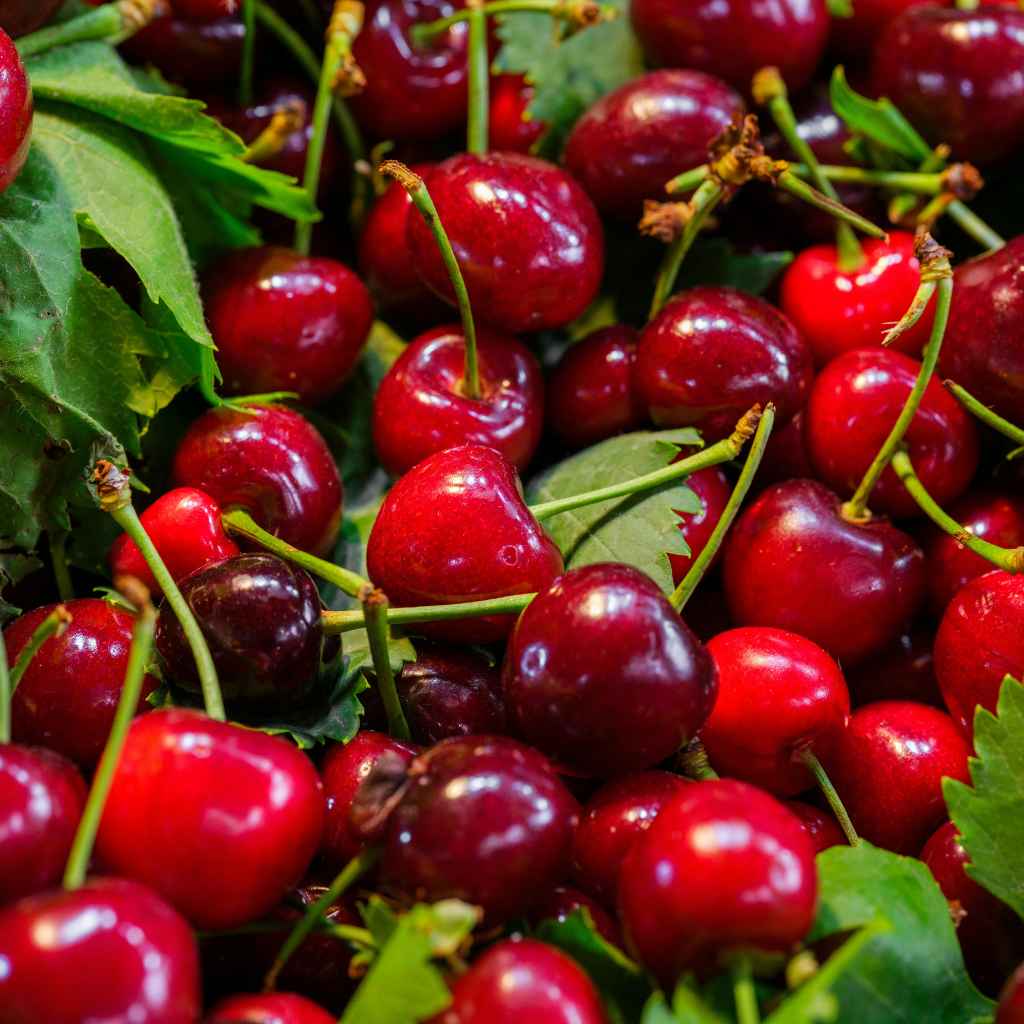
The first step is getting good pits. You want to use fresh pits from ripe cherries. Don’t use pits from dried or canned cherries.
They might not be viable. It’s best to eat the cherries first and then get the pits. You’ll need several pits because not all of them will sprout.
Aim for at least 10-15 pits if you can.
Once you have your cherries, eat them! Then, take the pits. Wash them very well under running water.
You need to remove all the sticky cherry flesh. Any leftover fruit can rot. It can also attract pests to your future seedlings.
Use a soft brush if you need to. Get them squeaky clean. This is a simple but crucial step for preventing mold later.
After cleaning, let the pits dry out for a day or two. Don’t bake them or put them in direct sun. Just let them air dry on a counter.
This helps prevent mold during the next stage. It also makes them easier to handle.
Step 2: Stratification – Giving Your Pits the Cold Shoulder
This is where the magic happens, or rather, where nature’s magic is mimicked. Stratification is key. You need to expose the pits to cold, moist conditions for a specific period.
This tells the seed it’s time to think about waking up.
Get a small, sealable plastic bag or container. Take a paper towel. Moisten it so it’s damp, but not dripping wet.
You can sprinkle a little bit of fungicide on the towel if you’re worried about mold. Lay your clean, dry pits on the damp paper towel. Fold the towel over them.
Place this inside your plastic bag or container. Seal it up.
Now, put this bag in your refrigerator. The ideal temperature is around 35-40°F (2-4°C). You want the back of the fridge, where it’s coldest.
Leave them there for about 8 to 12 weeks. Yes, nearly three months! It sounds like a long time, but it’s necessary.
Check the bag every week or two. If the paper towel feels dry, add a little more water. You want it consistently damp.
If you see mold, try to remove the affected pits and wipe down the bag. Sometimes you can gently rinse the pits.
Stratification Quick Facts
What it is: Mimicking winter conditions for seeds.
Why it’s needed: Breaks dormancy in cherry pits.
How long: 8-12 weeks.
Temperature: 35-40°F (2-4°C).
Moisture: Consistently damp paper towel.
Key goal: Prevent mold, encourage germination.
Step 3: Sowing Your Stratified Pits
After the long wait in the fridge, it’s time to plant! You should start to see a small sprout emerging from some of the pits. You might even see roots.
If a pit hasn’t sprouted, don’t worry. It might still grow. Some pits can take longer.
Get small pots. About 4-6 inches deep is good. Make sure they have drainage holes at the bottom.
Fill them with a good quality potting mix. You can use a seed-starting mix. Or, you can mix regular potting soil with some perlite for better drainage.
This is important because cherry trees don’t like wet feet.
Plant each pit about 1 inch deep. You can plant them pointed end up or down, it doesn’t usually matter. Water the soil gently but thoroughly.
You want the soil to be moist. Do not make it soggy. Place the pots in a warm spot.
A sunny windowsill is perfect. The temperature should be around 70°F (21°C).
Keep the soil consistently moist. You can cover the pots with a clear plastic lid or plastic wrap. This helps keep the humidity high.
This is like a mini-greenhouse. Once you see sprouts, remove the cover. Give them plenty of light.
If you don’t have a sunny window, a grow light can help.
Step 4: Caring for Your Seedlings
You’ve got a sprout! Congratulations! This is an exciting moment.
Now, the real work begins. Cherry seedlings are delicate. They need consistent care.
Continue to keep the soil moist but not waterlogged. Water when the top inch of soil feels dry to the touch.
Seedlings need lots of light. They should get at least 6-8 hours of bright light each day. If your seedlings are getting tall and spindly, it means they need more light.
You can move them to a brighter spot or use a grow light. Rotate the pots every few days. This helps the seedlings grow straight.
As the seedlings grow bigger, they will need more space. When they have a few sets of true leaves, you can start to think about transplanting them. You can move them into slightly larger pots.
This gives their roots more room to grow. Be gentle when transplanting. Their roots are fragile.
You might also want to thin out your seedlings. If multiple pits sprouted in the same pot, choose the strongest one. Remove the weaker ones.
This gives the best seedling all the resources it needs. You can do this by snipping the weaker ones at the soil line. This avoids disturbing the roots of the strong one.
Seedling Care Checklist
- Light: 6-8 hours bright light daily.
- Water: Keep soil moist, not soggy.
- Soil: Well-draining potting mix.
- Temperature: Warm, around 70°F (21°C).
- Potting: Transplant to larger pots as needed.
- Air: Good air circulation helps prevent disease.
Step 5: Transplanting Outdoors (The Big Move)
Once your seedlings are strong and the danger of frost has passed in your area, it’s time to move them outside. This is a big step for your young tree. Choose a location that gets full sun.
Cherries need at least 6-8 hours of direct sunlight every day.
The soil outside should also be well-draining. If you have heavy clay soil, you’ll need to amend it. Mix in compost, sand, or perlite.
This will help improve drainage. Dig a hole that is twice as wide as the root ball. Make it as deep as the root ball.
Gently remove the seedling from its pot. If the roots are tightly bound (root-bound), you can gently loosen them. Place the seedling in the hole.
The top of the root ball should be level with the ground. You don’t want to plant it too deep. Backfill the hole with soil.
Water the tree thoroughly. Mulching around the base of the tree is a good idea. It helps keep the soil moist and suppresses weeds.
When planting outside, it’s a good idea to plant more than one tree. Remember, most cherry trees need cross-pollination. Planting two different varieties increases your chances of getting fruit.
Even if you only grew one type of cherry pit, planting two seedlings increases the chance of at least one surviving and thriving.
Real-World Context: Where Your Cherry Tree Will Grow
Where you plant your cherry tree matters a lot. Most cherry varieties do best in USDA hardiness zones 5-8. This means they can survive winter cold but also handle summer heat.
If you live in a very hot or very cold climate, you might need to choose a specific variety known for that.
Soil type is also a big factor. Cherries hate having their roots sit in water. This can lead to root rot.
So, good drainage is essential. If your soil is heavy clay, consider planting on a raised bed. This ensures excess water drains away.
The pH of the soil should be slightly acidic to neutral, around 6.0 to 7.0.
Sunlight is another critical element. A south-facing slope is often ideal in many U.S. regions.
This provides maximum sun exposure throughout the day. It also helps protect the tree from harsh winter winds.
Wind is another consideration. Strong winds can damage the tree, especially when it’s young. Planting near a fence or other windbreak can offer protection.
However, don’t plant it too close to large trees. They can compete for water and nutrients.
What This Means For You: Patience and Possibilities
Growing a cherry tree from a pit is a long game. It’s not a quick reward. Most trees grown from seed will not produce fruit for at least 5 to 7 years.
Some might take even longer. This is a project for the patient gardener. It’s about enjoying the process of nurturing a plant from its very beginning.
The fruit you eventually get might be a surprise. It may not be the same as the cherry you ate. This is because of genetics.
It’s a bit like a lottery. You could get a fantastic new flavor, or something quite ordinary. The key is to have realistic expectations.
If you’re looking for specific fruit quality or a guaranteed harvest date, buying a grafted tree from a nursery is a better option. But if you love the idea of a long-term gardening project and the possibility of a unique outcome, growing from seed is a wonderful adventure. It connects you to the plant’s life cycle in a special way.
When to Worry and When to Cheer
Seeing your seedling grow is exciting! Any sign of green is good. If you see a sprout, that’s a win.
If you see a few leaves, that’s fantastic. Keep celebrating these small milestones.
When the seedling is growing steadily, it’s a good sign. If the leaves are a healthy green and the stem is getting thicker, cheer! You’re doing great.
When should you worry? If your seedling turns yellow and looks wilted, it could be overwatering. Check the soil moisture.
If it’s soggy, let it dry out a bit. If it’s consistently wilting, even when the soil is moist, it might have root issues. This could be root rot from poor drainage.
Another sign to watch for is pests. Tiny bugs on the leaves or stems can be a problem. You can often wipe them off gently.
Or, use a mild insecticidal soap if needed. Ensure good air circulation. This helps prevent many fungal diseases.
If your tree is planted outdoors and isn’t growing after several years, it might be due to poor soil, not enough sun, or lack of pollination. These are things to check if you’re not seeing growth after 3-4 years.
Quick Tips for Success
Here are some simple tips to boost your chances of success:
- Use multiple pits: Not every pit will sprout. Plant more than you think you’ll need.
- Cleanliness is key: Wash pits thoroughly to avoid mold.
- Don’t skip stratification: This cold treatment is essential for breaking dormancy.
- Patiently wait: Germination and fruiting take years.
- Provide good drainage: Cherries hate wet feet.
- Plenty of sun: Young trees need lots of light to grow strong.
- Consider companion planting: This might help deter pests.
- Protect from pests: Keep an eye out for bugs and diseases.
Frequently Asked Questions About Growing Cherries from Pits
Can I grow a cherry tree from a pit bought from the grocery store?
Yes, you can try growing a cherry tree from a pit bought from grocery store cherries. However, it’s important to use fresh pits from ripe cherries. Ensure you clean them very well and follow the stratification process.
Keep in mind that the resulting tree might not produce fruit true to the parent variety.
How long does it take for a cherry tree grown from a pit to produce fruit?
Trees grown from seed typically take much longer to produce fruit than grafted trees. You can expect it to take anywhere from 5 to 7 years, and sometimes even longer, before you see any cherries. Patience is a very important virtue for this gardening method.
Will the cherries from a pit-grown tree taste the same as the parent cherries?
Not necessarily. When you grow a cherry tree from a pit, you are creating a new genetic combination. The fruit produced may be different in taste, size, and sweetness from the cherry you ate.
It could be better, worse, or just different. This is part of the gamble of growing from seed.
What is stratification, and why is it important for cherry pits?
Stratification is a process that mimics natural winter conditions. It involves exposing the cherry pits to cold, moist temperatures for an extended period (usually 8-12 weeks). This period is crucial for breaking the seed’s dormancy, signaling it that winter has passed and it’s time to sprout when conditions are right.
My cherry pit didn’t sprout after stratification. What should I do?
It’s common for not all pits to sprout. Some may be non-viable, or they might need a longer stratification period. You can try re-stratifying some of the unsprouted pits for another period.
Also, ensure the pits were cleaned properly and kept consistently moist during the process. Sometimes, simply waiting longer after planting can yield results.
Do I need two cherry trees to get fruit if I grow them from pits?
Most cherry varieties are not self-pollinating, meaning they need pollen from a different cherry tree to produce fruit. Even if you grow your tree from a pit, the resulting tree will likely need a pollinator. Planting two trees grown from pits (ideally from different parent cherries) or planting a pit-grown tree alongside a grafted tree of a compatible variety is recommended for fruit production.
Conclusion: A Journey of Growth
Growing cherries from pits is a journey. It’s a test of patience and a lesson in nature’s timing. While it’s not the fastest way to get fruit, it’s incredibly rewarding.
You nurture a tree from its very first spark of life. The potential for surprise, for a truly unique cherry, makes it all worthwhile. Enjoy the process and the connection it brings to your garden.