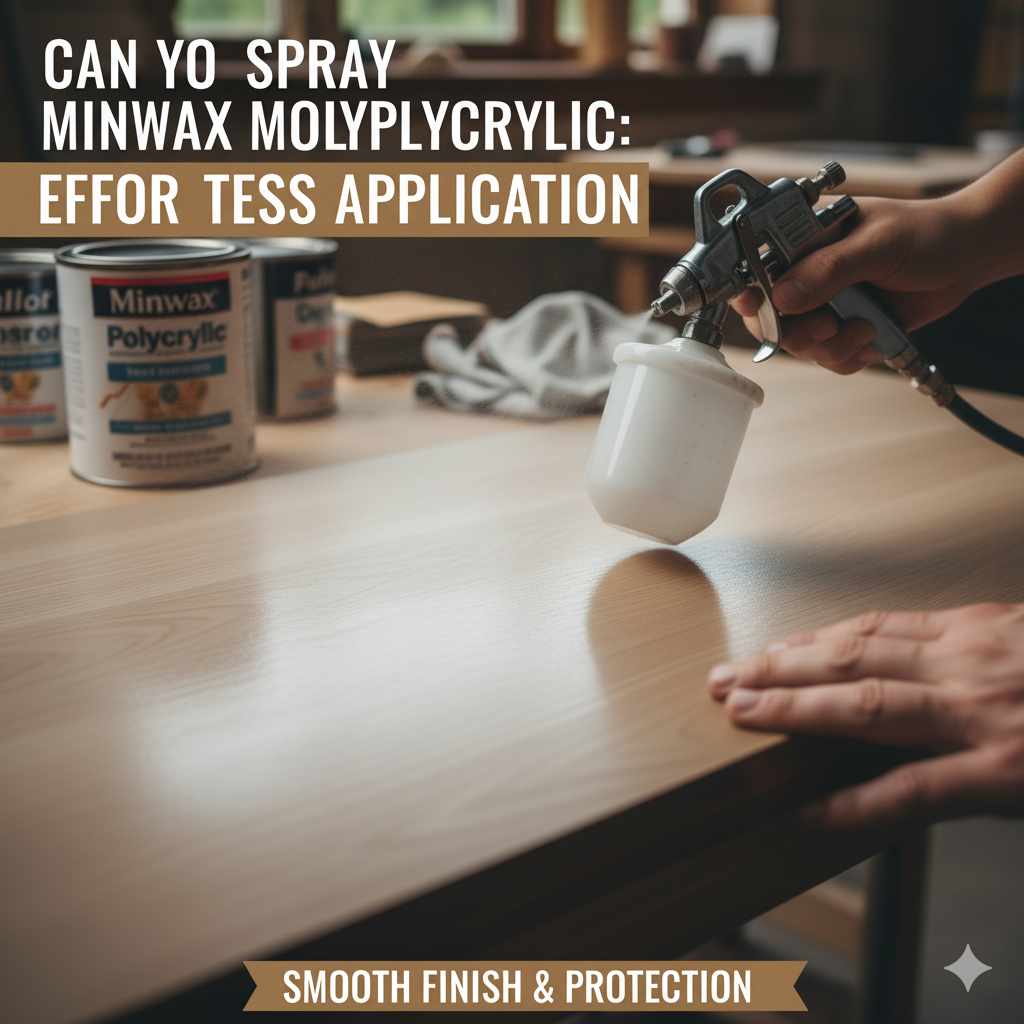
Can You Spray Minwax Polycrylic: Effortless Application
Yes, you absolutely can spray Minwax Polycrylic! It’s a fantastic way to achieve a smooth, professional-looking finish quickly and easily, especially on larger projects. This guide shows you how to do it safely and effectively for beautiful results every time.
Hey there, DIY friends! Are you staring at a beautiful wooden piece, maybe a cabinet door, a tabletop, or even some trim, and wondering how to get that perfectly smooth, protective finish without brush strokes? It’s a common woodworking puzzle, and the thought of a spray finish can seem a bit daunting. But don’t worry! Achieving a flawless coat of Minwax Polycrylic with a sprayer is totally doable, even for beginners. It might sound like a pro-only technique, but with a little guidance and the right approach, you’ll be spraying like a seasoned pro. We’re going to break down exactly how to use your sprayer for amazing results, making your projects shine. Get ready to transform your woodworking confidence!
Spray Minwax Polycrylic: Your Easy Guide to a Flawless Finish
Minwax Polycrylic is a popular water-based topcoat known for its clarity, durability, and fast drying times. It’s a favorite among DIYers and woodworkers because it’s easy to clean up and doesn’t have the strong fumes of oil-based finishes. While brushing offers great control, sometimes you just want that super smooth, streak-free finish that only spraying can provide, especially for larger or more intricate projects. Whether you’re refinishing furniture or adding a protective layer to your latest creation, learning to spray Polycrylic can elevate your results significantly. Let’s dive into how you can master this technique and achieve that coveted professional look!
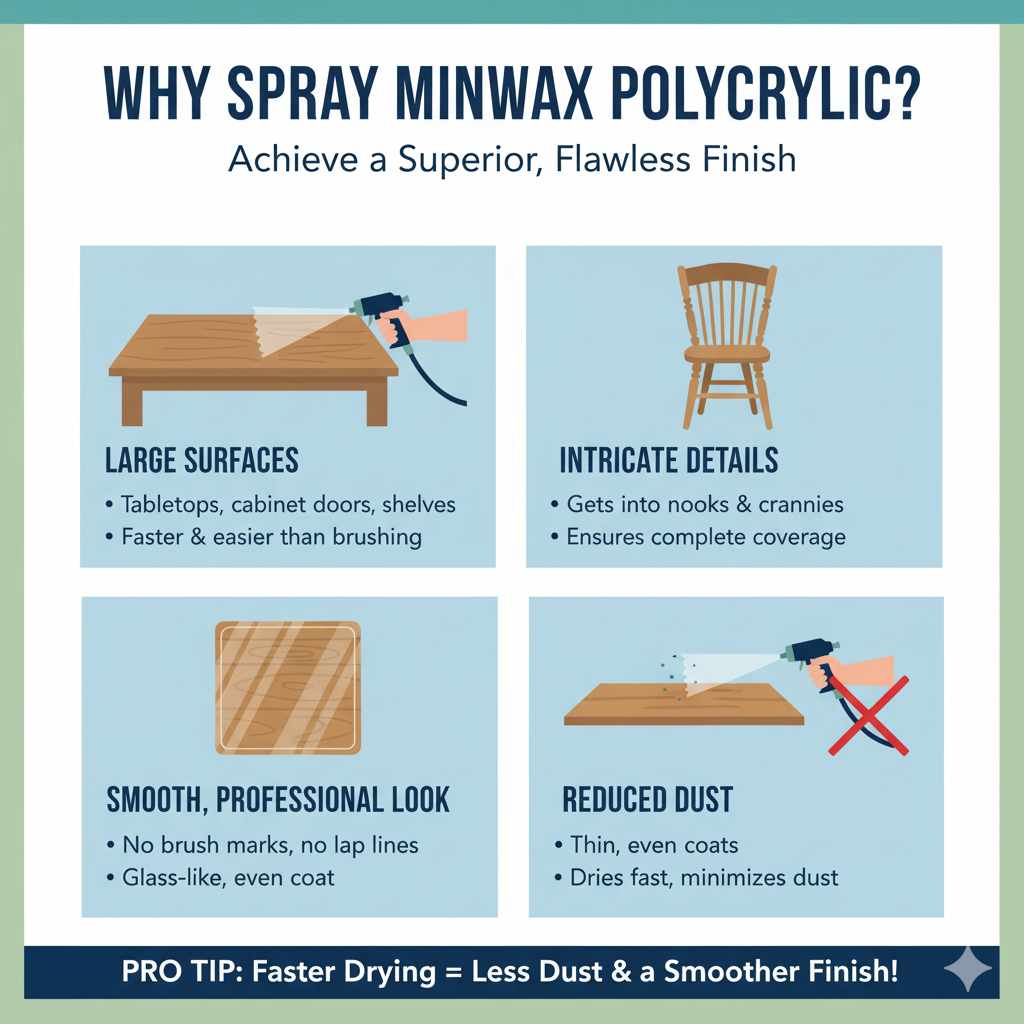
Why Spray Minwax Polycrylic?
Spraying Polycrylic isn’t just about speed; it’s about achieving a superior finish. When applied correctly, a spray finish means no brush marks, no lap lines, and a perfectly even coat that dries faster. This makes it ideal for:
- Large Surfaces: Tabletops, cabinet doors, shelves, and tabletops are much easier and faster to spray than brush.
- Intricate Details: Sprayers can get into nooks and crannies that brushes can’t easily reach, ensuring complete coverage.
- Smooth, Professional Look: Achieve that glass-like finish that’s hard to replicate with just a brush.
- Reduced Dust: A thin, even coat dries quickly, minimizing the chances of dust settling into a tacky finish.
Choosing Your Sprayer: What You Need
Not all sprayers are created equal, and the type you choose can significantly impact your results. For spraying Minwax Polycrylic, you have a few good options:
Types of Sprayers Suitable for Polycrylic
- Airless Sprayers: These are powerful and fast, ideal for large projects and thicker materials. They use high pressure to atomize the finish. Some models are very user-friendly for DIYers.
- HVLP (High Volume, Low Pressure) Sprayers: These offer excellent control and a smooth finish with less overspray than airless sprayers. They are great for furniture and cabinets. There are gravity-fed and siphon-fed types, as well as turbine-powered units.
- Propane/Electric Paint Sprayers (often called “Handheld Sprayers”): These are convenient for smaller projects and touch-ups. They are typically less expensive and easier to set up than larger systems but may require more thinning of the Polycrylic.
- Aerosol Cans: For very small projects or touch-ups, aerosol cans of Polycrylic (if available) are the simplest option, though they offer less control than a dedicated sprayer.
What Minwax Says About Spraying Polycrylic
Minwax itself recommends Polycrylic for spraying. They provide specific guidelines on thinning and equipment for the best results. It’s always a good idea to check the latest technical data sheet for the specific Polycrylic product you’re using. You can often find this information on the Minwax website under product support or technical information.
Essential Tools and Materials for Spraying Polycrylic
To get started, you’ll need more than just the Polycrylic and your sprayer. Here’s a checklist of what you’ll want to have on hand:
- Minwax Polycrylic: Choose the sheen (satin, semi-gloss, gloss) and type (water-based) you prefer.
- Sprayer: As discussed above, choose one appropriate for your project size.
- Paint Strainers: Crucial for filtering out any lumps or debris that could clog your sprayer.
- Mineral Spirits or Denatured Alcohol: For cleaning your sprayer after use (check your sprayer manual for specific product compatibility).
- Protective Gear:
- Respirator Mask: Essential for protecting your lungs from fine mist. A P95 or P100 respirator suitable for organic vapors and particulate is recommended.
- Safety Glasses: To protect your eyes from any accidental spray.
- Gloves: To keep your hands clean and protected.
- Drop Cloths or Plastic Sheeting: To protect your work area from overspray.
- Painter’s Tape: For masking off areas you don’t want to spray.
- Mixing Sticks: For stirring the Polycrylic.
- Measuring Cups: For thinning if necessary.
- Cleaning Rags: For wiping up spills.
- Optional: Air Compressor (if your sprayer requires one).
Preparing Your Polycrylic for Spraying
This is a CRITICAL step for achieving a good spray finish. If the Polycrylic is too thick, it won’t atomize properly, leading to sputtering, runs, and an uneven finish. Water-based finishes like Polycrylic typically require thinning.
Thinning Your Polycrylic
The exact amount of thinning depends on your sprayer. Always refer to your sprayer’s manual for recommended viscosity and thinning ratios. A common starting point for many HVLP sprayers is to thin Polycrylic by about 10-15% with water.
General Steps for Thinning:
- Stir, Don’t Shake: Gently stir the Polycrylic with a clean mixing stick. Shaking can introduce air bubbles.
- Strain: Pour the Polycrylic into a separate container through a paint strainer to remove any solids or clumps.
- Add Water: Gradually add clean water, stirring gently. Start with a small amount (e.g., 1 part water to 9 parts Polycrylic for a 10% reduction).
- Test Viscosity: The easiest way to test is with a viscosity cup, but for most DIYers, a good visual and feel test will suffice. The thinned Polycrylic should flow smoothly and evenly from your stir stick. It should be noticeably thinner than when brushed, but not watery. It should pour like thin cream.
- Strain Again: After thinning, strain the mixture one more time to ensure no lumps have formed.
Important Note: Over-thinning can weaken the finish. It’s better to spray multiple thin coats than one thick coat with overly thinned material.
Preparing Your Project for Spraying
Just like with brushing, proper surface preparation is key to a beautiful spray finish. This means:
- Sanding: Ensure your project is sanded smooth. Start with a lower grit sandpaper and work your way up to a fine grit (like 220 or higher) for a silky-smooth surface.
- Cleaning: Thoroughly remove all dust. A tack cloth is excellent for this, or you can use a damp (not wet) cloth followed by a dry one. Any dust left behind will show up prominently under a spray finish.
- Masking: Use painter’s tape to mask off hardware, edges you don’t want coated, or any areas that shouldn’t receive overspray.
- Clean Environment: Choose a clean, well-ventilated area free from airborne dust. If spraying indoors, lay down ample drop cloths or plastic sheeting to catch overspray. Outdoors, avoid windy days.
The Spraying Process: Step-by-Step
Now for the exciting part! Follow these steps for applying a smooth, even coat of Minwax Polycrylic.
Step 1: Set Up Your Sprayer
Read your sprayer’s manual carefully. Set the correct tip size, pressure, and air flow as recommended for the finish you are spraying (thin coating, water-based). Fill the spray gun’s cup with your thinned and strained Polycrylic.
Step 2: Prime Your Sprayer
Before spraying your project, test the sprayer on a piece of scrap wood or cardboard. This allows you to adjust your settings and ensure a consistent spray pattern. Look for an even “fan” pattern with no sputtering or heavy edges.
Step 3: The First Coat
Hold the spray gun about 10-12 inches away from your project.
Start spraying before you reach the edge of the workpiece, and continue spraying past the opposite edge. This technique, known as “।triggering off and on,” helps avoid applying too much finish at the start and end of each stroke, preventing drips and runs.
Move your arm in smooth, consistent, slightly overlapping strokes. Aim for about a 50% overlap between passes.
Keep the spray gun perpendicular to the surface throughout your movement to ensure an even fan pattern.
Apply thin, even coats. It’s better to apply 2-3 thin coats than 1 heavy one.
Step 4: Drying Between Coats
Minwax Polycrylic dries quickly. Typically, you can recoat within 1-2 hours, but always check the product’s specific drying times. Lightly sand between coats with a very fine grit sandpaper (320 or 400 grit) or a fine sanding sponge to knock down any dust nibs and ensure good adhesion. Clean off all dust thoroughly with a tack cloth after sanding.
Step 5: Subsequent Coats
Apply additional coats following the same technique as the first. You’ll notice the finish becoming smoother and more lustrous with each coat. For a high-gloss finish, you may want to apply more coats. For a matte or satin look, fewer coats might suffice, or you can use a Polycrylic in that sheen.
Step 6: Final Drying and Curing
Allow the final coat to dry completely. Polycrylic achieves its full hardness over several days to a week (this is called “curing”). During the curing period, be gentle with the surface to avoid scratching or denting it.
Spraying Different Types of Polycrylic
While the basic technique remains the same, there are a few variations depending on the type of Polycrylic you’re using:
Spraying Polycrylic Aerosol Cans
These are the most straightforward for beginners.
Shake the can vigorously for at least one minute after you hear the mixing ball rattle.
Spray in short, even bursts.
Maintain the recommended distance (usually 10-12 inches).
Overlap your passes by about 50%.
Work in a well-ventilated area and wear a respirator.
Ideal for small projects, touch-ups, or when you don’t have a spray gun.
Spraying Water-Based Polycrylic (Gallons/Quarts)
This is where most of the detailed instruction above applies.
Thinning is almost always required.
Use strainers diligently.
Clean your sprayer immediately after use with water and then a solvent (as per your sprayer manual) to prevent clogs.
Summary Table: Polycrylic Spraying Tips
| Tip | Description | Benefit |
|---|---|---|
| Thinning is Key | Water-based Polycrylic often needs thinning with water (10-15%) for proper atomization. | Prevents sputtering, ensures an even coat, and reduces runs. |
| Strain Everything | Use paint strainers for both raw material and thinned mixture. | Eliminates clogs and ensures a smooth, debris-free finish. |
| Consistent Motion | Maintain a steady distance (10-12 inches) and arm speed. | Achieves an even film thickness and prevents drips. |
| Overlap Passes | Overlap each sprayed pass by approximately 50%. | Ensures uniform coverage without lap marks. |
| Thin Coats Rule | Apply multiple thin coats rather than one thick one. | Faster drying between coats, less chance of runs, and a smoother final finish. |
| Clean Up Promptly | Clean your sprayer immediately after use. | Prevents dried Polycrylic from clogging and ruining your equipment. |
Troubleshooting Common Spraying Issues
Even with the best preparation, you might encounter a few snags. Here’s how to deal with them:
- Sputtering: This usually means the Polycrylic isn’t thinned enough, the sprayer tip is clogged, or the sprayer isn’t getting enough air pressure. Stop, check your thinning and clean your tip.
- Runs and Drips: You’re likely holding the sprayer too close, moving too slowly, or applying the coat too thickly. Trigger off before and after each stroke, and keep your passes even.
- Orange Peel: This looks like the skin of an orange. It can be caused by spraying too far away, moving too fast, or the finish being too thick. Adjust your distance, speed, or thinning.
- Uneven Coverage: Ensure your strokes overlap by 50% and that you maintain consistent gun speed and distance.
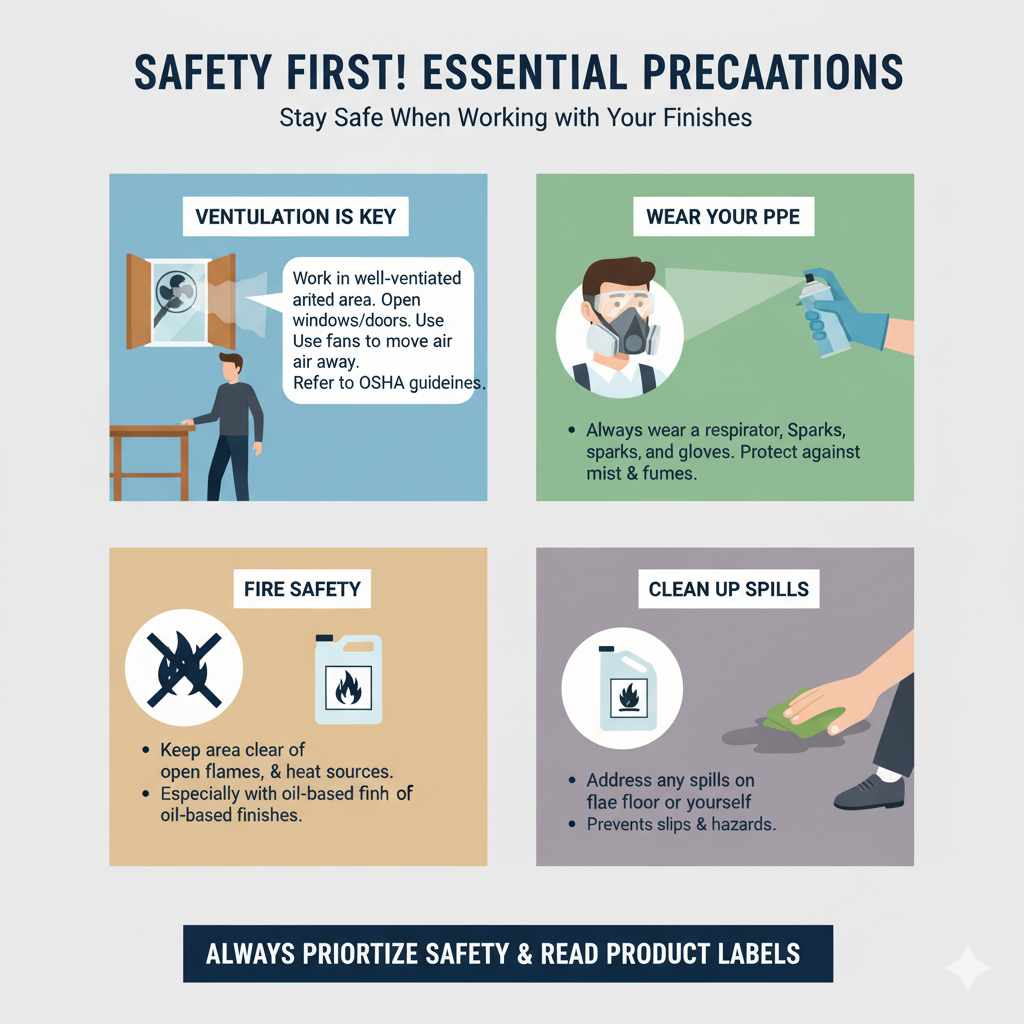
Safety First! Essential Precautions
Working with finishes, even water-based ones, requires attention to safety. Always:
- Ventilation is Key: Work in a well-ventilated area. Open windows and doors. If you don’t have good natural ventilation, consider using fans to move air away from you. For more information on ventilation requirements, you can refer to resources from organizations like the Occupational Safety and Health Administration (OSHA).
- Wear Your PPE: Always wear a respirator, safety glasses, and gloves. Fine mist from spraying can easily be inhaled or get into your eyes.
- Fire Safety: While water-based Polycrylic is not as flammable as oil-based finishes, it’s still good practice to keep the area clear of open flames or sparks.
- Clean Up Spills Immediately: Address any spills on your floor or yourself right away.
Frequently Asked Questions (FAQ) about Spraying Minwax Polycrylic
Q1: Can I spray Minwax Polycrylic with a regular paint sprayer found at home improvement stores?
A: Yes, many handheld electric paint sprayers designed for latex paint can spray thinned Polycrylic. Ensure your sprayer’s manual indicates it can handle thin coatings and follow the thinning guidelines.
Q2: How much water should I use to thin Minwax Polycrylic for spraying?
A: For most HVLP sprayers, start with about 10-15% water. For example, if you have 100 ounces of Polycrylic, add about 10-15 ounces of water. Always check your sprayer’s manual for specific recommendations or use a viscosity cup for precise measurement. Over-thinning can reduce durability.
Q3: Do I need to sand between every coat of sprayed Polycrylic?
A: Yes, it’s highly recommended. Lightly sanding with a fine-grit sandpaper (320-400 grit) or a fine sanding sponge after each coat (once dry) removes any dust nibs and ensures excellent adhesion for the next coat, resulting in a smoother finish.
Q4: What’s the best way to clean my sprayer after spraying Polycrylic?
A: Immediately after spraying, rinse your sprayer with warm water until all traces of the Polycrylic are gone. Some manuals also recommend a final rinse with denatured alcohol or another solvent recommended by the manufacturer to ensure all residue is removed and prevent clogs.