Winter Woodshop Guide: Heat, Humidity, Rust
Run a winter woodshop by keeping the space above about 50°F, holding relative humidity in the general range of 40 to 50 percent, and preventing any tool surface from dropping below the air’s dew point. Miss those targets and you get wood movement, glue and finish failures, rust, condensation in machines, static-heavy dust, and slippery floors. This guide covers heat choices, humidity control, rust prevention, ventilation, adhesives, finishes, and floor safety for garages, sheds, outbuildings, and basement shops.
Winter shop problems stack up because one shift triggers the next. Fast reheating raises air temperature before machine tables warm, so moisture condenses on cast iron. Air that gets too dry drives wood shrinkage and static. Closed doors hold heat, but they also trap dust and finish fumes. The fix follows a clear order: measure first, seal drafts second, choose heat third, ventilate on purpose, then protect tools and materials.
What should a winter woodshop be kept at?
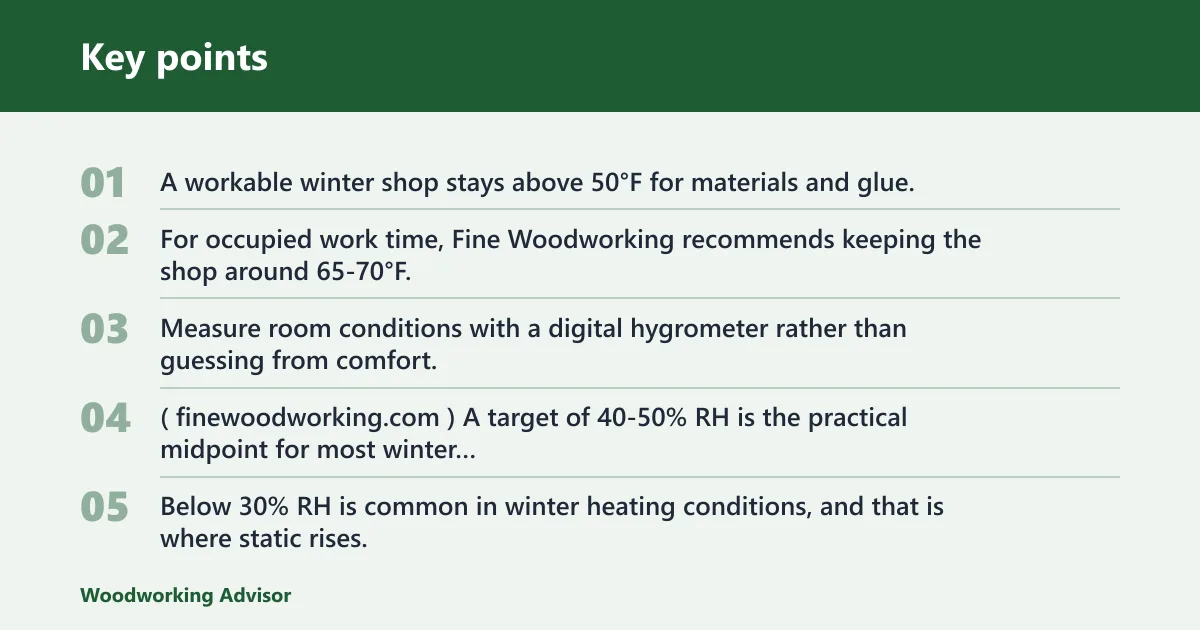


A workable winter shop stays above 50°F for materials and glue, aims near 40 to 50 percent relative humidity, and keeps stock and machine surfaces close to room temperature before milling, assembly, or finishing. For occupied work time, Fine Woodworking recommends keeping the shop around 65-70°F. Measure room conditions with a digital hygrometer rather than guessing from comfort. (Finewoodworking)
Target relative humidity and why it matters
A target of 40-50% RH is the practical midpoint for most winter shops. Below 30% RH is common in winter heating conditions, and that is where static rises, wood loses moisture faster, and panel fit starts changing more than many woodworkers expect. Push RH too high and the risk shifts toward rust, condensation that lingers, and mold on cool surfaces.
Use a digital hygrometer/thermometer, mount or place it at shop height, and keep it in the shop year-round. Check it before buying equipment or changing heaters. One week of readings will show whether the main problem is cold starts, large RH swings, or both.
Air temperature versus tool-surface temperature
Room air can look fine while cast iron is still cold enough to sweat. That is the winter trap. A table saw top, jointer bed, plane sole, or steel rule can sit below dew point after an overnight freeze, then collect moisture as soon as warm shop air hits it.
Suppose a detached 12-by-20 outbuilding sits cold all night, then a portable heater runs hard for 20 minutes before work starts. The air feels better, but the saw top is still cold. That is the moment rust begins, even though the thermostat reading says the shop is ready.
Wood moisture content and acclimation
For many interior hardwood projects, 6% to 8% moisture content is the target range. Depending on species and final service conditions, 6% to 12% can also be appropriate. The point is not a single magic number. The point is matching the stock to where the piece will live.
Check lumber with a moisture meter before milling. The garage climate guidance recommends checking moisture content within 2% of local equilibrium moisture content. Let lumber acclimate in stickered stacks before final dimensioning, especially if it came from a colder or more humid space. If readings are still moving, delay final thicknessing and panel glue-ups.
📊 Fine Woodworking says a heated vest can provide about 6 hours of warmth. Source: Cold-Weather Woodworking.
Is insulation more important than a bigger heater?
Yes, in most winter shops insulation and air sealing come first because they cut run time, reduce temperature swing, and keep surfaces closer to room temperature. A larger heater may raise air temperature faster, but it will not stop drafts, slab-edge chill, or condensation on cold tools. Fix the envelope before upsizing the heater.
Air sealing first: doors, windows, and floor-level drafts
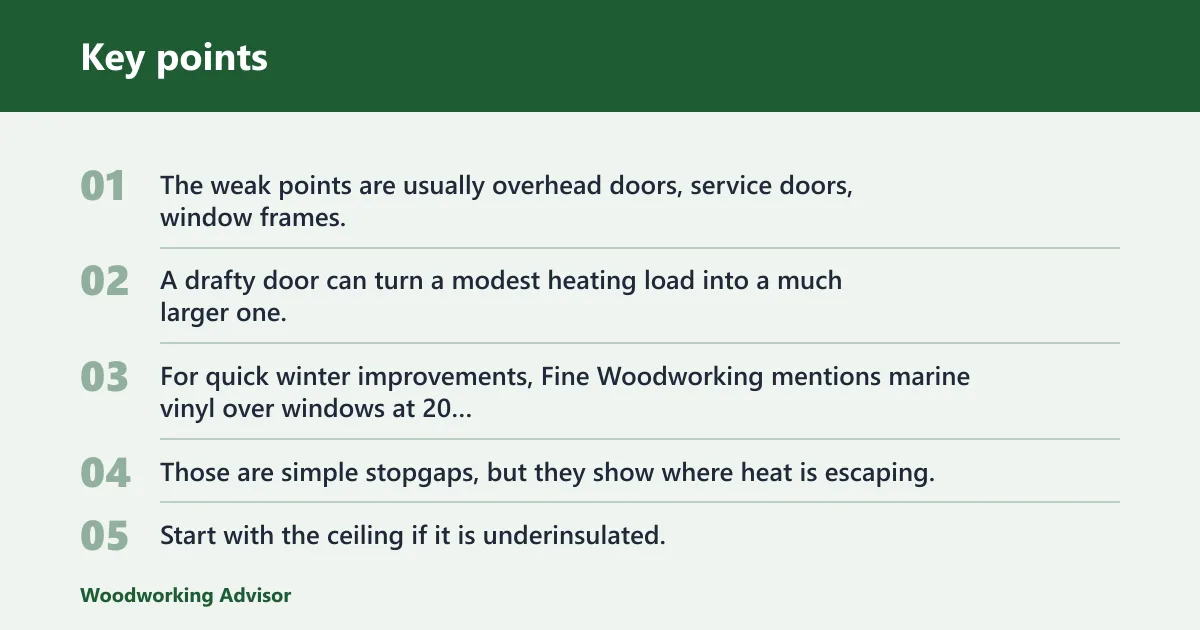
The weak points are usually overhead doors, service doors, window frames, and the joint where wall meets slab. Seal those first. A drafty door can turn a modest heating load into a much larger one; one heating guide notes a drafty door increased required heat to 130,000 BTUs.
For quick winter improvements, Fine Woodworking mentions marine vinyl over windows at 20 millimeters thick and a 2-in.-thick sheet of foam insulation for a drafty door. Those are simple stopgaps, but they show where heat is escaping.
Where insulation changes comfort most
Start with the ceiling if it is underinsulated. Warm air rises, and a cold ceiling makes the heater work harder. Walls come next. Floors matter too, especially on a slab, because cold feet change how long you can work and because low-level cold keeps machine bases and stored tools colder than the room air.
R-value affects heater run time more than thermostat setting does. Better insulation does more than save energy. It slows temperature swings, which protects tools, glue cure, and wood stability.
Attached garage, detached outbuilding, and basement differences
An attached garage usually shares some heat with the house, but it also raises stronger concerns about combustion appliances, fumes, and fire separation. A detached outbuilding loses heat faster and often needs more air sealing before any heater change pays off. A basement shop tends to be easier to heat but needs careful dust and finish-fume control because the air connects to living space.
Picture an attached garage with one insulated wall, an uninsulated overhead door, and a gas water heater nearby. In that space, air sealing and electric heat are usually a cleaner path than adding another open-flame heater. The issue is not only warmth. It is byproducts, ignition sources, and where the air goes next.
Selecting the Right Insulation Material for Your Shop Structure
The physical envelope of your garage dictates your heating efficiency. Most wood-framed shops benefit from R-19 to R-21 fiberglass batts paired with rigorous air sealing, while metal buildings require closed-cell spray foam to prevent thermal bridging and condensation. Choosing the wrong material leads to cold tools, rusted cast iron, and skyrocketing energy bills. To find the specific combination that matches your climate and building type, review our detailed breakdown of best garage insulation options. This guide explains why vapor-smart interior layers matter more than raw R-value when protecting your investment from moisture damage.
Correct Insulation Sequencing for Metal and Wood Sheds
Many shop owners skip the air-sealing step and jump straight to adding fiberglass, which traps moisture and rusts tools over time. The guide at workshop insulation sequencing breaks down how to inspect the shell, stop drafts, and apply a continuous thermal break to metal structures before adding insulation.
It also provides a decision table for choosing between rigid foam and batts based on your specific building type, ensuring you do not waste energy heating the outside air. Understanding whether to insulate the floor or roof first saves money on heating bills and prevents structural damage.
Choosing a Shop Vac for Indoor Dust Cleanup
For a closed shop, the priority is not just suction—it is keeping fine dust from recirculating. The supporting article explains which shop vac features matter most indoors, including sealed filtration, a fine-dust or HEPA-style filter when available, a dust bag, hose length, and cord length. It also compares a shop vac with a regular household vacuum so you can see which tool is better for sawdust, sanding residue, and general cleanup.
That matters because poor filtration or awkward handling can spread dust instead of removing it. If you are trying to clean a small enclosed workspace without stirring up more debris, this shop vac guide helps you choose a setup that is easier to use indoors and better suited to dust control.
Keep Fine Dust Out of the Air
A dust collector matters because it removes the chips and fine dust that a shop vac often leaves behind, especially from sanders, table saws, and other high-dust tools. The supporting guide on building a dust collector explains how to choose a collector path, estimate airflow, size hoses and fittings, and place separators and filters so the system actually captures debris instead of just moving air.
That matters for more than cleanup: better capture keeps filters from clogging too quickly, reduces airborne dust you can breathe, and helps a small shop stay quieter and more efficient. If you are planning a shop setup, this article gives you the sizing and layout basics before you buy parts.
When Garage Insulation Actually Pays Off
garage insulation value analysis explains when wrapping your shop structure makes financial and functional sense. The supporting article provides a decision matrix that distinguishes attached garages, where energy savings appear quickly, from detached units that require consistent heating to justify the cost. It details specific material options for walls and doors, focusing on how proper sealing prevents moisture accumulation and rust on stored tools.
This section matters because it moves beyond generic advice to a practical framework. By identifying where insulation delivers the most immediate benefit, the guide helps you avoid spending money on upgrades that won’t improve winter work conditions or protect your inventory from temperature swings.
Troubleshooting Winter Garage Water
If your garage floor is wet after snow, the fix depends on where the water is coming from. The supporting guide on garage snow water explains how to tell whether the problem is tracked-in snow, a leaky door or slab, or drainage that sends meltwater toward the building.
That distinction matters because each source needs a different repair. Identifying it early helps you avoid temporary patches that trap moisture, protect tools and wood from rust and swelling, and choose the fastest fix before winter damage spreads.
Drying Out a Damp Garage
The first step is to identify whether water is coming in through the roof, walls, slab, or door seals—or whether the garage is just sweating from humid air. That distinction matters because the fix changes: intrusion calls for sealing and drainage work, while condensation usually needs airflow, temperature control, or a dehumidifier.
The supporting guide on garage moisture fixes explains how to tell those problems apart and what to tackle first. That order is important in a woodshop, because solving the wrong issue can leave tools, lumber, and framing exposed to mold, rust, and repeated wet-dry cycles.
Sealing the Shell: Moisture and Airflow Control
Before installing heating equipment, you must address the structural envelope to prevent condensation and heat loss. The process involves air-sealing cracks and gaps first, then selecting insulation materials like rigid foam or fiberglass suited to metal or wood-framed structures. workshop insulation guides detail how to sequence these steps to avoid trapping moisture that damages tools and framing.
Properly managing the thermal break and vapor control layers is essential for long-term structural integrity. This approach reduces energy waste and stabilizes the internal environment, ensuring that heaters do not have to compensate for significant leaks or thermal bridging in the building shell.
How to Reuse Silica Gel Packets
If your shop uses silica gel to protect tool drawers, fasteners, and finish supplies, the key question is whether the packets can be dried and used again. The supporting guide explains when reactivation is safe, how to dry silica gel in an oven or microwave, and how to tell when a packet has gone past the point of reuse. That matters because damp desiccant stops pulling moisture out of the air and can leave stored metal vulnerable to rust and corrosion.
It also covers practical checks, common mistakes, and reuse limits so you can decide whether to save a packet or replace it. See the full silica gel reactivation guide for the step-by-step details.
What heater is safest for a garage woodshop?
The safest heater depends on the shop location, but electric resistance heat and mini-split heat pumps are usually the cleanest fit for attached garages and basement shops because they add no combustion moisture and need no fuel flame in the work area. Detached buildings allow more options, but every heater still needs clearance, dust awareness, and ventilation planning.
Electric resistance heat and mini-splits
Electric wall heaters, ceiling heaters, and portable electric units avoid combustion gases. That matters in closed winter shops. They also do not add water vapor to the air. Placement still matters: keep clearance around the unit, avoid blowing directly at finishing areas, and do not aim high heat at one machine while the rest of the room stays cold.
Mini-splits provide steady heat with less swing than on-off portable heaters. They also help shoulder-season humidity control. Their weakness in some woodshops is airflow pattern and dust loading around the indoor head, so filter cleaning becomes part of shop maintenance.
Propane and gas heat
Propane and gas heaters can heat quickly, but the type matters. Unvented combustion is a poor match for many closed shops because combustion byproducts stay indoors, and Fine Woodworking notes blue-flame propane heaters can add humidity. That extra moisture can push the shop toward condensation and rust.
Vented units are safer than unvented ones, but they still need correct clearances, proper flue setup, and attention to dust. If a heater has an open flame or hot surfaces near drifting fines, the risk profile changes fast.
Radiant, infrared, and stove heat
Radiant and infrared heaters warm people and surfaces in their path faster than they warm the whole air mass. That can be useful at a bench, but it does not solve whole-shop humidity or condensation on machines outside the heated zone. Wood and pellet stoves can work in detached shops, though ash, sparks, fuel storage, and clearance make them a harder fit around sawdust.
For small shops under 400 sq ft, one heating guide says 20,000-40,000 BTUs may be needed. Treat that as a starting band, not a purchase answer. Heat loss from leaks and poor insulation can overwhelm any size estimate.
Practical Winter Garage Heating Strategy
Effective winter comfort in a garage depends on sealing the structure before adding heat. The supporting guide details the exact order of operations: stopping air leaks first, adding door weatherstripping, and closing floor gaps to prevent wasted energy. This sequence ensures you aren’t fighting drafts while heating the outdoors. The article provides a budget-prioritized plan that covers insulation basics and specific heater choices tailored for storage, parking, or workshop use. Understanding these foundational steps helps you maximize warmth-per-dollar and avoid common energy mistakes.
Explore the complete step-by-step strategy for maintaining a heated garage space in winter garage heating strategies to apply these principles to your specific setup.
Using Propane Heaters Safely Around Sawdust
Portable propane heaters like Mr. Heater units can warm a woodworking garage quickly, but sawdust and carbon monoxide make them risky without strict precautions. Any propane heater used in a shop must be indoor-rated, placed at least three feet from combustible materials, and paired with an active carbon monoxide monitor.
If your garage lacks reliable ventilation, electric heat is the safer choice to prevent fire or CO buildup. The guide on Mr. Heater garage safety breaks down which models fit a workshop environment, how much clearance you need around benches and dust collection bags, and when switching to electric eliminates unnecessary risk.
How to Choose the Safest Heater for a Garage Workshop
Choosing a heater for a garage workshop comes down to balancing safety, power source, and the size of your space. The guide at Garage Workshop Heater Safety walks through the key trade-offs between electric and propane units, explains which heater types are safest, and breaks down clearance requirements, mounting options, and essential safety controls like thermostats.
It also includes a decision table and an electric-versus-propane comparison so you can pick a heater that fits your garage’s wiring and size—without risking fire or carbon monoxide exposure.
When a Floor Heater Makes Sense in a Garage Shop
A floor heater is usually the right call only when the garage is becoming a permanent, well-insulated shop rather than a space you warm up occasionally. The supporting article breaks down when under-slab heat is worth considering, how slab insulation and zoning affect comfort, and why poor planning can leave you with warm edges, cold walls, and higher energy use. It also explains the practical tradeoffs between hydronic and electric systems, plus what changes if you are finishing a shop for woodworking storage, dust control, and bench layout. For a deeper breakdown, see floor heater garage shop.
When a wood stove is a workable shop heater
A wood stove can be a practical winter heat source for a workshop, but only if the installation is built around fire safety and insurance approval. The supporting guide explains the core checks: code clearances, a listed hearth and chimney, dust and combustibles kept out of the stove zone, and the written approval many insurers require before they will cover the shop.
It also shows why this matters in real shop conditions, where sawdust, solvent storage, and tight layouts can turn a decent heater into a liability. If you’re weighing this option, the wood stove workshop article helps you judge whether the setup is safe, insurable, and worth the space it takes.
How do you keep a garage dry enough for woodworking?
Controlling moisture in a garage starts with identifying why surfaces are wet in the first place. The supporting guide explains how condensation forms, how to tell it apart from a leak or slab moisture, and which fixes address the real cause: excess humidity, air leaks, or cold surfaces. That matters because damp air can rust tools, damage lumber, stain drywall, and create mold risk on framing and stored materials.
If your shop is prone to winter dampness or the floor, door, and windows seem to “sweat,” this garage condensation guide shows practical ways to dry the space and keep it usable without guessing at the problem.
Garage workshop safety basics
Health and safety in a garage workshop comes down to keeping the space dry, clear, and well controlled so small hazards do not turn into big ones. This article explains how to manage the main risk areas: dust and fumes, heater and fire safety, electrical cords and outlets, PPE, and storage around combustibles. It also shows why winter makes these issues worse, with damp floors, brittle cords, and enclosed air that traps dust and vapor.
If you are setting up or reviewing a shop, use the garage workshop safety guide to build a practical checklist. The payoff is fewer breakdowns, less fire risk, better breathing conditions, and a workspace that is safer to use every day.
How infrared heaters change the math for cold workshops
Many woodworkers underestimate how targeted radiant heat performs in intermittent-use shops. Infrared units deliver direct warmth to your bench and machine area without heating the entire room, making them efficient for drafty or partially insulated spaces. The supporting article evaluates infrared heater value to help you decide if this direct heating method fits your specific workflow and layout.
Success depends on correct placement and sufficient wattage rather than just square footage. This analysis breaks down the technical specs, safety clearances required around combustibles, and when radiant heat is a poor fit compared to conventional forced-air systems.
Zoning Your Heat for a Cold-Weather Workshop
Heating an entire garage or shed wastes fuel and often leaves tools damp. A more efficient approach is to seal air leaks, add targeted insulation, and then heat only the immediate work zone with the smallest safe heater that maintains a comfortable temperature. Reversing this sequence—running a large heater in a drafty space—drains power, raises fire risk, and fails to protect finishes or metal surfaces from condensation.
This method applies whether you work in a detached garage or a basement corner. The supporting guide breaks down how to evaluate heat loss, choose between portable electric and gas options, and determine the minimum safe temperature for woodworking adhesives and finishes. Following this sequence keeps your shop usable without oversizing your equipment. Learn the full process for warming a winter workshop efficiently.
Why workshop lighting matters for safety and accuracy
Good shop lighting is not just a comfort upgrade; it directly affects cut accuracy, finish quality, and day-to-day safety. Bright, even ambient light reduces shadows at the saw and jointer, while focused task lighting helps you see layout lines, machine marks, and surface defects before they become mistakes. The right color quality also makes it easier to judge stain, paint, and wood tone accurately.
If you are planning a lighting setup, the best workshop lights guide breaks down fixture types, brightness, ceiling-height fit, glare control, and color rendering so you can choose lighting that matches how your shop is built and how you work.
Heat Source Safety Protocols for Combustible Environments
Electrical resistance is the only unconditionally safe option for a garage workshop; unvented gas and open-coil units risk igniting accumulated dust, solvents, and stored finishes if clearances are ignored. Garage workshop heating safety covers the risk hierarchy of common heater types and the specific setup changes required to make gas or electric alternatives acceptable. This framework defines the mandatory three-foot separation zones and ventilation controls that prevent heat sources from becoming fire hazards, ensuring the workspace remains structurally sound while maintaining adequate temperature for woodwork stability and adhesive curing.
Do you still need ventilation in winter?
Yes. Heating a shop in winter does not remove dust, fumes, or combustion byproducts, and closed-up spaces often get worse as air stagnates. Ventilation should be targeted rather than constant wide-open exhaust: capture dust at the source, use HEPA cleanup and ambient filtration, and exhaust only when the process actually creates fumes or excess moisture.
Source capture versus heat loss
Dust collection starts at the machine, not at the doorway fan. Capture at the saw, sander, router, or planer keeps fine dust from spreading into the whole room, where it becomes harder to filter and easier to ignite. Outdoor exhaust removes contaminants well, but it also dumps heated air outside and pulls cold replacement air back in.
That tradeoff is why sealed dust collectors with good filtration make more sense in winter than brute-force exhausting for every cut.
HEPA cleanup and ambient air cleaning
Use a HEPA shop vacuum for benches, machine cabinets, and floor edges where fine dust collects. Add ambient air cleaning for the dust that escapes source capture. In a shop that stays more closed in winter, this matters more, not less.
Static is part of the winter dust problem. Very low RH makes chips cling to hoses, machine interiors, and clothing. If RH stays in the 40-50% band, static usually becomes easier to manage.
Fumes and winter air exchange
Finishes, solvents, and some adhesives need active exhaust even when it costs heat. For shops under 500 sq ft, one competitor recommendation is a 500 CFM exhaust, and another mentions a 500-800 CFM inline duct fan. Use those figures as broad examples, then match the setup to the product label, room layout, and whether the shop shares air with living space.
Basement shops need the most caution because fumes can migrate indoors. Attached garages are next. Detached shops give more freedom, but they still need controlled make-up air so the exhaust fan is not pulling cold air through every crack.
Can a dehumidifier control shed moisture year-round?
Yes, but only when the shed stays warm enough for the unit to keep pulling water from the air. The supporting guide explains why compressor models usually work best above about 60°F, where they struggle in cold weather, and what happens when frost or low temperatures stop moisture removal. That matters because a damp shed can rust tools, warp stored lumber, and create musty conditions even when the building looks sealed.
It also helps you choose the right setup for your temperature range, from sizing and placement to when a dehumidifier makes sense versus other moisture-control methods. For the practical breakdown, see dehumidifier shed guide.
Set a Winter Humidity Target
For most heated woodshops and homes, winter indoor humidity should usually land around 30% to 40% RH; if cold windows or walls are showing condensation, the safer target is often closer to 25% to 30% RH. The key is to stay below the dew point of those surfaces, because excess moisture leads to rust, swollen lumber, glue problems, and recurring condensation. The winter humidity guide explains how to choose a target based on surface conditions, wood, and tools instead of guessing from a thermostat alone.
That matters because the “right” humidity is not a single number for every shop. The article also shows how to check humidity, interpret condensation, and adjust a humidifier so you protect both the workspace and the materials inside it.
How to Decide Whether to Add or Remove Moisture in Winter
Winter doesn’t automatically mean you need a humidifier or a dehumidifier—the right choice depends on your shop’s relative humidity. This guide explains the practical cutoff points for wood movement and condensation, then shows how to spot when indoor RH is too low or too high. It also covers the consequences of getting it wrong, such as open joints, swollen stock, sweating tools, and damp concrete, so you can protect both your lumber and your equipment.
For a clear, shop-ready breakdown of when to add moisture and when to remove it, see winter humidity control. The article includes simple decision rules, placement tips, and maintenance advice that help you choose the right machine before seasonal changes start affecting your work.
How do you stop rust in a cold shop?
Stop rust by controlling condensation first, then adding surface protection and drier storage. In winter, rust usually starts when warm moist air hits cold metal, not because the shop simply feels cold. Keep machine surfaces closer to room temperature, avoid rapid reheating, and store small steel tools in sealed or desiccated spaces.
Condensation control on cast iron and machine tables
Warm the room gradually when possible. Better yet, reduce overnight temperature drop with insulation and low background heat. A fast blast of heat into a cold shop is the classic trigger for wet cast iron tops, saw blades, fences, and gauge bars.
Apply a protective film or paste wax to cast iron tops and fences. Reapply after cleaning or after any visible water event. Protection does not replace dew-point control, but it buys time.
Tool-specific storage habits
Hand planes and chisels rust faster where bare steel meets leather rolls, fabric tool wraps, or damp drawers. Store them in cabinets or bins that limit air swing. Saw blades should be clean and dry before hanging or boxing. Measuring tools need special care because light rust on rules, squares, and calipers ruins accuracy before it looks dramatic.
- Cast iron tops: keep waxed or film-protected and covered only when the surface is fully dry.
- Hand planes: avoid damp rolls; use cabinets, socks, or drawers with desiccant.
- Chisels and plane irons: keep edges dry after sharpening and return them to sealed storage.
- Saw blades and router bits: clean pitch first, then protect from humid air swings.
- Measuring tools: store in cases or drawers with dry bags because light rust affects reading edges quickly.
Desiccants, cabinets, and dry storage
Desiccant packs or dry bags work best in small enclosed volumes such as a tool chest, router bit case, or blade drawer. They do very little in an entire leaky garage. Use them where the air volume is controlled. For larger shops, the real fix is steadier temperature and RH.
Choosing the Right Rust Inhibitor for Metal Tools
If you need a quick rule, Boeshield T-9 is the better choice for long-term protection on cast iron tops and stored hand tools, while WD-40 is mainly useful for fast moisture displacement and short-term wipe-downs. That difference matters because the wrong product can leave bare steel exposed, invite flash rust, and force you to clean tools again after a damp day.
The Boeshield T-9 vs WD-40 comparison breaks down where each product works best, how long the protection tends to last, and which one fits humid-shop storage, hand tools, and cast iron surfaces.
Protect cast iron surfaces from winter rust
Cast iron tool tops rust fastest when damp air meets a cold surface, so the fix is simple: keep the metal dry, reduce condensation, and renew a light protectant on a schedule. The supporting guide to cast iron rust prevention explains which waxes and corrosion inhibitors are worth using, how often to reapply them in winter, and what to do after a wet cleanup or humid day.
That matters because even light rust can stain precision machine beds, affect feeding, and turn a quick wipe-down into scraping or flattening later. It also includes a practical routine for table saw, jointer, and planer surfaces, plus storage and condensation-control tips that help prevent rust before it starts.
How do you restore a rusted hand saw without ruining the teeth?
Use a rust-removal method that cleans the plate while leaving the tooth geometry intact: wipe off grime first, then choose a light solvent, a rust remover, or a very fine abrasive only on the blade surface. The key is to stop before you round the points or thin the plate, because aggressive scrubbing can turn a usable saw into a sloppy cutter and can also hurt a vintage tool’s value.
The hand saw rust guide breaks down what to use, how to judge rust severity, when vinegar helps or hurts, and how to finish with an oil coat so the rust does not come back quickly.
How to Apply Boeshield T-9 on Shop Metal
For tools, hinges, fasteners, and other bare metal in a cold shop, the key is a thin, even coat on a fully clean, fully dry surface. The supporting guide walks through the full process, from removing old rust and corrosion to shaking the product, spraying from the right distance, and letting it dry before putting the part back into service. See the Boeshield T-9 application steps for the exact workflow.
This matters because too much product can trap grime, make rust checks harder, and leave precision parts less predictable. The article also explains when to use a light maintenance coat versus a heavier storage coat, plus common mistakes that shorten protection.
How Long Boeshield Protection Holds Up
Boeshield T-9 does not last forever, and the useful answer is that its protection time depends on where the metal lives. On indoor steel it often holds for months, but in a damp winter garage, cast iron, vise jaws, and other exposed hardware may need closer inspection and more frequent recoat cycles. The supporting guide on Boeshield lifespan explains the typical range and how storage conditions change it.
That matters because timing a reapplication before rust starts is easier than cleaning up corrosion after the fact. If you are planning winter maintenance, this article helps you decide which surfaces need monthly checks, which can go longer, and how to match protection to humidity and exposure.
Choosing the Right Rust Protection for Stored Tools
For winter shop prep, the big question is whether you need a dry protective film or a wetter protectant that can sit on steel longer. The Boeshield vs Fluid Film comparison explains which product is better for cast-iron tops, fences, and frequently handled surfaces versus long-idle machine parts, seasonal storage, and hidden steel that won’t be wiped down often.
That matters because the wrong choice can leave you with dusty tables, gummy residue, stronger odor, or extra cleanup when the shop reopens. The article breaks down those tradeoffs so you can match the product to the tool and avoid rust without creating a springtime mess.
Choose Rust Prevention by Tool Type
The right rust spray depends on what you are protecting. Cast-iron machines usually need a dry-film product that won’t gum up tables or attract dust, while tools stored in damp areas may need a heavier barrier spray. For hand tools, a lighter wipe-on protectant is often the cleaner choice.
The supporting guide breaks down those options in plain terms, compares them by storage conditions and tool category, and explains why the wrong product can lead to pitting, sticky surfaces, and more maintenance. If you want a practical starting point, the rust prevention spray guide shows how to match protection to the tool instead of guessing.
How to keep tools from rusting in storage
Keep tools dry, warm, and protected before you put them away. The supporting guide explains how to prevent condensation from forming on metal, how to keep storage humidity at or below 50%, and which rust blockers fit different setups like drawers, toolboxes, wall racks, van boxes, and sheds. That matters because rust does more than stain: it pits edges, seizes fasteners, and shortens the life of planes, saws, chisels, and measuring tools.
If you want a practical system for winter storage, start with preventing rusty tools. It covers the basics of desiccants, vapor-inhibiting protection, and post-use habits so the metal stays clean between projects.
What should you do about glue and finishes in the cold?
Keep the room, the stock, and the product above the manufacturer’s minimum application temperature, because warming only the air is not enough. Cold stock pulls heat out of glue lines and finishes. The usual winter failures are weak glue joints, cloudy or blushed finishes, slow cure, poor flow, and products damaged by freezing.
Glue limits and chilly-shop failure symptoms
Most manufacturers list a minimum application temperature on the bottle or technical sheet. Respect it. Below that threshold, water-based wood glues can turn sluggish, soak unevenly, and cure weakly. The joint may clamp fine and still fail later because the glue line never formed correctly.
How cold is too cold for glue-ups? If the glue, the wood, or the room is below the product minimum, it is too cold. That answer sounds simple because it is. Warm all three, then keep them warm through the early cure period.
Finish behavior in cold shops
Cold finishes thicken and level poorly. Waterborne products can blush or dry unevenly in damp cold air. Solvent finishes may flash slower, trap defects, or stay soft longer than expected. Winter finishing works best in a smaller conditioned zone with controlled exhaust rather than in a cold whole garage.
A common first-timer mistake is heating the room for half an hour while leaving the finish can and project panel on a near-freezing concrete floor. The thermometer says the shop is ready, but the finish still goes on cold and cures badly because the materials never reached room temperature.
Freeze-thaw damage and epoxy crystallization
Store glues and finishes indoors if freezing is possible. Some products tolerate limited freeze-thaw cycling, but many do not, and winter labels often say so plainly. Epoxy can crystallize in cold storage, which changes how it pours and mixes even before cure quality becomes a concern.
Bring products inside between sessions, and warm stock off the floor before use. If a project must stay in the shop, build the work schedule around a stable heated window rather than a short warm-up burst.
How do you winterize the shop floor and your PPE?
Winterize the floor by keeping meltwater out of traffic paths, adding traction at entrances and machine zones, and cleaning daily before sawdust turns wet spots into slippery paste. For clothing, wear thin layers with fitted sleeves, non-slip footwear, and use gloves only where the operation safely allows them around the task.
Floor traction and meltwater control
Snow and ice come in on boots, lumber carts, and vehicle tires. Put absorbent mats at the entry and traction mats where you stand to cut or assemble. Sweep chips before they mix with water. If the floor slopes, direct melt away from machines and extension cords.
Clothing that stays safe around machines
Bulky coats, loose cuffs, and dangling drawstrings do not belong near spinning tools. Thin base and mid layers are safer than one heavy jacket. Fine Woodworking says a heated vest can provide about 6 hours of warmth, which can keep core comfort up without adding loose fabric around blades or belts.
When gloves work and when they do not
Gloves can make sense for lumber handling, snow clearing, or moving sheet goods through a cold yard. They are a poor choice near rotating machinery where material feel and snag risk matter. Switch tasks, then take the gloves off. Winter safety often comes down to that small transition.
Winterize a Garage Workshop Before the Cold Sets In
If your shop lives in a garage, winter prep starts with stopping drafts and moisture before you add more heat. The supporting guide on winterizing a garage workshop breaks down the quickest fixes: sealing air leaks, improving insulation where it matters most, and setting up a moisture plan that protects tools, lumber, and finishes.
That matters because an underprepared garage shop can swing between damp, freezing, and hard-to-heat conditions. The article helps you decide what to seal first, how to reduce frost and condensation, and how to make an attached or detached garage safer and more usable all winter.
How do you control humidity in a winter shop?
When a shop stays damp, the fix is usually dehumidification, not more heat. The supporting guide explains how to choose the right unit for a garage or basement shop by considering room size, leakiness, winter temperature, and rust risk. It also shows when a 50–70 pint compressor model makes sense, when a smaller unit is enough, and when colder spaces need a desiccant or low-temperature design.
That matters because excess humidity leads to rusted tools, swollen lumber, mold, and finish problems. If you want a practical buying path instead of guesswork, start with the woodshop dehumidifier guide.
Winter readiness matrix
| Problem | Likely cause | Quick test | Recommended fix |
|---|---|---|---|
| Rust on cast iron or hand tools | Condensation from rapid reheating; RH drifting high; unprotected steel storage | Check hygrometer, then compare air temperature to cold machine surfaces after heat-up; look for moisture first on table edges and rules | Warm the shop more gradually, keep RH at 40-50%, protect cast iron with wax or film, and move edge tools and measuring tools into sealed drawers with desiccant |
| Glue failure | Glue, stock, or room below product minimum; stock not acclimated | Read the bottle minimum, then check wood moisture with a meter and confirm the parts feel room-warm, not slab-cold | Store glue indoors, acclimate wood, warm the room and the parts above 50°F at minimum, and delay glue-up until moisture content is near target |
| Finish blush or slow cure | Cold material, cold substrate, high local humidity, weak ventilation | Check room RH and touch-test whether the workpiece and finish can are colder than the room air | Warm finish and stock indoors first, create a conditioned finishing zone, and use controlled exhaust during and after application |
| Static-heavy dust buildup | Winter RH below 30%; weak source capture; closed shop air | Read hygrometer and inspect hoses, machine interiors, and clothing for clinging fines | Bring RH back toward 40-50%, improve source capture, use HEPA vacuum cleanup, and add ambient air cleaning |
| Condensation after heating a cold shop | Cold tools below dew point while air warms rapidly; leaks driving moist air onto cold metal | Start heat and inspect steel surfaces during the first 15-30 minutes, especially saw tops, blades, and squares | Air-seal first, maintain some background heat if possible, reduce overnight temperature swing, and avoid short high-output warm-up blasts |
Pre-season control order
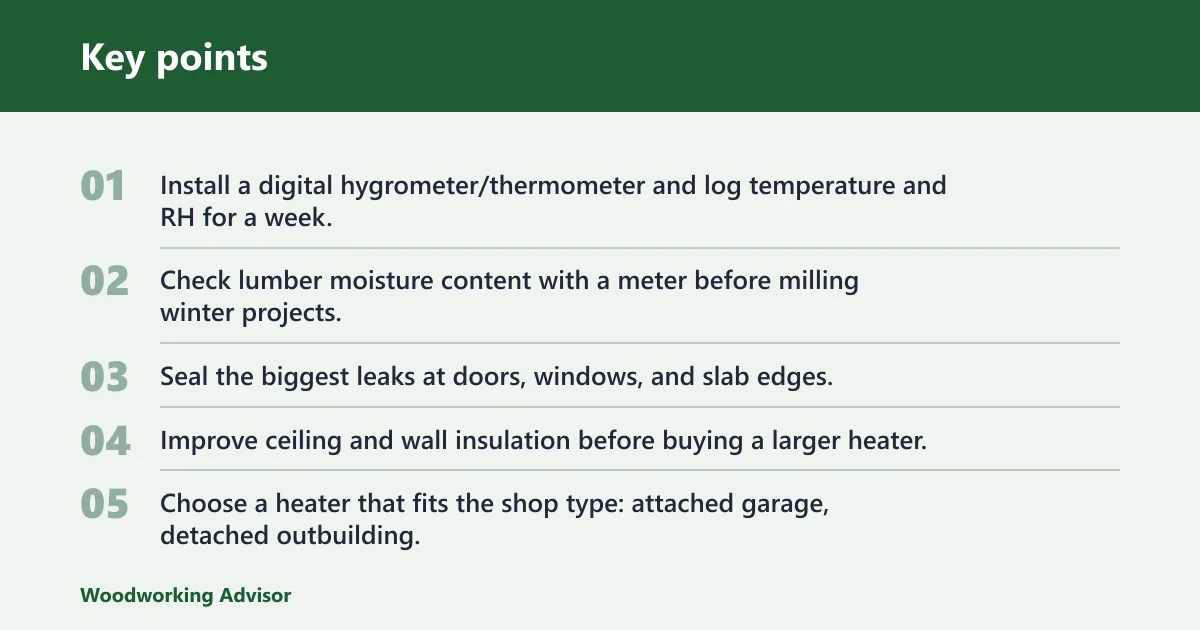
- Install a digital hygrometer/thermometer and log temperature and RH for a week.
- Check lumber moisture content with a meter before milling winter projects.
- Seal the biggest leaks at doors, windows, and slab edges.
- Improve ceiling and wall insulation before buying a larger heater.
- Choose a heater that fits the shop type: attached garage, detached outbuilding, or basement.
- Set up source dust capture, HEPA cleanup, and a winter exhaust plan for fumes.
- Protect cast iron and move small steel tools into drier storage.
- Store glue and finishes indoors and verify minimum application temperatures before use.
- Add entry mats, traction, and a daily floor cleanup routine.
If that list looks like a lot, notice the pattern: measurement drives sealing, sealing reduces heater demand, steadier heat reduces condensation, steadier RH reduces both wood movement and static, and cleaner air makes winter ventilation easier to manage. Treat the shop as one system and several winter problems get smaller at once.
Frequently asked questions
How do I keep a woodshop warm in winter without causing a fire?
Start with air sealing and insulation, then use a heater with proper clearance and stable placement. Electric resistance heat and mini-splits are usually the cleanest options for attached garages and basements. Keep dust off heaters, avoid bulky clothing near tools, and do not use open-flame heat as a substitute for ventilation.
What humidity should a winter woodshop be kept at?
Keep the shop near 40-50% RH and verify it with a digital hygrometer. Below 30% RH, static and wood shrinkage become more likely. Much above the target range, rust, condensation persistence, and mold risk increase, especially on cold tools and in leaky shops.
How do I stop rust on hand tools in a cold shop?
Prevent rapid temperature swings, store tools in enclosed drawers or cabinets, and use desiccants in those small spaces. Protect exposed steel with wax or a light film. Hand planes, chisels, saw blades, and measuring tools should not sit in damp rolls or open trays during winter air swings.
Do I need ventilation when heating a workshop in winter?
Yes. Heat does not remove dust, finish fumes, or combustion byproducts. Use source capture first, HEPA cleanup second, ambient filtration for lingering fines, and targeted exhaust during finishing or whenever fuel-burning heaters are involved. Winter ventilation should be controlled, not ignored.
How cold is too cold for woodworking glue-ups?
It is too cold whenever the glue, the wood, or the room is below the adhesive manufacturer’s minimum application temperature. Warming only the air is not enough if the stock stayed cold on a slab floor. Bring all three into range and hold them there through early cure.
How do I protect wood from winter movement and swelling?
Check moisture content with a meter, acclimate lumber in stickered stacks, and delay final dimensioning if readings are still moving. Many interior hardwood projects target 6% to 8% MC, though 6% to 12% may fit species and service conditions. Stable RH matters as much as final joinery layout.
Sponsored / affiliate links. As an Amazon Associate I earn from qualifying purchases. I may earn additional commission from eligible campaigns.