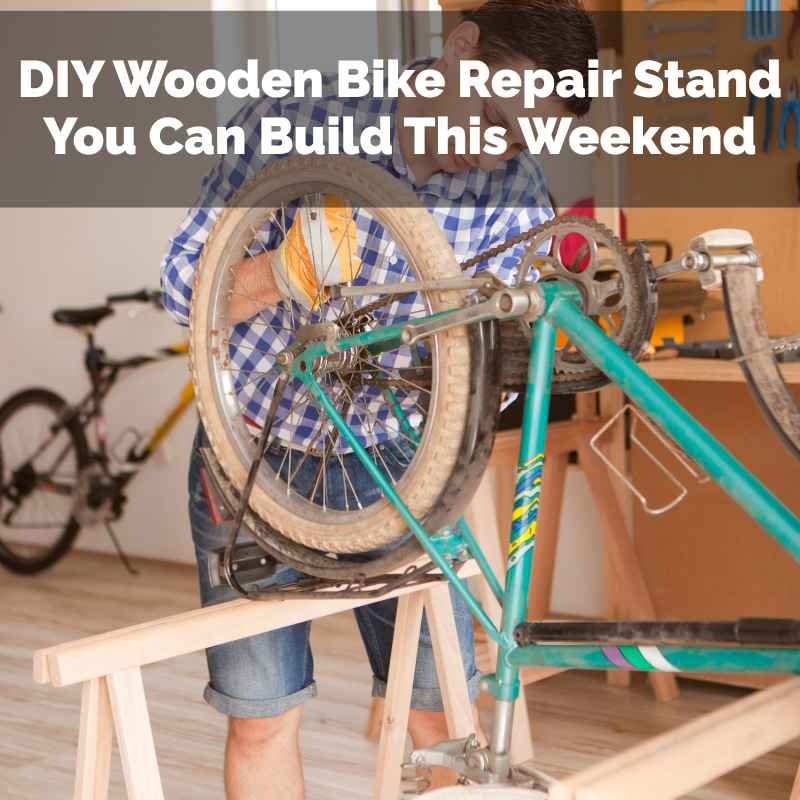
DIY Wooden Bike Repair Stand You Can Build This Weekend
Building your own wooden bike repair stand is a practical weekend project that saves money and gives you a reliable tool for bike maintenance. This guide breaks down the process into easy steps using common materials and tools, ensuring you can achieve a sturdy and functional stand for your home workshop.
Understanding Your DIY Wooden Bike Repair Stand
So, what exactly is a DIY wooden bike repair stand? It’s a simple structure. It’s made mostly from wood. Its main job is to hold your bicycle securely. This lets you work on it easily. You can lift the back wheel. Or you can clean the drivetrain. You can adjust gears. All this is possible without the bike moving. Think of it like a workbench for your bike. But it’s designed just for that purpose. It usually has a base for stability. It has arms or a cradle to hold the bike frame. Sometimes, it clamps the seat post. Others hold the bottom bracket area. The goal is always the same: secure support. This makes repairs much smoother. It also protects your bike. You won’t have to lean it against walls. Or balance it precariously. This kind of stand is often called a “workstand.” But this one is special because you build it. You use common lumber. You use basic tools. It’s a very rewarding project. It’s also very practical for any cyclist.
Why would you want to build one instead of buying? Cost is a big reason. Good quality bike repair stands can cost hundreds of dollars. A DIY wooden stand can be made for a fraction of that. You might spend $50 to $100. It depends on the wood and hardware you use. Another reason is customization. You can build it to your exact needs. Maybe you have a special type of bike. Or you need it to be a certain height. Building it yourself lets you tweak the design. You get exactly what you want. Plus, there’s a great sense of accomplishment. Building something useful with your own hands is satisfying. It’s also a good way to learn basic carpentry skills. You’ll learn how to measure. You’ll learn how to cut wood. You’ll learn how to join pieces together. These are handy skills for many projects around the house. So, it’s more than just a bike stand. It’s a learning experience too.
The basic idea is simple. You create a stable platform. This platform lifts your bike. It holds it in place. The most common designs focus on holding the rear of the bike. This is because many common repairs happen there. Things like chain maintenance. Or gear adjustments. Or fixing a flat tire on the rear wheel. Some designs might also support the front. But for a beginner DIY project, focusing on the rear is often best. It’s simpler to build. And it covers most common needs. You’ll find many plans online. Some are very basic. Others are more complex. We’ll focus on a design that is easy to build. It’s strong. And it works very well for most home mechanics. It uses readily available lumber. Like 2x4s and plywood. These are easy to find at any hardware store. You won’t need fancy tools either. A saw, a drill, and some screws will do the job.
My Weekend Stand-Building Adventure
I remember the first time I truly felt stuck on a bike repair. It was a Saturday afternoon. My trusty old road bike had a flat tire. Not just any flat. The rear wheel flat. I’d done front tires before. Those are simple enough. Just lean the bike against something. Or flip it upside down. But the rear wheel is different. I tried leaning it. It kept slipping. I tried flipping it. That’s a mess. Cables get tangled. Shifters can get bumped. My garage floor got greasy. I was getting frustrated. The sun was starting to set. I just wanted to ride. I thought about buying a stand. But honestly, the price tags made my eyes water. I looked at my pile of wood scraps in the corner. I’m a bit of a DIY guy. I tinker with things. A thought hit me: could I build my own? I grabbed a tape measure. I looked at my bike. How high did the wheel need to be? What would hold the frame steady? Panic started to fade a little. Annoyance turned into a challenge. I sketched out a rough idea. It involved two upright pieces. And a support piece to cradle the bottom bracket area. It seemed doable.
That evening, I rummaged through my tools. I found some sturdy 2x4s. I had some plywood scraps too. I spent a good hour planning. I looked online for DIY bike stand ideas. Many were complex. Some used metal. Others looked like they needed advanced welding skills. But I found a few simpler wooden designs. They gave me the confidence to try. The next morning, I went to the hardware store. I bought a few more pieces of lumber. Just to be sure. I got some good screws. And a couple of small metal brackets. The actual building was surprisingly straightforward. I cut the wood. I drilled pilot holes. I screwed the pieces together. I made sure each joint was strong. I was a little nervous when I first put the bike on it. Would it hold? What if it tipped? But it was surprisingly stable. The rear wheel lifted off the ground perfectly. I could spin the pedals. I could work on the chain. It felt amazing. I’d fixed my bike. And I’d built the tool to do it. That feeling was better than any store-bought stand.
Materials Checklist
- Lumber:
- Several 8-foot 2×4 boards (pine or fir works well)
- One sheet of 3/4-inch plywood (for the base and supports)
- Hardware:
- 2.5-inch wood screws
- 1.5-inch wood screws
- Optional: Metal L-brackets for extra reinforcement
- Tools:
- Measuring tape
- Pencil
- Hand saw or circular saw
- Drill and drill bits
- Screwdriver bits
- Safety glasses
- Sandpaper (medium grit)
Planning Your Wooden Bike Stand Design
When you’re planning your DIY wooden bike stand, think about a few key things. The first is stability. This is the most important part. Your stand needs to be solid. It should not wobble or tip over. This means you need a wide and heavy base. A good base prevents accidents. It keeps your bike safe. It also keeps you safe. The second thing is height. How high do you need the back wheel to be? Most standard bikes will need the wheel lifted about 12-18 inches off the ground. This gives you enough space to work. You can spin the pedals freely. You can access the chain and cassette easily. You can adjust this height when you design. The third thing is the bike support. How will the bike actually rest on the stand? Common methods include a cradle. This cradle holds the bottom bracket shell. Or a sturdy arm that supports the chainstay area. Some designs use a clamp for the seat post. But a cradle for the bottom bracket is usually the most stable and easiest to build for a DIY project. It supports the frame directly.
For a simple yet effective wooden stand, a common design uses an ‘X’ shape or a simple rectangular base. From this base, two upright posts rise. At the top of these posts, a horizontal support is attached. This is where the bike cradle will sit. The cradle itself is often made from wood. It might be two padded pieces of wood. These pieces are spaced just right. They grip the bottom bracket shell. Or it could be a single piece with a groove. It’s important to make sure the cradle is padded. You don’t want to scratch your bike frame. Felt or rubber padding works well. You can even use old pieces of carpet. Just make sure it’s securely attached. The whole structure should feel robust. Like it can handle the weight of your bike plus your leaning into it.
Let’s talk about the core structure. A solid base is crucial. You can make this from two pieces of 2×4 wood. Lay them in a wide ‘X’ shape. Or a simple rectangle. A rectangle might be two 2x4s about 2 feet long. With two shorter 2x4s connecting them. This gives you a good footprint. From this base, two upright posts will rise. These are typically made from 2x4s as well. They should be tall enough to get your wheel off the ground. Maybe 18-24 inches. At the top of these uprights, you’ll add a crossbar. This is another 2×4. This crossbar is where the magic happens. It holds the cradle. The cradle can be a few pieces of wood. Shaped to fit around your bike’s bottom bracket. You’ll want to reinforce the connections. Using wood screws is fine. But adding L-brackets at key joints makes it even stronger. Think about the stress points. The connection between the base and uprights. The connection between the uprights and the crossbar. These need to be strong.
A Closer Look at Stability
Why it matters: A wobbly stand makes repairs dangerous. It can lead to bike damage or injury. Key features for stability:
- Wide Base: The wider the base footprint, the harder it is to tip. Think at least 18-24 inches in each direction.
- Weight: Heavier wood and a solid structure add stability. Plywood adds good weight.
- Strong Joints: Use plenty of screws. Pre-drill holes to prevent splitting. Consider metal brackets at critical points.
- Center of Gravity: Keep the main uprights and the bike support relatively low. This lowers the overall center of gravity.
Gathering Your Lumber and Hardware
Now, let’s get down to specifics. What kind of wood should you use? For a DIY bike stand, you don’t need exotic hardwoods. Good old pine or fir 2x4s are perfect. They are strong, affordable, and easy to work with. You’ll likely need about 3 to 4 eight-foot 2×4 boards. This will give you enough material for the base, uprights, and crossbar. For the base, you might also use some plywood. A piece of 3/4-inch plywood, about 2 feet by 2 feet, is excellent for a solid base. It adds weight and prevents the legs from sinking if you use it outside. Plywood is also great for making the bike cradle itself. It’s easier to cut curves and shapes from plywood. You can also use 2×4 scraps for the cradle. Just shape them carefully.
When it comes to hardware, screws are your best friend. You’ll need a good supply of wood screws. For joining 2x4s, 2.5-inch screws are usually a good length. They go deep enough to create a strong hold. Make sure they are suitable for outdoor use if your garage is damp. For attaching thinner pieces like plywood or smaller wood blocks for the cradle, 1.5-inch screws will work well. Don’t be shy with screws. Use more rather than fewer. Pre-drilling pilot holes is a must. This prevents the wood from splitting. Especially when you’re working near the ends of boards. A small drill bit, slightly smaller than the screw threads, is what you need. This makes driving the screws much easier. And it makes the joint much stronger.
What about those optional metal brackets? L-brackets can add a significant amount of strength. Especially at the joints where the upright posts meet the base. Or where the crossbar meets the upright posts. They are inexpensive. And they provide peace of mind. You can find them in the hardware section of any store. Make sure to get screws that are the right size for the brackets. They usually come with their own holes. Also, consider some rubber padding or old carpet scraps for the cradle. This protects your bike’s frame. You can attach this padding with staples or a strong adhesive. It’s a small detail that makes a big difference.
Quick Tool Tips
- Measuring Tape: Accuracy is key. Double-check all your measurements.
- Pencil: Use a sharp pencil for clear lines.
- Saw: A hand saw is fine for a few cuts. A circular saw or miter saw makes it faster and more precise.
- Drill: Essential for pilot holes and driving screws. Have a set of drill bits for pilot holes and your screw bits.
- Safety Glasses: Always wear them when cutting or drilling wood. Wood chips can fly.
- Sandpaper: Smooth any rough edges. Especially on the bike cradle. This prevents snags.
Step-by-Step Building Instructions
Let’s get building! First, gather all your wood and tools. You want everything ready before you start cutting. Measure and mark your wood pieces accurately. It’s better to measure twice and cut once. For the base, you can cut two pieces of 2×4, each about 24 inches long. Then cut two more pieces, each about 18 inches long. These will form a rectangle. Or, for an ‘X’ base, you can cut two 2x4s about 24 inches long. Then cut a notch in the center of each so they fit together. Make sure your cuts are as square as possible. This ensures a stable structure.
Next, assemble the base. If you made a rectangle, lay out the four pieces. Connect the corners using 2.5-inch screws. Pre-drill your holes. If you made an ‘X’ base, fit the notched pieces together. Secure them with screws. This base needs to be strong. It’s the foundation of your stand. Now, for the upright posts. Cut two pieces of 2×4, each about 20 inches long. These will stand vertically from your base. Attach these upright posts to the base. Position them so they are parallel to each other. Place them about 8-10 inches apart. Use plenty of 2.5-inch screws. You can also add L-brackets on the inside or outside of the joint for extra strength. Ensure they are plumb (perfectly vertical).
Now, let’s add the crossbar. Cut another piece of 2×4, about 18 inches long. This will sit horizontally on top of your two upright posts. It needs to be wide enough to attach your bike cradle. Position it carefully. Ensure it’s level. Attach it to the top of the upright posts. Again, use 2.5-inch screws. Pre-drill. You can also add L-brackets here. This is a critical connection. Make it very secure. The height of this crossbar determines how high your bike wheel will be. Measure from the floor to the bottom of the crossbar. Adjust your upright post length if needed before attaching the crossbar. Aim for that 12-18 inch lift for the rear wheel.
Crafting the Bike Cradle
This is where your bike will rest. It needs to be shaped to fit your bike’s bottom bracket shell. You can use a piece of plywood or shaped 2x4s.
Option 1 (Plywood): Cut a piece of plywood about 6 inches wide and 10 inches long. Find the center of its length. Draw a gentle curve on each side, about 1.5 inches deep. Cut these curves out. This creates a U-shape. This U-shape will cradle your bottom bracket. Attach this cradle to the front edge of your crossbar using 1.5-inch screws. Ensure it’s centered.
Option 2 (2x4s): Cut two short pieces of 2×4 (about 4 inches long). Shape them into a slight curve on one side. You can do this with a rasp or sander. Mount these two curved pieces onto the crossbar. Space them so they grip your bike’s bottom bracket shell securely. About 3-4 inches apart.
Padding: Cut strips of felt, carpet, or thick foam. Glue or staple these to the inside of your cradle. This prevents frame damage and makes it grippier.
Assembly and Reinforcement
Once all the main pieces are assembled, it’s time for reinforcement. Go back over all your joints. Are they tight? Are they secure? Add extra screws where you think it’s needed. Especially at the base connection points. And where the uprights meet the crossbar. Think about how the weight will be distributed. You want no flexing. No creaking. If you bought L-brackets, now is the time to install them. Place them on the inside or outside of the key joints. Screw them in firmly. This adds a professional touch and serious strength. The goal is a stand that feels like it’s built from one solid piece of wood.
After all the screws are in, and brackets are attached, take a look at the overall structure. Are there any sharp edges? Any splinters? Use sandpaper to smooth down any rough spots. Pay special attention to the bike cradle. You don’t want anything that could snag your bike. Or scratch your frame. This is also a good time to ensure everything is square and plumb. If something looks a little off, you might be able to adjust it slightly. Add a bit more support where needed. The more solid it feels, the more confident you’ll be using it.
Consider the weight. A heavier stand is a more stable stand. If your stand feels a little light, you can add weight. You could screw a thin sheet of plywood to the bottom of your base. Or even add some decorative but functional pieces of wood. The more stable it is, the less likely it is to tip. And the more enjoyable bike maintenance will be. A well-built stand makes the whole process easier. It saves your back. It saves your tools from being dropped. It saves your bike from scratches.
Quick Checks Before Use
- Wiggle Test: Push and pull on the stand from different angles. Does it wobble?
- Screw Check: Ensure all screws are tight.
- Cradle Fit: Does the cradle look like it will hold your bottom bracket securely? Is the padding in place?
- Height Check: If possible, place your bike on it briefly. Does the rear wheel lift off the ground as expected?
Real-World Use and Adjustments
So, you’ve built your stand. Now, let’s see how it performs. When you first put your bike on it, be gentle. Lift the rear wheel. Guide it into the cradle. Make sure it sits snugly. You should feel it settle in. The cradle should gently hug the bottom bracket shell. It shouldn’t be too tight. It shouldn’t be too loose. The upright posts should be holding the weight evenly. The entire stand should remain firmly on the ground. If the stand rocks back and forth, your uprights might be too short. Or your base might not be wide enough. If it tips side-to-side, the base is likely too narrow.
In real homes, garages can be uneven. If your floor isn’t perfectly level, your stand might lean a bit. This is usually okay. But if it makes the bike feel unstable, you can fix it. You can add small shims under one of the base legs. Just a thin piece of wood or cardboard. It doesn’t take much to level things out. Another thing to consider is the type of bike. Road bikes have thinner frames. Mountain bikes have thicker frames. Ensure your cradle can accommodate your specific bike. You might need to adjust the width or shape. This is where the custom nature of DIY shines. You can tweak it as you go.
If you find the cradle isn’t gripping well, you have a few options. First, make sure the padding is thick enough. It should provide some cushioning and grip. Second, you can adjust the angle of the cradle pieces. Sometimes a slight tilt can help them seat better. Or you can add a simple strap. A velcro strap can wrap around the cradle and bottom bracket. This adds extra security. It’s like a seatbelt for your bike. This is especially useful for heavier bikes. Or if you plan to do work that requires a bit more force. Like removing a stubborn crank arm. A little extra security goes a long way. This is the beauty of a DIY project. You can adapt it. You can improve it. You learn what works best for your setup.
Common Scenarios & Solutions
- Stand Wobbles: Check base width, upright stability, and joint strength. Add reinforcement if needed.
- Bike Slips: Ensure cradle padding is thick and grippy. Adjust cradle shape or add a strap for extra security.
- Wheel Too Low/High: Adjust the length of your upright posts. Re-attach the crossbar and cradle at the correct height.
- Uneven Floor: Use shims under the base to level the stand and the bike.
When to Worry and When It’s Normal
It’s normal for your DIY wooden bike stand to feel a little different than a store-bought metal one. Wood has a bit of flex. It’s not as rigid as steel. So, if you hear a slight creak when you put weight on it, don’t panic right away. It’s often just the wood settling. Or a minor flex. What you should worry about is significant movement. If the stand rocks back and forth violently. If you see joints starting to pull apart. Or if the wood itself looks like it’s cracking under pressure. These are signs that something is wrong. Your stand might not be strong enough for the job.
It’s also normal to need a few small adjustments. Maybe the cradle needs to be wider. Or narrower. Maybe the height isn’t quite right. You might discover this after your first repair. Don’t feel like you have to live with it. This is your chance to improve your design. Add a bit more padding. Or trim down a piece that’s too high. These are minor tweaks. They are part of the DIY process. They don’t mean your stand is a failure. They mean you’re learning and adapting.
What is concerning is if the stand makes you feel unsafe. If you’re constantly worried about your bike falling. Or if you’re afraid to put any real effort into a repair. That’s not good. Your stand should give you confidence. It should make repairs easier. If it’s not doing that, it’s time to re-evaluate. Double-check all your screws. Add those L-brackets you considered. Make sure the base is as wide and stable as possible. Safety first. Always. For you, your bike, and your stand. If the wood itself feels weak or rotten, that’s a definite sign to rebuild or
Simple Safety Checks
- Listen: Pay attention to any new noises your stand makes.
- Look: Visually inspect joints for any separation or cracks.
- Feel: Does the stand feel solid when you put weight on it?
- Bike Fit: Does the bike sit securely in the cradle without wobbling?
Quick Tips for Your DIY Stand
Here are a few quick tips to make your DIY stand experience even better. First, use wood glue in addition to screws for all your major joints. Apply a thin layer of wood glue to the mating surfaces before screwing them together. Wipe away any excess glue that squeezes out. Glue adds a lot of strength. It makes the joints much more durable. It’s a small step that pays off in the long run. It helps prevent those minor creaks and groans too.
Second, consider adding a small tray or hook. You know, for your tools. Or that greasy rag. You can attach a small piece of plywood to the side of one of the upright posts. Or screw in a simple hook. It’s amazing how much easier it is to work when your tools are right there. No more searching for that wrench. No more bending down to pick it up from the floor. This little convenience makes a big difference in your repair flow. It keeps your workspace tidy too.
Third, don’t be afraid to paint or seal your stand. If your garage is damp, or if you plan to use the stand outdoors sometimes, a coat of paint or sealant will protect the wood. It will also make it look nicer. Choose an exterior-grade paint or a clear sealant. This will help your stand last much longer. It’s a simple finishing step that adds a lot of value. Plus, you can pick your favorite color!
Enhancement Ideas
- Tool Tray: Attach a small shelf to the side.
- Hose Holder: Add a hook for your bike pump hose.
- Wheel Chock: A simple block on the base can stop the front wheel from rolling if you’re working on the rear.
- Adjustable Height: For more advanced builders, you could design a way to adjust the height of the crossbar.
Frequently Asked Questions
How much weight can a DIY wooden bike stand hold?
A well-built wooden bike stand, using standard lumber like 2x4s and proper reinforcement, can easily hold the weight of most bicycles. This typically includes road bikes, mountain bikes, and hybrids. Expect it to comfortably support up to 50-75 pounds. Always ensure your joints are strong and consider adding L-brackets for maximum support.
What is the best type of wood to use for a DIY bike stand?
Pine or fir 2x4s are excellent choices. They are strong, affordable, and easy to work with. You can also use plywood for the base and cradle pieces. Avoid soft woods that might splinter easily. For increased durability and weather resistance, consider using treated lumber if your stand will be exposed to moisture.
How do I keep my bike from scratching when using the stand?
The key is padding! Line the bike cradle with soft material. This can be thick felt, pieces of old carpet, foam padding, or even rubber mats. Secure the padding with strong adhesive or staples. This creates a cushion between the wood and your bike frame, preventing any scratches or damage.
My stand feels a bit wobbly. What can I do?
Wobble usually comes from a narrow base or weak joints. Widen the base footprint. Ensure all screws are tight. Add extra screws at critical joints. Metal L-brackets are a great way to reinforce the connections between the base and uprights, and between the uprights and the crossbar. Make sure the uprights are perfectly vertical (plumb).
Can I build a stand that holds the front wheel instead?
Yes, you can! Designs for front-wheel stands often involve a fork mount. This requires more specific measurements for your bike’s front axle. For a first-time DIY project, holding the rear of the bike via the bottom bracket is generally simpler and more stable. But a front-wheel stand is a great next project once you have experience.
What are the basic tools I will need?
You’ll need a measuring tape, pencil, a saw (hand saw, circular saw, or miter saw), a drill with drill bits for pilot holes and screwdriver bits, and safety glasses. Sandpaper for smoothing edges is also helpful.
Conclusion
Building your own wooden bike repair stand is a fantastic weekend project. It’s achievable, cost-effective, and incredibly useful. You’ll end up with a sturdy tool. It will make all your bike maintenance tasks much easier. From simple tire changes to more complex gear adjustments. Remember to prioritize stability and strong joints. And don’t be afraid to add extra padding and reinforcements. Enjoy the process of building. And enjoy the satisfaction of working on your bike with your own custom-made stand. Happy wrenching!