How to Glue a Split Table Top Without Making It Worse
A structural split opens the fibers, changes width under light pressure, or runs through a load-bearing part of the top. A surface crack usually stays in the finish or paint film. I check both sides of the top, press near the gap, and note whether the line follows the grain or crosses a glued joint.
How do you tell whether the split is structural?


Check the crack width and movement
Look at the seam with the table at rest, then press lightly on each side of the crack. If the opening widens or closes even a little, the wood is moving and the repair needs adhesive, not just cosmetic filling. If the line stays the same and only the finish is fractured, the problem may sit in the surface film.
Look for grain direction and joint lines
Splits often run with the grain on solid wood tops, especially across the width where seasonal movement is strongest. A split that passes through a glued-up panel seam may also point to a failed glue joint. If the crack follows a panel joint, the repair changes because the seam may need to be cleaned more carefully before it will bond again.
Separate finish damage from wood separation
Paint or finish can crack without the wood opening underneath. That matters because a film bridge can hide a larger split, and it can also block glue from reaching the wood at the crack line. If the top flexes and the line opens, treat it as a wood repair and assume the finish at the seam will need attention.
What glue works best for a split tabletop?
PVA wood glue is the first choice for a tight, clean split with good wood-to-wood contact. Polyurethane glue works better when the crack is less exact and needs some gap filling, but it expands as it cures and leaves messier squeeze-out. Epoxy fits wider openings and longer working time.
Use PVA wood glue for tight splits
PVA wood glue bonds well when the two faces fit closely and the seam can close without force. It cleans up with water before it hardens, which can make it a less messy option for finish work around a tabletop. I reach for it on narrow cracks that still meet cleanly along the grain.
Use polyurethane glue for less exact seams
Polyurethane glue can help when the split is not perfectly tight, but it is less forgiving around finished surfaces. It expands as it cures, so a small amount may go a long way. That expansion can fill slight voids, yet it also pushes out more residue than PVA and can stain nearby finish if masking is poor.
Use epoxy for wider gaps or slow, careful work
Epoxy is useful when the split is wider, irregular, or full of old residue that cannot be removed completely. Its longer working time can make injection and alignment easier on a large top. It also bridges gaps better than PVA, though it still needs clean wood surfaces if the repair is expected to hold.
| Split severity | Finish condition | Movement risk | Safest adhesive | Injection method | Clamp pressure approach |
|---|---|---|---|---|---|
| Hairline split | Finish intact at the edge | Low | PVA wood glue | Glue syringe or narrow applicator tip | Light spring clamps, just enough to hold alignment |
| Open split, about 1/32 to 1/16 in. | Finish broken at the seam | Moderate | PVA if faces still meet; polyurethane if fit is uneven | Syringe, then work glue along the seam line | Bar clamps with pads, tightened only until beads appear |
| Wider split, about 1/16 to 1/8 in. or more | Old finish or dirt in the crack | Higher | Epoxy | Mix first, then inject or pack carefully into the void | Controlled bar clamp pressure; stop before the fibers crush |
| Split that changes with pressure | Finish may be cracked or lifted | Active movement | Epoxy if the seam is sound after cleaning; otherwise repair the cause first | Do not pry open aggressively; inject only after cleaning | Very light closure only, with cauls to spread load |
How do you get glue into the crack without opening it wider?
Clean the crack line, protect the finish, and inject adhesive with a glue syringe or applicator bottle instead of prying the split apart. That cuts the risk of lengthening the crack. If a little flex is needed, open the seam only enough for the nozzle to reach, then stop as soon as the glue wets both faces.
Clean the crack line first
Loose dust, crumbs, and old finish crumbs keep glue from reaching bare wood. Blow or brush out the seam, then pick out debris with a thin plastic scraper or a clean knife edge used gently. The aim is a clear bond line, not a larger void.
Mask the surface before injection
Apply masking tape along both sides of the split before the glue goes in. That keeps squeeze-out off the finish and gives a cleaner edge for cleanup later. Tape also helps control where the glue travels when pressure is applied, which matters on sealed tabletops that can stain quickly.
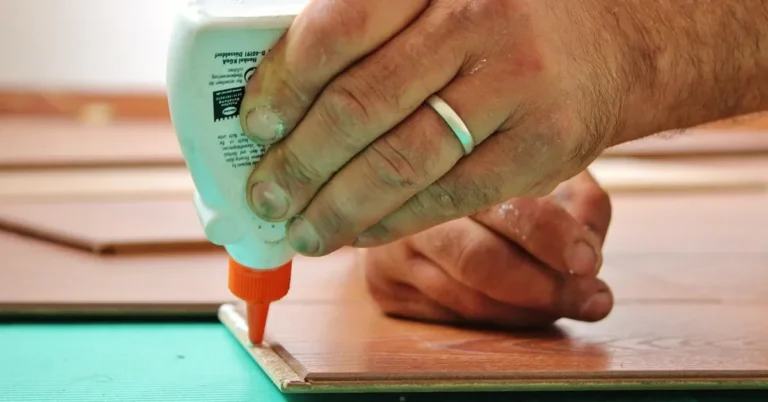
Use a syringe or narrow tip
A glue syringe or applicator bottle lets the adhesive enter deep into a narrow crack without forcing the tabletop apart. Work from one end to the other and watch for glue appearing along the seam. If the crack is tight, patience beats prying; forcing the gap open can tear fibers and widen the failure.
Open only as much as needed
If the adhesive will not enter, a slight and temporary flex can help. That flex should be minimal. The aim is to admit glue, not to create a larger void that has to be filled later. Once the glue reaches the full length of the split, stop moving the parts and begin closure.
Should I clamp a split tabletop before or after glueing?
Clamp after the glue is in place. Before glueing, use light spring clamps only if they help align the seam without stressing it. Heavy clamp force before adhesive can drive the crack farther open, and overtightening after glueing can crush fibers or starve the joint of adhesive.
Use spring clamps for light alignment
Spring clamps are useful when the split wants to shift sideways or lift at one edge. They provide light pressure and are good for temporary closure while glue is being placed. They are not the tool for squeezing a tabletop hard shut, because that can distort the seam and push adhesive out of the bond line.
Use bar clamps for controlled closure
Bar clamps are the better choice when the crack needs measured pressure across the tabletop width. Use pads or cauls so the jaws do not dent the finish or the wood. Tighten only until the crack closes and a thin bead appears. If the seam starts to bow or the fibers crush, the clamp is too tight.
Watch the alignment from top and edge
Check the repaired area from above and from the edge before leaving it alone. A tabletop can look closed from one angle while the faces are still misaligned. If the seam is proud on one side, release and reset it before the glue starts to grab.
How do you keep glue off the finish and clean the repair?
Mask both sides of the crack before glue enters, use only enough adhesive to wet the bond faces, and wipe squeeze-out while it is still workable. If residue hardens on the finish, remove it carefully after cure so the tabletop is not scratched. Damaged finish may need sanding and refinishing around the repair.
Protect the finish before the squeeze-out starts
Masking tape is the simplest barrier around a crack line. It helps keep glue off the coating, especially on painted or varnished tops where cleanup can smear a soft film into a larger stain. Tape also makes it easier to spot fresh squeeze-out before it spreads.
Wipe while the glue is still workable
PVA glue can be cleaned with a damp cloth before it skins over. Polyurethane and epoxy need their own cleanup timing and method, but neither should be left to harden across a finished surface. Wipe only the stray glue, not the seam itself, or the joint can be starved of adhesive.
Remove cured residue without hurting the top
Once cured, scrape or lift residue with care. The finish at the edge of the crack is often fragile, so aggressive scraping can scratch the repair area. If the finish is already broken or stained, sanding and refinishing around the seam may be the only clean result.
How long should I clamp a repaired tabletop?
Clamp long enough for the glue to set, but not so long that the parts are over-stressed by the clamp itself. For most PVA repairs, leave the clamps until the adhesive has enough hold to keep the seam closed. Full cure takes longer than initial grab, so avoid loading the tabletop too soon.
Follow the adhesive’s set time, not just the clock
PVA often needs several hours of clamp time, while epoxy and polyurethane may follow different cure schedules. The exact timing depends on temperature, joint fit, and glue type. The important point is that the table should stay undisturbed until the seam no longer shifts under light pressure.
Remove clamps only after the joint is stable
When the adhesive has set, release the clamps and check whether the crack stayed closed. If the seam springs back, the joint was either starved, dirty, or stressed by movement. Do not put the table back into service until the repair has reached full cure.
What should I do if the split keeps reopening after repair?
A split that reopens is usually telling you that movement, moisture content, or a failed bond line is still active. Do not simply add more glue over the top. Check the wood’s dryness, inspect for trapped finish in the seam, and confirm that the original joint is actually clean enough to bond.
Check for seasonal movement and moisture content
Wood expands and shrinks with humidity. A tabletop that split once may split again if the room stays too dry or if the top is forced across a movement path. If the split keeps reopening, stabilize the indoor environment and confirm the top is not restrained by bad attachment hardware.
Inspect for trapped finish or old glue
Finish/paint film can block glue penetration at the crack line. Old glue can do the same. If either remains in the seam, the repair bonds to the contamination instead of the wood. Clean the line back to sound material before trying again.
Use the least aggressive fix that still holds
If the split is hairline and stable, PVA may be enough. If the seam is wider or inconsistent, epoxy may be the better second attempt. If the table itself is moving too much, the repair will keep failing until the cause of the movement is addressed.
Can I repair a tabletop split without removing the finish?
Sometimes, if the crack is narrow and the finish is intact enough to tape off and work around. But finish or paint film at the crack line can stop glue from reaching the wood. If the split is open, dirty, or lifting finish along the seam, some localized finish removal is often necessary.
When the finish can stay
If the crack is hairline, clean, and the coating has only a thin fracture line, a taped repair may be enough. In that case, the main job is to get adhesive into the wood fibers without spreading finish damage. That works best on tight splits with good alignment.
When finish removal becomes necessary
If the seam contains flaking varnish, paint ridges, or old filler, the glue may never touch bare wood. Scraping the crack line back to sound material is then part of the repair. Without that step, the bond can fail even if the clamps hold the top shut.
How do I tell if the split is structural or just a surface crack?
A structural split moves, has depth, or follows a grain line through the wood itself. A surface crack is usually limited to the finish and does not change under light pressure. Test the gap gently, inspect the underside, and look for any sign that the wood fibers have separated rather than only the coating.
Use pressure and back-lighting
Press lightly near the crack and shine light across the seam. A structural split often shows a changing line or a shadow deep in the wood. A surface crack usually stays fine and shallow, with no real movement in the board below the finish.
Check both faces of the tabletop
If the crack shows on the top but not the underside, the damage may be mostly cosmetic. If the line appears on both faces or the crack widens under gentle flex, it is reasonable to treat it as structural. That distinction determines whether the repair is glue-only or requires deeper surface prep first.
Frequently asked questions
How do you glue a split table top without making the crack wider?
Clean the seam, tape both sides, and inject adhesive with a syringe or narrow applicator instead of prying the top apart. Use only enough flex for the glue to enter. Then clamp lightly until the crack closes, stopping before the fibers are compressed or the split grows longer.
What kind of glue works best for a split tabletop repair?
PVA wood glue is best for tight, clean wood-to-wood contact and cleans up with water. Polyurethane glue can help with uneven splits and small voids, but it expands and makes messier squeeze-out. Epoxy is the better choice for wider gaps or repairs that need longer working time.
How do I keep glue from staining the tabletop finish?
Mask both sides of the crack before glue goes in, then wipe squeeze-out while it is still workable. The finish at the seam can stain quickly, especially with polyurethane or epoxy. If residue hardens on the coating, remove it carefully and expect to sand and refinish damaged areas.
Do I need to open the crack wider to get glue inside?
No, not unless the seam is so tight that the adhesive cannot enter at all. A glue syringe or applicator bottle usually solves the problem without forcing the split apart. If any flex is needed, keep it minimal and stop as soon as the glue reaches the full length of the crack.
Sponsored / affiliate links. As an Amazon Associate I earn from qualifying purchases. I may earn additional commission from eligible campaigns.