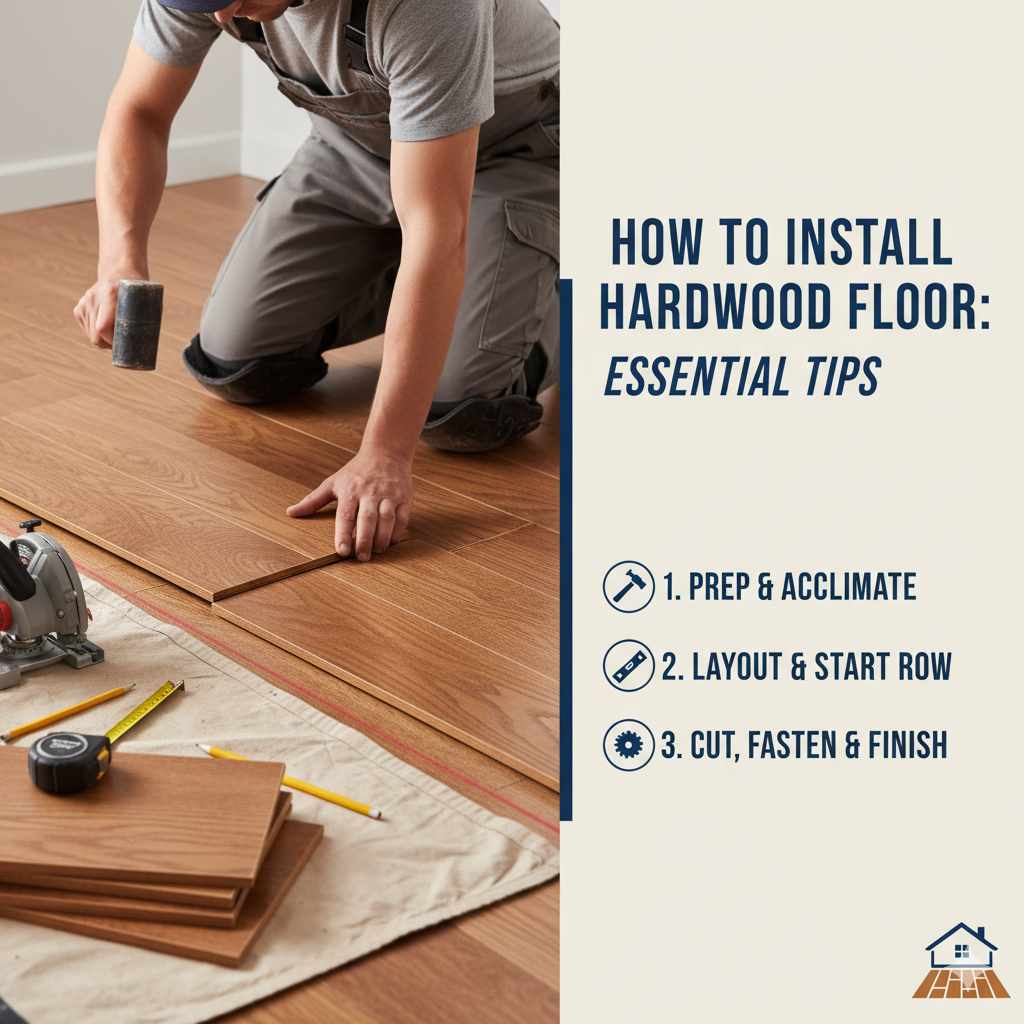
How To Install Hardwood Floor: Essential Tips
Installing hardwood floors yourself is achievable with careful planning and the right tools. This guide provides essential tips for beginners, covering preparation, layout, fastening, and finishing touches to ensure a beautiful, durable floor you can be proud of.
Dreaming of beautiful, warm hardwood floors gracing your home? You might think it’s a job best left to the pros, but with a little patience and the right guidance, you can absolutely install hardwood flooring yourself! Many homeowners feel overwhelmed by the idea, worrying about mistakes or damaging expensive materials. That’s completely understandable. But don’t let that stop you. This guide is designed to break down the process into simple, manageable steps, making DIY hardwood floor installation accessible and rewarding. We’ll walk you through everything, from prepping your subfloor to laying the final plank, ensuring you have the confidence to tackle this project and achieve stunning results.
Are you ready to transform your living space with the timeless elegance of hardwood? Let’s get started on turning that dream into a reality!
Why Choose Hardwood Flooring?
Hardwood floors are a fantastic choice for many homes. They add significant value, look beautiful over time, and are relatively easy to keep clean. Unlike carpet, they don’t trap dust and allergens. Plus, the natural beauty of wood brings warmth and character to any room. When you install them yourself, you also gain the immense satisfaction of knowing you did it!
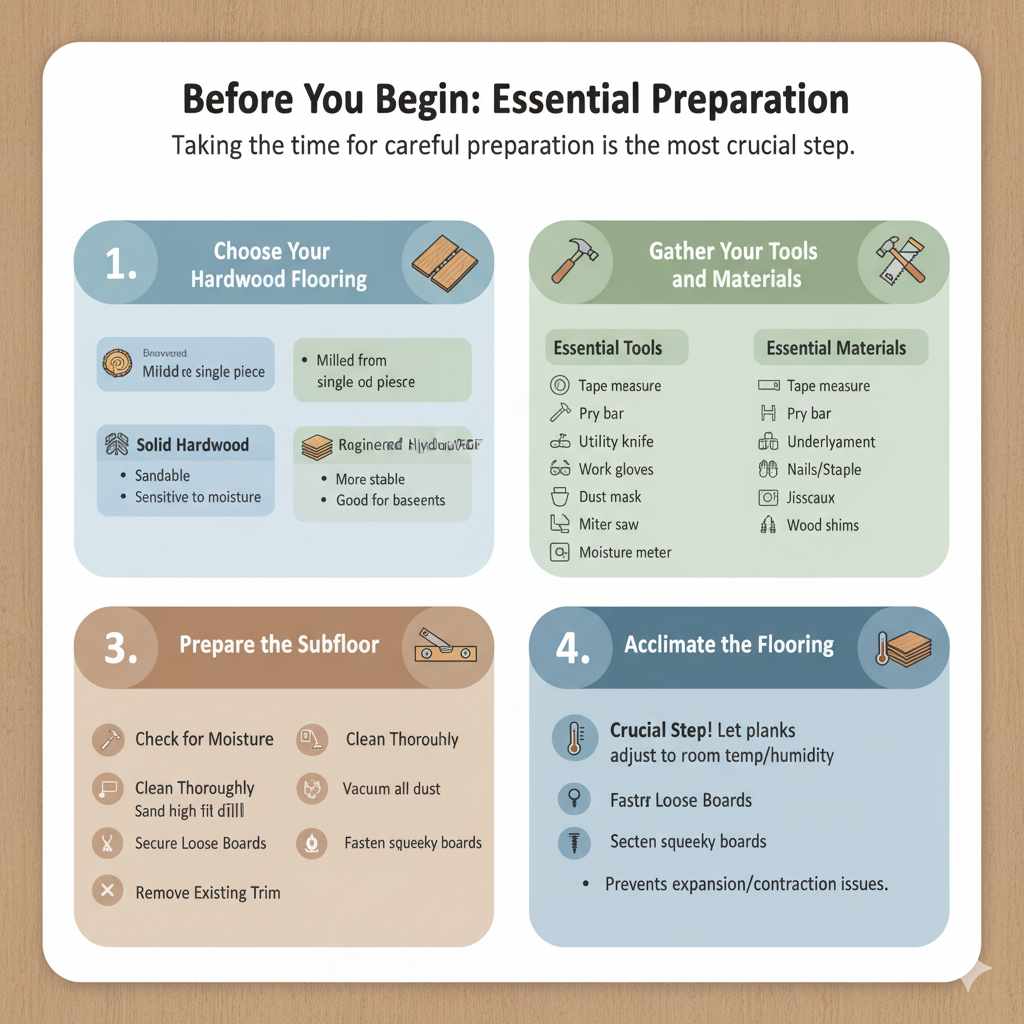
Before You Begin: Essential Preparation
Taking the time for careful preparation is the most crucial step. Skipping this part can lead to a world of headaches later on. Think of it like building a strong foundation for a house – it needs to be perfect!
Here’s what you need to tackle:
1. Choose Your Hardwood Flooring
There are two main types of hardwood flooring for DIY installation:
- Solid Hardwood: These planks are milled from a single piece of wood. They can be sanded and refinished many times over their lifespan. They are typically thicker and more durable but can be more sensitive to moisture and humidity changes than engineered wood.
- Engineered Hardwood: These planks have a thin layer of real hardwood on top, bonded to multiple layers of plywood or HDF underneath. This construction makes them more stable and less prone to expanding or contracting with humidity fluctuations, making them a good choice for basements or areas with varying moisture levels.
Consider your room’s environment, your budget, and the look you want. For beginners, engineered hardwood can sometimes be a bit more forgiving due to its stability.
2. Gather Your Tools and Materials
Having the right tools makes the job so much easier and safer. Here’s a list of essential items:
Essential Tools:
- Tape measure
- Pencil
- Hammer
- Pry bar
- Chalk line or chalked string
- Utility knife
- Safety glasses
- Work gloves
- Dust mask
- Miter saw or circular saw (for cutting planks)
- Jigsaw (for cutouts around vents, doors, etc.)
- Flooring nailer (pneumatic or manual) or a staple gun designed for flooring
- Air compressor (if using a pneumatic nailer)
- Vacuum cleaner
- Broom and dustpan
- Moisture meter
- Optional: Oscillating multi-tool (great for undercutting door jambs)
Essential Materials:
- Hardwood flooring planks
- Underlayment (moisture barrier and sound dampener, if recommended by the manufacturer)
- Flooring nails or staples (appropriate size for your flooring and nailer)
- Wood shims (for expansion gaps)
- Adhesive (if using a glue-down method, though not typical for most beginner DIY nail-down/staple-down installations)
3. Prepare the Subfloor
This is critical for a smooth, stable floor. Your subfloor needs to be clean, dry, and level.
- Check for Moisture: Use a moisture meter to ensure your subfloor is dry. For concrete subfloors, a plastic sheeting vapor barrier is almost always required. For existing wood subfloors, check the manufacturer’s recommendations. The Building Science Information website offers great technical details on moisture management in buildings.
- Clean Thoroughly: Vacuum all dust, dirt, and debris. Sweep the area meticulously.
- Level the Surface: Any high spots can be sanded down. Low spots might need to be filled with a leveling compound. Your subfloor should not have more than a 1/8-inch variation over a 6-foot span.
- Secure Loose Boards: If you have a plywood or OSB subfloor, make sure all boards are securely fastened to the joists. Add screws or nails where needed to eliminate squeaks or movement.
- Remove Existing Flooring and Trim: You’ll need to remove baseboards, shoe molding, or quarter-round trim. Carefully pry them off and set them aside if you plan to reuse them. Also, remove any old flooring materials.
4. Acclimate the Flooring
This is a non-negotiable step! Hardwood expands and contracts with changes in humidity. Letting the planks acclimate in the room where they’ll be installed allows them to adjust to the room’s normal temperature and humidity. Follow the manufacturer’s instructions, but generally, this means leaving the boxes sealed and stacked flat in the room for at least 72 hours (sometimes longer). Ensure the room’s HVAC is running at its normal temperature.
Planning Your Layout
A good layout makes installation much smoother and helps you achieve a professional look. Don’t just start nailing planks at random!
Here’s how to plan:
1. Determine the Direction of Planks
Generally, you want to lay the planks perpendicular to the floor joists. If you’re laying planks parallel to the longest wall in the room, this usually means they’ll be running perpendicular to the joists. This provides the most stable installation. If laying parallel to the joists, you’ll need a very sound subfloor and possibly extra bracing.
2. Dry-Lay a Few Rows
Before you start nailing, lay out a few rows of planks in your planned direction. This allows you to visualize the final look and identify potential issues. It also helps you see how the planks meet different walls and doorways.
3. Plan for Expansion Gaps
Hardwood needs room to expand. You must leave an expansion gap around the perimeter of the room – along all walls, around pipes, columns, and any other fixed objects. A general rule is to leave a gap of about 1/4 to 1/2 inch per 5 feet of flooring width. You’ll use spacers or shims to maintain this gap, and they will be hidden by your baseboards or transition strips.
4. Consider the First and Last Rows
The first row is often the most challenging. You usually have to rip (lengthwise cut) the planks to fit, and they might not have the tongue facing outward for easy nailing. You might also need to cut off the tongue of the first row of planks to ensure they lay flat against the wall.
The last row might also need to be ripped to fit. You’ll need to measure carefully and cut planks to fill the remaining gap. Sometimes, to get the last row in, you’ll need to use a pull bar to snug it up against the previous row.
Installing Your Hardwood Floor: Step-by-Step
Now for the part you’ve been waiting for. Let’s get those beautiful planks down!
- Start with the First Row Begin in a corner of the room that is furthest from the main entry door. This way, as you work, you’ll be moving towards the exit, and the finished floor won’t be covered by your work area. If you’re using planks with a tongue-and-groove system, and the wall is relatively straight, you may want to remove the tongue from the first row of planks that will face the wall so it sits flush. Place your first plank with the grooved edge facing the wall. Use a chalk line to ensure your first row is perfectly straight. Use your spacers or shims to maintain the required expansion gap along the wall. Secure the plank by nailing through the tongue at an angle. Start nailing about 1-2 inches from the end of the plank and space nails every 6-8 inches. You might need to face-nail (nail directly down into the subfloor through the plank) the first and last rows, especially if using a nailer that requires access to the tongue.
- Continue Laying Planks For subsequent rows, fit the tongue of the new plank into the groove of the previous one. You might need to use a tapping block against the edge of the plank to gently tap it into place, ensuring a tight fit without damaging the edges. Continue securing with your flooring nailer, angling the nails through the tongue. Important: Stagger your end joints. Don’t line up the ends of planks from row to row. Offset the joints by at least 6 inches (or as recommended by the manufacturer) for structural integrity and a more natural look. Start new rows with a plank cut to a specific length so the end joints are staggered.
- Cutting Around Obstacles When you reach doorways, radiators, or other fixed objects, you’ll need to make cuts. For door jambs, it’s best to undercut them using a handsaw or oscillating multi-tool so the flooring can slide underneath. This creates a much cleaner finish than trying to cut around the jamb. For vents and other openings, measure and cut planks precisely. You can use a jigsaw for curved cuts. Remember to account for your expansion gap around these obstacles as well.
- Installing the Last Row Measuring and fitting the final row can be tricky. Measure the width needed, remembering to subtract your expansion gap. You’ll likely need to rip planks lengthwise to fit. Once cut, you may need to use a pull bar – a specialized tool that hooks onto the edge of the plank and allows you to pull it tight against the previous row – to snug it up before fastening.
- Nailer Techniques If you’re using a pneumatic nailer, follow the manufacturer’s instructions closely. Ensure the nailer is set to the correct pressure for your flooring thickness. Typically, you’ll aim the nailer at an angle into the tongue of the board. For the first and last rows, where the nailer might not fit, you will likely need to face-nail. Predrill holes for face nails to prevent splitting, and use a nail set to sink the nail heads slightly below the surface.
Cutting and Fitting Specific Areas
Let’s look at some common tricky spots and how to handle them.
Doorways and Door Jambs
This is where you’ll likely use your jigsaw or oscillating multi-tool. The goal is to have the flooring butt up cleanly against the jamb. If you try to lay the flooring into the jamb, it often looks messy and can snag. The best method involves sliding a piece of flooring under the jamb to mark your cut line. Then, cut the jamb at that line. This allows the flooring to slide neatly underneath.
Refer to resources like This Old House for visual guides on undercutting door jambs – seeing it done is often much clearer!
Radiators and Pipes
For pipes or radiator legs, you’ll need to drill holes in your planks. Measure carefully where the pipe’s center is on the plank. Drill a hole slightly larger than the pipe’s diameter to allow for expansion. If the hole is near an edge, you might need to make a pie-shaped cut so the piece can be fitted around the pipe.
Stair Nosing
If your project involves stairs, this is where you’ll use specialized stair nosing pieces. These are typically thicker or have a shaped edge to cover the edge of the tread and the rise. Installation usually involves adhesive and often also nailing into the sub-tread. This is a more advanced step, and many DIYers opt to have this part done professionally or choose pre-finished stair treads.
Finishing Touches
Almost there! Once all the planks are installed, it’s time for the final details.
1. Trim and Baseboards
Reinstall your baseboards and shoe molding or quarter-round. These cover the expansion gap and give the floor a finished look. You can nail them into the wall studs, not directly into the hardwood floor itself. This allows the floor to move freely without pushing against the trim.
2. Transition Strips
Use transition strips (like reducers or T-molding) where your new hardwood floor meets a different flooring type (like tile or carpet) or to cover expansion gaps at doorways leading to other rooms.
3. Cleaning
Give your new floor a thorough cleaning. Vacuum up all dust and debris. You can then use a lightly damp mop or a manufacturer-recommended hardwood floor cleaner. Avoid excessive water!
Quick Comparison: Nail-Down vs. Glue-Down vs. Floating
While this guide focuses on the common nail/staple-down method for beginners, it’s helpful to understand other options:
| Method | Pros | Cons | Best For |
|---|---|---|---|
| Nail/Staple-Down | Most secure for solid hardwood. Long-lasting if done correctly. | Requires specialized flooring nailer/stapler and compressor (if pneumatic). Not suitable for all subfloors (e.g., concrete without a wood sublayer). | Solid hardwood, plywood/OSB subfloors. |
| Glue-Down | Can be used on concrete subfloors. Quieter than nail-down. | Messy application. Requires specific adhesives and trowels. Difficult to repair or replace. | Engineered hardwood, concrete subfloors. |
| Floating | Easiest for DIY, especially engineered or laminate. No nailing/gluing to subfloor. Planks interlock. | Can feel less solid underfoot. Not ideal for all hardwood types. Needs a good underlayment. | Click-lock engineered hardwood, laminate flooring. |
For most introductory DIY hardwood flooring projects, the nail or staple-down method over a wood subfloor is common and achievable. Engineered hardwoods often come with click-lock systems, making them ideal for floating installations.
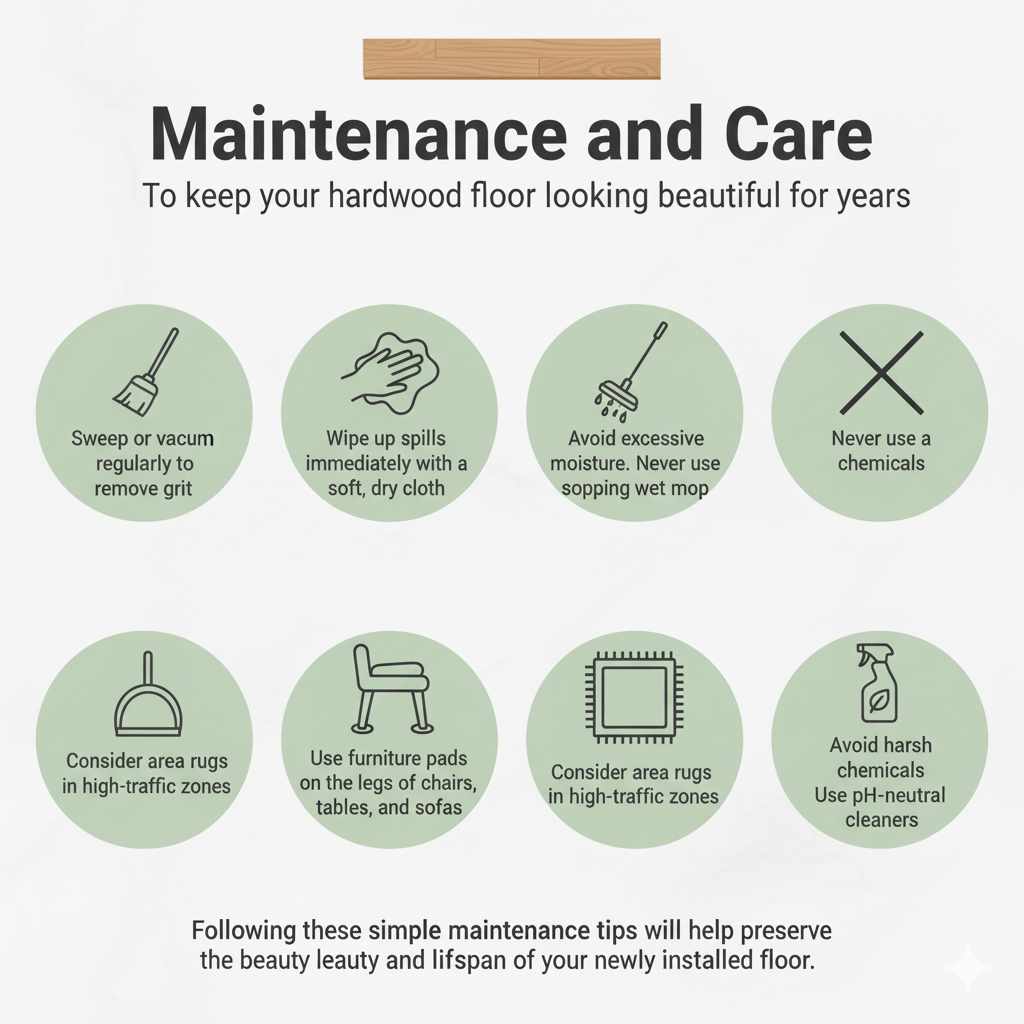
Maintenance and Care
To keep your hardwood floor looking beautiful for years:
- Sweep or vacuum regularly to remove grit that can scratch the finish.
- Wipe up spills immediately with a soft, dry cloth.
- Avoid excessive moisture. Never use a sopping wet mop.
- Use furniture pads on the legs of chairs, tables, and sofas.
- Consider area rugs in high-traffic zones to protect the finish.
- Avoid harsh cleaning chemicals or abrasive cleaners. Stick to pH-neutral cleaners specifically designed for hardwood.
Following these simple maintenance tips will help preserve the beauty and lifespan of your newly installed floor. Check out the National Wood Flooring Association (NWFA) for more in-depth consumer care guides.
Frequently Asked Questions (FAQ)
Q1: How hard is it to install hardwood floors for a beginner?
A1: Installing hardwood floors can be challenging but is definitely achievable for a determined beginner. It requires careful planning, patience, and the right tools. Taking it one step at a time and following detailed instructions, like this guide, significantly increases your chances of success.
Q2: Can I install hardwood floors over existing tile or carpet?
A2: Generally, you cannot install hardwood directly over carpet. Carpet is too soft and will not provide a stable base. You can often install hardwood over well-adhered tile, but you must ensure the tile surface is perfectly flat and solid, and that you account for the increased height. It’s often best to remove existing flooring down to the subfloor for the most secure installation.